00197815-04_JC_PM_WF2_SX12_EN.pdf - 第58页
18 WF2 SX1/2 Appendix: C&P20x head exchange 3 min 6 / 6 C A U T I O N ! R e f e r t o s a f e t y i n s t r u c t i o n s i n u s e r m a n u a l b e f o r e c o m m e n c i n g M a i n t e n a n c e Machine Status…
18 WF2 SX1/2 Appendix: C&P20x head exchange 3 min 5 / 6
CAUTION! Refer to safety instructions in user manual before commencing Maintenance
Machine Status OFF Transport Empty
NOTICE! ESD guidelines are to be followed Tool:
T49, T85, T94, K01
Wear Part: Consumables:
www.asm-smt.com
25 Connect both camera cables (HotLink
only).
26 Fasten the screws holding the strain relief
(Hot Link only).
27 Connect the two camera cables (GigE
only).
28 Close the camera cable clip (GigE only). 29 Plug in the pressure sensor (vacuum
pump only).
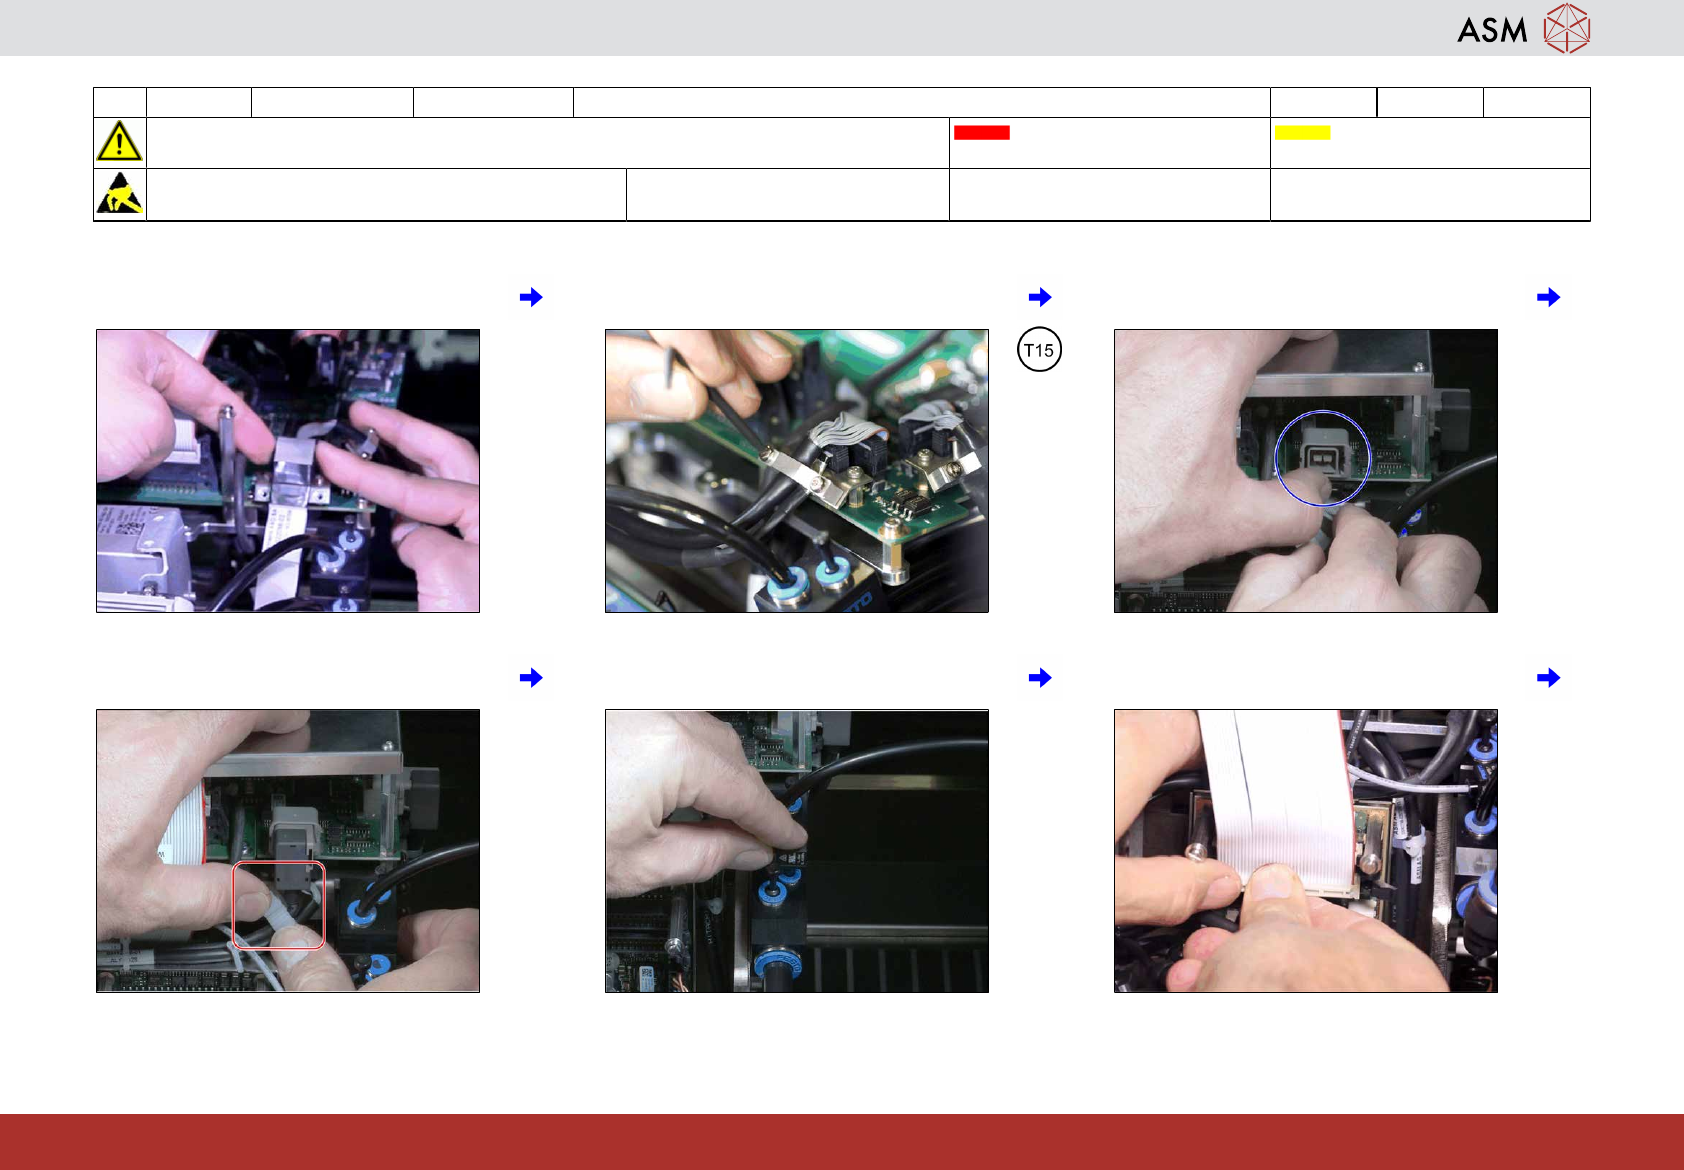
30 Connect both ribbon cables.
18 WF2 SX1/2 Appendix: C&P20x head exchange 3 min 6 / 6
CAUTION! Refer to safety instructions in user manual before commencing Maintenance
Machine Status OFF Transport Empty
NOTICE! ESD guidelines are to be followed Tool:
T49, T85, T94, K01
Wear Part: Consumables:
www.asm-smt.com
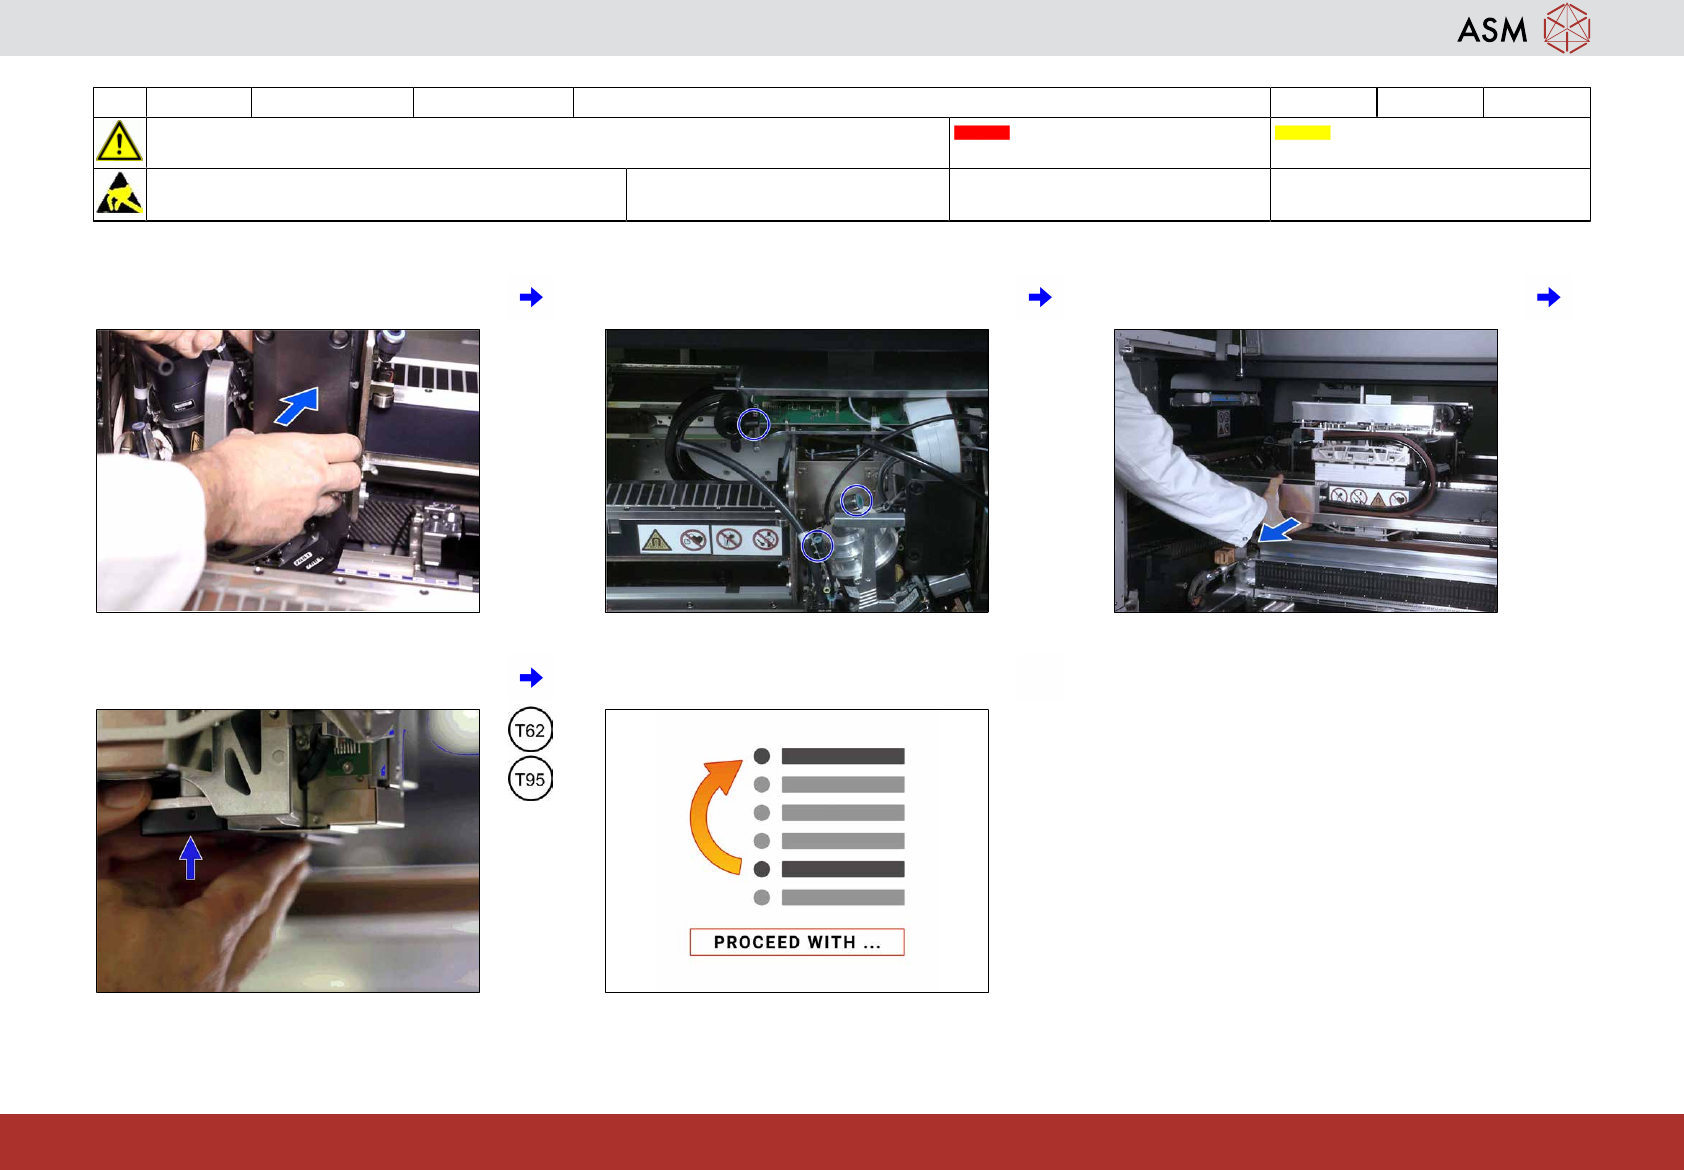
31 Mount the protection cover. 32 Connect the 3 air hoses. 33 Move the gantry with the maintained head
to the end limit.
34 Remove the component sensor protection. 35 Proceed with task “Clean the Z-Axis of the
remaining C&P20x”.
19 WF2 SX1/2 Appendix: CPP head exchange 3 min 1 / 4
CAUTION! Refer to safety instructions in user manual before commencing Maintenance
Machine Status OFF Transport Empty
NOTICE! ESD guidelines are to be followed Tool:
T58, K01
Wear Part: Consumables:
www.asm-smt.com
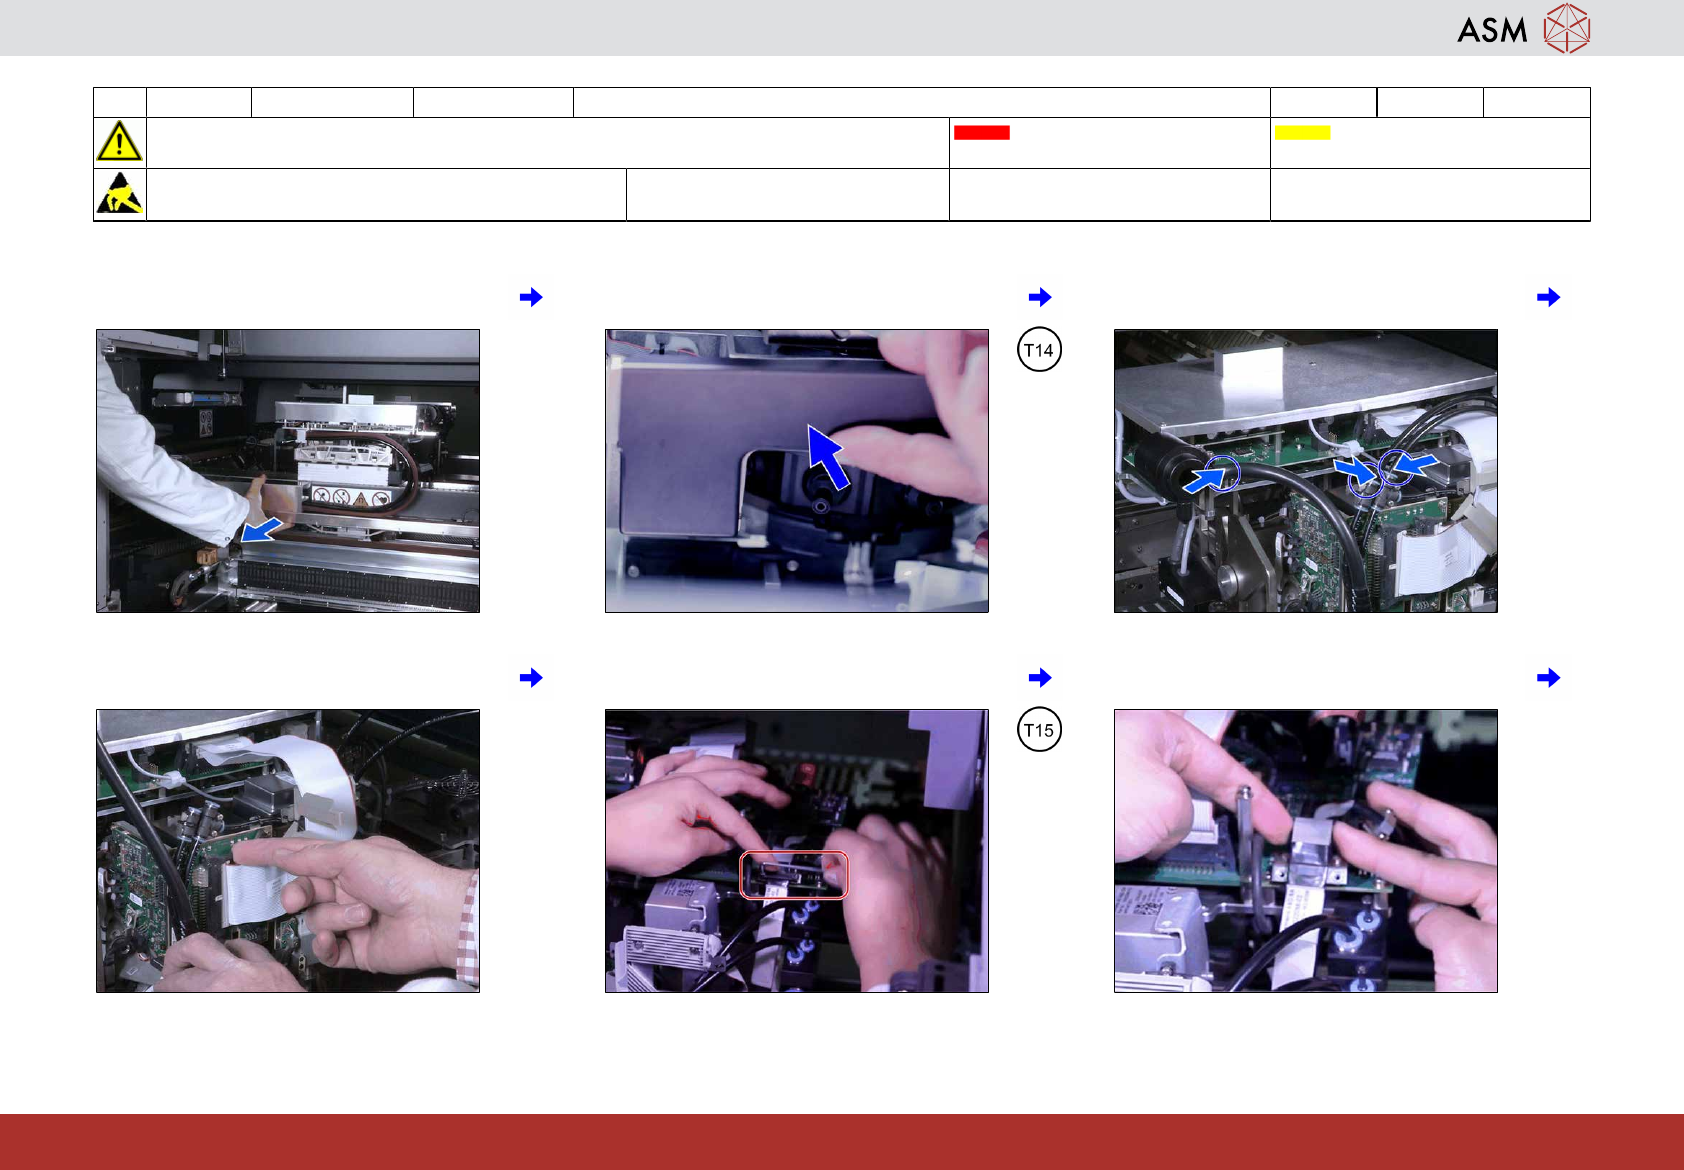
1 Move the gantry with the head to be main-
tained to the end limit.
2 Put on the corresponding component
sensor protection.
3 Unplug the 3 air hoses from the head.
4 Disconnect both ribbon cables. 5 Loosen the screws holding the strain relief
(HotLink only).
6 Unplug both camera cables (HotLink only).