SOM-1925-002.pdf - 第17页
14 Tg 1407 -ID-SO 0607 - 002 3. Rough V iew Screen Contact T ype Run-Out Prevention Squeegee Rubber Upper surface Squeegee Holder Right side surface Front surface Lower surface T able 3 Squeegee Length A B SQ-0021 :2 70 …

13
Tg1407-ID-SO
0607-002
Table 2
Item Description
5.Applicable PCBs PCB Size (X): (Squeegee Length - 20 mm) or less
PCB Size (Y): Refer to the specifications of the unit to be used.
6.Squeegee Length
Specifications
Selectable from SQ-0021 : 270mm, SQ-0023 : 350mm,
SQ-0025 : 170mm, SQ-0026 : 200mm or SQ-0027 : 220mm
7.Others Equipped with Screen Contact Type Run-Out Prevention Mechanism (Contact
section is made of resin).
There is almost no run-out of solder paste on the both sides of the squeegee.
2.Specifications
14
Tg1407-ID-SO
0607-002
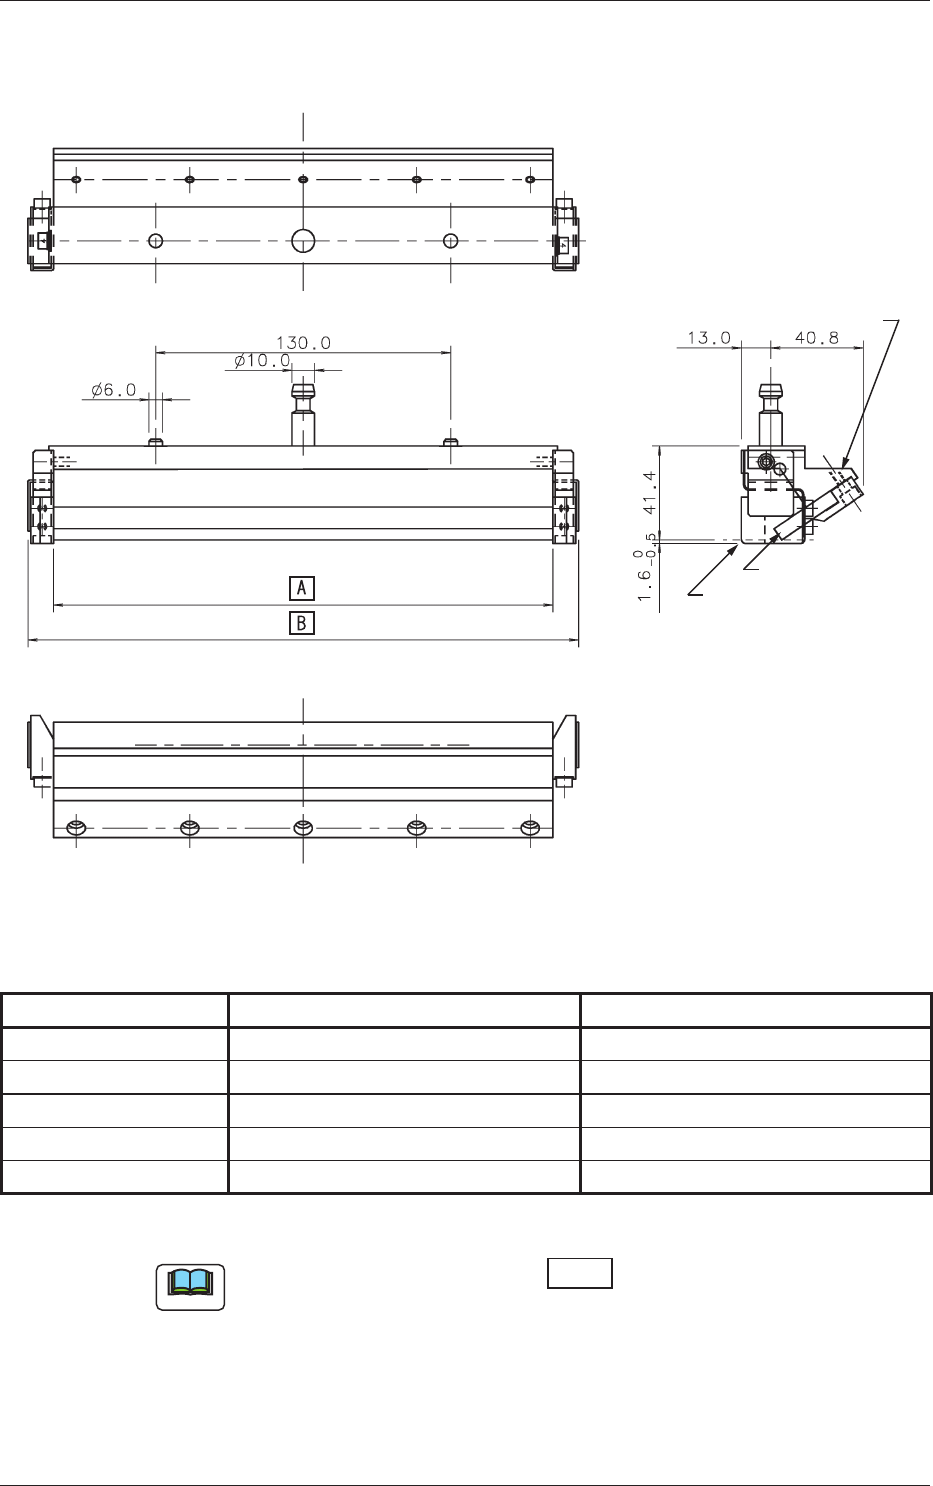
3. Rough View
Screen Contact Type
Run-Out Prevention
Squeegee Rubber
Upper surface
Squeegee Holder
Right side surface
Front surface
Lower surface
Table 3
Squeegee Length A B
SQ-0021
:2
70
270.0 292.6
SQ-0023
:35
0
350.0 372.6
SQ-0025
:170
170.0 192.6
SQ-0026
:
200
200.0 222.6
SQ-0027
:220
220.0 242.6
Unit: mm
Note
(a) The dimensions shown in the box vary depending on the
squeegee length.
(b) Two squeegees are used as a set.
(c) For squeegees of length of 220mm or more, the shape of the solder
paste run-out prevention panel setting section (on the both sides) is
slightly different from those on the squeegees shorter than 220mm.
3. Rough View

15
Tg1407-ID-SO
0605-001
4. Preparation before Pattern Program Creation
The settings are so set that the HR squeegee can be selected on the pattern
program.
4.1
"Squeegee" Tab
•
Sheet Layout
When the [WIZARD] button in the "PLAN MODE" on the Product Change
submenu bar is pressed and then the [USER SETTING] button is also
pressed, the following tab sheet appears.
Fig. 1 "Squeegee" Tab
•
Squeegee Entry Procedure
Procedure
(1) Press the [Size] button and select the length of the squeegee to be
entered.
(2) Press the [Assortment] button and set the type of squeegee to be
entered to "HR".
(3) When the [Addition>>] button is pressed, the selected squeegee
is entered.
Note
The entered data is reflected on the "Squeegee Select" under the
"Print" tab on the "Pattern Program" edit window.
4. Preparation before Pattern Program Creation