YSM40 Mainte_E.pdf - 第103页
3-35 3 Periodic maintenance items 3.4 Air intake fan filter F ailuretocleanthefiltersmaycausefilterclogging,andthetemper atureinsidethemachinewillincrease. T his ma ylowerthefunctionsofthemachine…
3-34
3
Periodic maintenance items
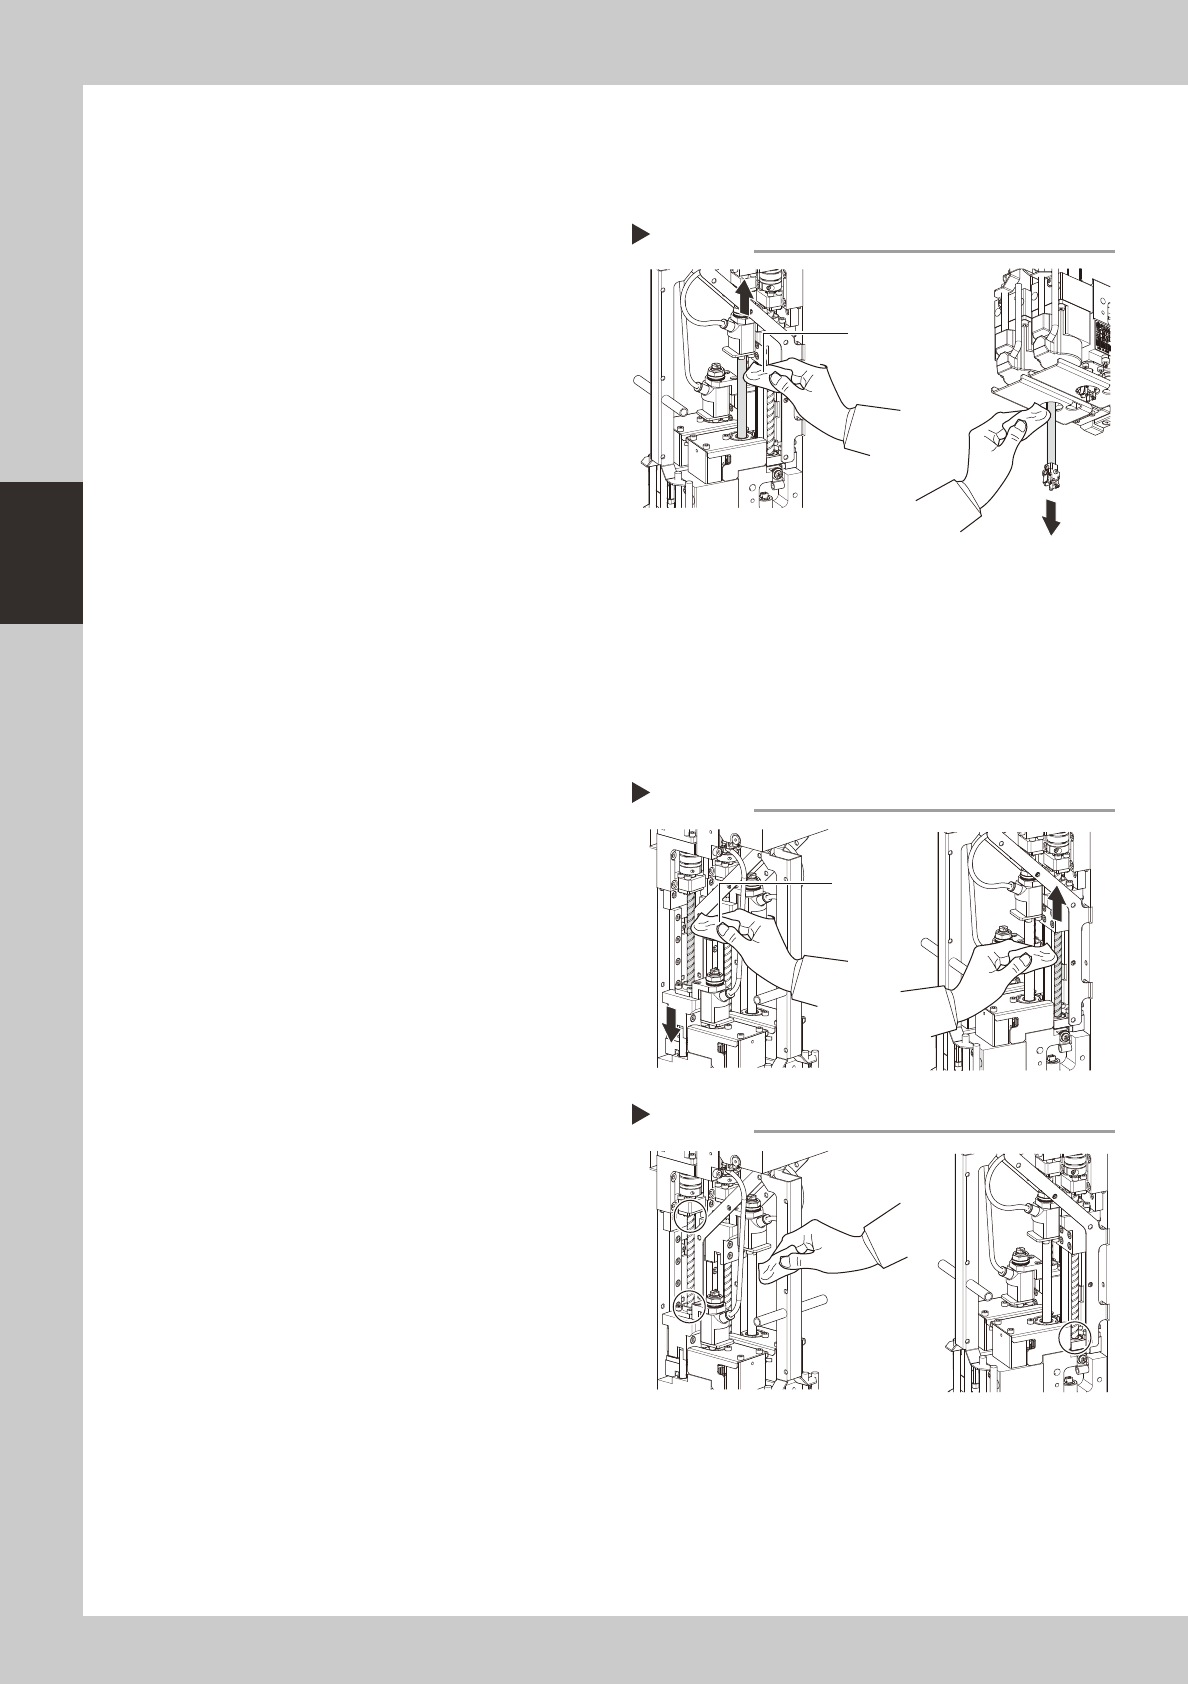
3.3.2 Cleaning and lubricating the spline shaft
Asageneralguide,thesplineshaftshouldbecleanedandlubricatedevery3months.Usethefollowing
proceduretocleanandlubricatethesplineshaft.
1
Clean the spline shaft.
Use a lint-free cloth to wipe off the dust and
dirt on the spline shaft.
1. Clean the upper part of the shaft as
shown in the figure at right.
2. Lower the shaft and clean the lower part
of the shaft.
53325-N5-00
2
Apply grease.
Apply a thin, uniform coat of the specified
grease (NSL) by hand to the spline shaft.
3
Wipe off the excess grease.
Move the head unit up and down, then
wipe off the grease which has collected at
the upper and lower ends of the ball screw
3.3.3 Cleaning and lubricating the ball screw
Asageneralguide,theballscrewshouldbecleanedandlubricatedevery3months.Usethefollowing
proceduretocleanandlubricatetheballscrew.
1
Clean the ball screw.
Use a lint-free cloth to wipe off the dust and
dirt on the ball screw.
1. Lower the shaft and clean the upper part
of the ball screw as shown in the figure
at right.
2. Raise the shaft and clean the lower part
of the ball screw.
53326-N5-00
2
Apply grease.
Uniformly apply the specified grease (NSL)
by hand to the ball screw.
3
Wipe off the excess grease.
Move the head unit up and down, then
wipe off the grease which has collected at
the upper and lower ends of the ball screw
(indicated by a circle in the figure at right).
53327-N5-00
Cleaning the spline shaft
Step 1
Lint-free cloth
Cleaning the ball screw
Step 1
Lint-free cloth
Wiping off the excess grease
Step 3
3-35
3
Periodic maintenance items
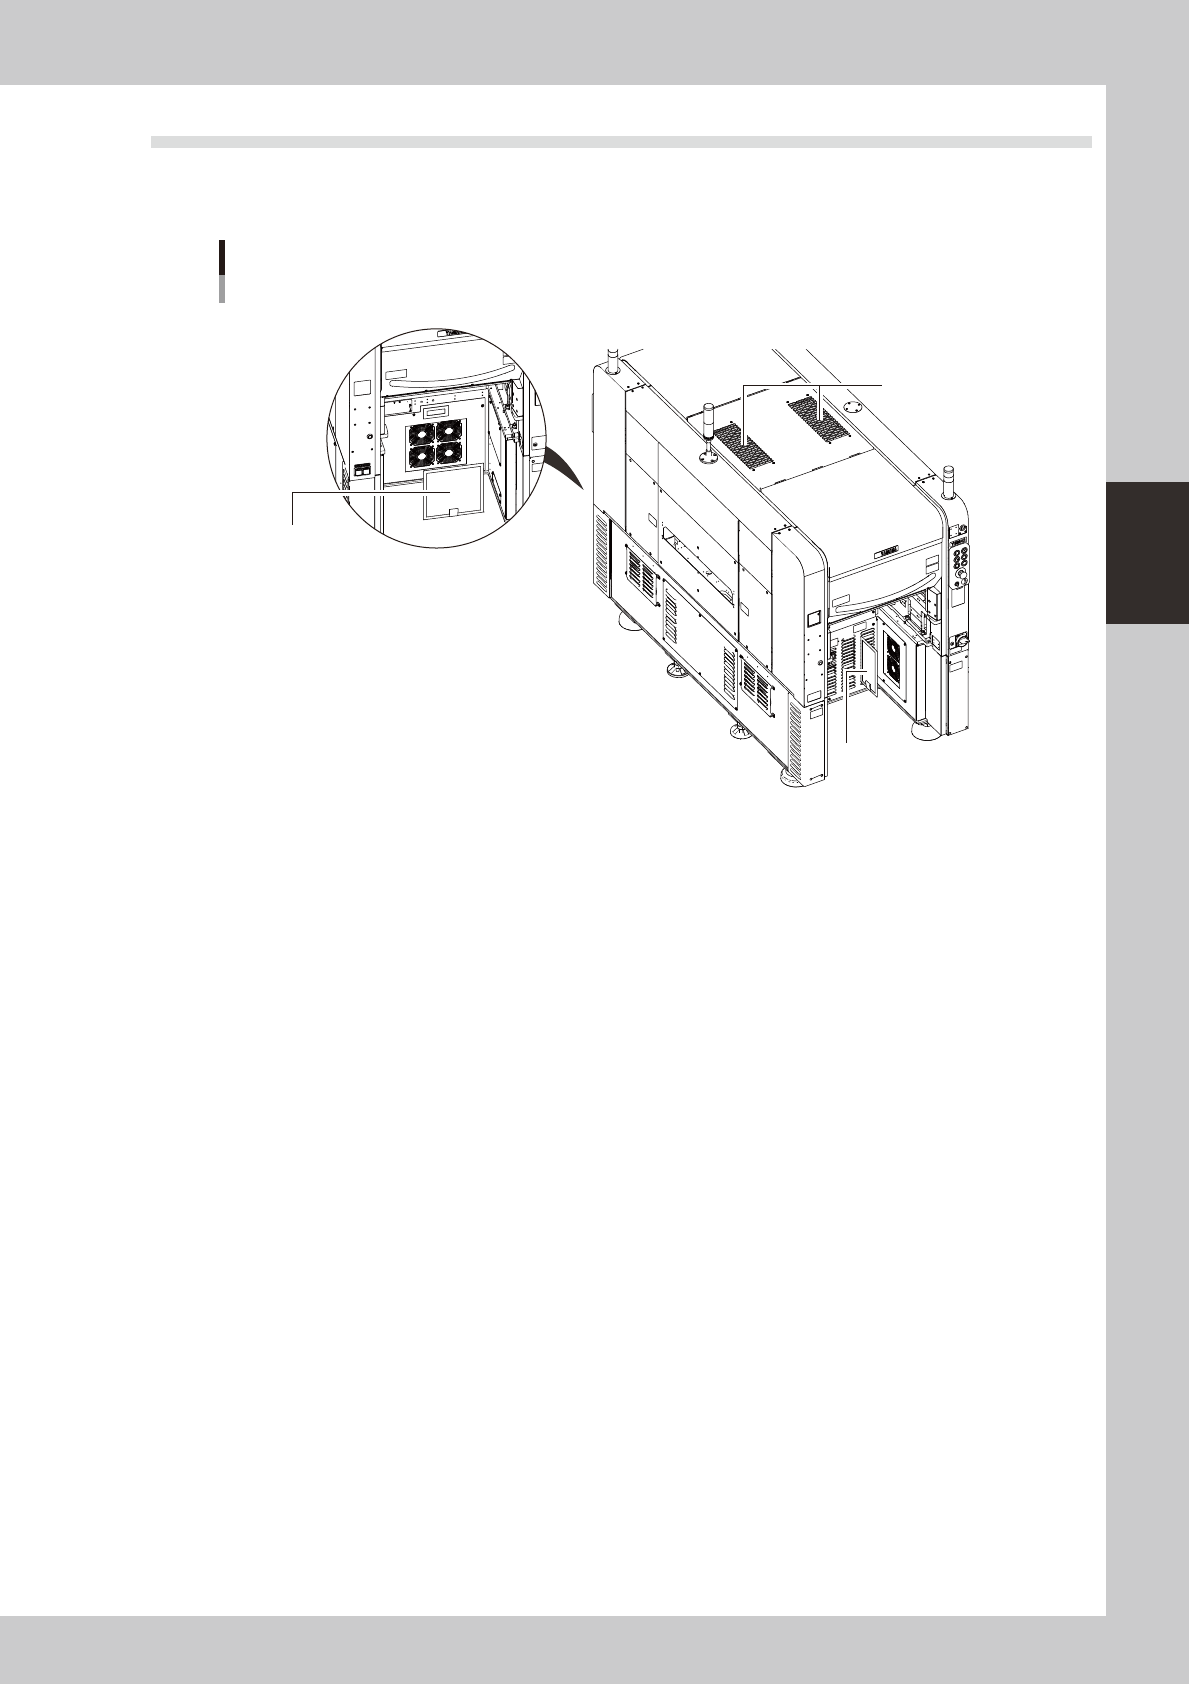
3.4 Air intake fan filter
Failuretocleanthefiltersmaycausefilterclogging,andthetemperatureinsidethemachinewillincrease.This
maylowerthefunctionsofthemachineandshortentheservicelife,soperiodicallycleaneachfilter.
Filter positions
Machine rear side
Machine front side
Top cover fan filter
Rear base fan filter
Circuit protector fan filter
533C4-N5-00
Thereare3typesoffilterswhichareinstalledinthefollowing4places.
Topcover :Twoplacesincenteroftopcover
Circuitprotector :Oneplaceonfrontrightside
Rearbase :Oneplaceinrearcenter
3-36
3
Periodic maintenance items
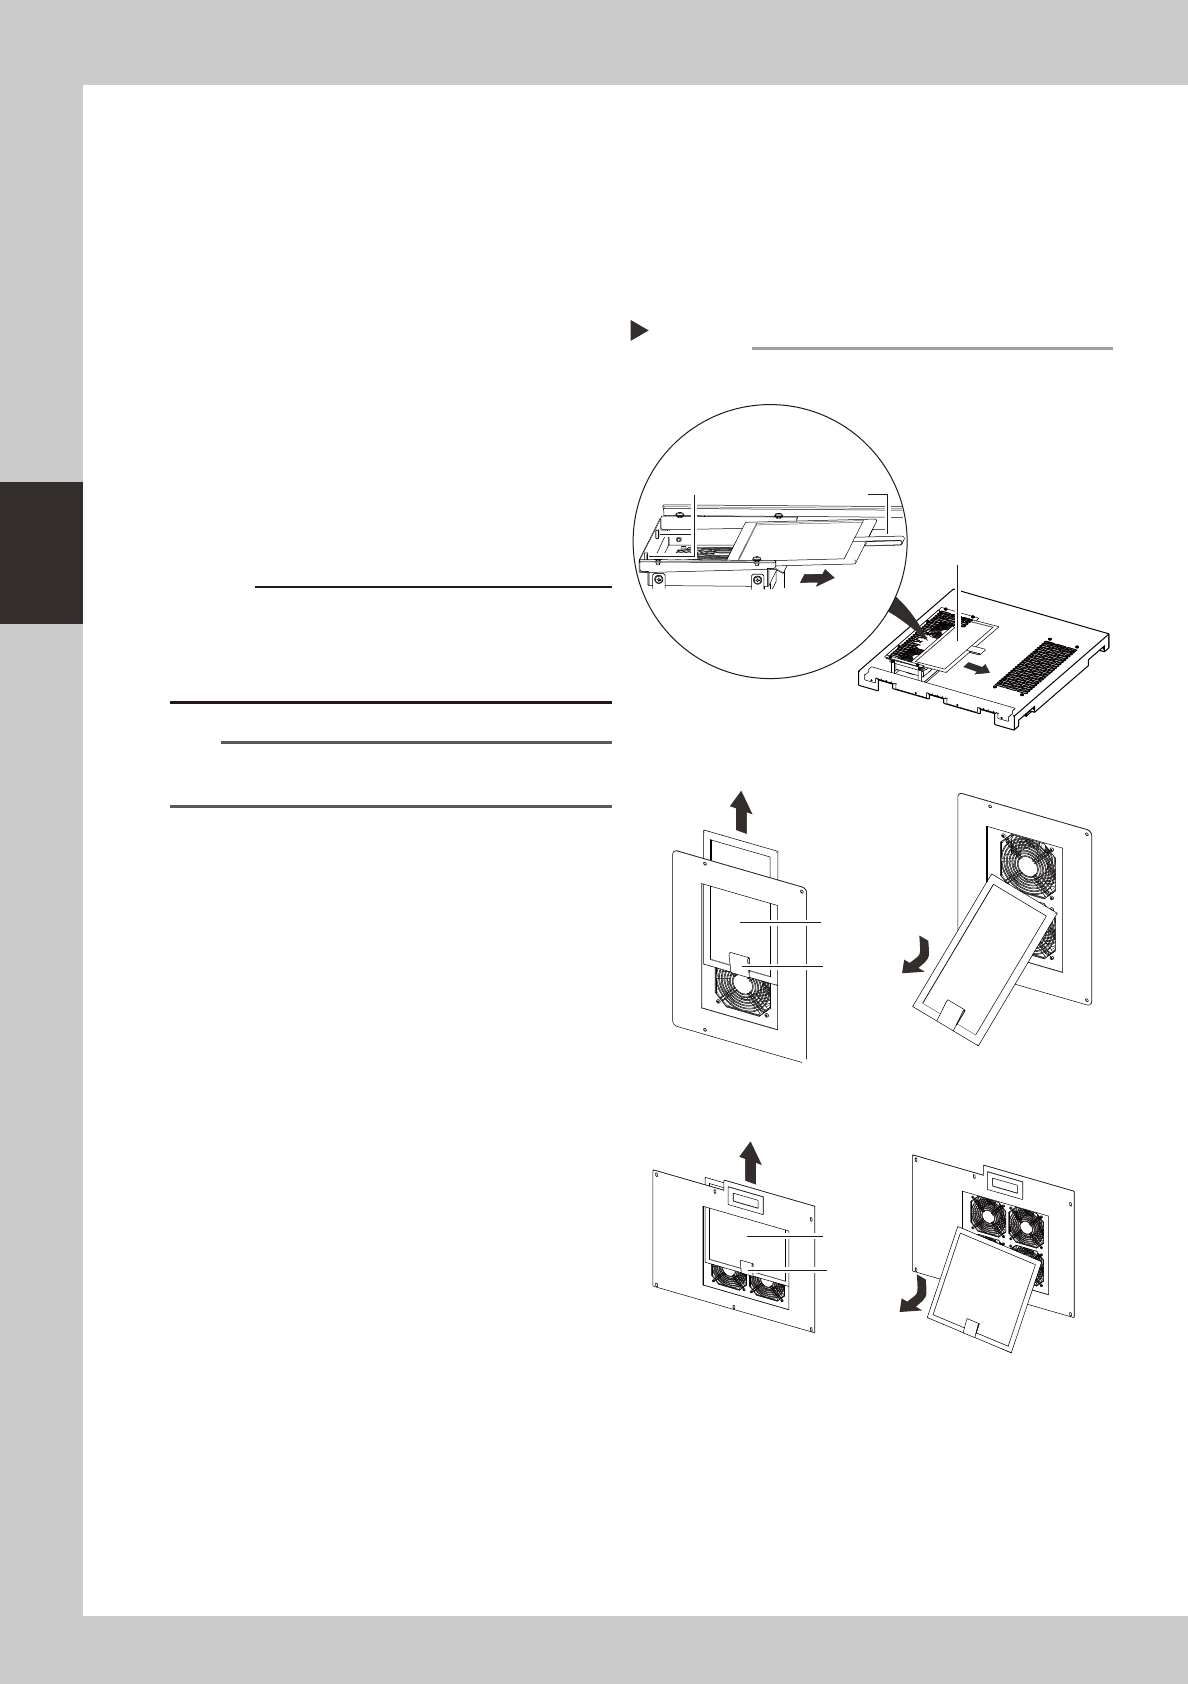
3.4.1 Cleaning the filters
1
Make the preparation for cleaning.
1. Remove the feeder exchange carriage
from the machine and turn off the
machine power.
2. Prepare a vacuum cleaner for cleaning.
2
Remove the filters.
As shown in the figure on the right, remove
the filters.
There are two filters in the top cover.
Remove both filters.
533C5-N5-00
3
Clean the filters.
Use the vacuum cleaner to suction out dust
and dirt.
c
combines with moisture and causes clogging. Since it is
n
NOTE
If the dust cannot be removed or the filter has worn out,
replace the filter with a new one.
4
Return the filters to their original
positions.
Reinstall the filters by reversing the removal
procedure.
Removing the filters
■ Top cover fan filter
■ Circuit protector fan filter
■ Rear base fan filter
Step 2
Filter
Filter
Handle
Handle
Magnet
Filter
Handle