YSM40 Mainte_E.pdf - 第104页
3-36 3 Periodic maintenance items 3.4.1 Cleaning the filters 1 Make the prepar ation for cleaning. 1. Remove the feeder exchange carriage from the machine and turn off the machine power . 2. Prepare a vacuum cleaner for …
3-35
3
Periodic maintenance items
3.4 Air intake fan filter
Failuretocleanthefiltersmaycausefilterclogging,andthetemperatureinsidethemachinewillincrease.This
maylowerthefunctionsofthemachineandshortentheservicelife,soperiodicallycleaneachfilter.
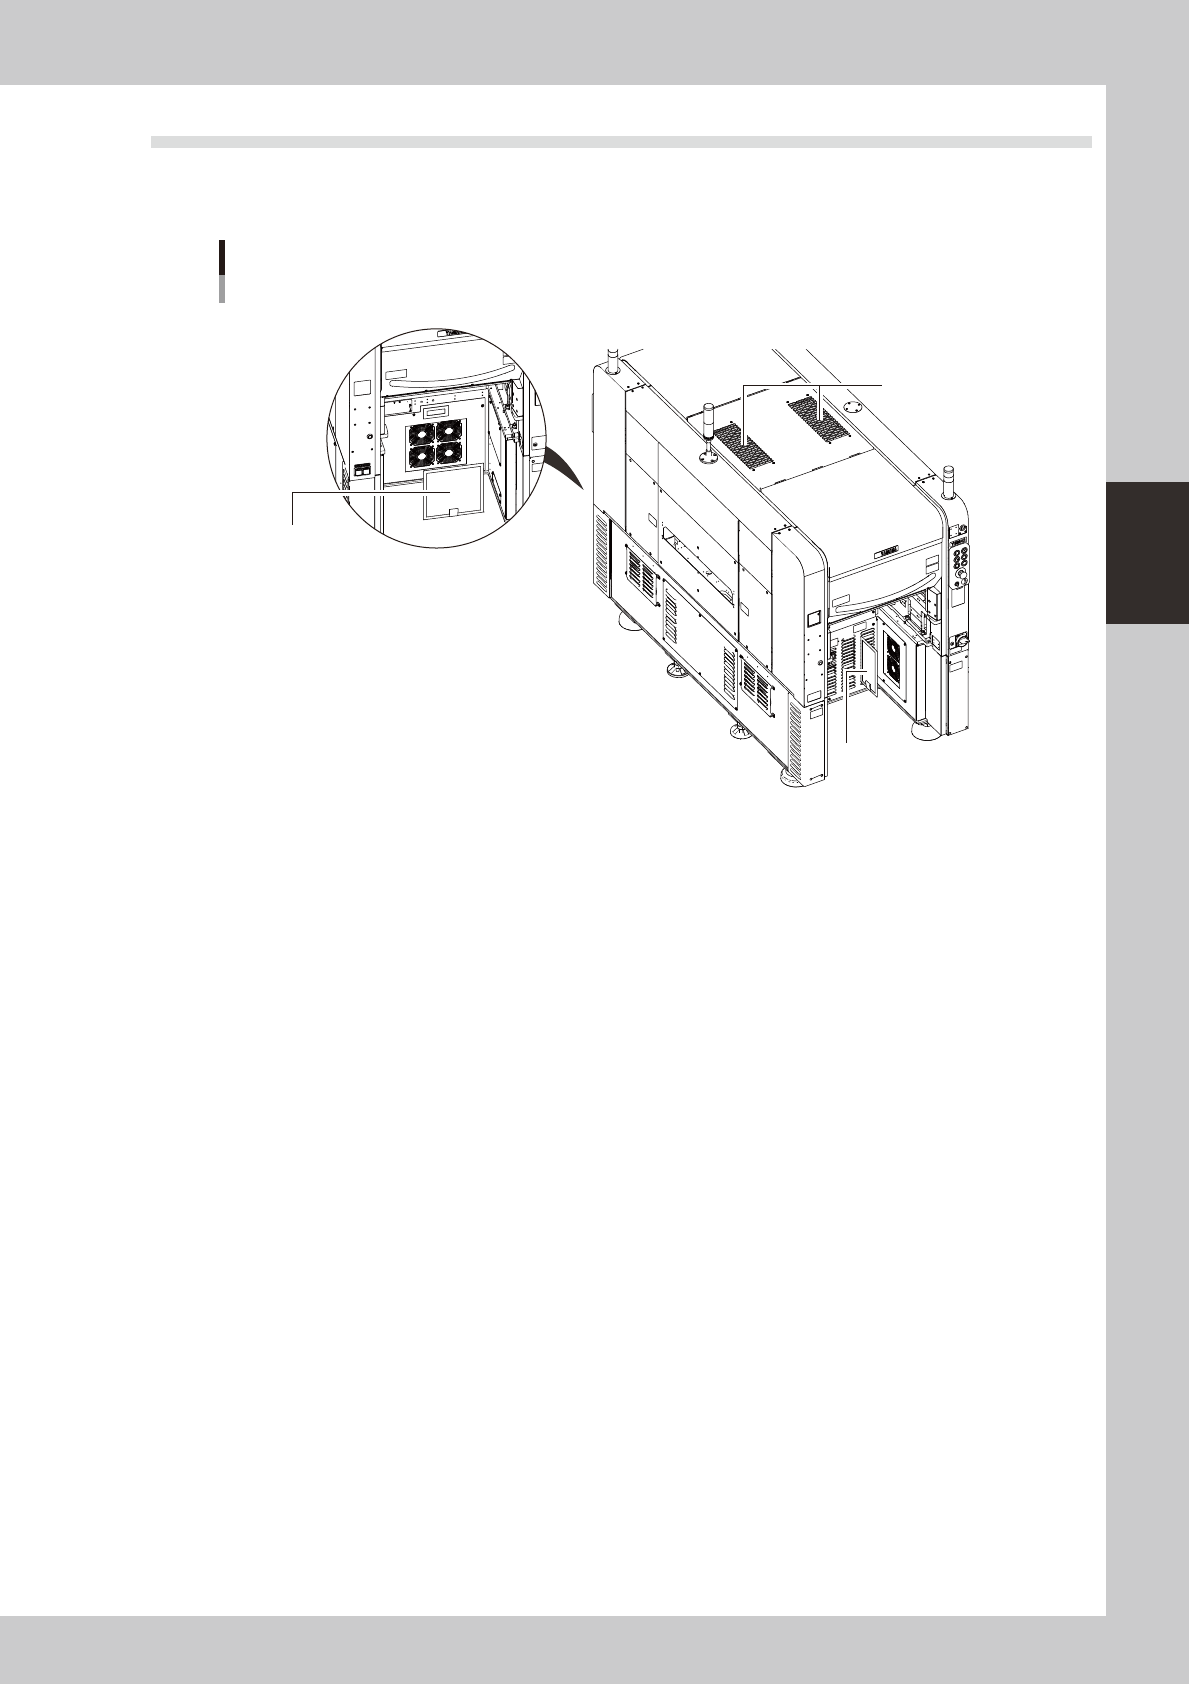
Filter positions
Machine rear side
Machine front side
Top cover fan filter
Rear base fan filter
Circuit protector fan filter
533C4-N5-00
Thereare3typesoffilterswhichareinstalledinthefollowing4places.
Topcover :Twoplacesincenteroftopcover
Circuitprotector :Oneplaceonfrontrightside
Rearbase :Oneplaceinrearcenter
3-36
3
Periodic maintenance items
3.4.1 Cleaning the filters
1
Make the preparation for cleaning.
1. Remove the feeder exchange carriage
from the machine and turn off the
machine power.
2. Prepare a vacuum cleaner for cleaning.
2
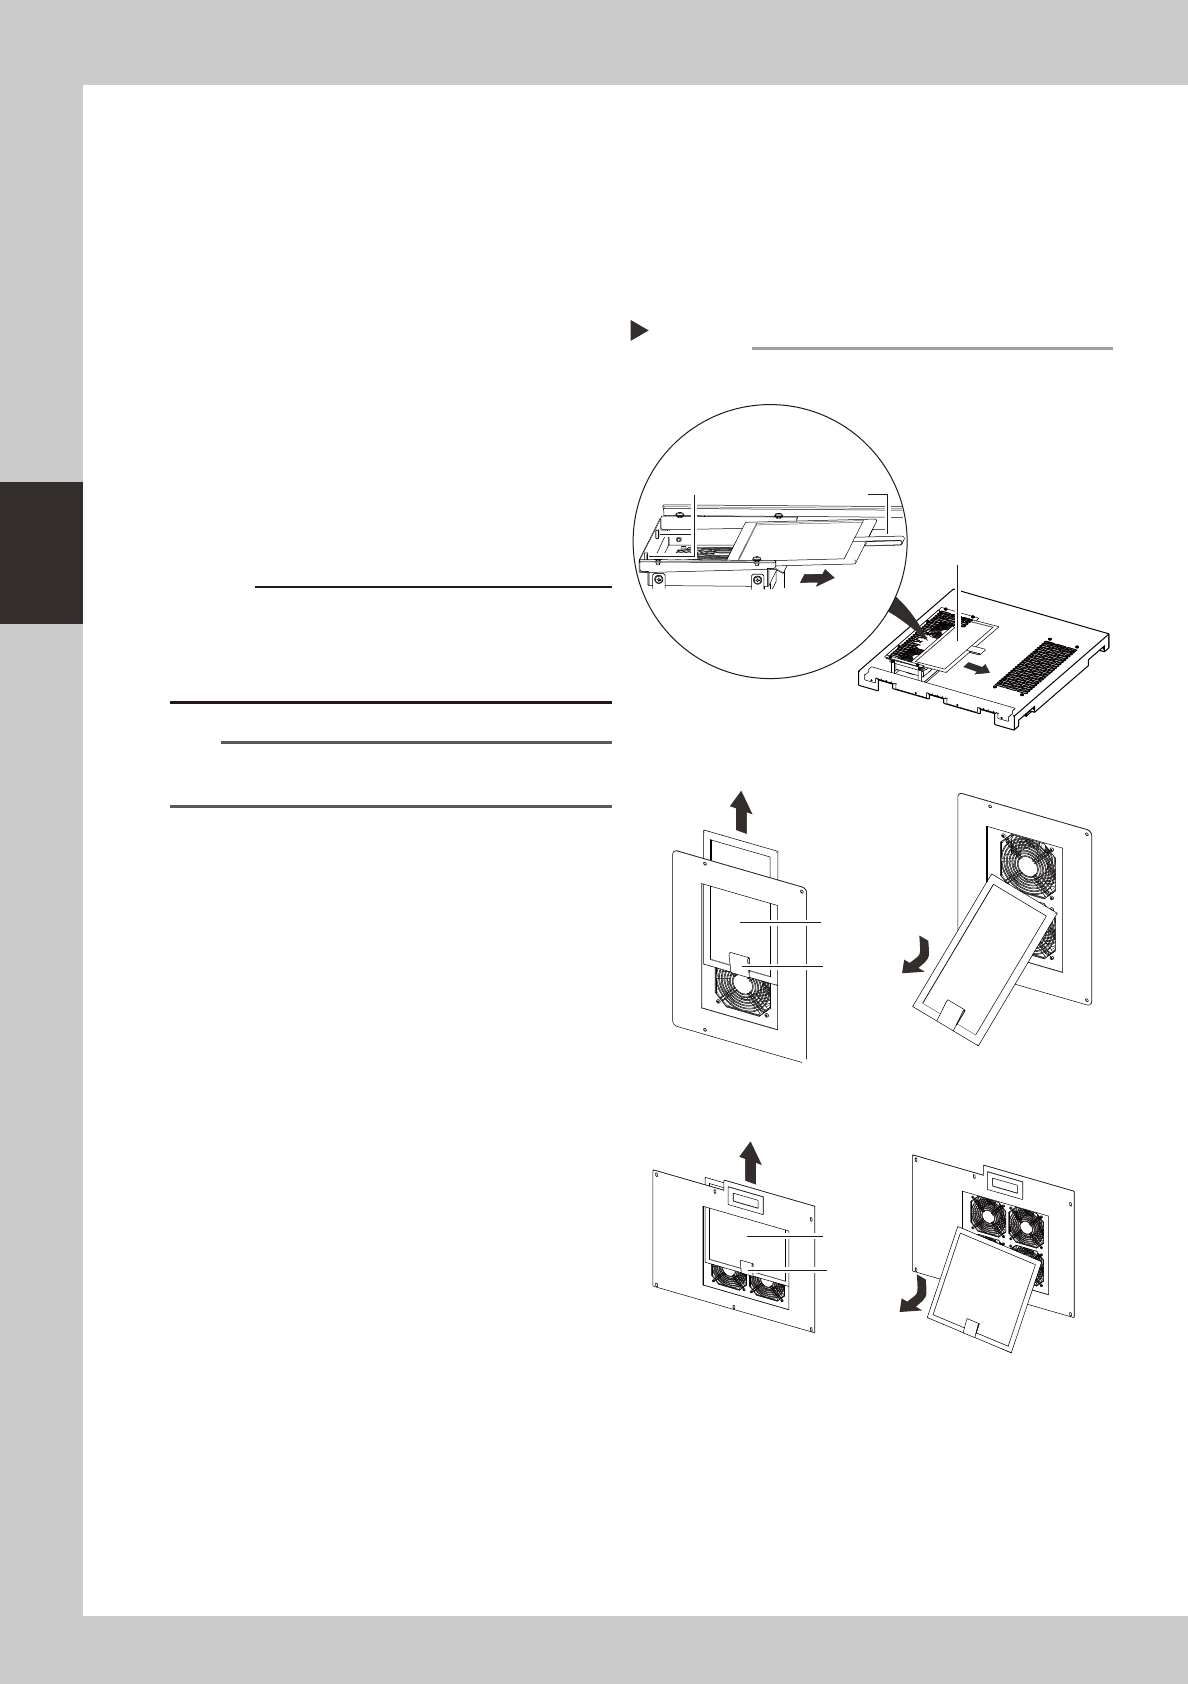
Remove the filters.
As shown in the figure on the right, remove
the filters.
There are two filters in the top cover.
Remove both filters.
533C5-N5-00
3
Clean the filters.
Use the vacuum cleaner to suction out dust
and dirt.
c
combines with moisture and causes clogging. Since it is
n
NOTE
If the dust cannot be removed or the filter has worn out,
replace the filter with a new one.
4
Return the filters to their original
positions.
Reinstall the filters by reversing the removal
procedure.
Removing the filters
■ Top cover fan filter
■ Circuit protector fan filter
■ Rear base fan filter
Step 2
Filter
Filter
Handle
Handle
Magnet
Filter
Handle
3-37
3
Periodic maintenance items
4. Six-month inspection
4.1 Cleaning the camera lighting unit
e
Thelightingunitmaybecomedirtyduetodustanddirt.Werecommendperiodiccleaningasexplainedbelow.
Toensuresafety,makesurethatthemachinepowerswitchisoffortheemergencybuttonispressedbefore
startingwork.
c
become unreliable.
c
of the lighting unit by the user will void the warranty.
4.1.1 Fiducial camera
Thefiducialcameraismountedonthehead.Thecleaningprocedureforthecamera'slightingunitisgiven
below.
1
Move the head unit.
Move the head unit to a position which
permits the lighting unit to be easily
cleaned.
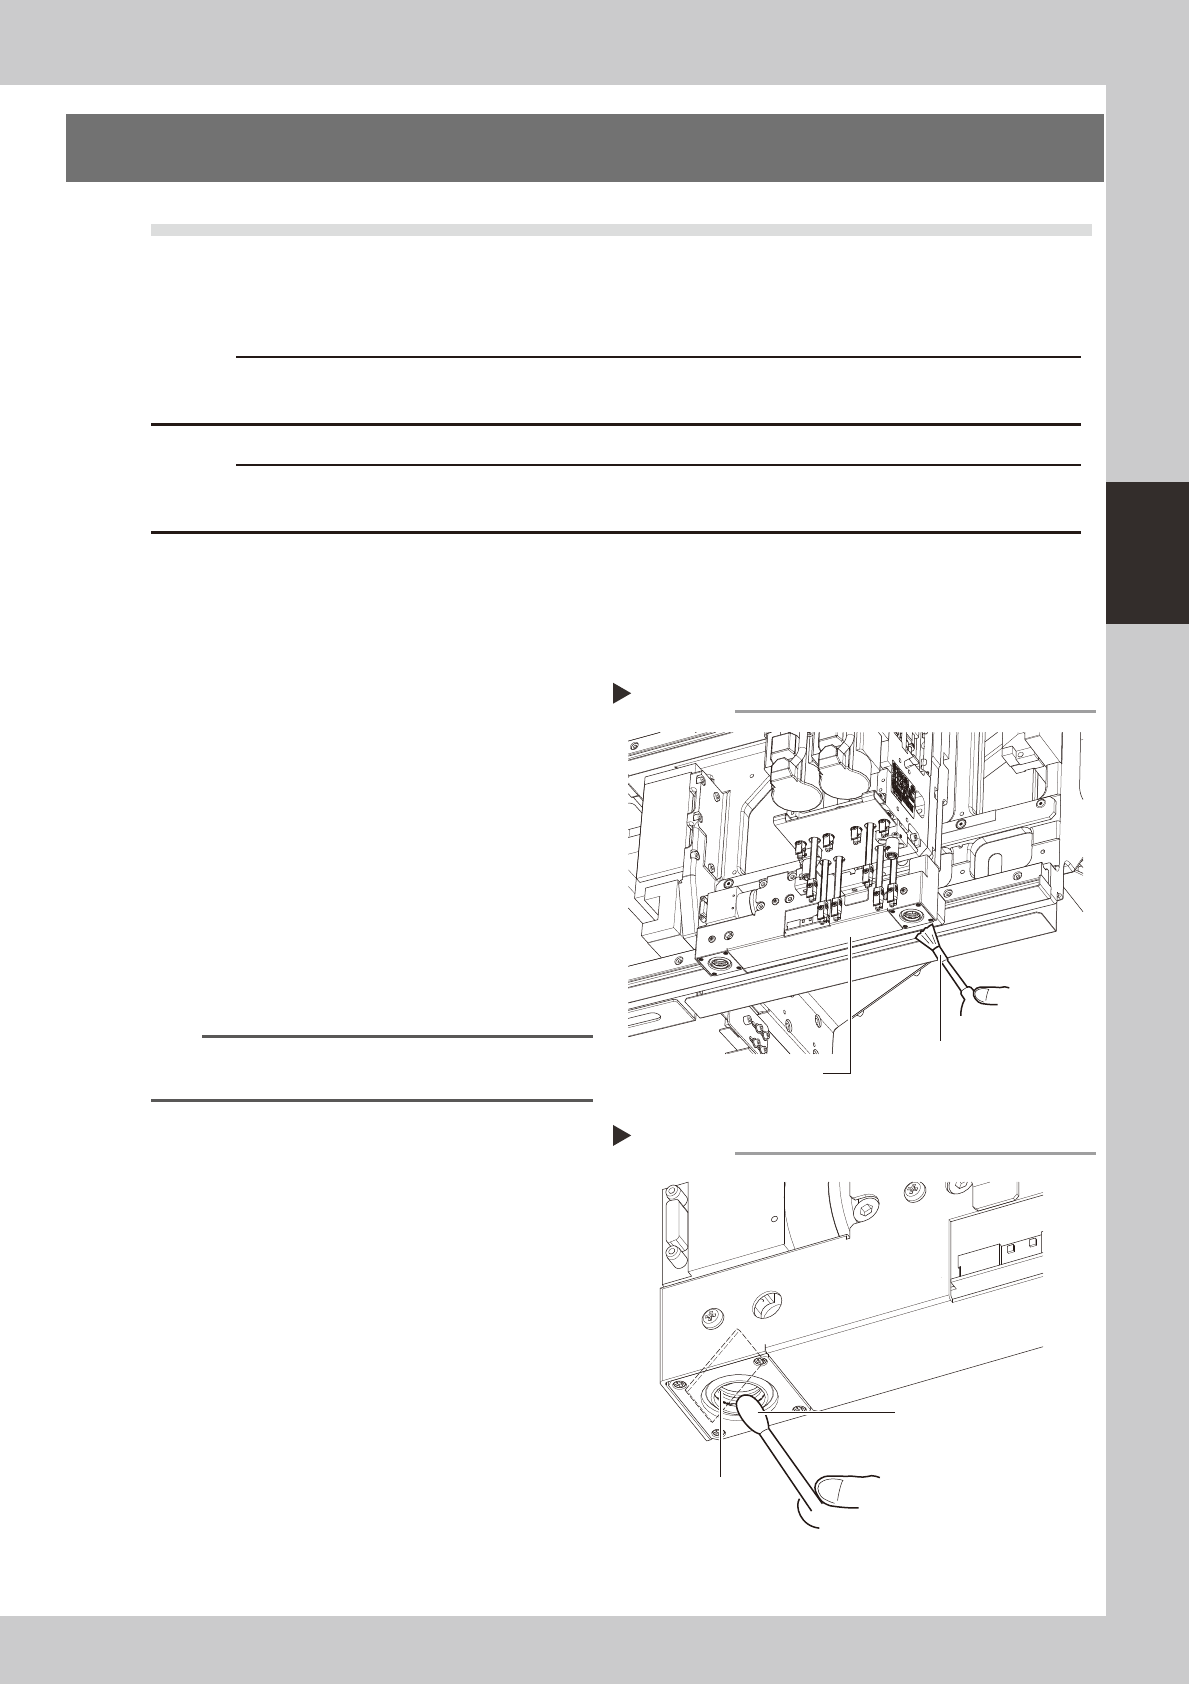
2
Clan the lighting unit.
Use an optical brush to remove the dust
from the lighting unit.
53340-N5-00
3
Clean the reflector plate.
Use a cotton swab slightly dampened with
lens cleaner to clean the reflector plate side
as shown in the figure at right.
53341-N5-00
TIP
The optical brush and lens cleaner are optional
purchase items.
Fiducial camera lighting unit
Using an optical brush to remove dust
Step 2
Optical brush
Cotton swab dampened
with lens cleaner
Cleaning the reflector plate
Step 3
Reflector plate