YSM40 Mainte_E.pdf - 第42页
1-3 1 Maintenance 2. Preparing for maintenance tasks T asks described in this section focus mainly on replacing par ts (consumable parts) that might cause a gradual loss of machine functions during use. This section also…

1-2
1
Maintenance
1.2 Importance of periodic inspections and cleaning
Periodicinspectionsandcleaningareextremelyimportantmaintenancetasks.Failuretoperforminspections
andcleaningwillpreventthemachinefromdeliveringfullperformanceandmayleadtocomponentmounting
problemsorequipmentbreakdowns.
Examples:
•Dirtynozzlesmightcausemistakesincomponentrecognitionandcausemountingerrors.
•Dirtyairpathsmaycausenumerouspickupandmountingerrors.
•Inadequatefeederandfeederplateinspectionsmaycausepickuperrors.
•Dirtyopticalsystem(camera,lighting,etc.)maycauserecognitionerrors.
•Poorgreasingofaxesmaycauseabnormalnoises.
•PoorinspectionssuchasofvalvesmaycauseerrorsinPCBclampingandconveying.
Astheseexamplesshow,failuretomakeinspectionsmayleadtoequipmentproblems.Westronglyrecommend
youperformperiodicinspectionsandcleaningtoensurethemachineisusedunderoptimalconditions.
1-3
1
Maintenance
2. Preparing for maintenance tasks
Tasks described in this section focus mainly on replacing parts (consumable parts) that might cause a gradual
loss of machine functions during use. This section also describes how the user can easily replace parts when
a breakdown occurs.
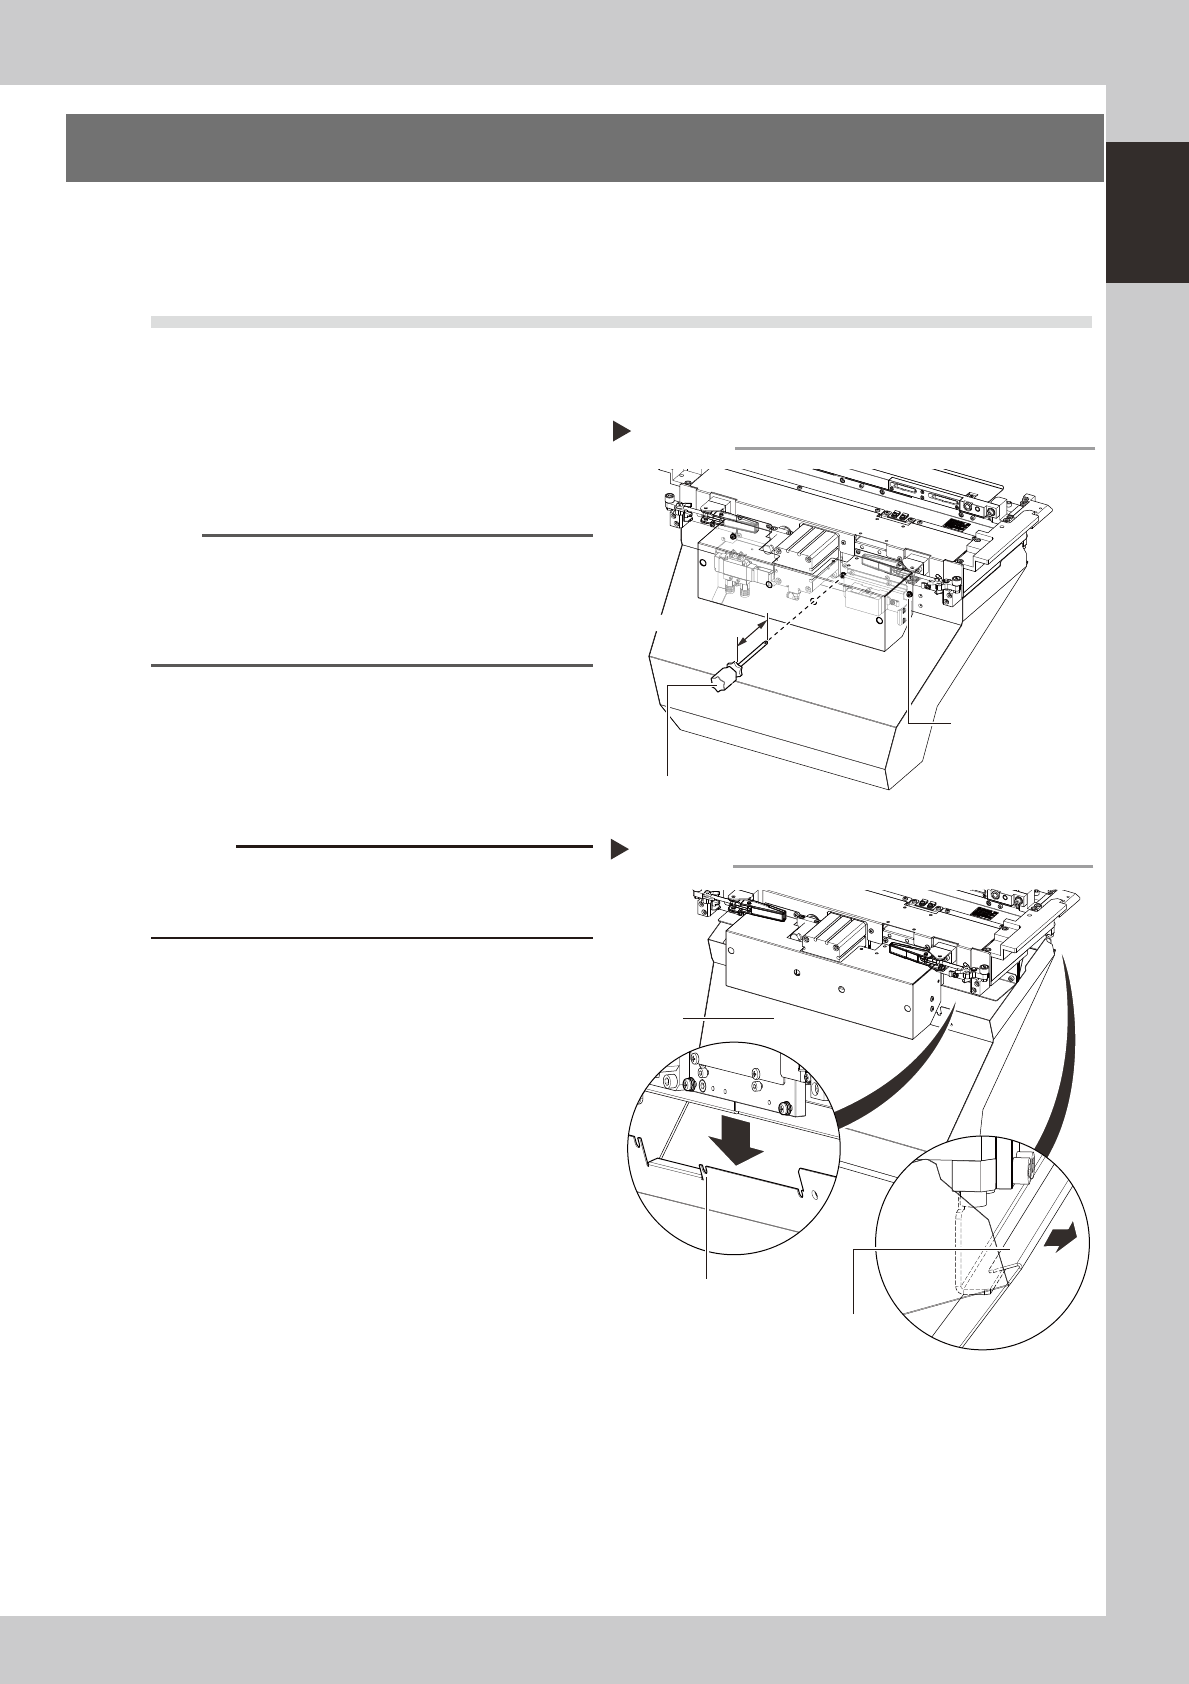
2.1 Removing the tape cutter duct
Thetapecutterductcanberemovedbothformaintenanceproceduresandfacilitatingaccessintothemachine
interior.Theductremovalprocedureisgivenbelow.
1
Loosen the duct securing screws.
Use a Phillips screwdriver to loosen the 4
duct securing screws as shown in the figure
at right.
n
NOTE
Do not completely remove the duct securing screws.
The duct can be removed simply by partially loosening
the screws.
Use a Phillips screwdriver with a shaft length longer than
100mm.
53100-N5-00
2
Remove the duct.
As shown in the figure at right, slide the duct
downward first, then detach the rear hooks
to remove the duct.
c
below.
53101-N5-00
3
Reattach the duct.
After the maintenance work, etc. has been
completed, reattach the duct by reversing
Remove the duct
Step 2
Duct
Duct securing screw
position (notched)
Hook
Loosening the duct securing screws
Step 1
Duct securing screws
(4 screws)
Phillips screwdriver
Longer than 100mm
1-4
1
Maintenance
its removal procedure (described above).
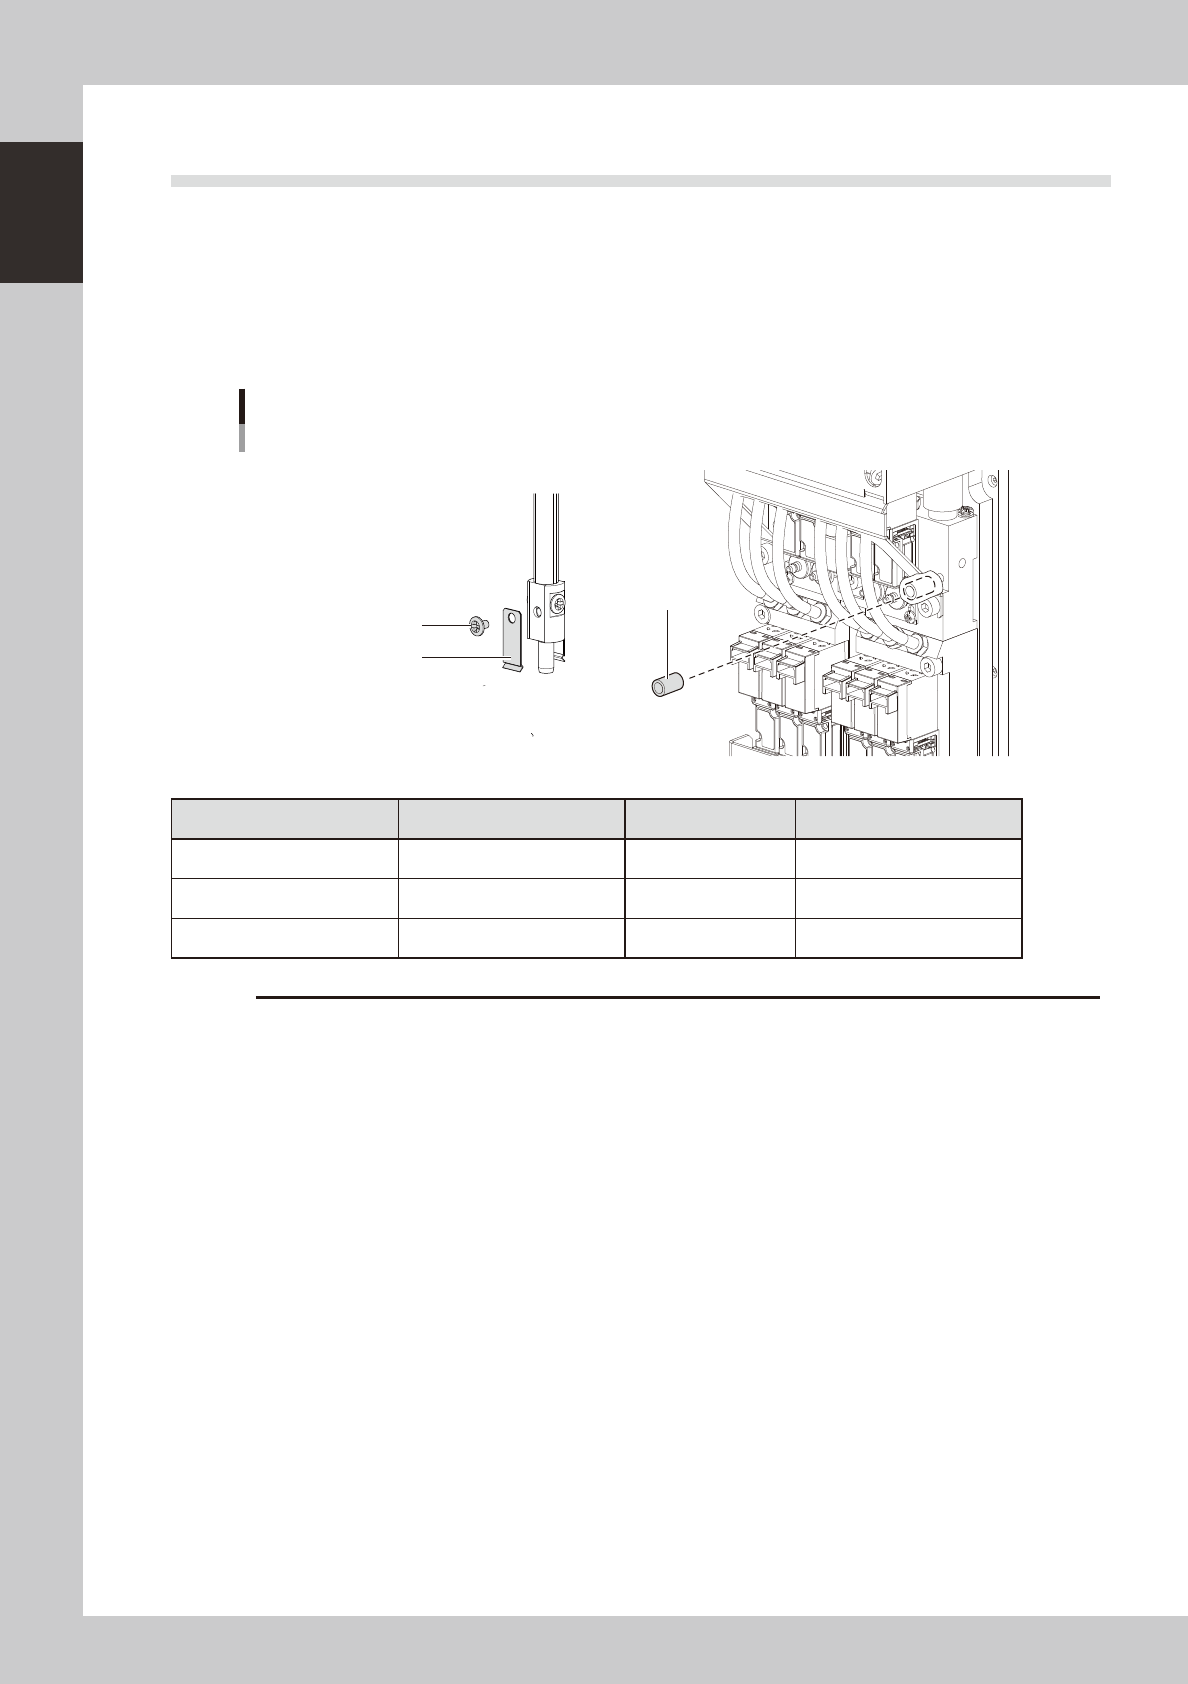
2.2 Consumable parts
Theterm"consumableparts"inthismanualindicatespartssubjecttocontinualwearduringusecausing
graduallossoffunctions.Thefollowingpartsareclassifiedinthismanualasconsumablepartsandshouldbe
replacedasneededduringmaintenance.
2.2.1 MU head unit
n
Consumable parts (parts supplied with machine)
Consumable parts (MU head)
Parts supplied with machine
Air filter
Nozzle leaf spring
Nozzle leaf mounting screw
53102-N5-00
Product Name Parts List Designation Parts No. Note
Nozzle leaf spring LEAF SPRING KG7-M7137-A0X
Nozzle leaf spring mounting screw
SCREW, PAN HEAD 90990-08J016 M2 × L2.5
Air filter FILTER KLF-M7156-00X
c
The part Nos. given in this manual are the original part Nos. which were assigned to the parts when this manual was