YSM40 Mainte_E.pdf - 第70页
3-2 3 Periodic maintenance items 1.1.2 Checking the nozzle leaf spring condition Anunstableholdingforceatthenozzleleafspring(hereafterreferredtosimplyas"leafspring")canad versely affectpickup…
3-1
3
Periodic maintenance items
1. Weekly inspection
This section mainly describes weekly inspection and cleaning.
1.1 Nozzle inspection
Afaultybuffingoperation(springaction)cancausepickuperrors.Topreventthis,inspecteachnozzle.
1.1.1 Buffing area inspection
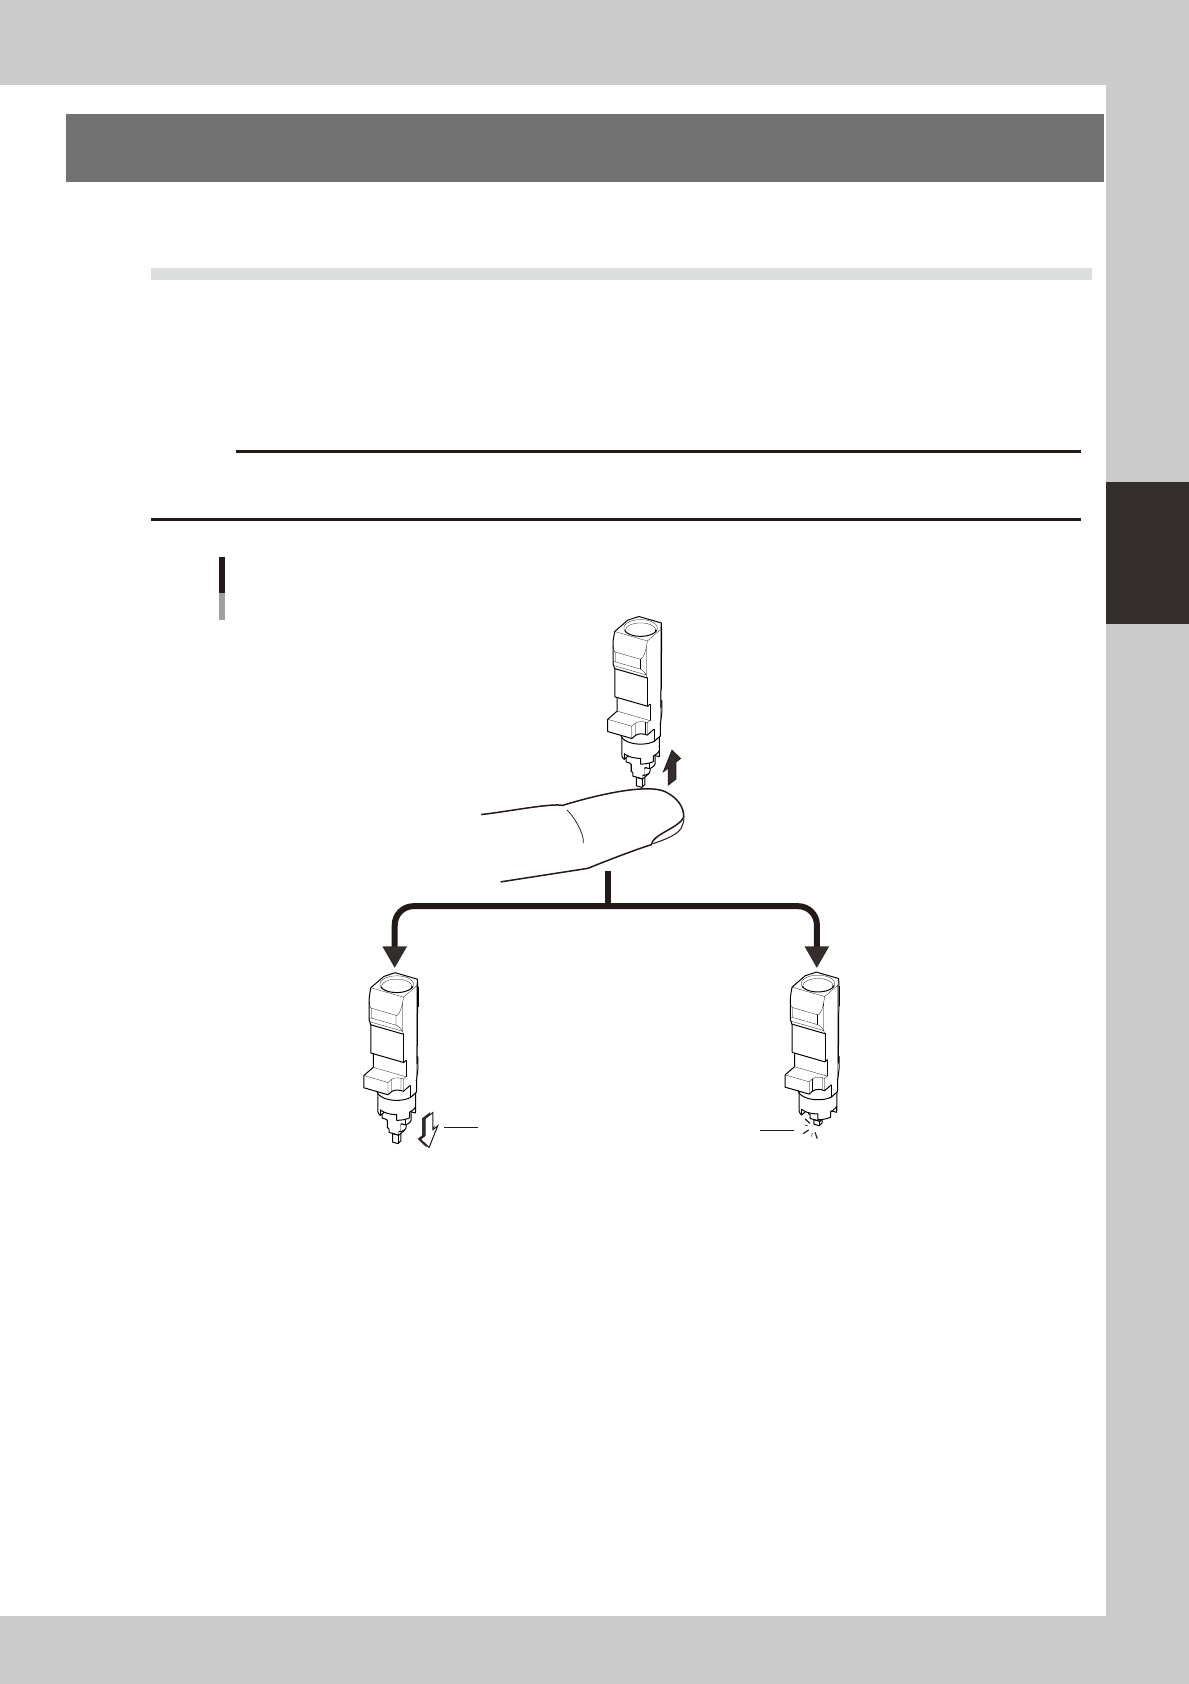
Checkthespringactionofthenozzles.Pressonanozzleandifitreturnsnormallythereisnoproblem.
However,ifthereturnactionispoor(sluggish)thenpickuperrorsandrecognitionerrorswilloccur.
c
tip returns to its original position after being pressed in approximately 1mm.
Checking the nozzle spring action
Example showing type 502A nozzle
Press on the nozzle tip with your hand.
Returns to original
position
Returns sluggishly
or does not return.
OK
No good
53300-N5-00
3-2
3
Periodic maintenance items
1.1.2 Checking the nozzle leaf spring condition
Anunstableholdingforceatthenozzleleafspring(hereafterreferredtosimplyas"leafspring")canadversely
affectpickup,recognition,andmountingoperations.Theholdingforceoftheleafspringshouldthereforebe
checkedinaperiodicmanner.
n
Leaf spring inspection points
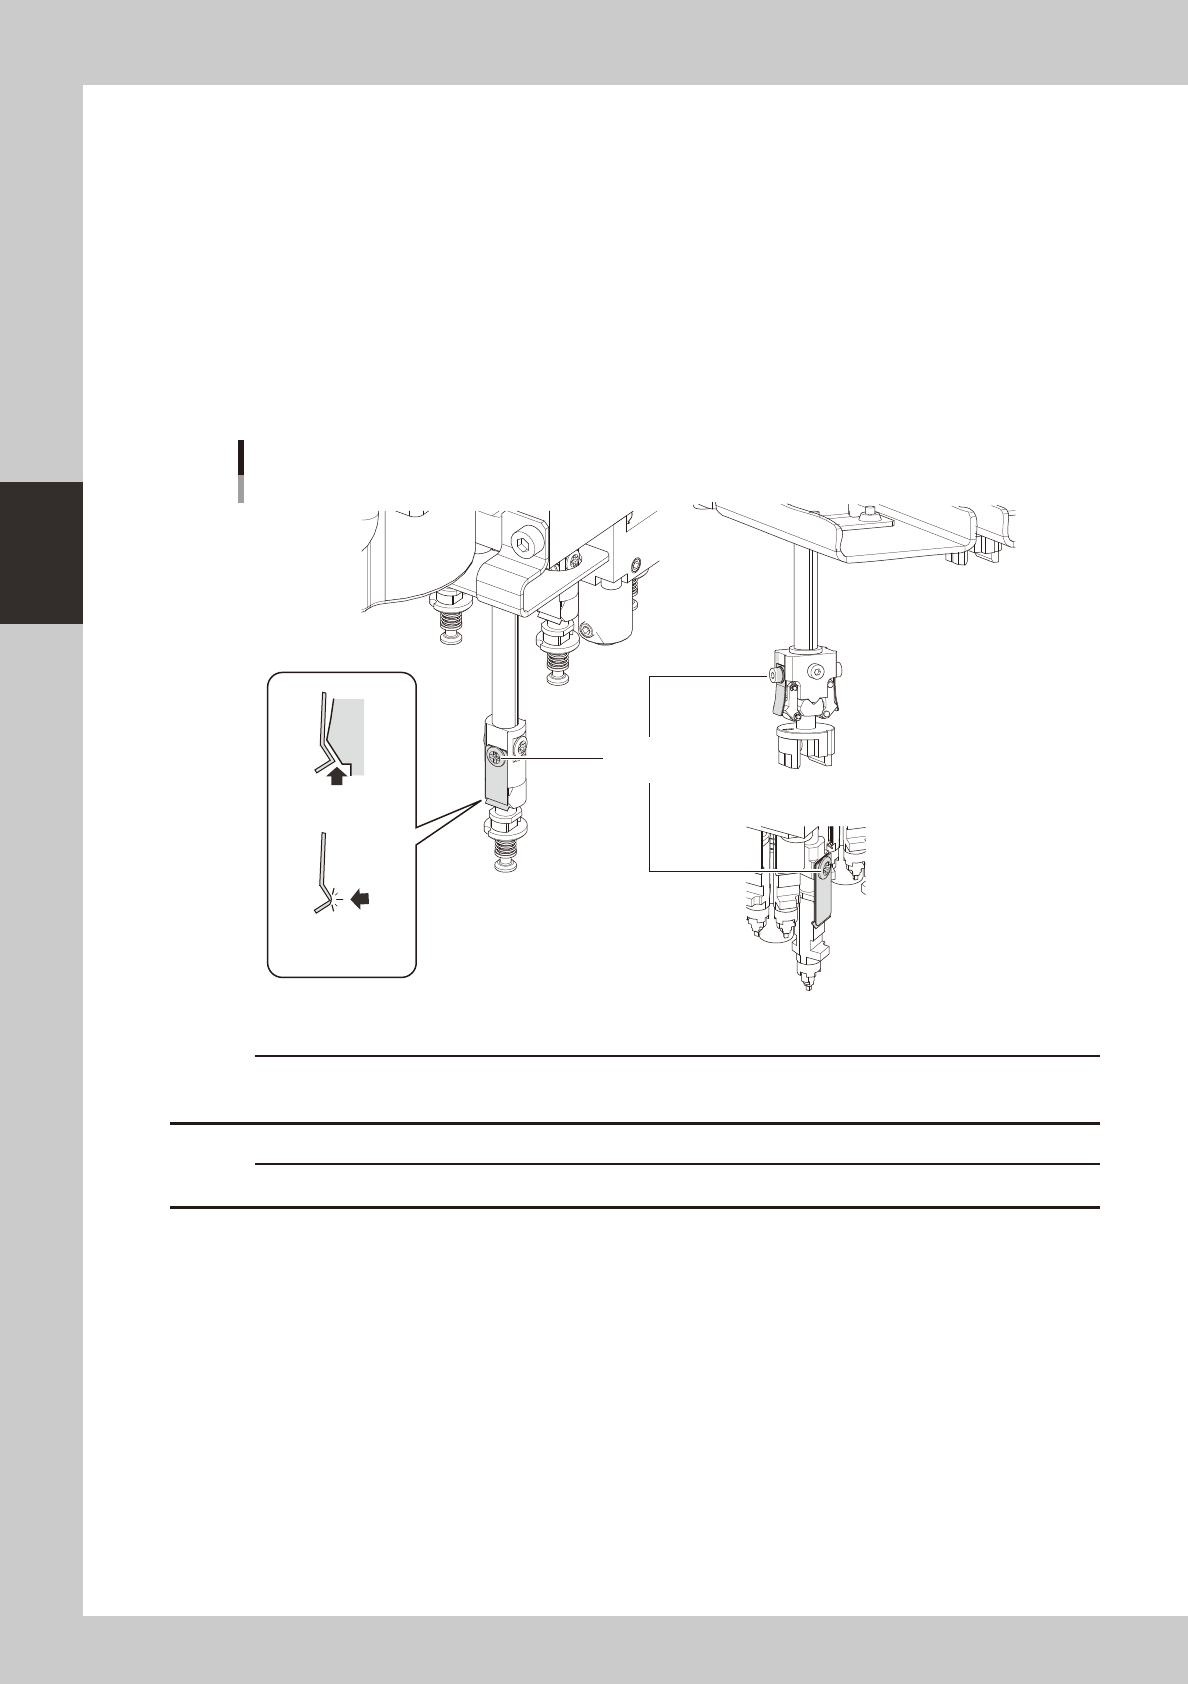
Checkthefollowingpointsbyremovingthenozzleandreattachingittothenozzleholder.
•Theleafspringhasenoughgrippingforce.
•Thereisnogapbetweentheleafspringsandthenozzle.
•Theleafspringisnotwarpedordeformed.
•Thegrippingpartoftheleafspringisnotfrayed.
Checking the leaf spring condition
MU head FL head
HS head
There should be
no gap.
Leaf spring should
not be frayed.
Screw should
be tightened.
53305-N5-00
c
c

3-3
3
Periodic maintenance items
1.1.3 Replacing nozzle leaf springs
Thenozzleleafspring(hereafterreferredtosimplyas"leafspring")replacementprocedureisgivenbelow.
n
MU head
e
1
Remove the nozzle.
Remove (by hand) the nozzle where the leaf
spring is to be replaced.
n
NOTE
When the machine is equipped with a nozzle station,
return all nozzles to the nozzle station.
2
Remove the leaf springs.
While pressing the shaft from the rear, use a
precision Phillips screwdriver to remove the
screw, then remove the leaf spring from the
nozzle holder.
53306-N5-00
c
3
Install the new leaf spring.
With the leaf springs kept pushed upward,
tighten the screw with the Phillips precision
screwdriver to assemble the leaf spring.
53307-N5-00
c
Always attach the leaf springs so that they become
parallel.
4
Reattach the nozzle.
5
Check that the nozzle is held
securely.
1. Insert the nozzle in place and check that
there is no gap between the leaf spring
and the nozzle.
2. Attempt detaching and attaching the
nozzle several times to check that there
is no looseness.
c
return all nozzles to the nozzle station.
Removing the leaf spring
Step 2
Precision screwdriver
Leaf spring to be replaced
Installing the new leaf spring
Step 3
New leaf spring and
mounting screw
While pressing the leaf spring
upward, tighten the mounting screw.