YSM40 Mainte_E.pdf - 第74页
3-6 3 Periodic maintenance items 8 Secure the nozzle shaft. Install the spring and mount block, and then secure the nozzle shaft. 9 Change the orientation of the keyw ay in the main shaft. Use the rotary head attach/deta…

3-5
3
Periodic maintenance items
5
Replace the leaf spring.
1. Use a Phillips precision screwdriver to
remove the leaf spring mounting screw
and detach the leaf spring.
2. Insert the nozzle leaf spring mount tool
for HS head (hereafter called the “tool”)
into the shaft and secure a new leaf
spring temporarily.
3. Match the leaf spring to the keyway and
secure it while pushing the tool against
the wall.
53313-N5-10
n
NOTE
Push the tool against the wall in a stationary and stable
place.
6
Check that the nozzle is held
securely.
1. Insert the nozzle in place and check that
there is no gap between the leaf spring
and the nozzle.
2. Attempt detaching and attaching the
nozzle by hand several times to check
that there is no looseness.
c
return all nozzles to the nozzle station.
7
Insert the nozzle shafts into the
main holder.
A serial number is marked on the main
holder.
Starting from the position to the right of the
serial number marking, insert each nozzle
shaft into place in the order of numbers (1, 2,
3 …) as marked on the leaf spring
53330-N5-10
TIP
Shaft number order of each head
Head 1: 1, 2, 3, and so on
Head 2: 9, 10, 11, and so on
Head 3: 17, 18, 19, and so on
c
position.
If the rank marking on the main holder does not match
operation or mounting accuracy failure.
Attaching the leaf spring
Step 5
Leaf
spring
Leaf spring mounting screw
Nozzle leaf spring mount tool
for HS head
Wall
Do not produce
any clearance.
Step 7
Rank marking
Rank marking
Inserting nozzle shafts
Head 2
Head 8
Serial number
(marking)
Leaf spring
(Head number marking)
3-6
3
Periodic maintenance items
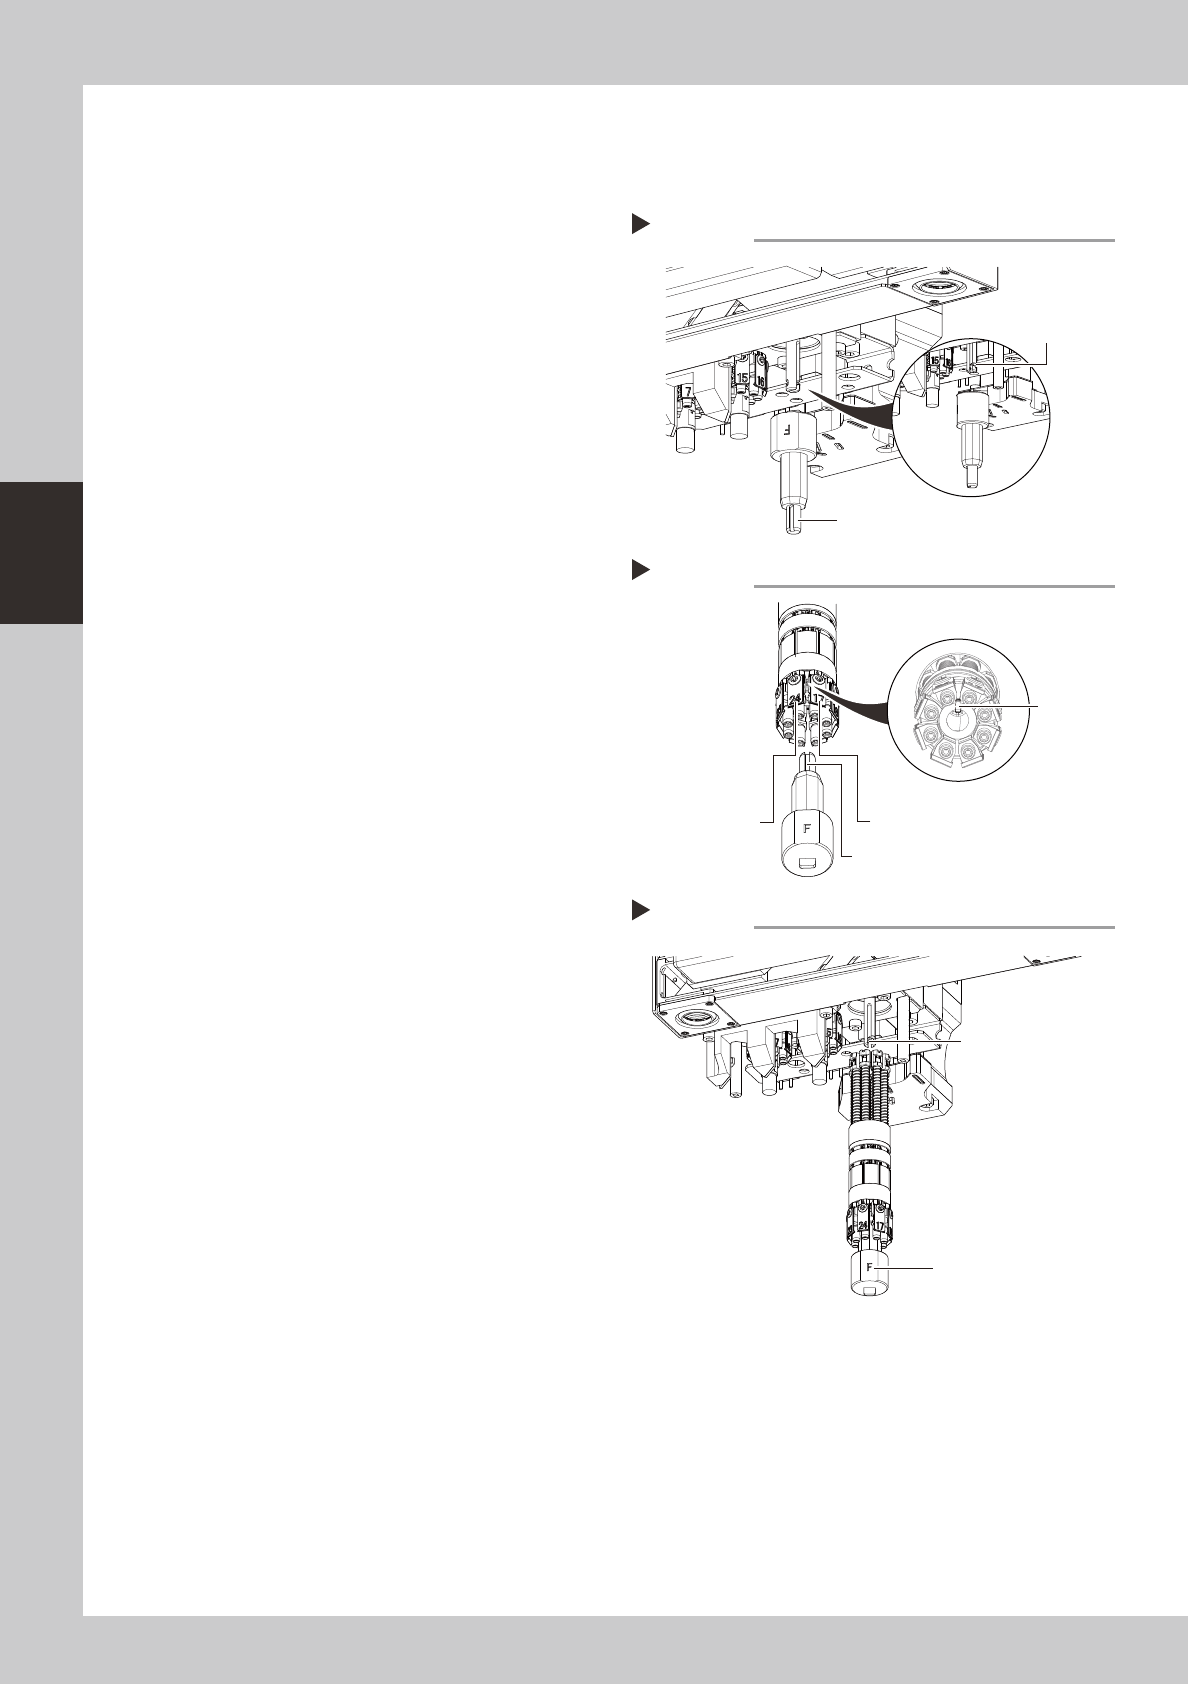
8
Secure the nozzle shaft.
Install the spring and mount block, and then
secure the nozzle shaft.
9
Change the orientation of the
keyway in the main shaft.
Use the rotary head attach/detach tool to
turn the keyway so that it directly faces this
machine. (The keyway in the main shaft is
located at twelve o'clock position when
viewed from the lower portion.)
533C1-N5-00
0
Install the rotary head attach/
detach tool.
Insert the rotary head attach/detach tool
into the rotary while aligning its keyway with
the rotary’s pin. The “F” side of the tool
should be positioned between the first and
last heads.
533C2-N5-00
q
Insert the rotary onto the main
shaft.
Align the “F” side of the rotary head attach/
detach tool with the keyway in the main
shaft, and then insert the rotary onto the
main shaft.
533C3-N5-00
w
Pull out the rotary head attach/
detach tool.
e
Reattach the spring holder.
Reverse step 1 to reattach the spring holder.
r
Make sure the rotary is properly
installed.
Turn the rotary by hand one turn to the right
and one turn to the left. If the rotary does
not turn smoothly, then pull it out again.
Check the position of the mount block and
reinstall the rotary using the same procedure
from step 9.
Changing the main shaft orientation
Step 9
Main shaft keyway
Rotary head attach/detach tool
Installing the tool
Step 10
Pin
First head
Last head
Keyway
Installing the rotary
Step 11
Main shaft keyway
“F” marking
3-7
3
Periodic maintenance items
n
FL head
e
1
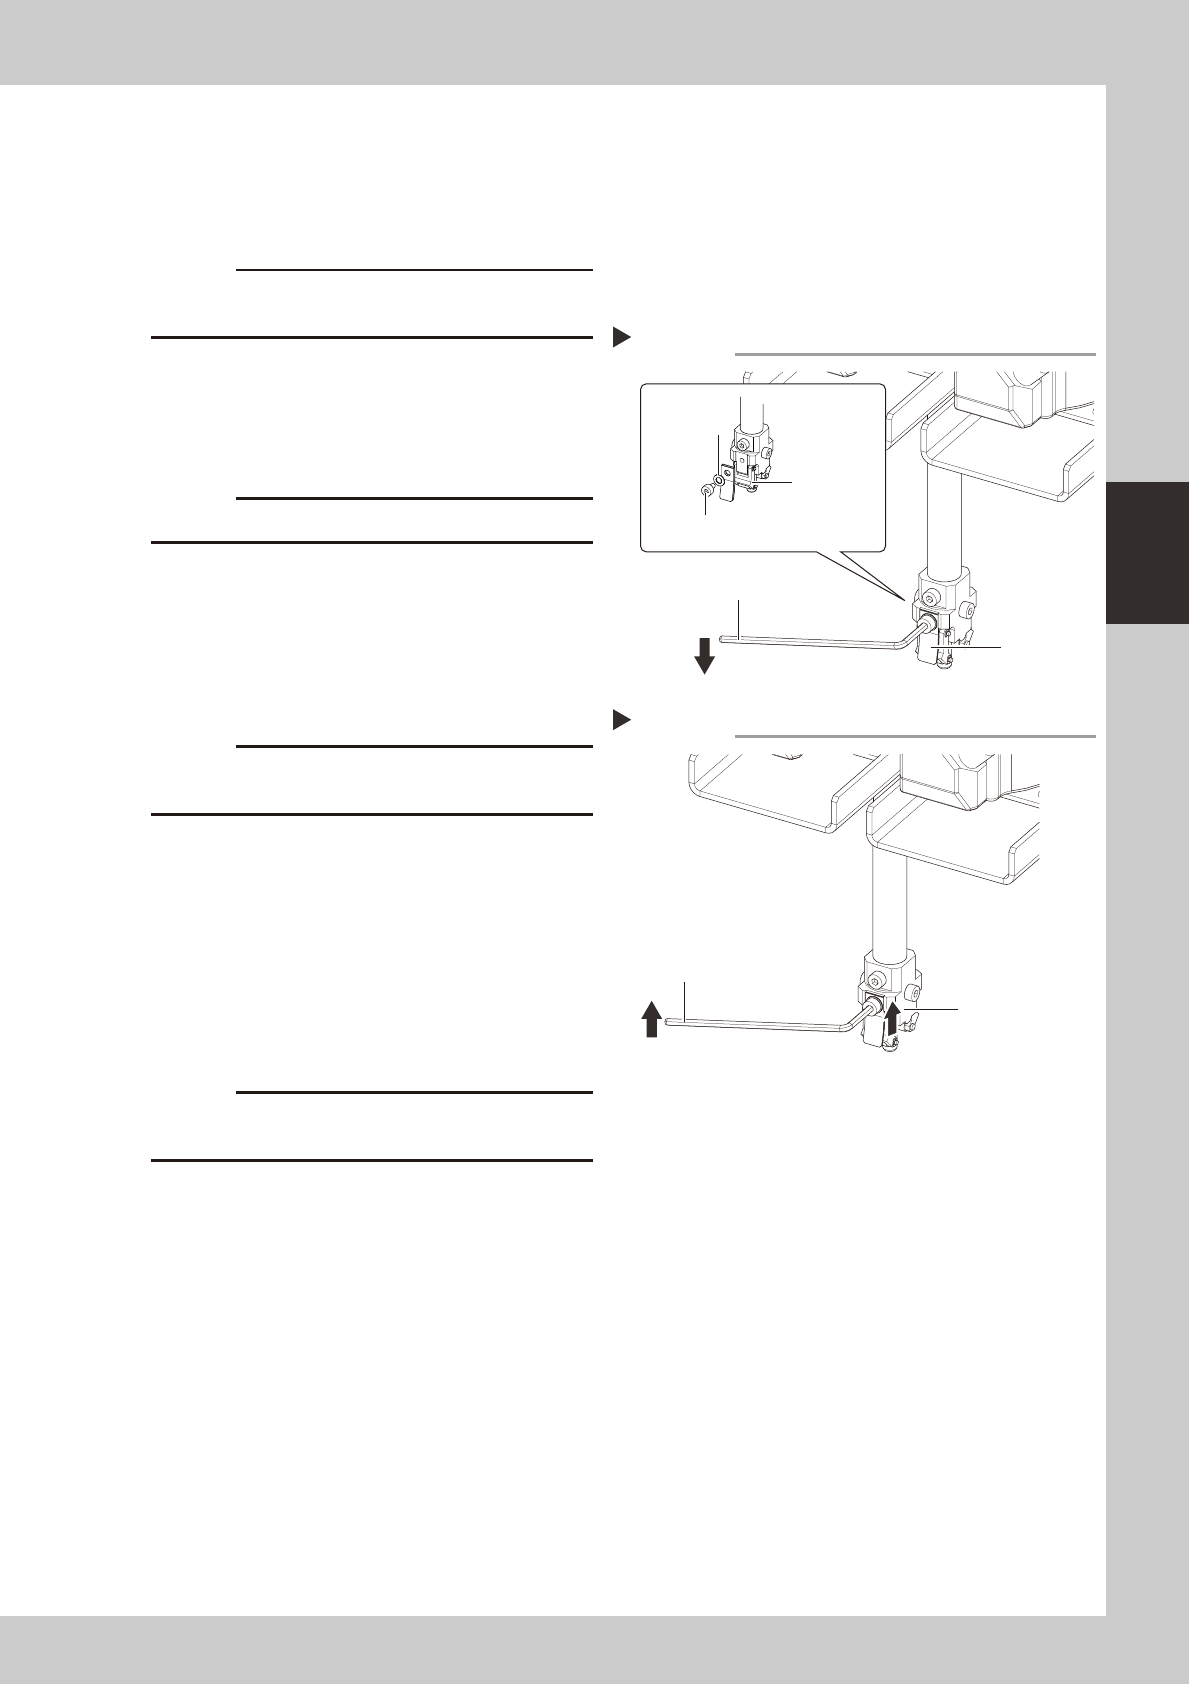
Remove the nozzle.
Remove the nozzle where the lead spring is
to be replaced.
c
return all nozzles to the nozzle station.
2
Remove the leaf springs.
Use a hex wrench (1.5) to remove the
mounting screw and remove the lead spring.
53314-N5-00
c
3
Install the new leaf spring.
With the leaf spring kept pushed upward
along with the nozzle arm assembly, tighten
the screw mounting with the hex wrench
(1.5) to secure the leaf spring.
53315-N5-00
c
Always attach the leaf springs so that they become
parallel.
4
Reattach the nozzle.
5
Check that the nozzle is held
securely.
1. Check that there is no gap between the
leaf springs and the nozzle.
2. Attempt detaching and attaching the
nozzle several times to check that there
is no looseness.
c
return all nozzles to the nozzle station.
Removing the leaf spring
Step 2
Hex wrench
Leaf spring
Leaf spring mounting screw
Washer
Nozzle arm
assembly
Installing the leaf spring
Step 3
Hex wrench
Push the leaf
spring upward.