YSM40 Mainte_E.pdf - 第78页
3-10 3 Periodic maintenance items 1.2.3 Cleaning the nozzle tip T ocleanthetipofanozzle,usethe“nozzletipcleaningtape(hereaftercalled“cleaningtape”)thatcomes suppliedwiththemachine. n NOTE The cleani…
3-9
3
Periodic maintenance items
1.2.2 Cleaning the nozzle air path (monthly)
e
1
Remove the nozzle from the head.
Always first press the emergency stop button
and then remove the nozzle from the head.
The machine must be in emergency stop to
ensure safety during work.
c
return the nozzle to the head from which it was
removed.
2
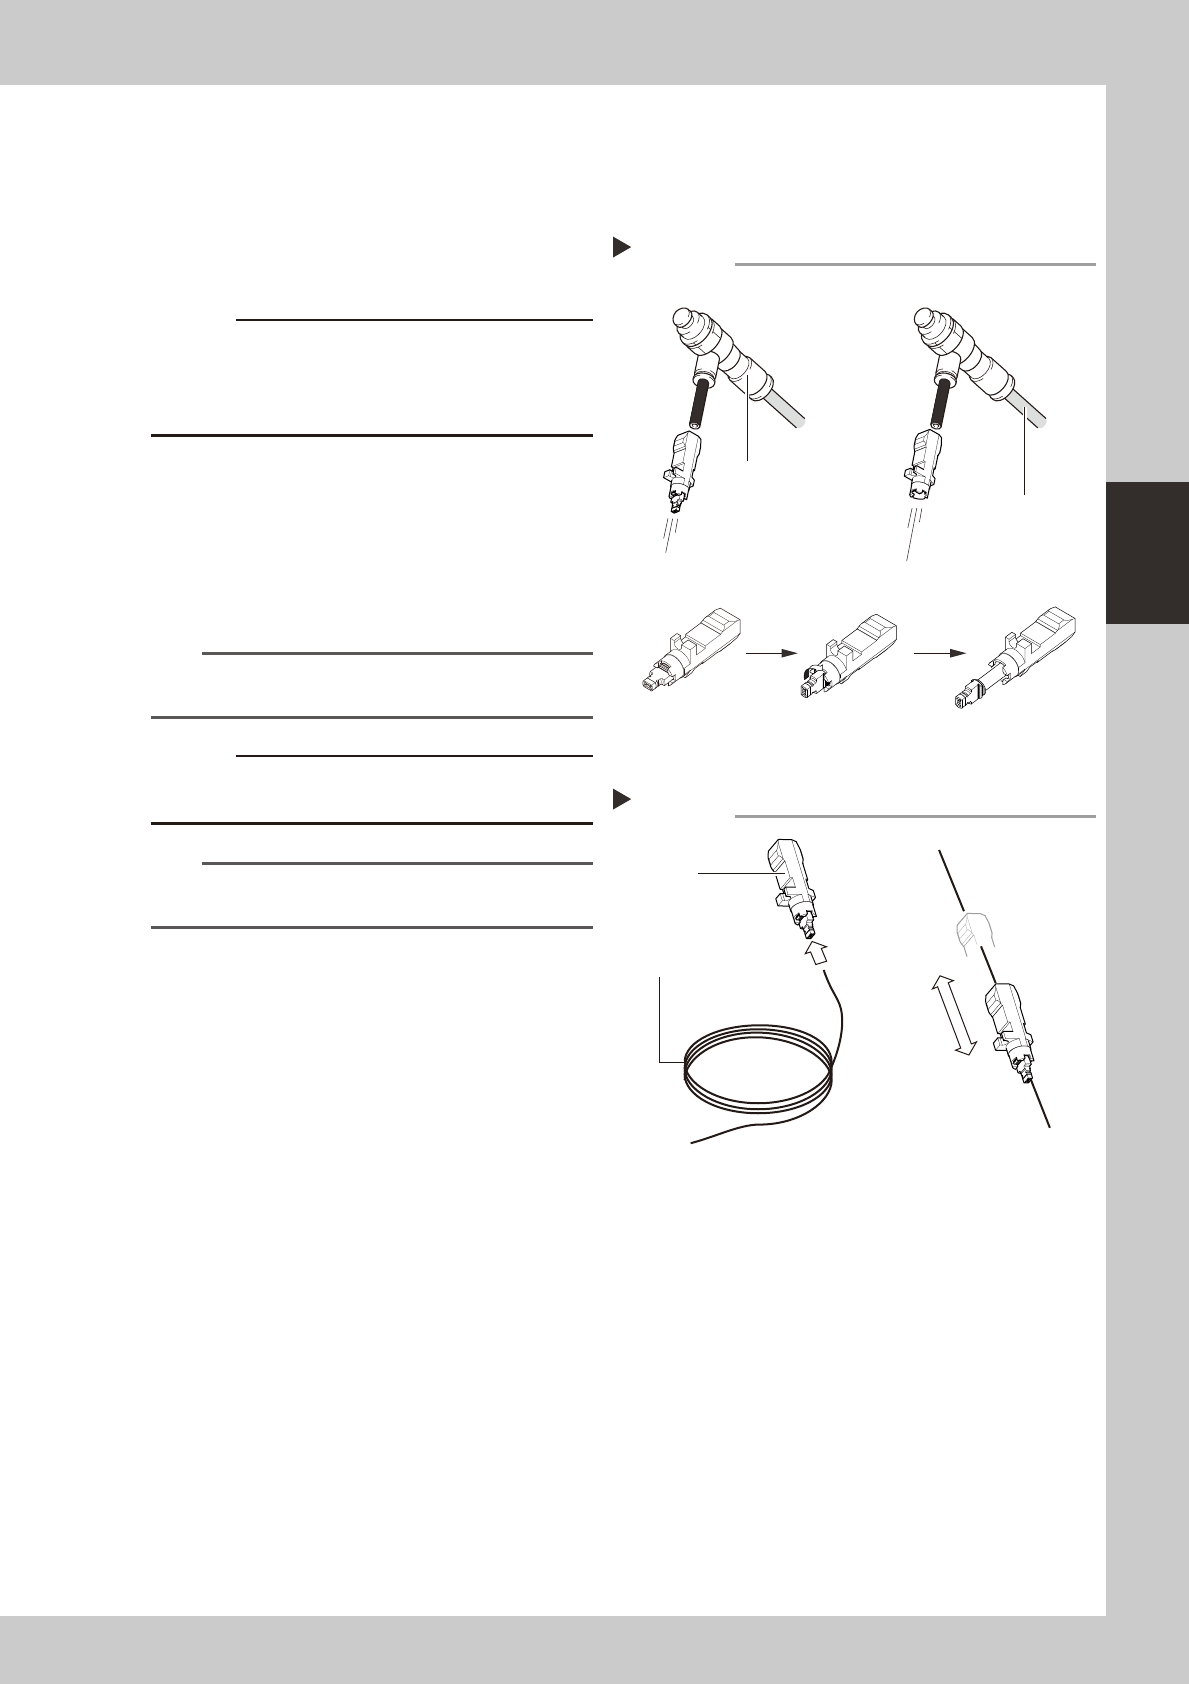
Blow air through the nozzle.
1. Detach the nozzle tip and air blow the
nozzle from the nozzle mounting side.
2. Attach the nozzle tip and air blow the
nozzle from the nozzle mounting side.
53308-N5-00
n
NOTE
The nozzle tip of Type 60X Group nozzles cannot be
removed.
c
the inner spring.
n
NOTE
If there are dust deposits in the nozzle, perform steps 3
and 4.
3
Clean the nozzle hole.
1. Pass a nozzle cleaning wire through the
nozzle hole.
2. Clean the nozzle by moving it as shown
at right.
53309-N5-00
4
Blow air onto the nozzle tip again.
Remove the nozzle cleaning wire, then
air-blow the nozzle interior with the air blow
tool as described in Step 2.
Air blow
Step 2
Air blow unit (optional)
Rotate 90 degrees while
pressing the tip.
Pull the tip outward
to detach it.
Air tube (orange)
connected to
air supply port
Blow air from the nozzle attachment side.
■ Attaching/detaching the nozzle tip
Detach the nozzle tip, and
air-blow from that side.
Cleaning a nozzle
Step 3
Nozzle
Nozzle cleaning wire
3-10
3
Periodic maintenance items
1.2.3 Cleaning the nozzle tip
Tocleanthetipofanozzle,usethe“nozzletipcleaningtape(hereaftercalled“cleaningtape”)thatcomes
suppliedwiththemachine.
n
NOTE
The cleaning tape helps remove dirt or grime from a nozzle, which was not removed with an ultrasonic cleaner (option).
n
How to use
Usetheadhesivesurfaceofthecleaningtapetoremovedirtorgrimeonthetipofeachnozzle.
n
HS head
TheoptionalnozzlecleanerforHShead(hereaftercalled“nozzlecleaner”)allowscleaningthetipsof8nozzlesata
timewithoutdetachingthenozzlesfromthemachine.
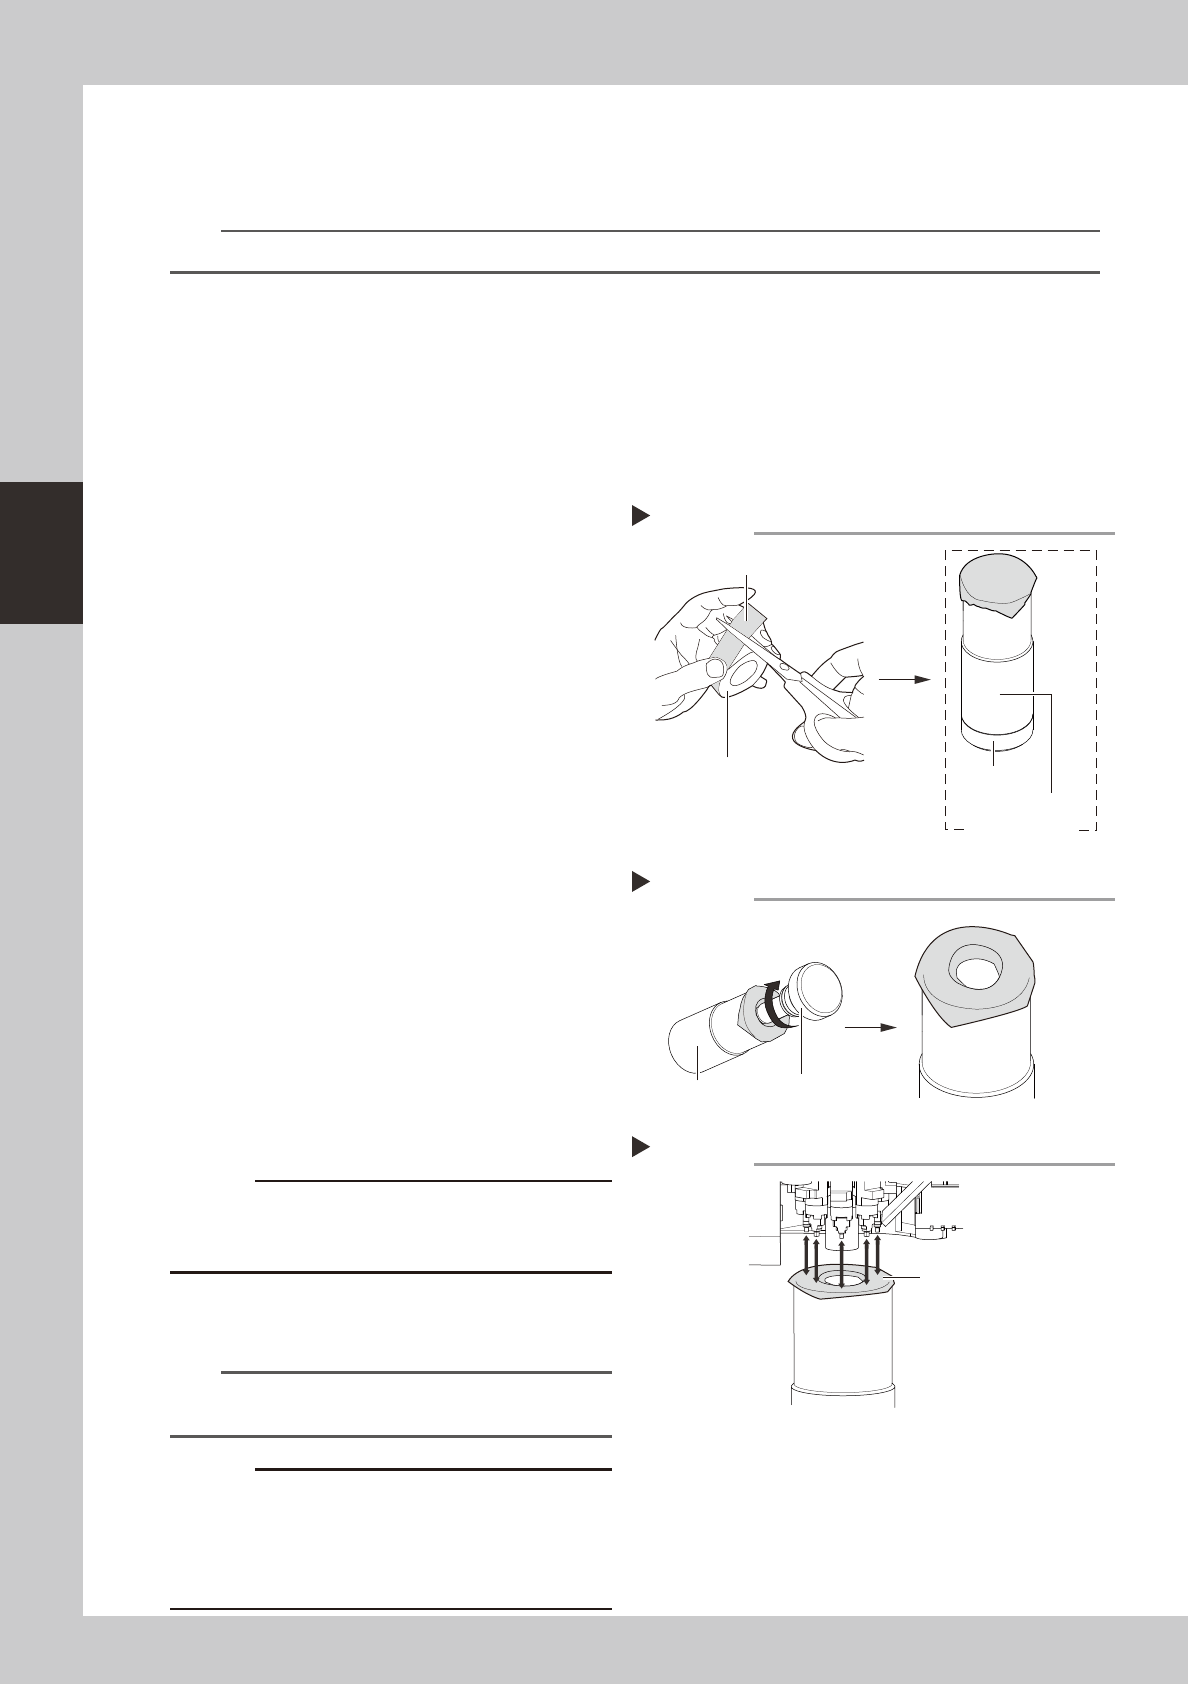
1
Attach a cleaning tape to the
nozzle cleaner.
1. Cut the cleaning tape into a square.
2. Attach the cleaning tape to the tip of
the nozzle cleaner.
533D1-N5-00
2
Make a hole in the cleaning tape.
1. Pull out the cleaner 2 and make a hole in
the center of the cleaning tape.
2. After making a hole, widen the hole by
pressing the tape against the inner wall
of cleaner 1.
533D2-N5-00
e
3
Remove the feeder exchange carriage.
Press the emergency stop button and then
remove the feeder exchange carriage from
the machine.
4
Move the head to a position where
the nozzles can be cleaned easily.
5
Clean the nozzle tips.
Clean the nozzle tips by pressing the nozzle
cleaner up against the nozzle tips a few
times from below the HS head rotary.
533D3-N5-00
c
cleaning tape to adhere to the nozzle tips.
6
Peel the cleaning tape off the
nozzle tips.
n
NOTE
We recommend replacing the cleaning tape for every
4 tables.
c
cleaner if the cleaning tape is left attached to the
nozzle cleaner. When storing the nozzle cleaner after
tape off the nozzle cleaner.
Attaching a cleaning tape
Cleaning tape
Step 1
Cut into a square.
Nozzle cleaner
Cleaner 2
Cleaner 1
Making a hole in the cleaning tape
Step 2
Cleaner 2
Cleaner 1
Cleaning the nozzle tips
Step 5
Tape surface
3-11
3
Periodic maintenance items
1.3 Cleaning the multi-camera lighting's protective cover
Adhereddust,etc.,onthemulti-cameralighting'sprotectivecovercancausecomponentrecognitionerrors.To
preventthis,inspectandcleanthecoverinaperiodicmanner.
e
Toensuresafety,makesurethatthemachinepowerswitchisoffortheemergencystopbuttonispressed
beforestartingwork.
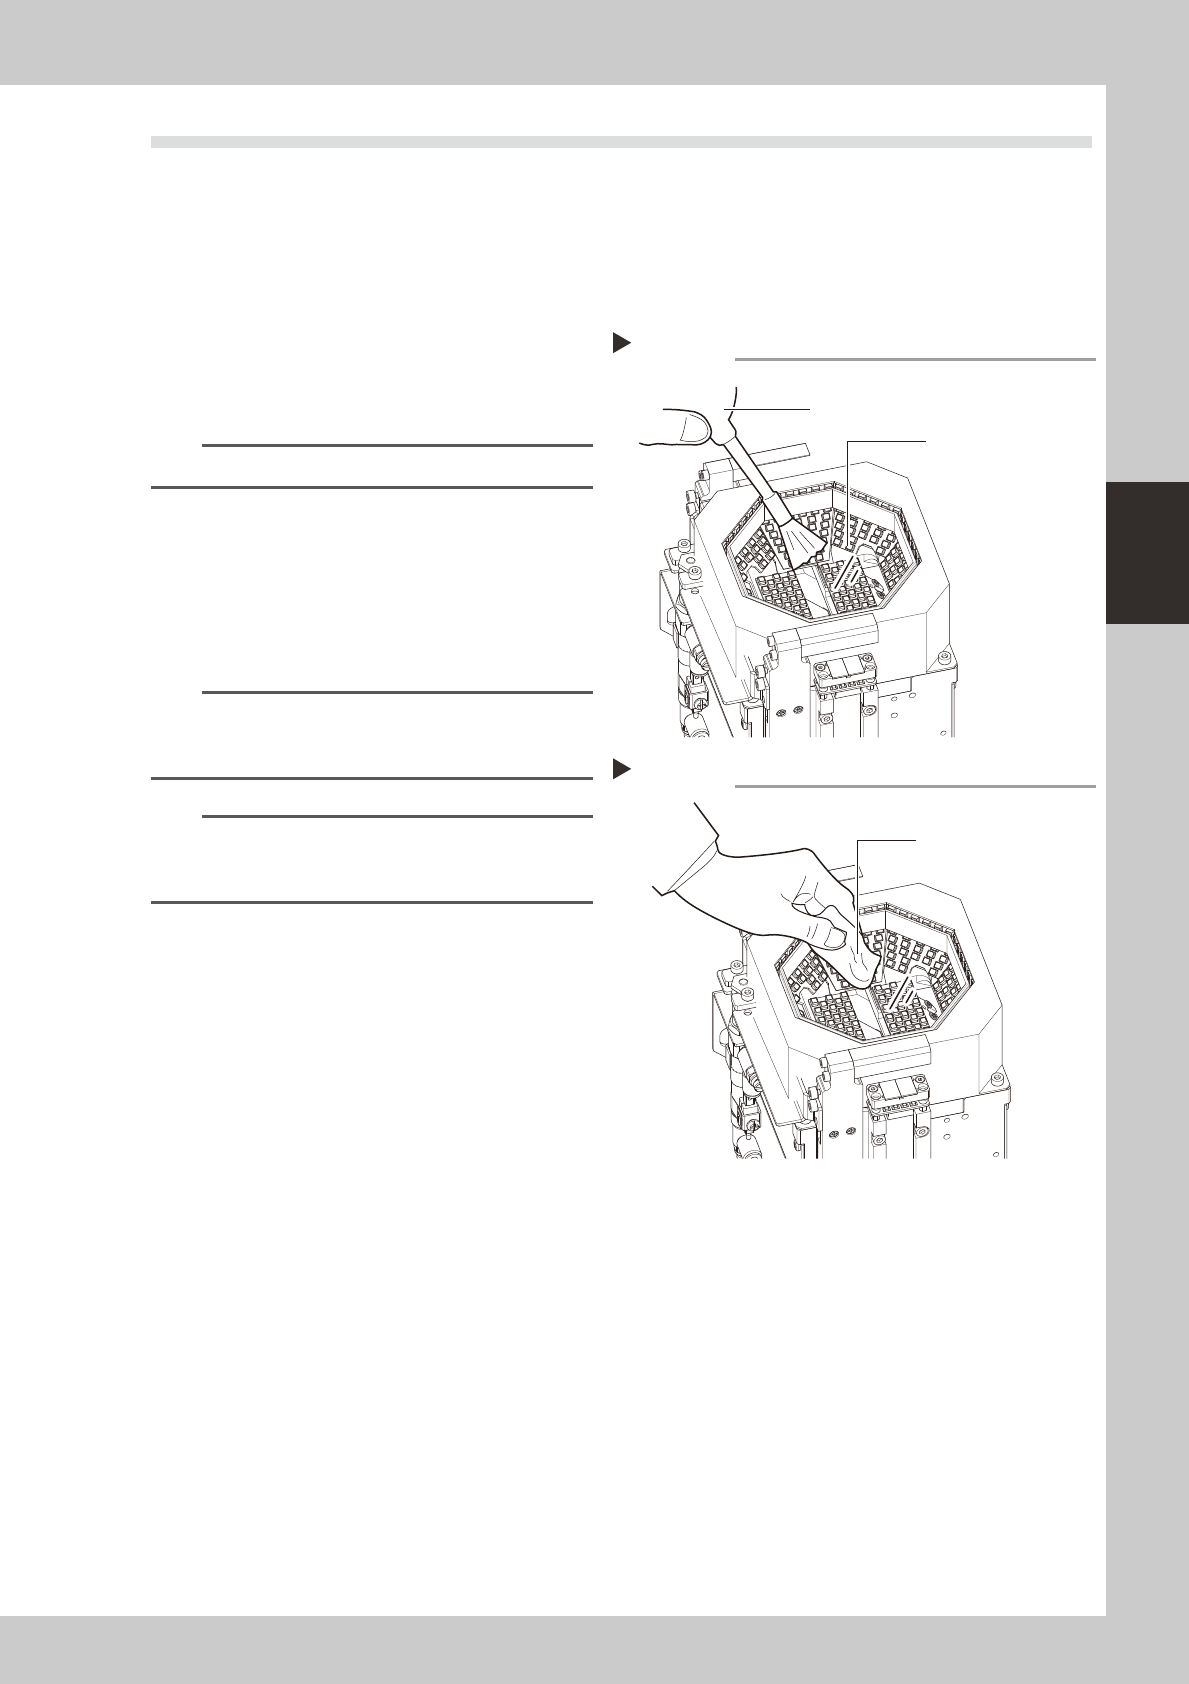
1
Use an optical brush to remove any
dust from the lighting's protective
cover.
53205-N5-00
TIP
A lens blower brush is available as an option.
2
Wipe the lighting's protective cover
with a cloth.
Wipe the lighting's protective cover with a
cloth which has been dampened with a
small amount of lens cleaner.
53206-N5-00
n
NOTE
Use a lint-free cleaning cloth or paper wiper.
A lens cleaner is supplied with the machine. Do not use
other type of cleaner.
n
NOTE
If the above actions fail to properly clean the
protective cover, perform the procedure described in
section 4.1 "Cleaning the camera lighting unit".
Blowing off dust with blower brush
Step 1
Protective cover (glass)
Lens blower brush
Wiping the transparent cover
Step 2
Lent-free cleaning cloth
or paper wiper