YSM40 Mainte_E.pdf - 第80页
3-12 3 Periodic maintenance items 2. Monthly inspection This section describes the procedures for inspecting, cleaning, and lubricating the X-axis ball screw , guide, and linear scale, and the Y -axis guide and linear sc…
3-11
3
Periodic maintenance items
1.3 Cleaning the multi-camera lighting's protective cover
Adhereddust,etc.,onthemulti-cameralighting'sprotectivecovercancausecomponentrecognitionerrors.To
preventthis,inspectandcleanthecoverinaperiodicmanner.
e
Toensuresafety,makesurethatthemachinepowerswitchisoffortheemergencystopbuttonispressed
beforestartingwork.
1
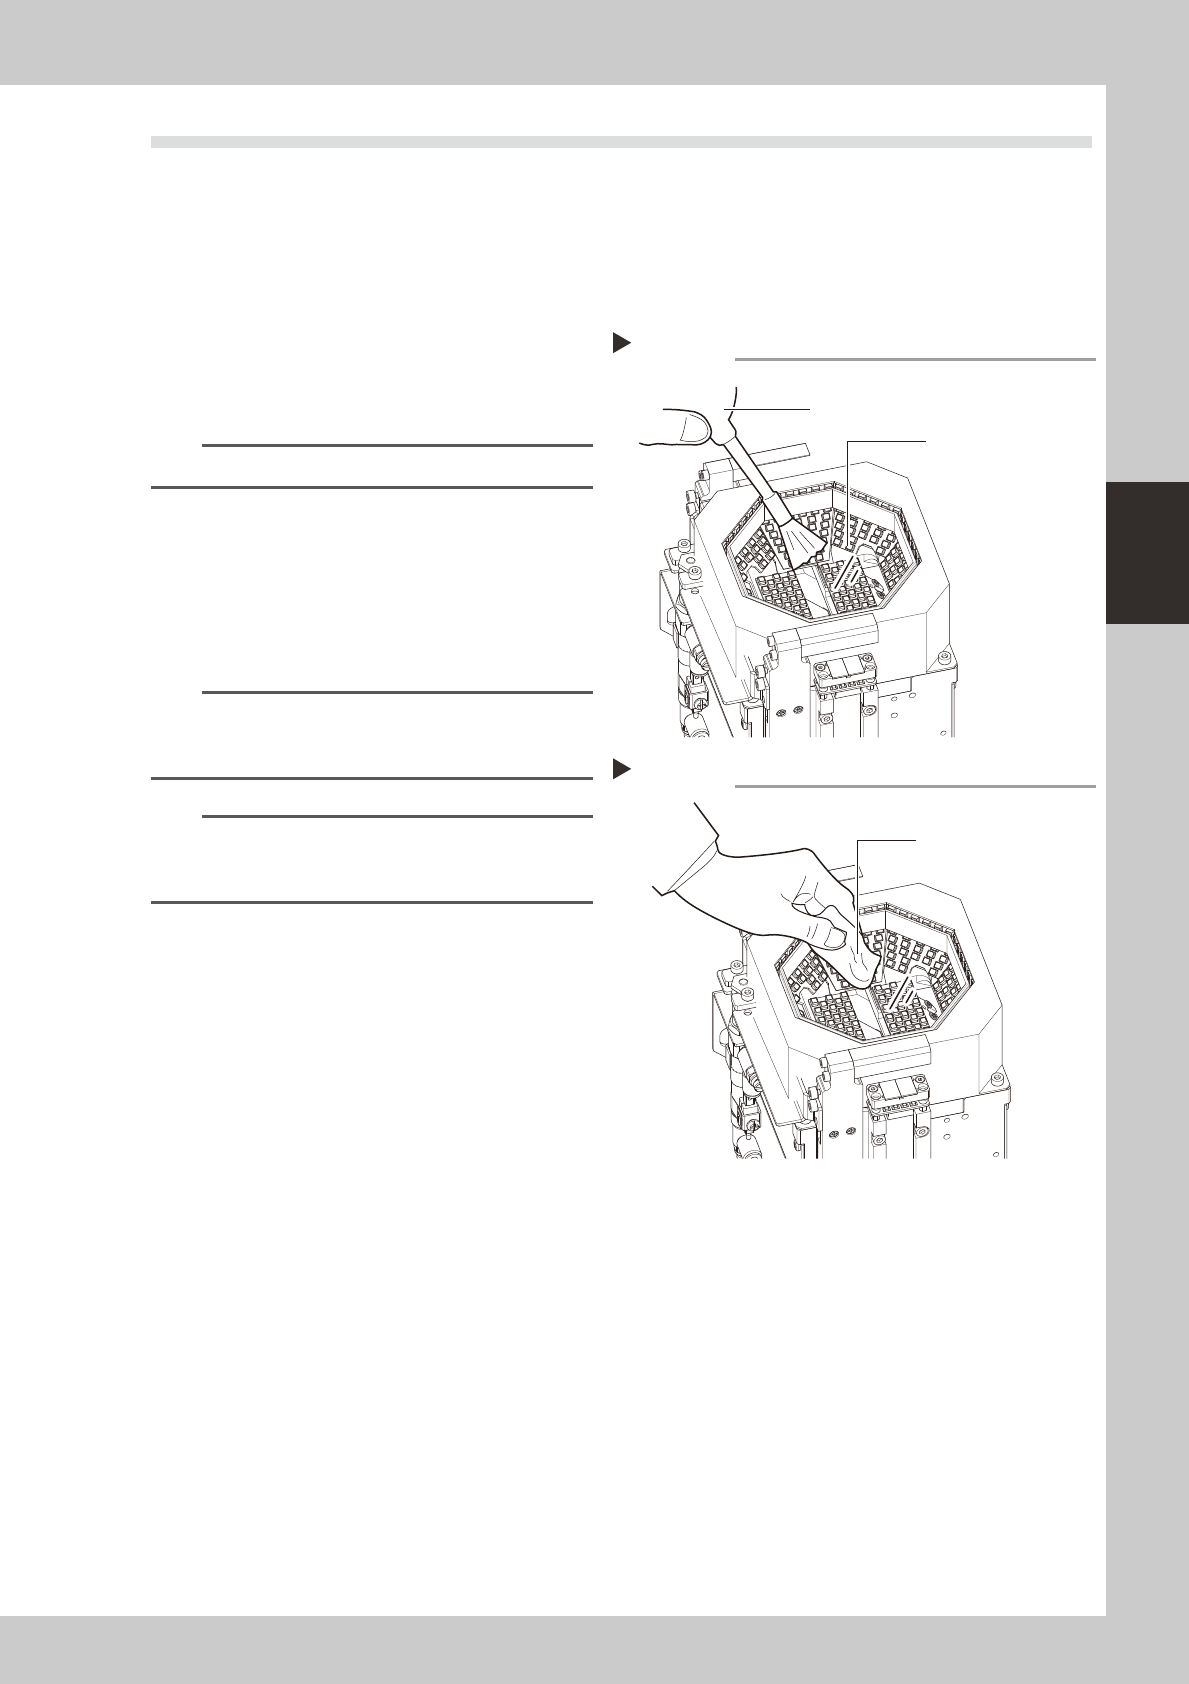
Use an optical brush to remove any
dust from the lighting's protective
cover.
53205-N5-00
TIP
A lens blower brush is available as an option.
2
Wipe the lighting's protective cover
with a cloth.
Wipe the lighting's protective cover with a
cloth which has been dampened with a
small amount of lens cleaner.
53206-N5-00
n
NOTE
Use a lint-free cleaning cloth or paper wiper.
A lens cleaner is supplied with the machine. Do not use
other type of cleaner.
n
NOTE
If the above actions fail to properly clean the
protective cover, perform the procedure described in
section 4.1 "Cleaning the camera lighting unit".
Blowing off dust with blower brush
Step 1
Protective cover (glass)
Lens blower brush
Wiping the transparent cover
Step 2
Lent-free cleaning cloth
or paper wiper
3-12
3
Periodic maintenance items
2. Monthly inspection
This section describes the procedures for inspecting, cleaning, and lubricating the X-axis ball screw, guide,
and linear scale, and the Y-axis guide and linear scale. The inspection items and cautions are given below.
n
Inspection items
1. Any foreign matter adhering to the ball screws and linear guides?
CheckifanyfallenchipshaveadheredtotheXandYaxisballscrewsand/orX,YandWaxislinearguides.
2. Do the ball screws and linear guides have the correct amount of grease?
Checkifgreasehasflowedofforsplatteredintheairfailingtoadhere.Alsocheckifgreasehasdiscoloredorhardened.
e
3. Any abnormal sounds from the ball screws?
Presstheemergencystopbutton.ThencheckforanyabnormalsoundswhilepressingtheX-axisbyhand.
Countermeasures
1.Ballscrewsandlinearguidesmaybedamagedwhenchipsandothermaterialbiteintothem.Ifchipsareadhering,
wipethemoffalongwiththegreaseorremovewithtweezers,etc.
2.Applygreasewhilereferring“Cleaningandlubrication”describedlateron.
3.ConsultyourYAMAHAsalesofficeorrepresentativewhenabnormalsoundsoccurevenaftertryingthe
countermeasuresintheabovesteps1and2.
n
Cautions
w
WARNING
c
the warranty.
c
c
grease" in Chapter 1.
3-13
3
Periodic maintenance items
2.1 Rotary unit
Asageneralguide,themainrotaryandshaftnozzlesshouldbecleanedevery3months,althoughthismay
varysomewhatdependingontheairsupplyconditionsandtheoperatingtime.
2.1.1 Cleaning the rotary unit
e
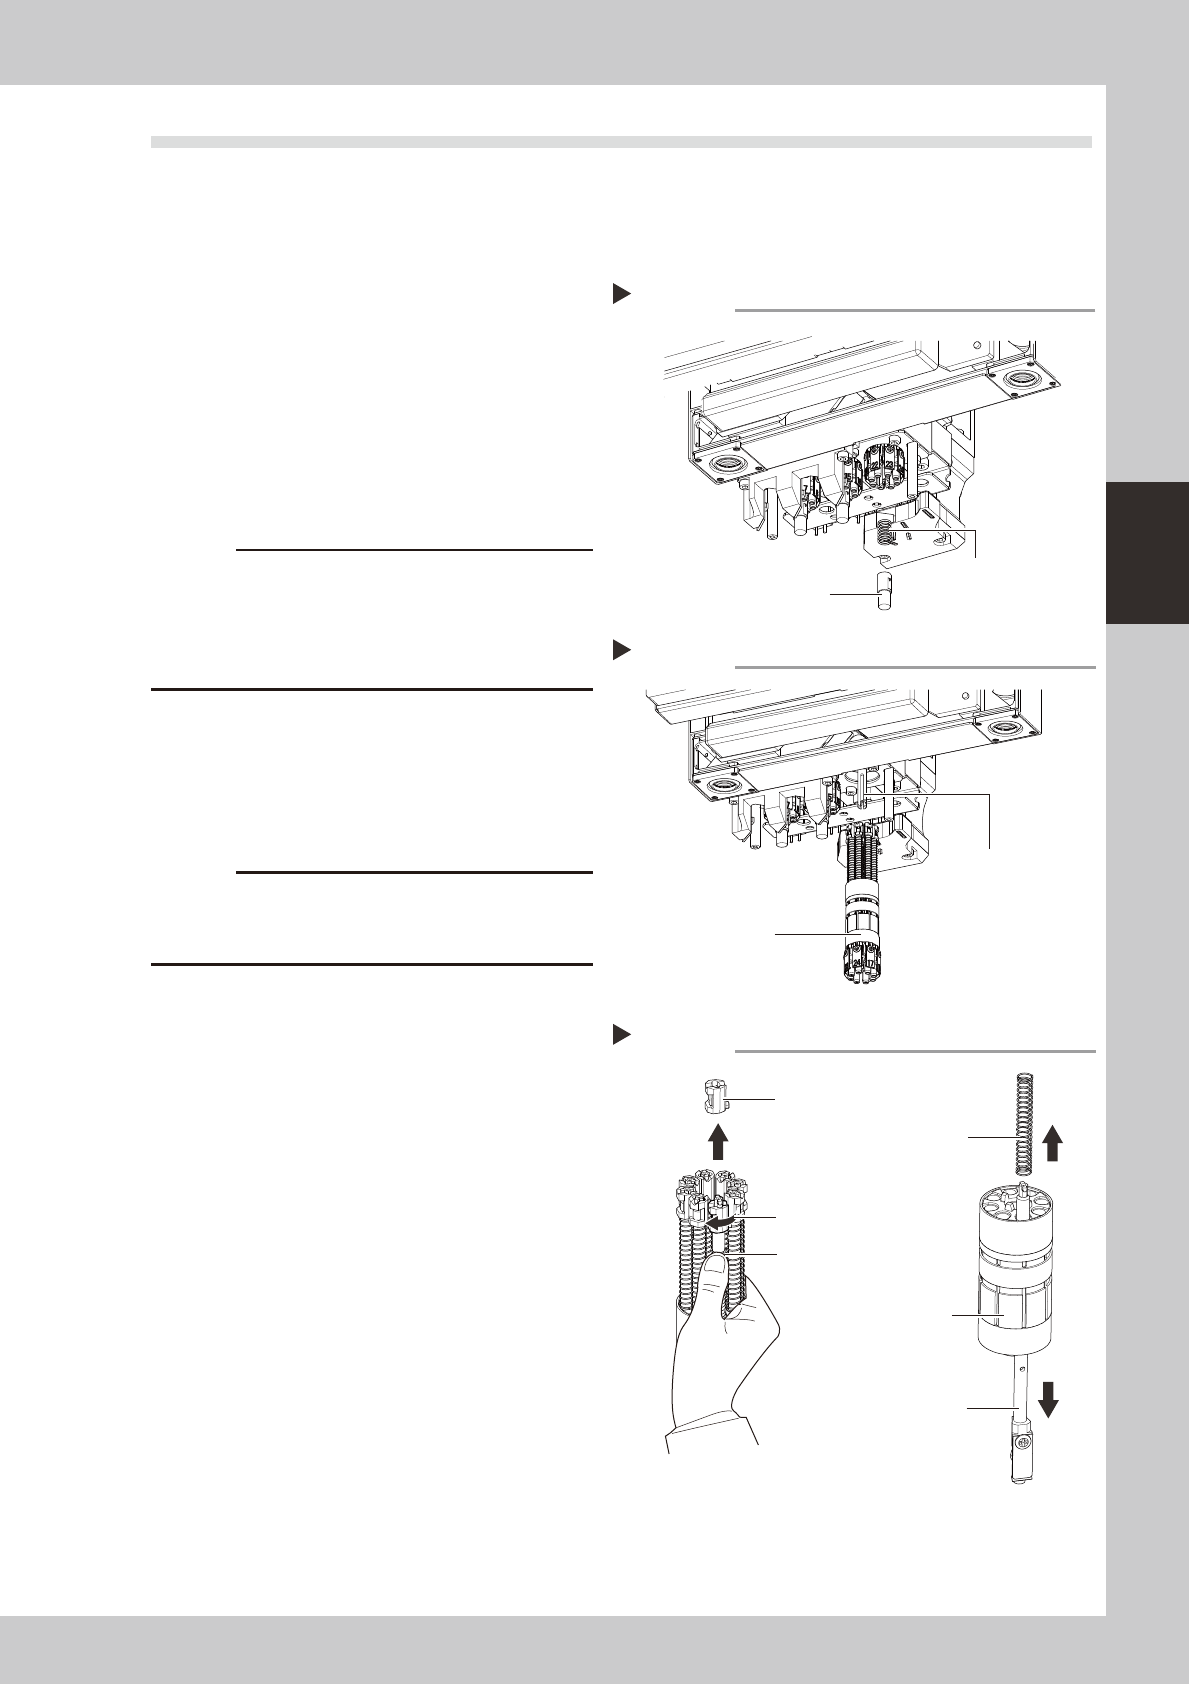
1
Remove the spring holder.
1. While pressing up the spring holder shown
in the figure at right, turn it to the right.
2. Remove the spring holder and the spring.
53311-N5-10
2
Remove the rotary.
Pull out the rotary from the head unit.
53312-N5-10
c
view lighting unit and other parts.
can easily return it in the original position after
cleaning.
3
Remove the mount block.
With the spring held down as shown in the
figure at right, turn the mount block 90
degrees and pull it out upward.
53322-N5-00
c
To prevent the spring and mount block from falling out
the spring during removal of the mount block.
4
Pull out the nozzle shafts and
springs.
Pull out all nozzle shafts and springs from the
main holder.
Removing the spring holder
Step 1
Spring holder
Spring
Removing the rotary
Step 2
Rotary
Main shaft
Removing the mount block
Step 3
Hold down the spring
Spring
Turn 90 degrees
Main holder
Nozzle shaft
Mount block