00197197-02-IM SetupCenter 5.1.pdf - 第19页
Installation Datalogic Scanner’s C radle BC-8030 (Narrowband) Hardware Install ation Installation Manual SIPLACE Setup Center 5.1 19 ► Scan the barcode "Restore BC-80X0 Def ault" to rest ore the sta nd ard conf…
Installation
Hardware Installation Datalogic Scanner’s Cradle BC-8030 (Narrowband)
18 Installation Manual SIPLACE Setup Center 5.1
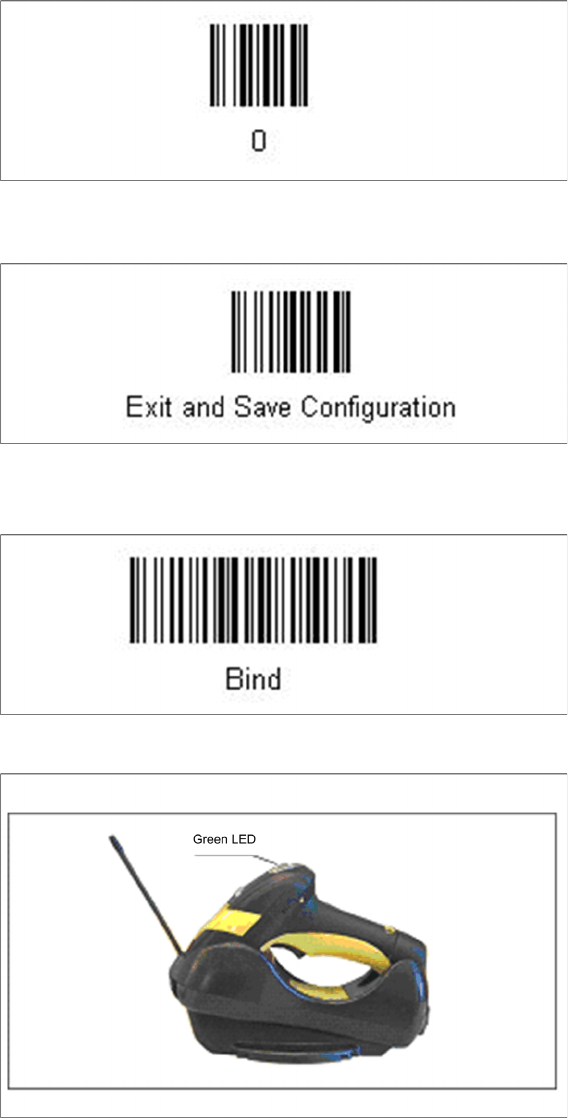
► Scan the barcode “0” four times.
The scanner must have an address (temporary "0000"), so that it can get connected to the cradle. This
address will be changed / set again later by Setup Center with the automatic configuration.
In order to configure the cradle a scanner needs to be bound to the cradle with the barcode "Bind".
► Scan the barcode "Bind" now.
► If the green LED of the scanner blinks, put the scanner into the cradle.
► The green LED is now switched off and the scanner is already registered on the cradle.
The interface of the cradle can be set up now with the following barcodes.
Installation
Datalogic Scanner’s Cradle BC-8030 (Narrowband) Hardware Installation
Installation Manual SIPLACE Setup Center 5.1 19
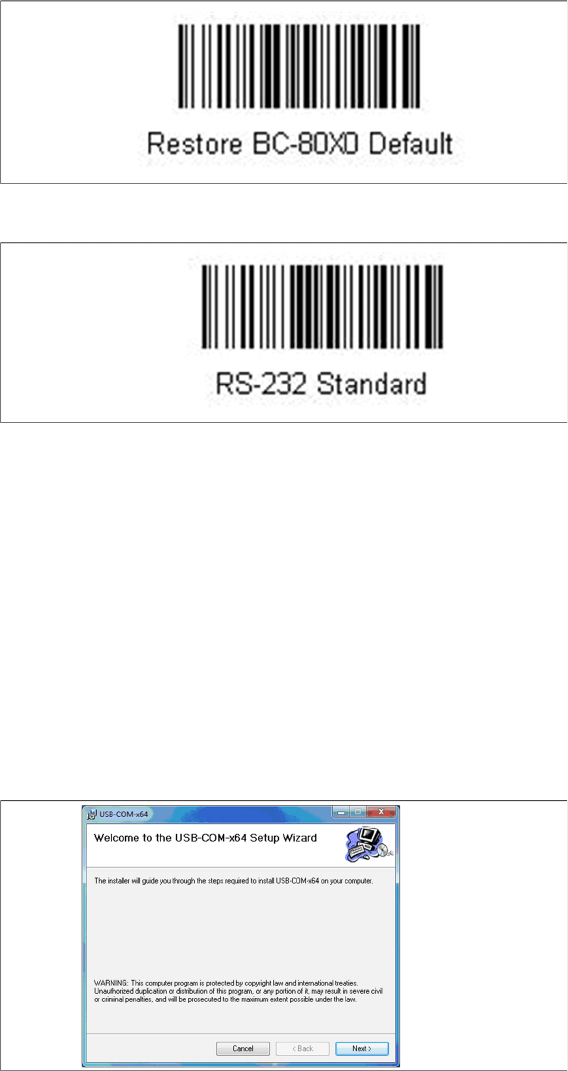
► Scan the barcode "Restore BC-80X0 Default" to restore the standard configuration of the cradle.
► Scan the barcode "RS-232 Standard" to set the interface to RS-232.
The cradle is now ready for use with Setup Center.
4.2.2.2 Connect cradle via USB
Installation of the USB-COM driver
Step 1
The installation packages for 32 bit and 64 bit operating systems are located in the “\3rdparty install
-
er\Datalogic\USB-COM Driver” directory of the Setup Center installation CD.
► Choose the appropriate installation package for your operating system.
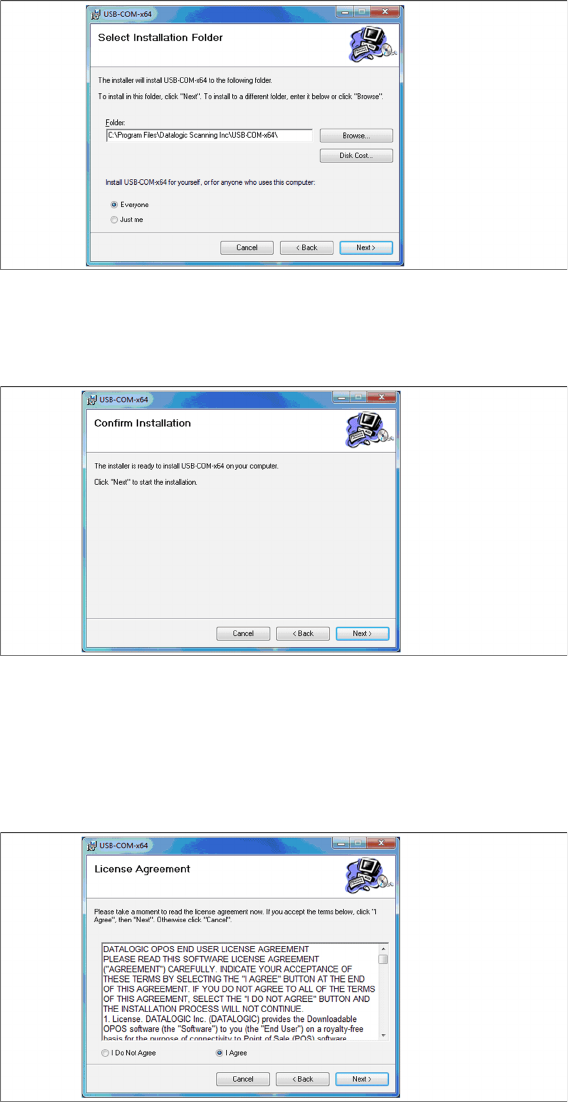
Step 2
► Click Next.
Installation
Hardware Installation Datalogic Scanner’s Cradle BC-8030 (Narrowband)
20 Installation Manual SIPLACE Setup Center 5.1
Step 3
► The Select Installation Folder dialog box prompts you to enter the name of the folder in which the
software should be installed. The system suggests a default destination folder for you.
► However, you can click the Browse button to open a dialog box in which you can enter or select the
path you want to use. If the folder you specify does not exist, it is created after having accepted a
confirmation dialog.
► Select the option Everyone.
► Click Next.
Step 4
► Click Next.
Step 5
► Read the license agreement relating to use of this software and select I Agree to accept the license
agreement.
► Click Next.