00197197-02-IM SetupCenter 5.1.pdf - 第37页
Installation Motorola MC70/MC75 1D/2D barcode scanner Hardware Installation Installation Manual SIPLACE Setup Center 5.1 37 ► In case of a upgrade installation confirm the updat e of Setup Center C lient with "O K&q…
Installation
Hardware Installation Motorola MC70/MC75 1D/2D barcode scanner
36 Installation Manual SIPLACE Setup Center 5.1
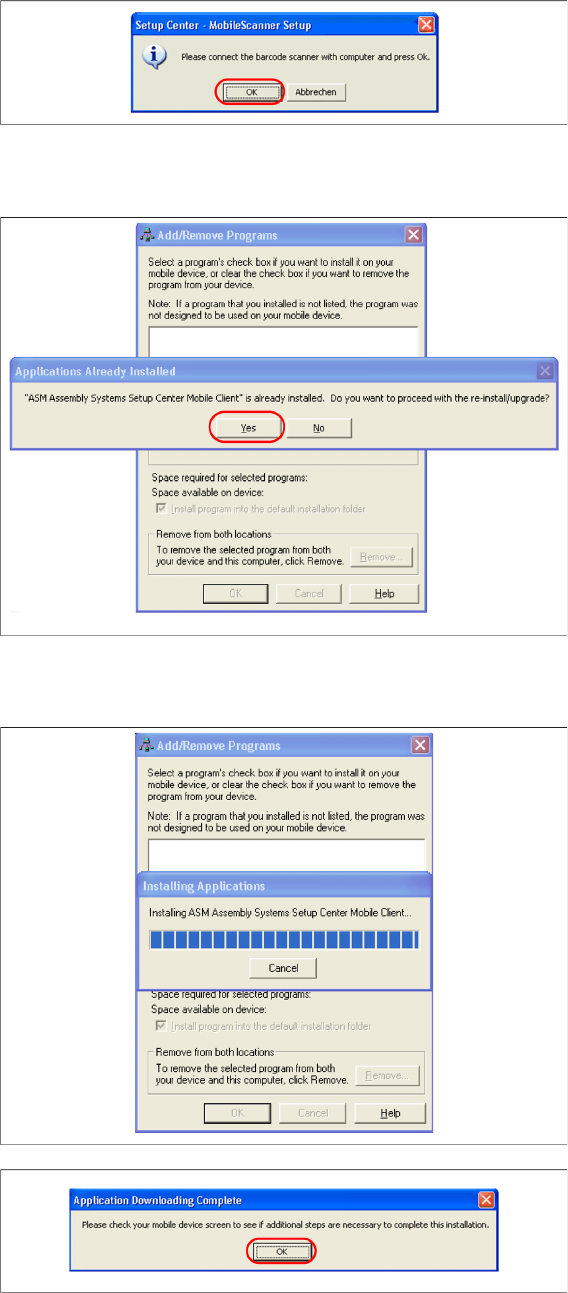
► Make sure that the scanner is placed in the basic station and connected to Setup Center.
► Select "OK" start the transfer of the software components to the scanner.
► In case of a upgrade installation confirm the upgrade of SSC Mobile Scanner with "Yes".
The transfer of the components to the scanner is beginning.
► After completion of the data transfer to the device click on "OK" to close the window.
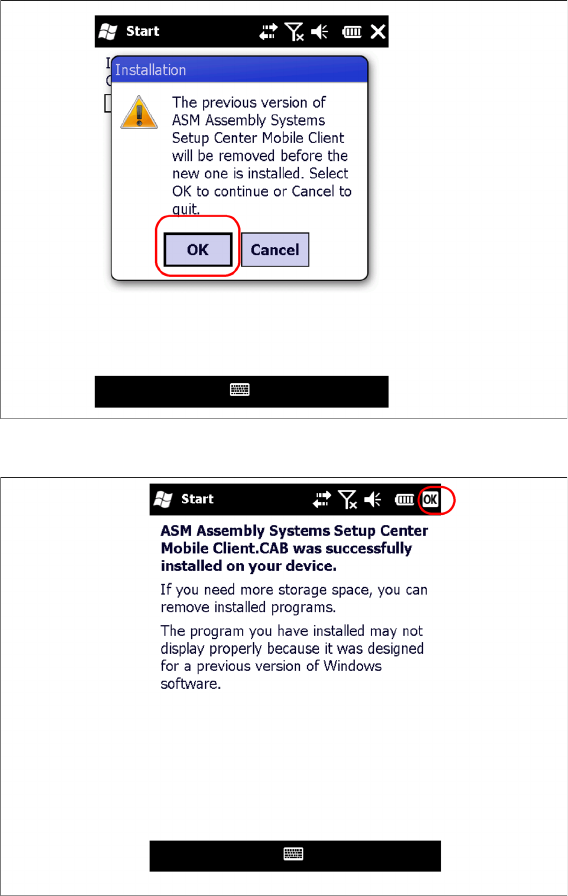
The installation of MC70 Setup Center Client is beginning.
Installation
Motorola MC70/MC75 1D/2D barcode scanner Hardware Installation
Installation Manual SIPLACE Setup Center 5.1 37
► In case of a upgrade installation confirm the update of Setup Center Client with "OK".
► Select "OK" to close the window. The installation is now completed. Please restart the device by
holding down the power key 5 seconds. After restart the Setup Center Client starts automatically and
you can start with the configuration of Setup Center and Client Software.
Installation
Hardware Installation Optional: Docking Station
38 Installation Manual SIPLACE Setup Center 5.1
4.2.5 Optional: Docking Station
To obtain more details about using the docking station for X-Series and SX-Series tables, please refer
to the current version of the operating manual.
4.2.5.1 Installing the CAN Card in the PC
The data connection between the Setup Center PC, on which the Setup Center software is to be in
-
stalled, and the docking station is realized via a CAN Bus. This requires installation of a CAN card in the
Setup Center Computer. This CAN card is included in the delivery of docking station (optional).
► Open the Setup Center Computer housing according to the manufacturer's instructions.
► Select a free PCI slot in your Setup Center Computer for installing the CAN card.
► Plug the CAN card into the selected PCI slot.
► Close the Setup Center Computer housing according to the manufacturer's instructions.
NOTICE
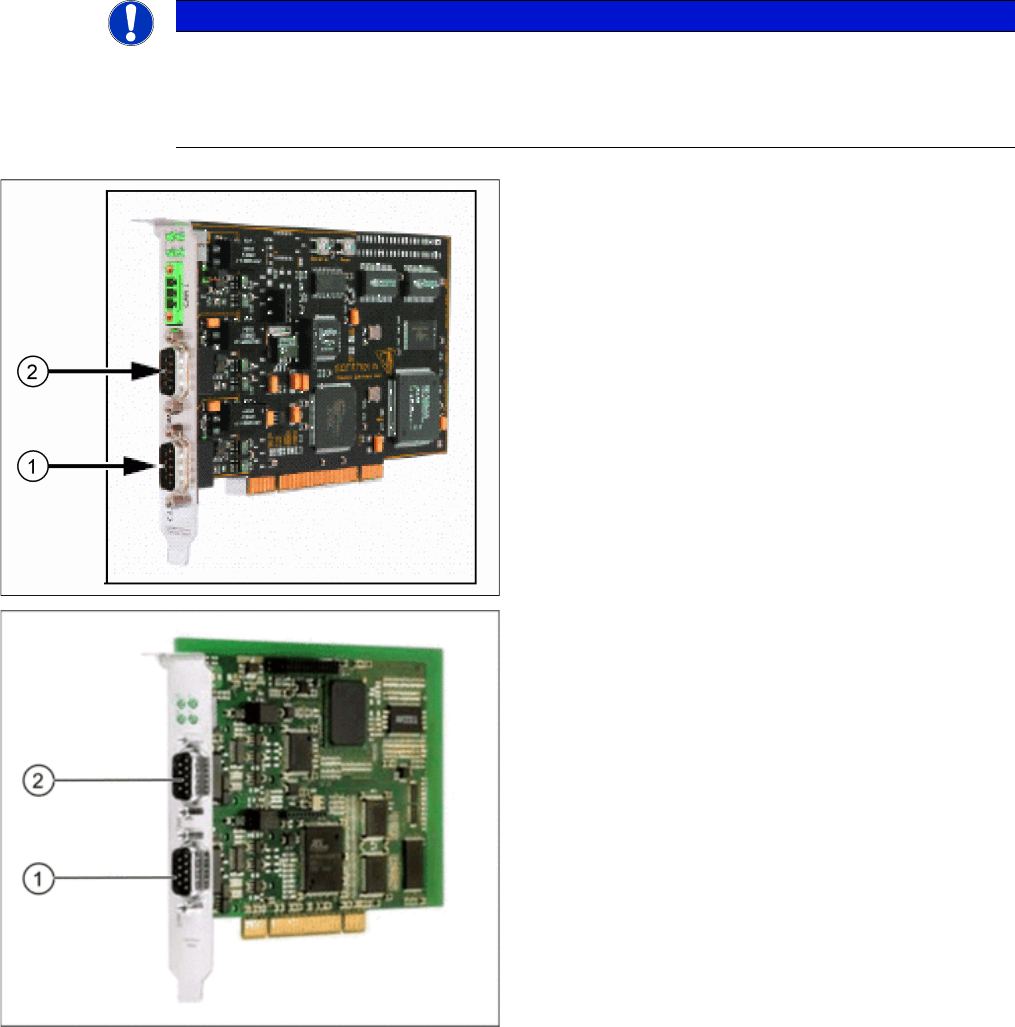
There are two different models of CAN cards available:
The CAN card Power CAN PCI supports only 32 bit operating systems, the newer version Pow
-
er CAN PCI COM 168 V2 supports 32 bit as well 64 bit operating systems. The driver and API
installation package is supporting both CAN card models.
CAN Card - Power CAN PCI
1. Bus 1
2. Bus 2
CAN Card - Power CAN PCI COM 168 V2
1. Bus 1
2. Bus 2