4OM-996-007.pdf - 第68页
Attachment for Hand Grease Gun KH-120 T able 4A5 Standard Shape Part No. Remarks V T ype 1 0 1 630 061 2028 H TI S T ype 1 1 2 630 061 1977 H TI N T ype 1 1 2 630 061 7467 THK P T ype 1 1 2 630 061 7474 THK L T ype 1 0 1…

• SYNTHESO HT220 (NOK KLUBER) or its equivalent
Table 4A4
Oil Names Makers
KLUBERSYNTH GH6-220 NOK KLUBER
Do not mix SYNTHESO HT220 with KLUBERSYNTH GH6-220.
(2) Brush
Use a brush whose bristles do not come off if possible.
(3) Vinyl Gloves
Use a pair of vinyl gloves to apply grease or oil by hand.
(4) Grease Applicator
Use a normal grease applicator on the market.
(5) Hand Grease Gun "KH120"
Maker: Yamada Yuki
Use the two grease guns (accessory parts) separately for two types
of greases. Be sure to select a proper gun.
Two Types of Greases: DAPHNE EPONEX GREASE No. 1
NEW MOLYNOC GREASE No. 1
Refer to the attached instruction manual for the detailed
information on how to use these greases.
Appearance
Fig. 4A3
1.2 Preparation for Maintenance
Note
0412-002 1-4 AIM01ETRP
Notice
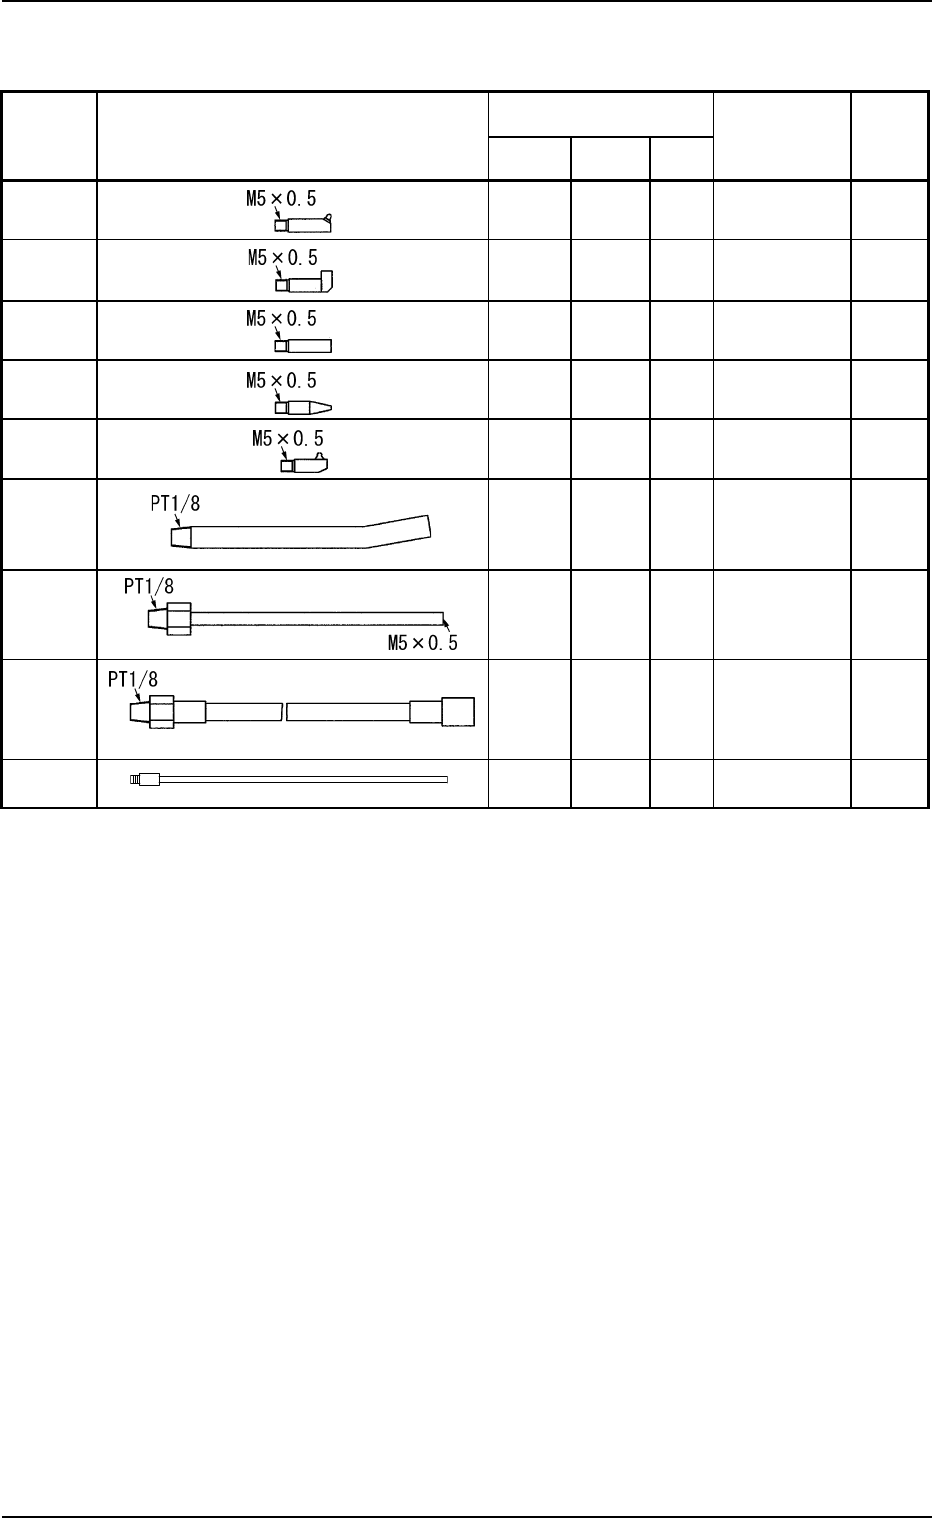
Attachment for Hand Grease Gun KH-120
Table 4A5
Standard Shape Part No. Remarks
V Type 1 0 1 630 061 2028 HTI
S Type 1 1 2 630 061 1977 HTI
N Type 1 1 2 630 061 7467 THK
P Type 1 1 2 630 061 7474 THK
L Type 1 0 1 630 061 7481 THK
H Type 1 0 1 630 061 7450 THK
U Type 1 1 2 630 061 7443 THK
SPK-3C 1 0 1 630 061 7504
Yamada
Yuki
FL Type 1 0 1 630 104 9823 HTI
1.2 Preparation for Maintenance
Grease and Required Number
of Attachments
For DAPHNE
EPONEX
GREASE No. 1
For NEW
MOLYNOC
GREASE No. 1
Total
Frequency
in Use
0305-001 1-5 AIM01ETRP
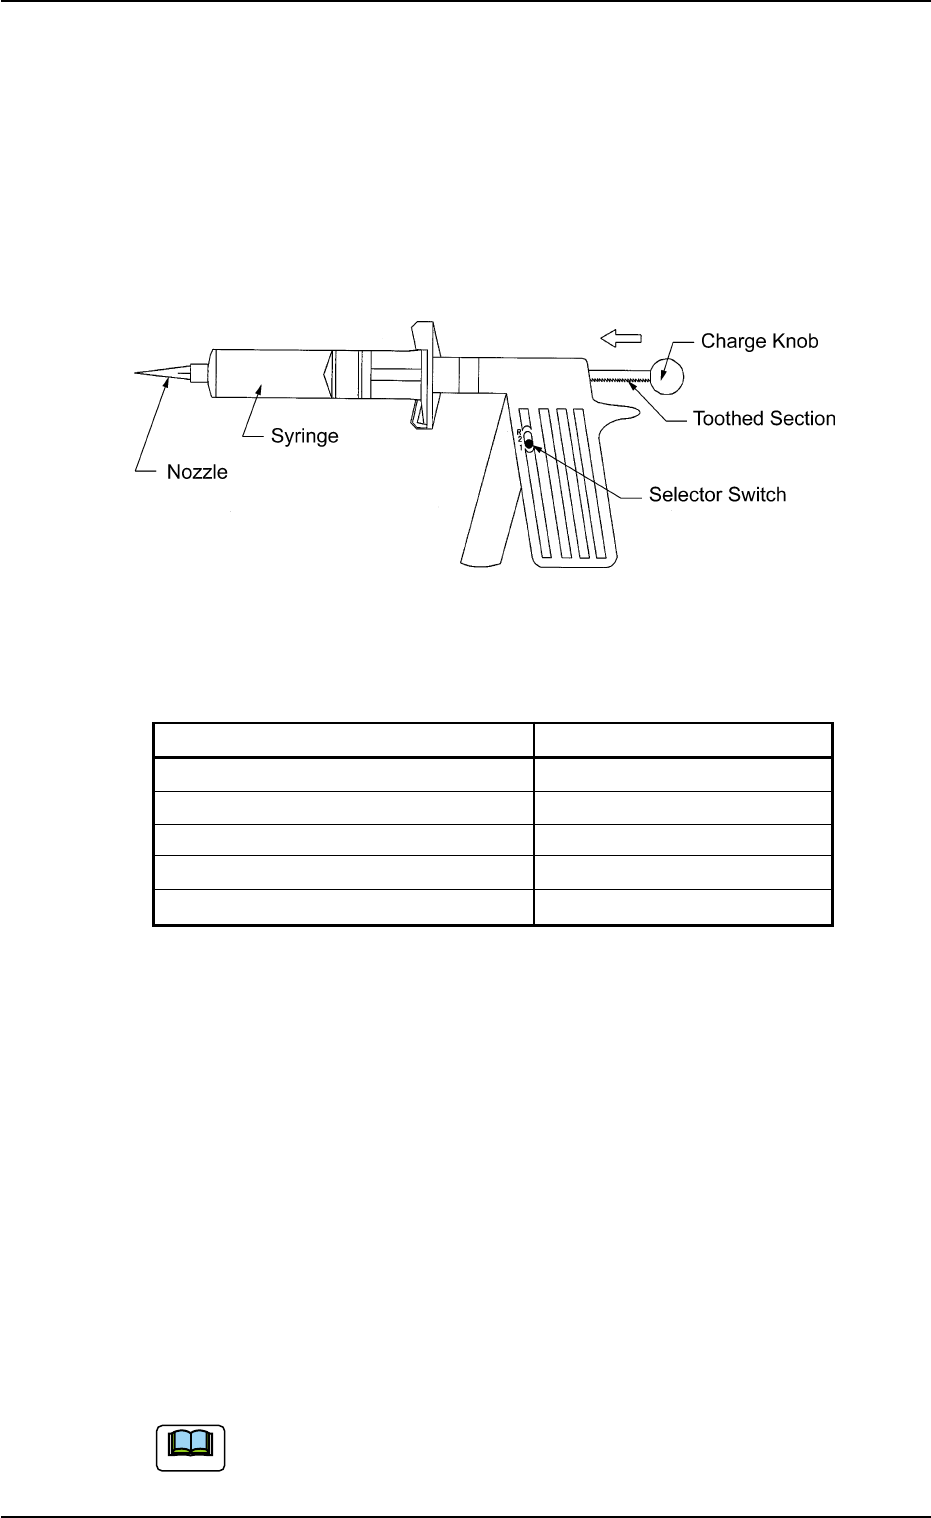
(6) Dispense Gun "DG10KIT"
Maker: Sanei Tech
This gun can be used for three types of greases.
Use the syringes and the nozzles properly.
Three Types of Greases: DAPHNE EPONEX GREASE No. 1
DAPHNE EPONEX GREASE No. 3
NEW MOLYNOC GREASE No. 1
Appearance
Fig. 4A4
<Contents of Kit>
Table 4A6
Part Name Q’ty
Dispense Gun (Main Body) for 10 cc 1
Syringe 20
Piston 20
End Cap 20
Syringe Cap 20
Usage
(6-1) Set the selector switch to "1" in normal cases.
Note: When the switch is set to "2", grease will be pushed out
excessively.
Be sure to set the switch to "R" before storing the gun (keeping it
unused).
(6-2) Before the charge knob is pushed to dispense the grease, con-
firm that the charge rod is inserted with its toothed section facing
downward.
(6-3) Check the amount of grease before it is supplied
(6-4) Push the charge knob slightly forward before the grease is sup-
plied.
Refer to the attached instruction manual for the detailed infor-
mation on how to use the dispense gun.
1.2 Preparation for Maintenance
0305-001 1-6 AIM01ETRP
Note