00195377-0102.pdf - 第23页
Retrofit instructions: Flexible dual conveyor, SIPLACE D4 04/2007 Edition 23 : Loosen the scr ews of all clamping rings on the conv eyor , so t hat the clamping r ings can be moved on the hexagonal shaf ts. 2 : Loosen th…
Retrofit instructions: Flexible dual conveyor, SIPLACE D4
04/2007 Edition
22
2.4 Converting the conveyor
: Switch the placement machine off at the main power switch.
: Remove the middle protective covers over the conveyor.
: Remove all four doors of the extension kit.
2
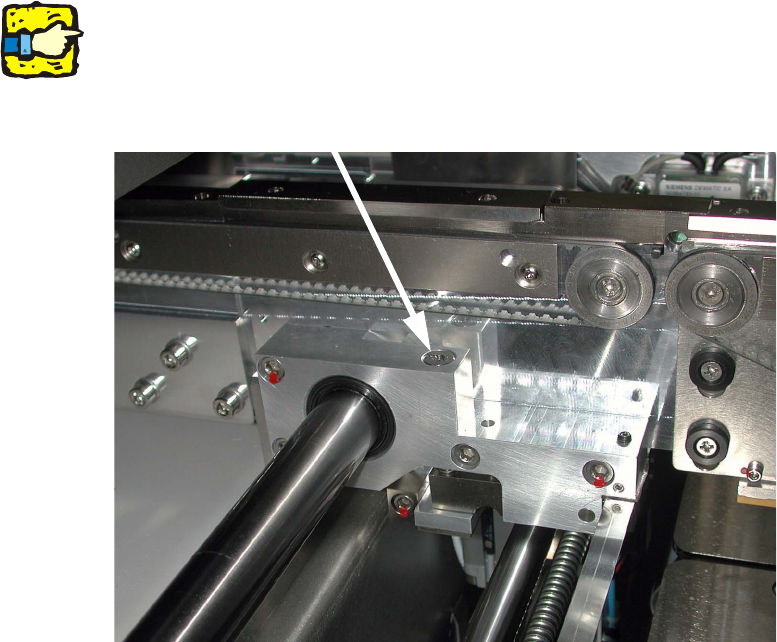
: Release the brake on the conveyor rail by loosening the clamping screws.
2
There is a compression spring underneath the screw. Make sure that it does not jump out and that
you do not lose it. 2
2
2
2
2
2
2
2
2
Clamping screw
Retrofit instructions: Flexible dual conveyor, SIPLACE D4
04/2007 Edition
23
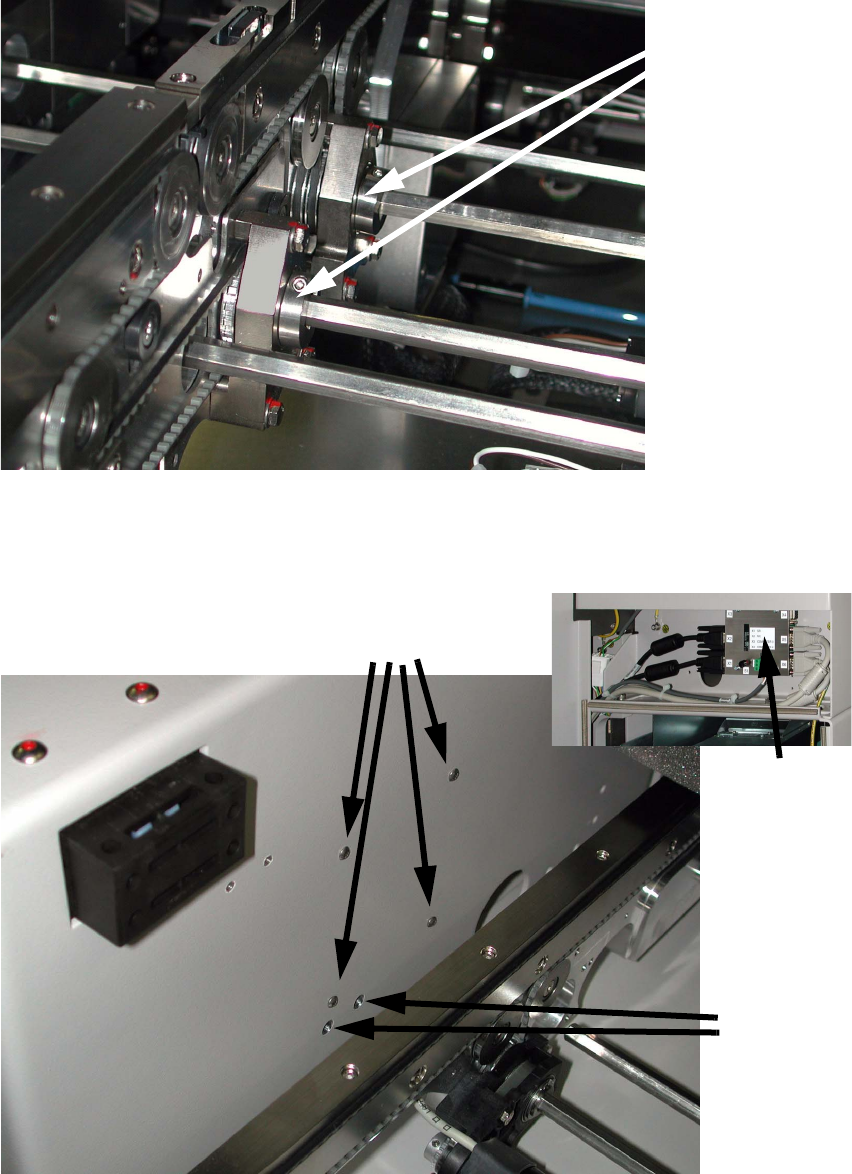
: Loosen the screws of all clamping rings on the conveyor, so that the clamping rings can be
moved on the hexagonal shafts.
2
: Loosen the four screws on the video multiplexer and remove the multiplexer.
Do NOT remove the two screws underneath.
2
2
Clamping rings
Loosen these four screws
DO NOT
loosen
these
screws.
Video
multiplexer
Retrofit instructions: Flexible dual conveyor, SIPLACE D4
04/2007 Edition
24
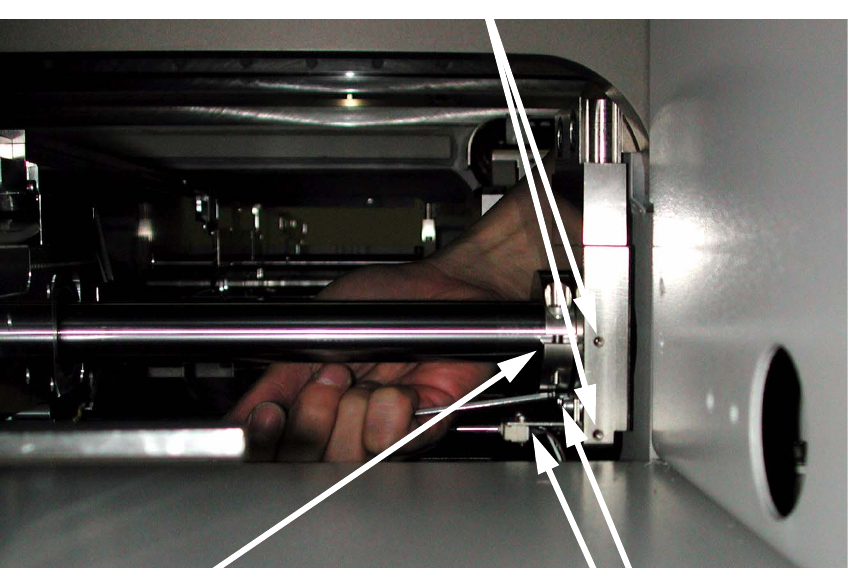
: Remove all the clamping rings from the conveyor (20x).
: Remove all the hexagonal shafts from the conveyor.
To do this, displace the conveyor rails. You can take out the hexagonal shafts via the non-motor
side.
: Loosen the two screws on the conveyor rail limit switch on the input side and push the limit
switch aside. If the limit switch is directly mounted (without a bracket) onto the flange, you can
skip this step (see photo).
: Remove the stop ring (if present).
2
2
2
2
2
2
2
Loosen two screws (viewing the PCB input side)
Stop ring
2 screws for the conveyor rail limit switch (without bracket)