00195377-0102.pdf - 第29页
Retrofit instructions: Flexible dual conveyor, SIPLACE D4 04/2007 Edition 29 : Screw the fixing blocks with the hex agonal shaft s to the sides in the conveyor area and to the separating laye rs in the extension kits. 2 …
Retrofit instructions: Flexible dual conveyor, SIPLACE D4
04/2007 Edition
28
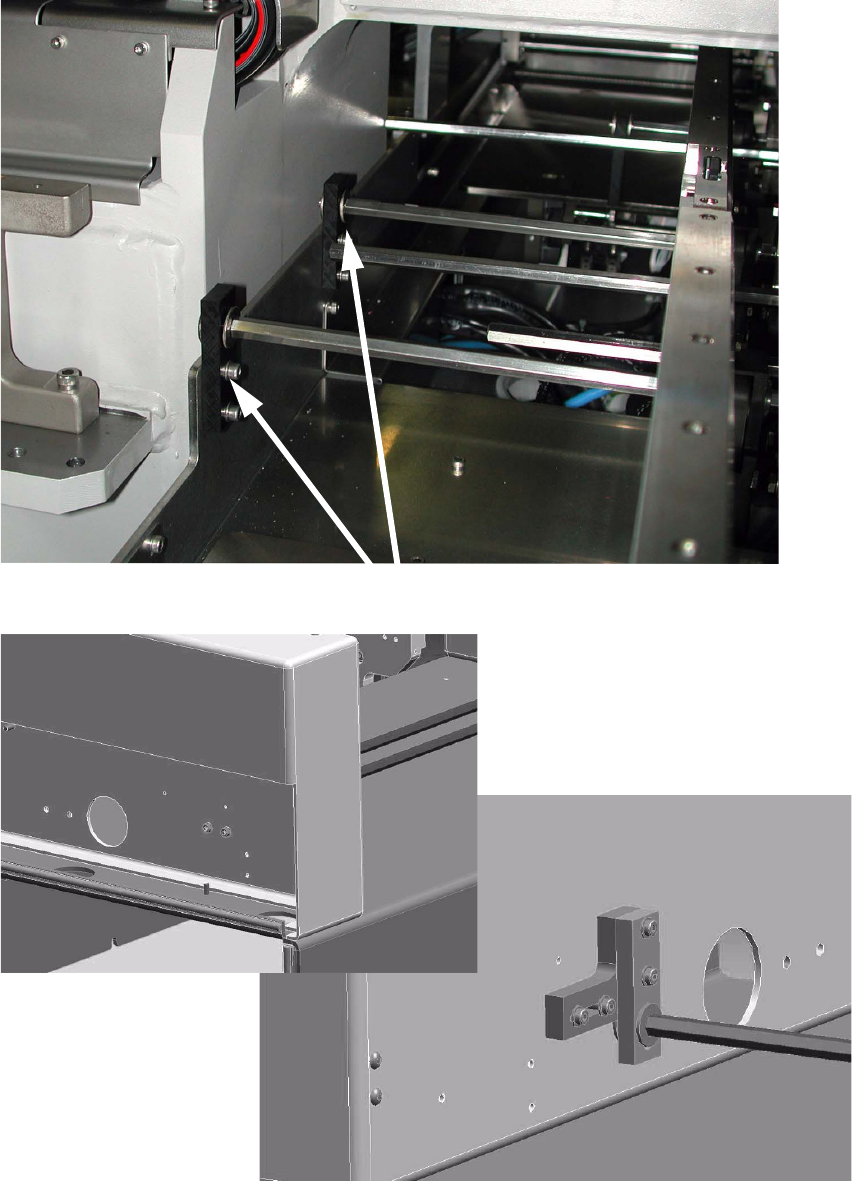
: Insert the new hexagonal shafts into the conveyor.
The shoulder always points to the motor side.
Use the holes in the opposite conveyor rails to insert the hexagonal shafts for the center belt.
2
: Push the conveyor rails inwards.
2
: Fasten the fixing blocks to the hexagonal shafts.
2
2
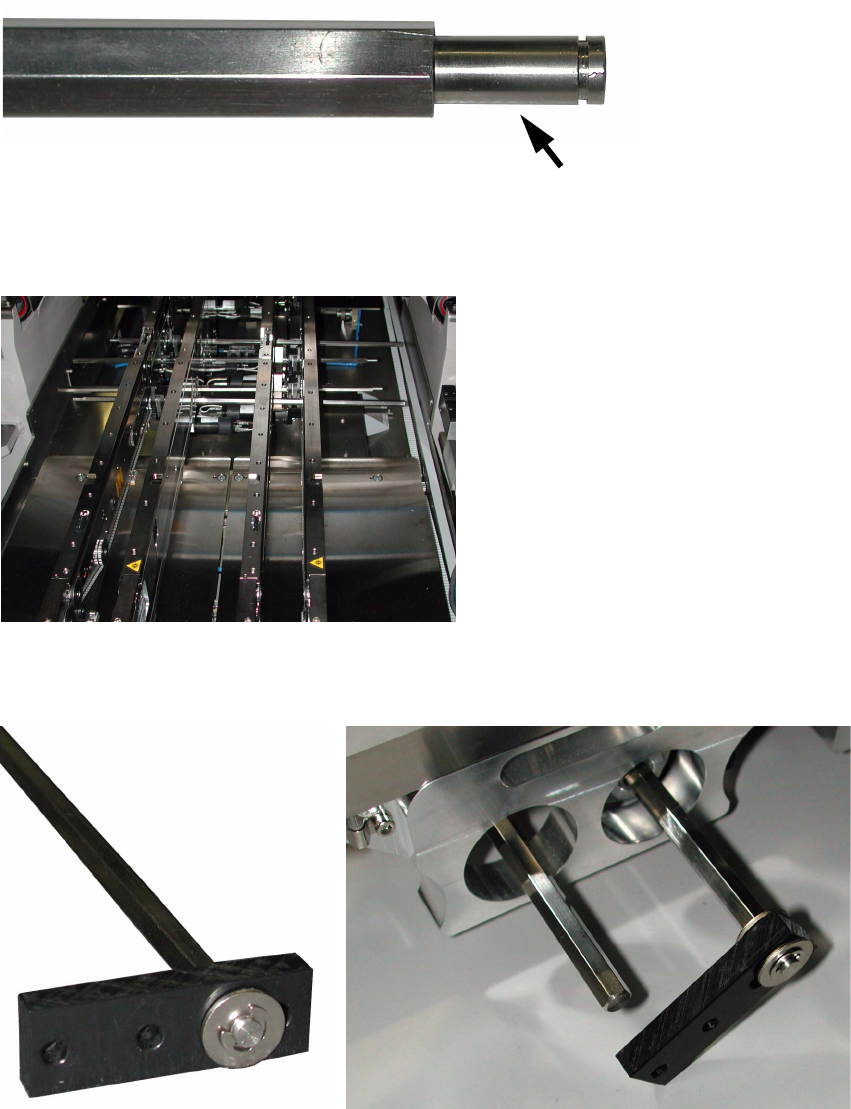
Hexagonal shaft with shoulder
Retrofit instructions: Flexible dual conveyor, SIPLACE D4
04/2007 Edition
29
: Screw the fixing blocks with the hexagonal shafts to the sides in the conveyor area and to the
separating layers in the extension kits.
2
Fixing blocks
Retrofit instructions: Flexible dual conveyor, SIPLACE D4
04/2007 Edition
30
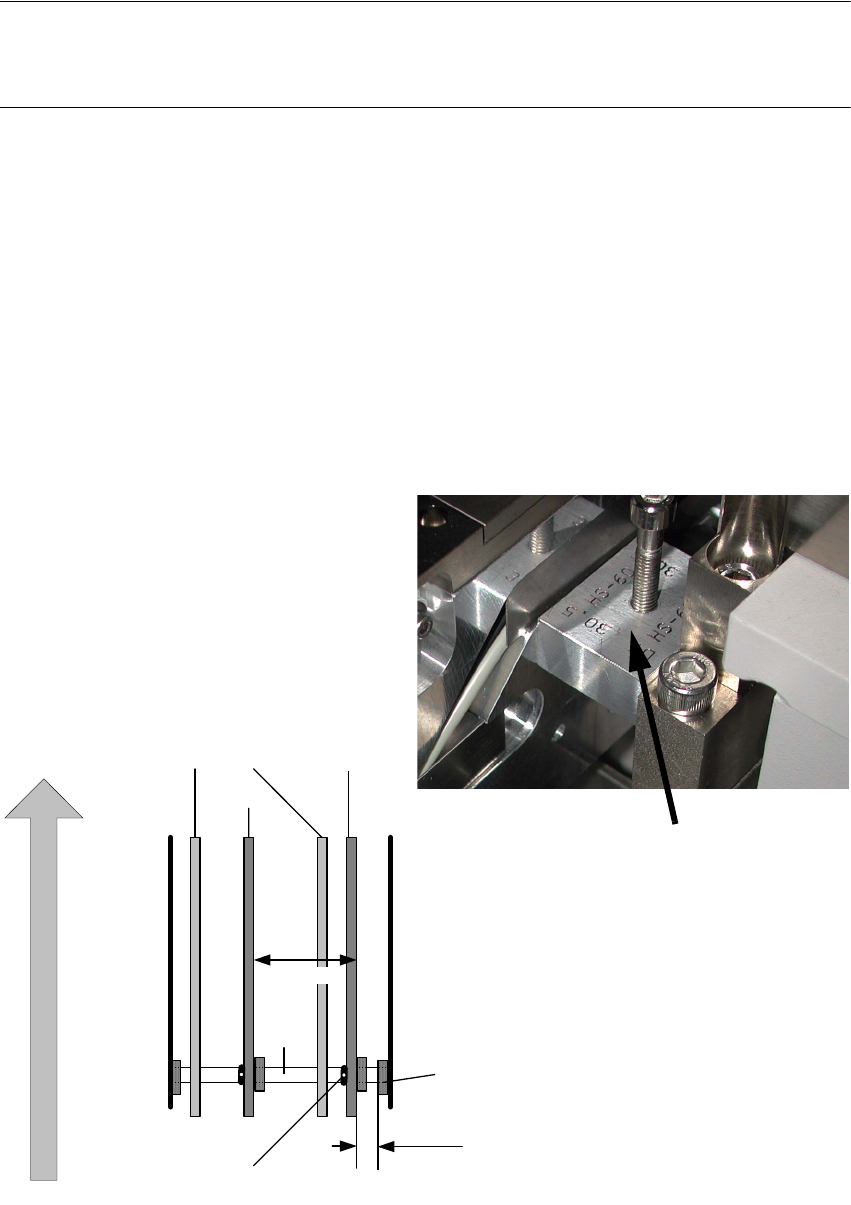
PLEASE NOTE:
Setting the fixed conveyor rail is normally not required unless the fixed conveyor rail was moved
during service work before.
: Fit the conveyor rail limit switch on the input side (see illustration, page 24).
: Fit the video multiplexer.
: Fit all four doors to the extension kit.
: Attach the middle protective covers over the conveyor.
: Switch the placement machine on at the main switch.
: Position conveyor rail 1 (conveyor rail 4 for the fixed side on the left) using the width adjustment
(SITEST) and the "Conveyor fixed side panel, setup gauge, DC/SC HS60/D4 (item no.:
03054247-) step by step at the width of 30.5 mm.
2
Fig. 2.4.1 Setting for the "Fixed conveyor rail" HS-60, D4
Dual conveyor
Conveyor rails
T ra ck 2 T rack 1
S h aft m ou n
t
Direction of PCB transport
Screw to loosen the
fixed rail
movable
fixe d
fixe d
30.5mm
25 1 .7 m m
Shaft
Gauge
Fixed conveyor rail