00195377-0102.pdf - 第31页
Retrofit instructions: Flexible dual conveyor, SIPLACE D4 04/2007 Edition 31 : Change to SITEST (level Service) to th e menu "transport 1 options and configuration => re fe- rence position fixed rail => teach …
Retrofit instructions: Flexible dual conveyor, SIPLACE D4
04/2007 Edition
30
PLEASE NOTE:
Setting the fixed conveyor rail is normally not required unless the fixed conveyor rail was moved
during service work before.
: Fit the conveyor rail limit switch on the input side (see illustration, page 24).
: Fit the video multiplexer.
: Fit all four doors to the extension kit.
: Attach the middle protective covers over the conveyor.
: Switch the placement machine on at the main switch.
: Position conveyor rail 1 (conveyor rail 4 for the fixed side on the left) using the width adjustment
(SITEST) and the "Conveyor fixed side panel, setup gauge, DC/SC HS60/D4 (item no.:
03054247-) step by step at the width of 30.5 mm.
2
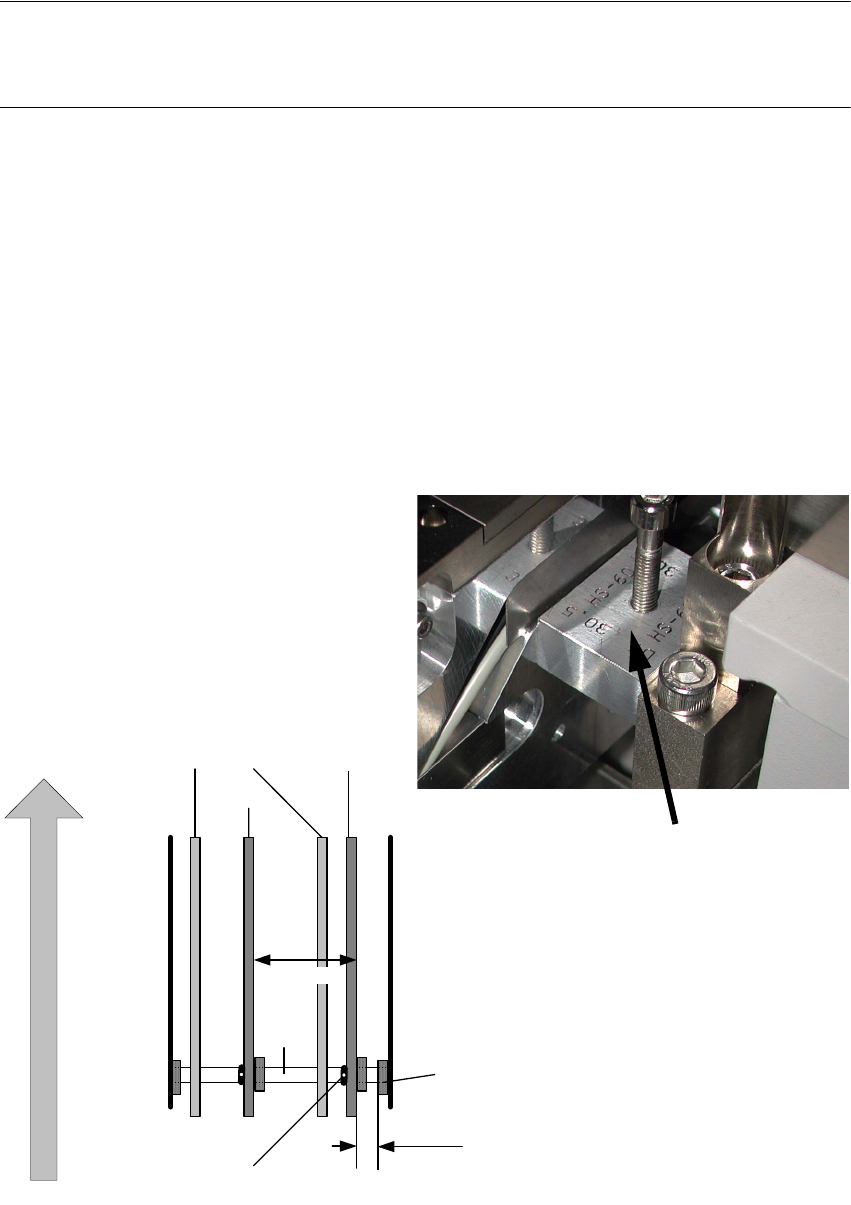
Fig. 2.4.1 Setting for the "Fixed conveyor rail" HS-60, D4
Dual conveyor
Conveyor rails
T ra ck 2 T rack 1
S h aft m ou n
t
Direction of PCB transport
Screw to loosen the
fixed rail
movable
fixe d
fixe d
30.5mm
25 1 .7 m m
Shaft
Gauge
Fixed conveyor rail
Retrofit instructions: Flexible dual conveyor, SIPLACE D4
04/2007 Edition
31
: Change to SITEST (level Service) to the menu "transport 1 options and configuration => refe-
rence position fixed rail => teach => step by step 100µm".
The adjustment units connect.
2
This function can only be carried out, when you have logged in via the Service engineer (SIPLACE)
operator level. 2
2
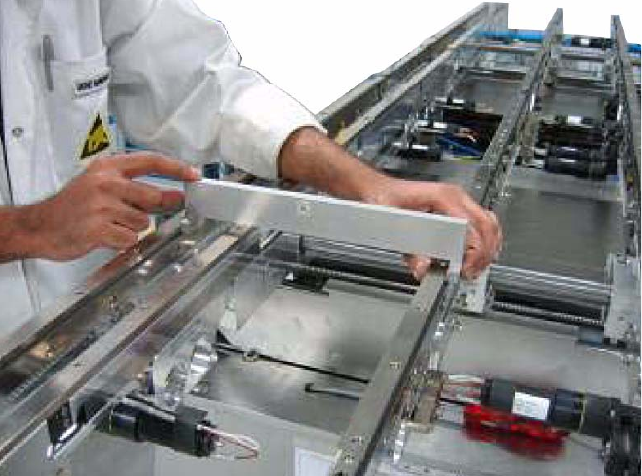
: Lay the gauge into the input conveyor between transport rail and mounting flange of the trans-
port tray. Control the value 30,5 with the gauge. The straightness and parallelity is guaranteed
by the adjustment units.
: Save the positions of the fixed conveyor rail.
2
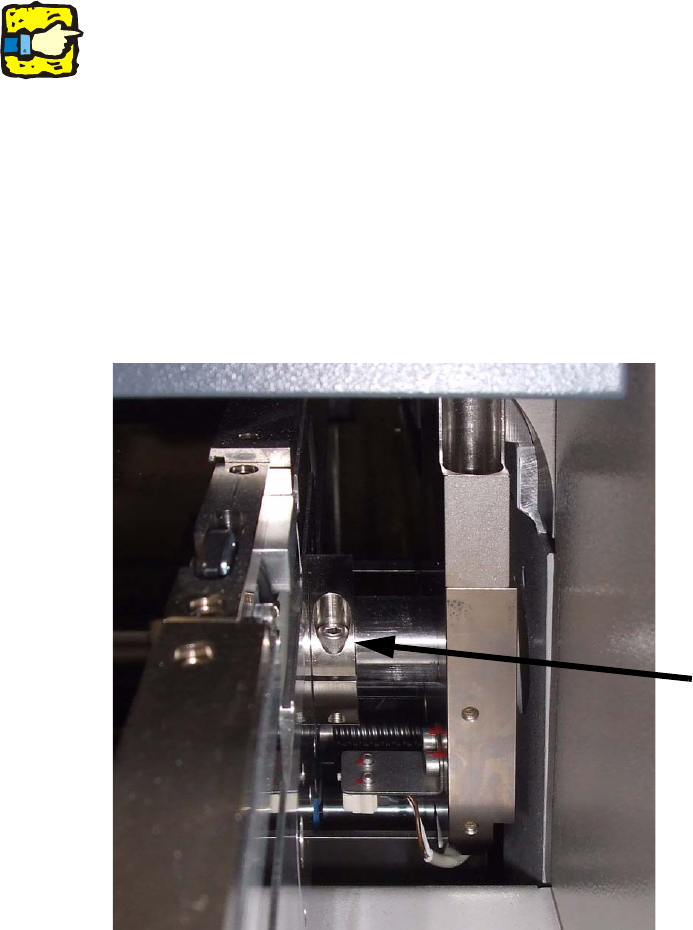
: In addition, you can secure this conveyor rail using the stop ring (illustration, page 10).
2
2
2
2
2
2
Stop ring
Retrofit instructions: Flexible dual conveyor, SIPLACE D4
04/2007 Edition
32
: Position conveyor rail 3 (conveyor rail 2 for the fixed side on the left) using the width adjustment
(SITEST) and the "Conveyor fixed side panel, setup gauge, DC/SC HS60/D4 (item no.:
03054248-) step by step at the width of 251.7 mm.
2
: Change to SITEST (level Service) to the menu "transport 2 options and configuration => refe-
rence position fixed rail => teach => step by step 100µm".
The adjustment units connect.
: Lay the gauge into the input conveyor between transport rail (belt support) 1 and 3 / 4 and 2.
Inlay the spring and fix the fixing screw of the brake (input and outpur conveyor).
Control the value 251.7mm with the gauge.
: Save the positions of the fixed conveyor rail.
2
2
: Position the other conveyor rails parallel to this one and fix them using the spring and the
clamping screw.
: To check the PCB conveyor, travel the conveyor to 216 mm and insert the test PCB (item no.
00359535-01) in the PCB conveyor. Run the PCB through the entire PCB conveyor.
: Switch to Gantry functions and then to the "Calibrate conveyor edges" menu to calibrate the
PCB reference corner position. This has to be done for both conveyor tracks and placement
areas.
: Save the machine data and exit the SIITEST program.
: Restart the placement system.