ts9800-user-guide-7511-0360_A.pdf - 第21页
21 Step 5: Touch the up and dow n a rro ws to set the desired temperature. T hen tou ch th e ‘ Accept ’ icon to save and exit . Note : Maximum tem perature setti ng is 90°C. Step 6: Watch the fluid ma nifold ’ s temperat…
20
6.5 Setup
Step 1:
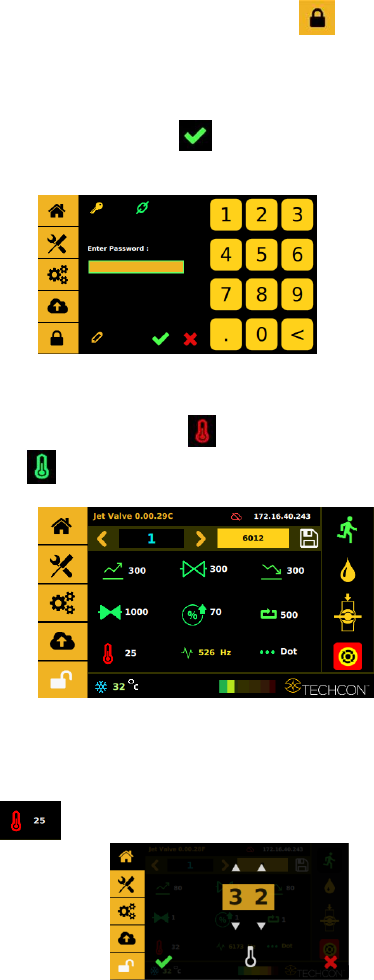
Touch the ‘Login’ icon to enter the login screen
Step 2:
Enter the default password ‘0000” in the password window. Then touch
‘Accept’ icon to save and exit . Attention: For changing the password,
refer to section 9.5.1.
Step 3:
Touch the “Temperature” icon to turn the heater ON and the icon will
turn green .
Step 4:
Touch the value field next to the temperature icon to enter the temperature
setting
screen .
21
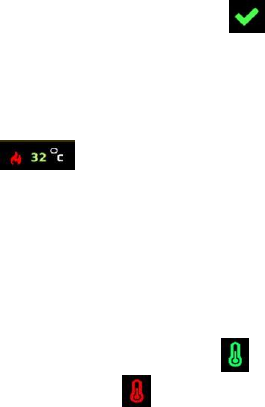
Step 5:
Touch the up and down arrows to set the desired temperature. Then touch the
‘Accept’ icon to save and exit . Note: Maximum temperature setting is
90°C.
Step 6:
Watch the fluid manifold’s temperature reading at the bottom of the screen
. Once this temperature reaches the correct temperature setting, then
start the dispensing.
Warning: Do not touch nozzle or fluid manifold with your fingers once the
heater is turned on. Use provided tools for making any adjustment if necessary.
Step 7:
Touch the ‘Temperature’ icon again to turn OFF the heater and the icon will
turn back to red .

22
7. VALVE SETUP AND CLEANING
7.1 Valve removal.
1. Turn Off or disconnect the fluid pressure the syringe/fluid supply
line from the material reservoir.
2. Switch-Off the control unit.
3. Disconnect all valve cables.
4. Remove the valve from the XYZ table.
5. The valve can be now taken apart for cleaning, refer to section 7.3
for cleaning instructions.
6. After replacing the new valve or new control unit, repeat section 4.2
for setup and section 4.3 for nozzle calibration.
7.2 Installation of new nozzle insert.
1. Turn Off or Disconnect pressure to material syringe.
2. Unscrew the Nut and bushing assembly from the fluid manifold using
the nozzle adjustment tool.
3. Unscrew the nozzle bushing/insert assembly from the nozzle adjustment
nut using the nozzle installation tool.
4. Remove the nozzle insert from the nozzle bushing.