Nordson_EFD_OptiSure_Operating_Manual - 第27页
OptiSure Automated Optical Inspection 27 www.nordsonefd.com info@nordsonefd.com +1-401-431-7000 Sales and service of Nordson EFD dispensing systems are available worldwide. Positional Checking Example Positional Checking…
OptiSure Automated Optical Inspection
26 www.nordsonefd.com info@nordsonefd.com +1-401-431-7000 Sales and service of Nordson EFD dispensing systems are available worldwide.
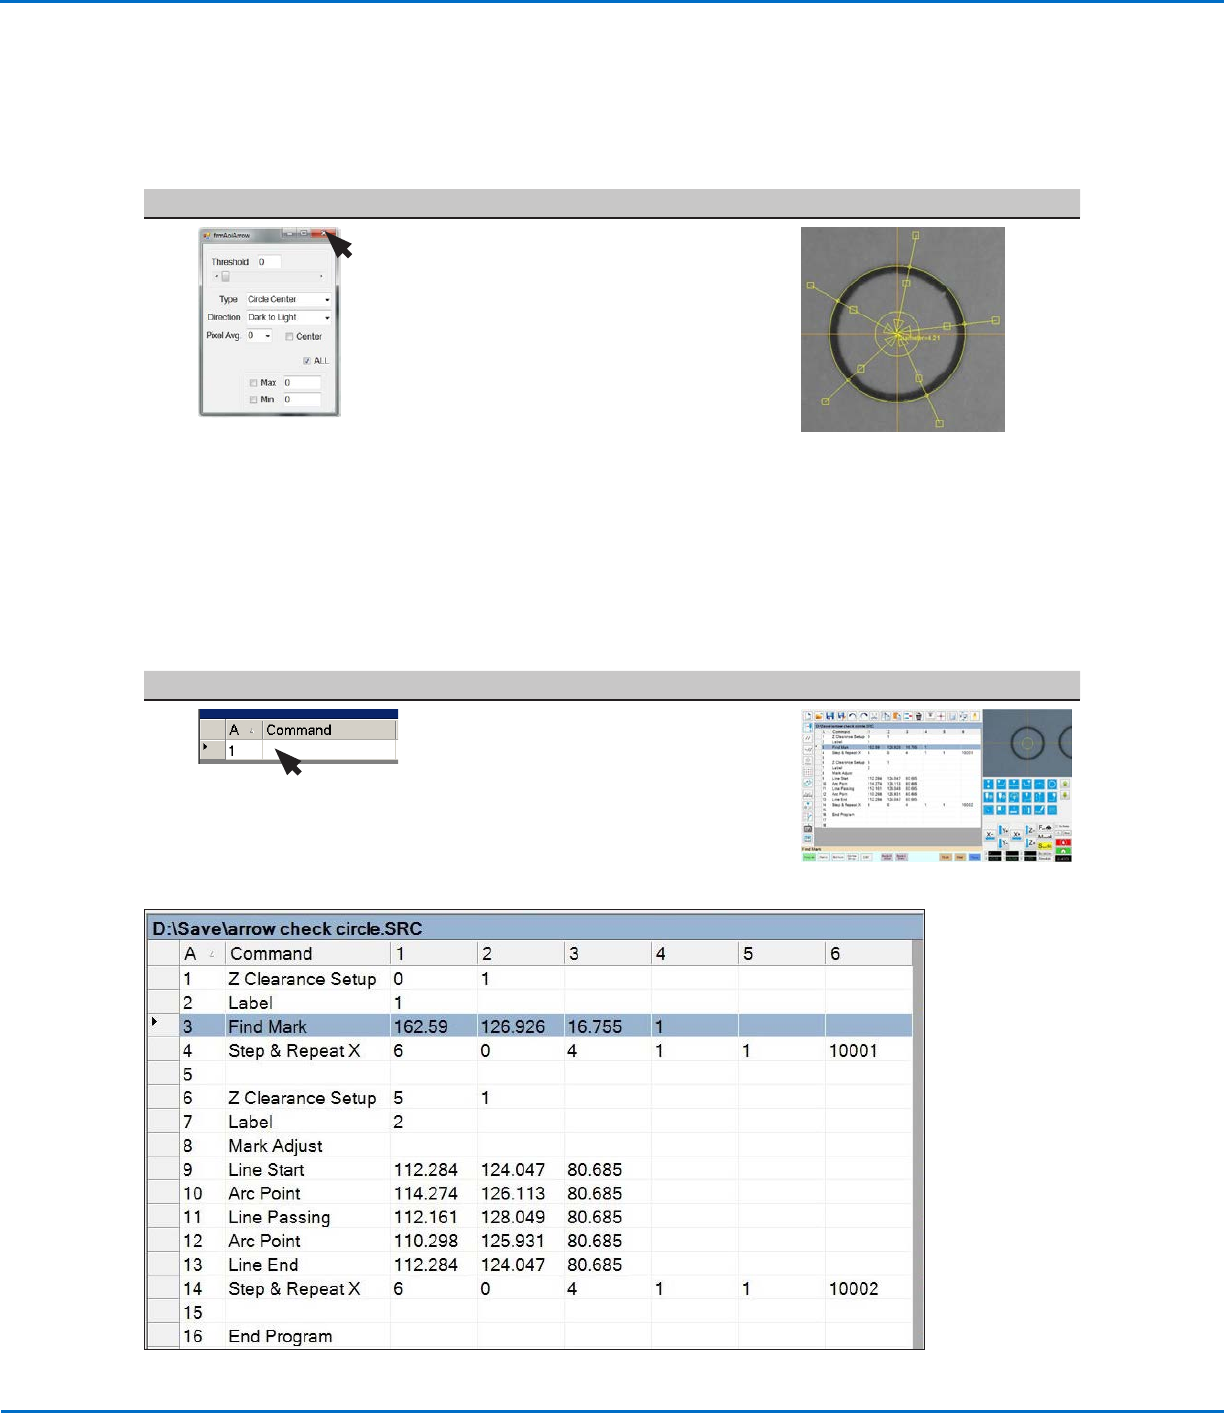
Example program that contains a Find Mark command for a Circle Center mark
Using the Arrow Types (continued)
# Click Step Reference Image
14
• Close the dialog box to save the
settings.
The system adds the circle diameter
(item 8) and its value (item 9) to the
mark image of the circle.
The saved mark image now contains
additional data that will allow the
system to accurately find it upon
reaching its corresponding Find
Mark command in a program.
• Continue to “To Use a Circle Center
Mark Image in a Program” below to
use the Circle Center mark.
9.
8.
Circle Center Example (continued)
To Create a Circle Center Mark Image (continued)
To Use a Circle Center Mark Image in a Program
# Click Step Reference Image
1
• In the dispense program, insert a
Find Mark command and specify
the Mark No. for the Circle Center
mark you created in the previous
procedure.
NOTE: The complete example
program is provided below.

OptiSure Automated Optical Inspection
27www.nordsonefd.com info@nordsonefd.com +1-401-431-7000 Sales and service of Nordson EFD dispensing systems are available worldwide.
Positional Checking Example
Positional Checking is an OptiSureAOI feature that allows you to determine the exact X and Y offsets of a
dispensed dot that deviates from a designated dispense location. Positional Checking is accomplished by using the
Circle Center arrow type and the Positional Checking and Step & Repeat commands. The overview below shows
how this feature works.
Overview of the Positional Checking Feature
1. A workpiece with defined
dispense locations.
2. Dispensed dots on the
workpiece.
3. Using a Step & Repeat
program, the camera examines
each dispensed dot.
4. If a dispensed dot fits within the specified
X and Y offset range, it passes; if not, it
fails.
5a. Pass / fail status is displayed in a Positional Checking
window. The system also captures and saves image
files for all pass / fail results.
Using the Arrow Types (continued)
6. Open an image to view details, including
diameter and XY offset.
5b. Pass / fail images are saved in the D:\ directory into
two folders: NG (not good) and OK.
OptiSure Automated Optical Inspection
28 www.nordsonefd.com info@nordsonefd.com +1-401-431-7000 Sales and service of Nordson EFD dispensing systems are available worldwide.
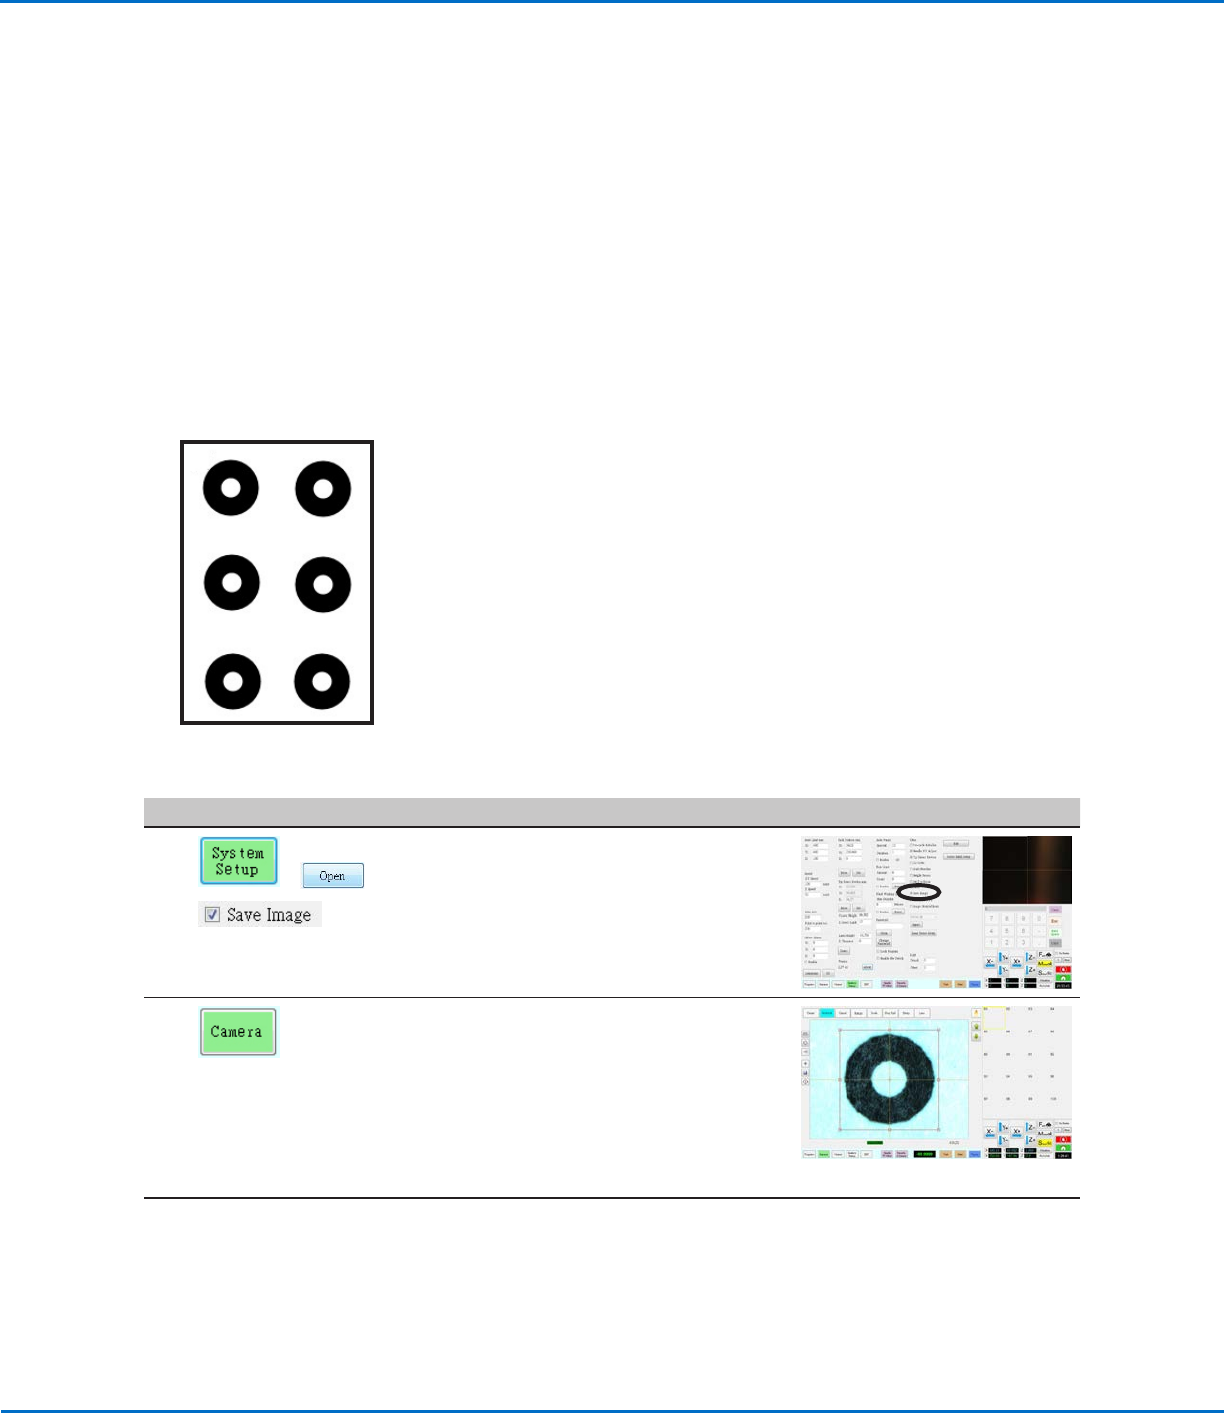
This example uses a set of six concentric circles in which dots of white fluid are dispensed in the center of larger
black circles. A Positional Checking program is created to verify the accuracy of dot placement in relation to the
larger black circles.
Positional Checking allows the camera to determine the X and Y offset of a dispensed circle from a given or defined
location. The Step & Repeat Block command causes a window to open that shows the pass / fail status of each
dispensed dot: Green for dots that pass and red for dots that fail. The camera also takes a screen capture of each
dot and saves the image; the images provide dispense details, including diameter and XY offset.
PREREQUISITES
The system is set up to save images. Refer to “Setting Up the System to Save Images” on page9 as needed.
To learn how to use this feature, create a workpiece template with defined, circular dispense locations, similar to
the one shown below.
To Create a Circle Center Mark Image
# Click Step Reference Image
1
> >
• Under System Setup > Other, ensure
that the SAVE IMAGE checkbox is
selected.
2 • Click CAMERA to go to the camera
screen.
• Position the workpiece template on the
fixture plate and bring the circle you
want to use for the mark into view.
NOTE: Nordson EFD recommends
using the top-left dot, but any dot will
work.
Continued on next page
Positional Checking Example (continued)
Using the Arrow Types (continued)