Nordson_EFD_OptiSure_Operating_Manual - 第63页
OptiSure Automated Optical Inspection 63 www.nordsonefd.com info@nordsonefd.com +1-401-431-7000 Sales and service of Nordson EFD dispensing systems are available worldwide. Using the Laser to Measur e and Recor d Profile…
OptiSure Automated Optical Inspection
62 www.nordsonefd.com info@nordsonefd.com +1-401-431-7000 Sales and service of Nordson EFD dispensing systems are available worldwide.
PREREQUISITES
The confocal laser (Laser C) is properly installed and set up using the Laser Setup wizard. Refer to “Setting Up
the Confocal Laser” on page10.
The CL-NavigatorN software has been installed on the DispenseMotion controller. Refer to “To Install CL-
NavigatorN on the DispenseMotion Controller” on page61.
The All.cldt file has been obtained from Nordson EFD and can be located for transfer to the DispenseMotion
conroller. Refer to “To Obtain the All.cldt File” on page61.
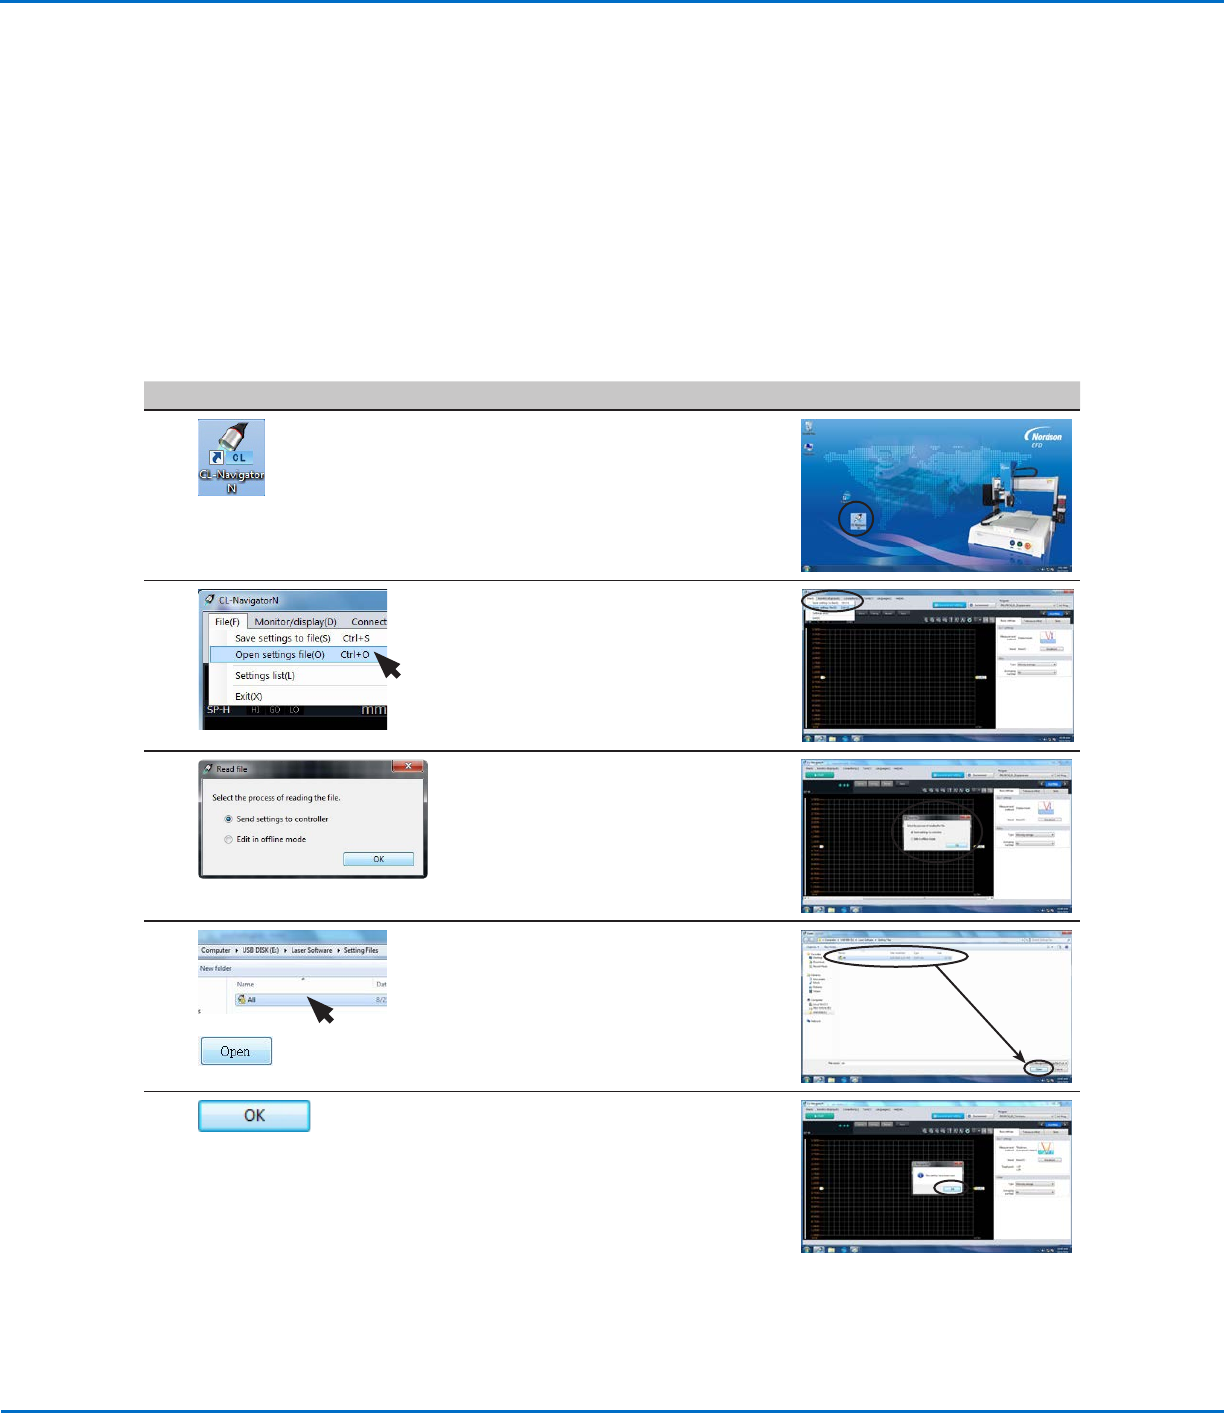
To Send “All.cldt” to the DispenseMotion Controller
# Click Step Reference Image
1
• On the DispenseMotion controller
desktop, open CL-NavigatorN.
2 • Click FILE(F) and select OPEN
SETTINGS FILE(O).
3 • Ensure that SEND SETTINGS TO
CONTROLLER is selected.
• Click OK.
4
>
• Navigate to the location where
“All.cldt” is stored.
• Select “All.cldt” and click OPEN.
5 • Click OK to clear the message.
• Continue to the next procedure to use
the “All.cldt” settings file to measure
and record the profile (displacement or
thickness) of a fluid or a workpiece in
real time.
Using the Laser to Measure and Record Profiles
(continued)
OptiSure Automated Optical Inspection
63www.nordsonefd.com info@nordsonefd.com +1-401-431-7000 Sales and service of Nordson EFD dispensing systems are available worldwide.
Using the Laser to Measure and Record Profiles
(continued)
To Measure and Record the Profile of a Fluid or a Workpiece
PREREQUISITES
The “All.cldt” file has been sent from CL-NavigatorN to the DispenseMotion controller as described under “To
Send “All.cldt” to the DispenseMotion Controller” on page62.
# Click Step Reference Image
1
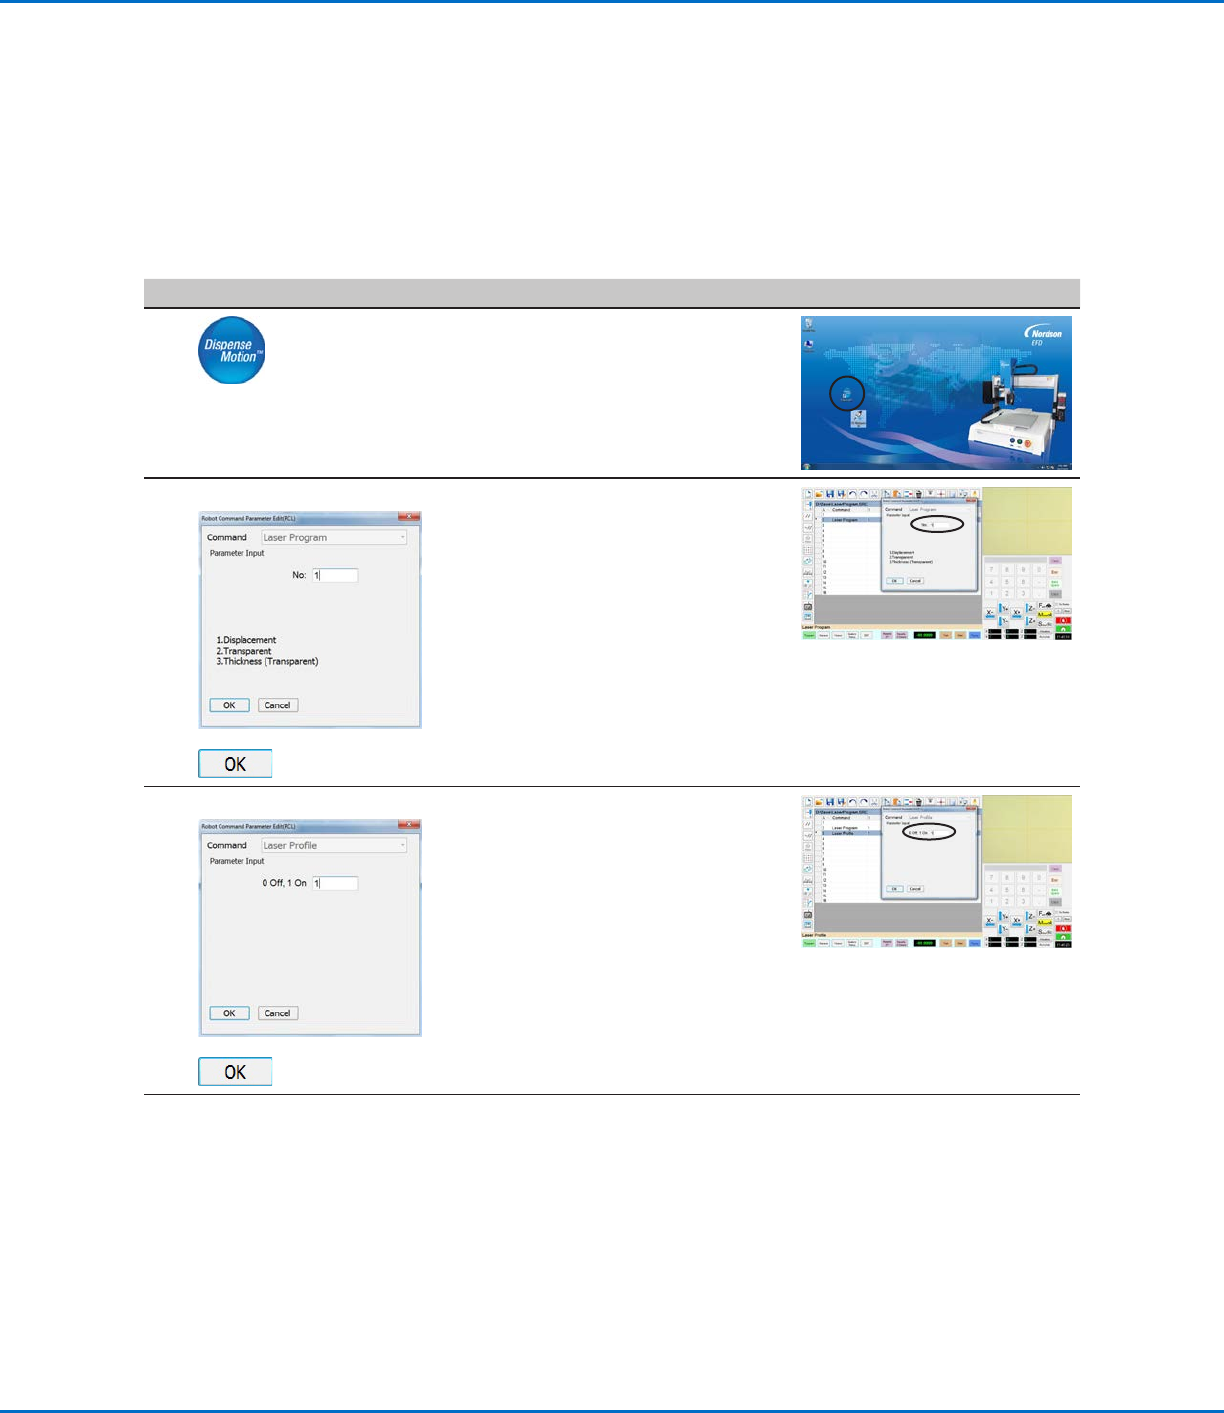
• On the DispenseMotion controller
desktop, open DispenseMotion.
2
LASER PROGRAM >
>
• Insert a LASER PROGRAM command
and specify the laser program you
want to use. For this example, enter
1.
NOTE: Selection 1 is the
Displacement laser program for non-
transparent materials or surfaces.
• Click OK.
3
LASER PROFILE >
>
• In the next empty command address,
insert a LASER PROFILE command.
• Enter 1 to turn Laser Profile ON.
• Click OK.
Continued on next page
OptiSure Automated Optical Inspection
64 www.nordsonefd.com info@nordsonefd.com +1-401-431-7000 Sales and service of Nordson EFD dispensing systems are available worldwide.
# Click Step Reference Image
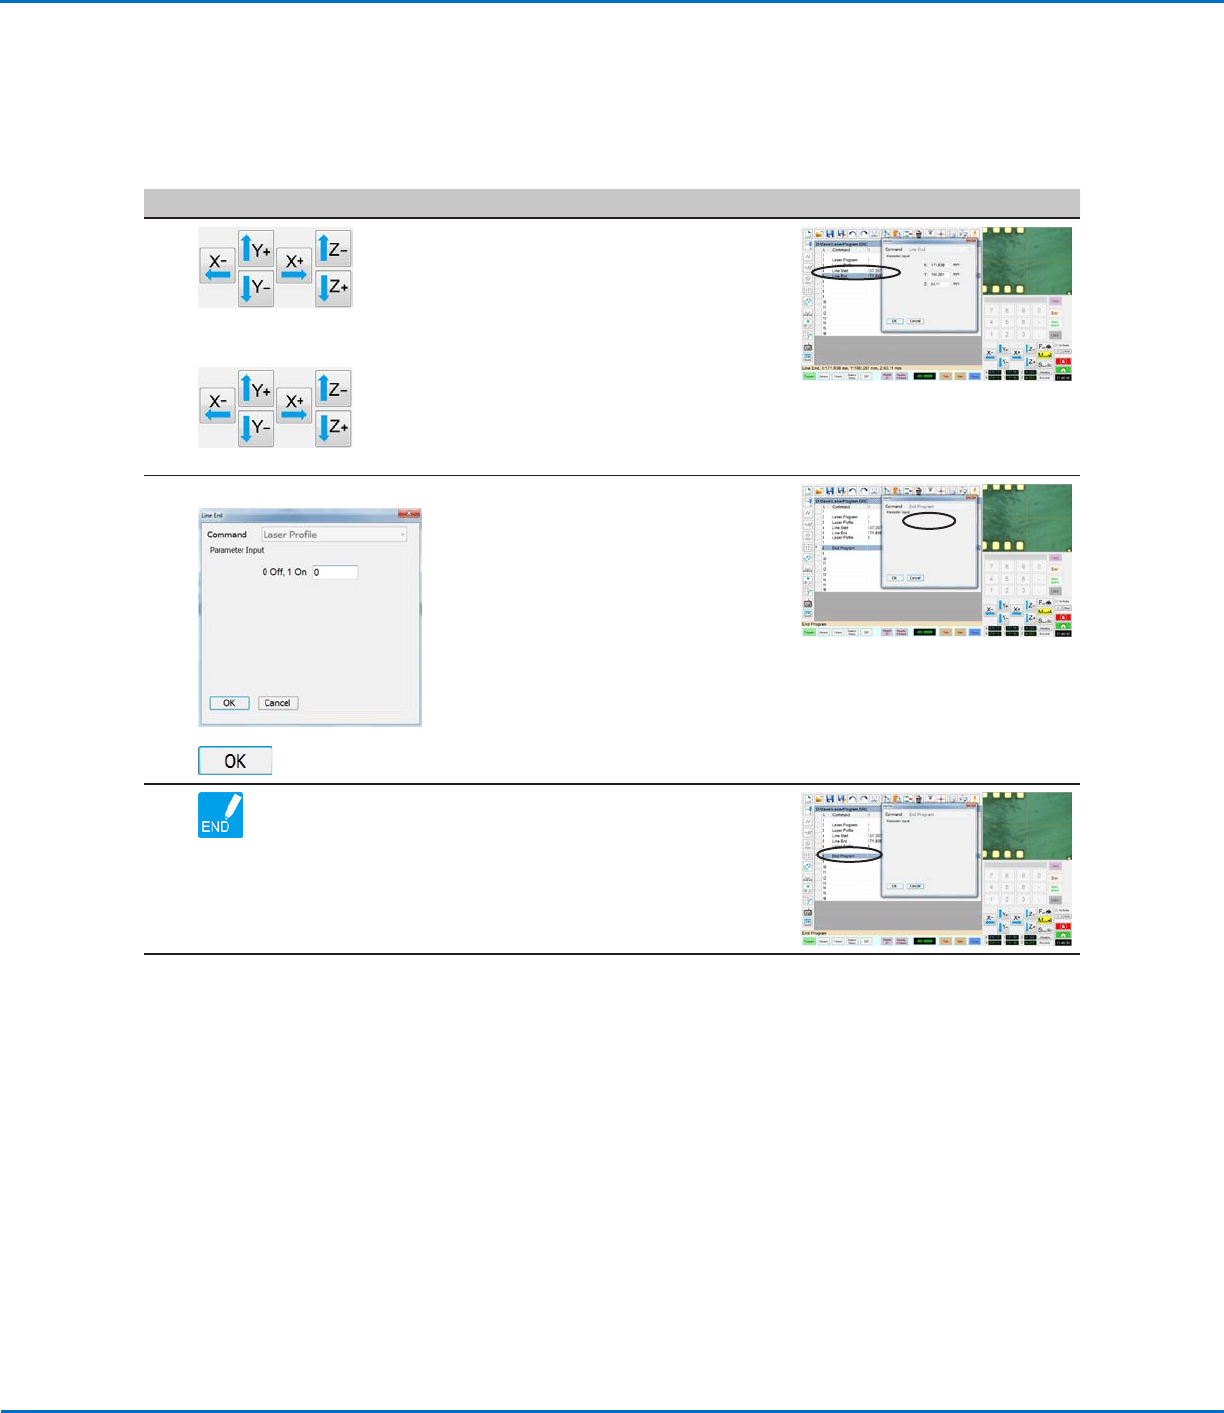
4
> LINE
START
> LINE
END
• Jog the camera to the location on the
workpiece where you want the laser
to start reading.
• Enter a LINE START command.
• Jog the camera to the location on the
workpiece where you want the laser
to stop reading.
• Enter a LINE END command.
5
LASER PROFILE >
>
• In the next empty command address,
insert a LASER PROFILE command.
• Enter 0 to turn Laser Profile OFF.
• Click OK.
6 • Insert an END PROGRAM command
to complete the program.
Continued on next page
Using the Laser to Measure and Record Profiles
(continued)
To Measure and Record the Profile of a Fluid or a Workpiece (continued)