00194422-09_MM_X-Series_en.pdf - 第37页
Major Maintenance 5.2.3 Performing Maintenance Ta sks Maintenance Tasks for Base Ma chine Maintenance Manual SIPLACE X Series 37 5.2.3.4 5 . 2 . 3 . 4 C h e c k in g a n d C le a n in g / R e p la c in g t h e C o m p r …
Major Maintenance
Maintenance Tasks for Base Machine 5.2.3 Performing Maintenance Tasks
36 Maintenance Manual SIPLACE X Series
5.2.3.2
5.2.3.2 Cleaning the Gas Pressure Shock Absorbers on the Protective Covers
Cleaning the Gas Pressure Shock Absorbers on the Protective Covers
5.2.3.3
5.2.3.3 Check/replace the gas pressure shock absorbers on the protective covers
Check/replace the gas pressure shock absorbers on the protective covers
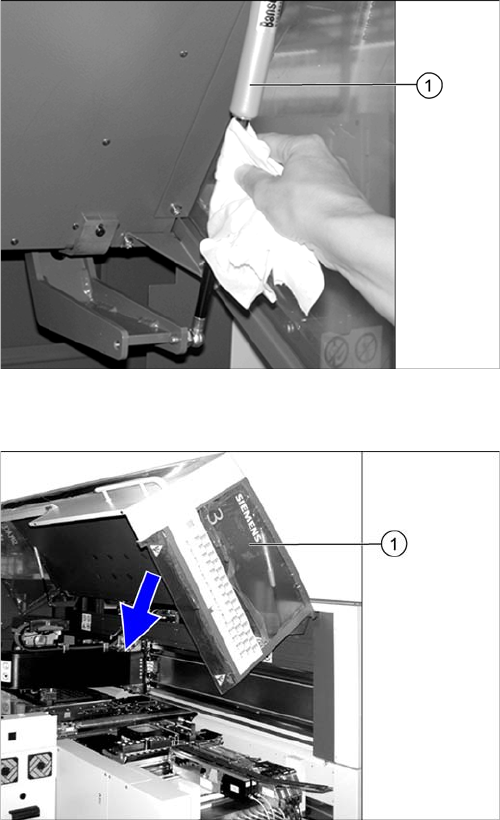
► Open the protective covers.
► Wipe the sliding surfaces of the gas pressure shock
absorbers (1) clean with a lint-free cloth.
► There should be no oil visible on the pistons: other
-
wise replace the gas pressure shock absorbers.
For removal and installation details, read the service
manual for your machine.
► Close the machine safety covers.
► Open the protective cover (1).
► Pull the protective cover approx. 30 cm downwards
and then release it again.
If the cover does not open completely again and if
there is play in the uppermost position (approx. 20
mm), replace the gas pressure shock absorbers.
For removal and installation details, refer to the Ser
-
vice manual for your machine.
► Pull the protective cover vertically to a position be
-
tween the top and bottom positions and then release
it again.
The cover must stay in position without help. If it clos
-
es on its own, replace the gas pressure shock ab
-
sorbers.
For removal and installation details, read the service
manual for your machine.
► Close the protective cover.
► Repeat these steps for all protective covers.
Major Maintenance
5.2.3 Performing Maintenance Tasks Maintenance Tasks for Base Machine
Maintenance Manual SIPLACE X Series 37
5.2.3.4
5.2.3.4 Checking and Cleaning/Replacing the Compressed Air Filter (if required)
Checking and Cleaning/Replacing the Compressed Air Filter (if required)
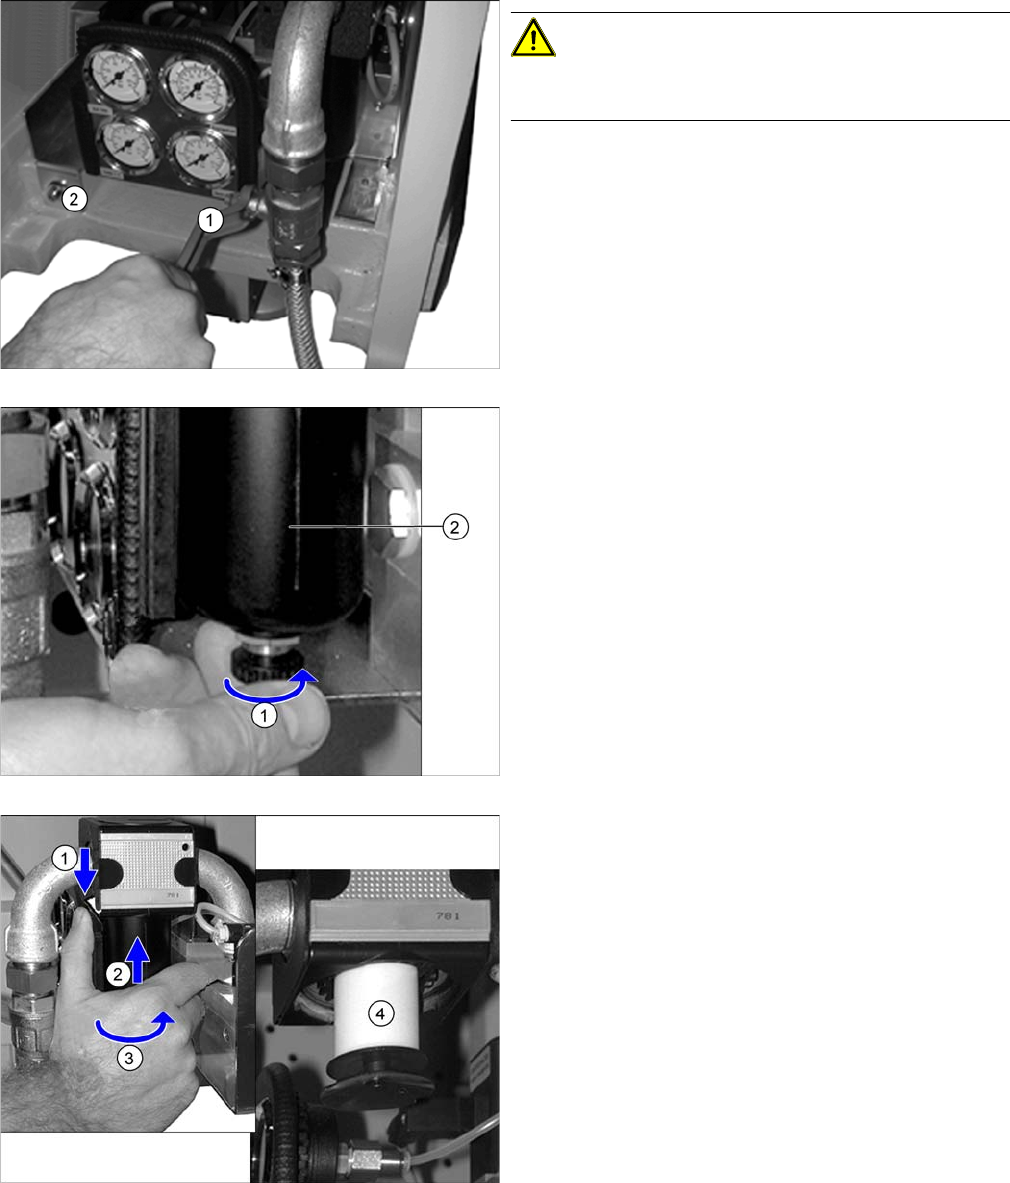
CAUTION!
Before checking or replacing the compressed air filters,
you need to shut off the supply of air!
► Use the machine key to open the door to the com
-
pressed air supply, detach the cable and remove the
door.
► Turn the main compressed air valve (1) clockwise. All
manometers must be set to zero.
► Loosen the screw (2) , and pull out the compressed
air supply.
► Place the collecting vessel under the compressed air
supply.
► Open the screw (1) beneath the cover cap (2) to re
-
lease the pressure.
► Pull the locking lever (1) on the cover downwards.
Press the cover (2) upwards and unscrew by turning
to the left (3).
► Unscrew the compressed air filter (4) and check for
dirt.
► Replace the filter if it is dirty.
⇨ Filter element 5 μm [03050213-xx]
HSxx / D1 / D2 / D4 / SX series / X series from
March 2008 pneumatic valve [03062274-xx]
(for [03060279-xx] pneumatic unit)
⇨ Replacement filter for 5 μm compressed air filter
for pneumatic valve [03038979-xx]
X series up to SN B089 [03004680-xx]
(for [03004151-xx] pneumatic unit)
⇨ Filter element for 5 μm filter (new) for pneumatic
valve [03039182-xx]
X series from SN B090 [03038691-xx]
(for [03038058-xx] pneumatic unit)
Major Maintenance
Maintenance Tasks for Base Machine 5.2.3 Performing Maintenance Tasks
38 Maintenance Manual SIPLACE X Series
5.2.3.5
5.2.3.5 Cleaning/Replacing the Head Exhaust Air Filter/X Motor Cooling
Cleaning/Replacing the Head Exhaust Air Filter/X Motor Cooling
5.2.3.6
5.2.3.6 Checking/Cleaning/Replacing the Cooling Air Filter/Y Axes
Checking/Cleaning/Replacing the Cooling Air Filter/Y Axes
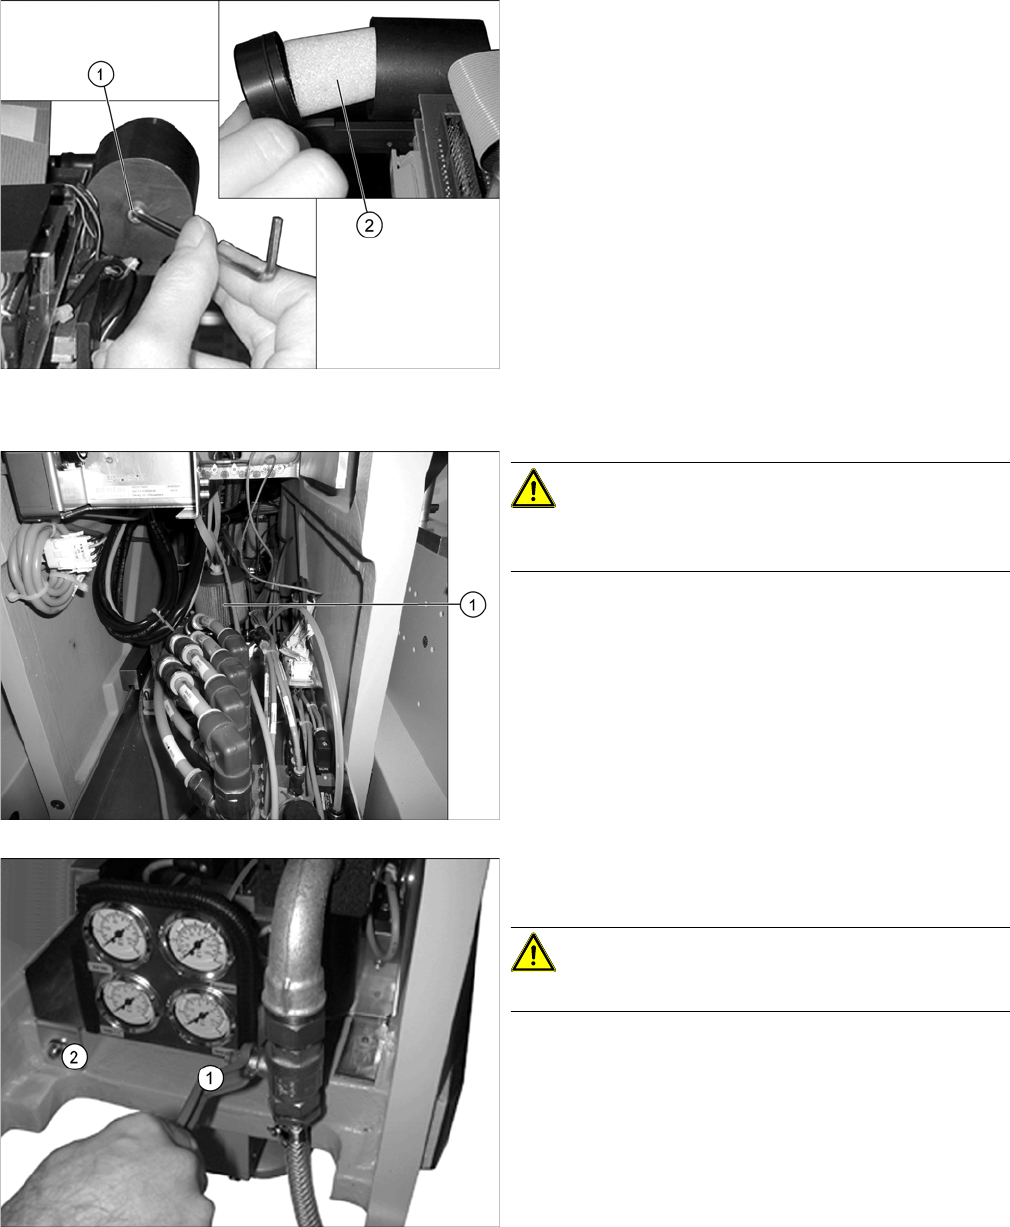
► Remove the protective cover from the relevant place
-
ment head.
► Loosen the fastening screw (1) on the filter casing.
► Check the "filter element 40 µm" [03003717-xx] (2)
for discoloration.
If you see discoloration, replace with a new one.
► Fit the filter, the casing and the protective cover for
the placement head.
► Repeat these steps for the filter elements of all place
-
ment heads.
CAUTION!
The main compressed air valve must be closed for this
work and the manometer set to zero!
► Open the wing screw on the upper side of the filter (1)
and pull it up and out.
► Check the filter for dirt and vacuum it, if required.
► If the filter can no longer be cleaned, replace it
[00376006-xx].
► Push the pneumatic unit carefully back into the ma
-
chine and fix into place with the screw provided (2).
CAUTION!
Make sure that you do not pinch any cables or hoses!
► Open the main compressed air valve once more (1).
► Close the door to the compressed air supply.