00194422-09_MM_X-Series_en.pdf - 第43页
Major Maintenance 5.3.3 Performing Maintenance Ta sks Maintenance Tasks for the Com ponent Docking Unit Maintenance Manual SIPLACE X Series 43 5.3.3.3 5 . 3 . 3 . 3 C le a n in g t h e T a p e C u t t e r Cleaning the Ta…

Major Maintenance
Maintenance Tasks for the Component Docking Unit 5.3.3 Performing Maintenance Tasks
42 Maintenance Manual SIPLACE X Series
5.3.3.2
5.3.3.2 Greasing the Cutter
Greasing the Cutter
Risk of injury when working near the tap e cutter
X-Series Tape Cutter - No te : Obser ving the Fu nction Status
► Switch off the machine, disconnect it from the power supply and secure it to prevent unauthorized
reactivation. Observe the instructions in section "1.2 Preparatory Work..." [ ➙ 12].
► Fill the "grease gun with hose for Y axis" (volume applied approx. 0.4 g) [00374563-xx] with
Klüberplex BEM 34-132 [00374565-xx] (see also "6.1 Filling the Grease Gun" [ ➙ 59]).
See also
1.2 Preparatory Work... [ ➙ 12]
6.1 Filling the Grease Gun [ ➙ 59]
WARNING
Risk of injury when working near the cutter.
When working in the area of the tape cutter, move the component trolley out of the machine
and disconnect the machine from the mains supply and the compressed air supply.
► Wait until the operating pressure has dropped to 0 MPa.
► Always secure the machine against unauthorized reactivation.
► Do not reach into the tape cutter.
NOTICE
Observing the function status
Tape cutters with the following function statuses have lubrication nipples and must be greased:
➢ Tape cutter pneum. SIPLACE HF [03019941S05]
➢ Tape cutter pneum. SIPLACE HF/X-Serie [03052900S03]
➢ Tape cutter pneum. SIPLACE X-Serie [03066690S02]
► This is a functional improvement that has been adopted retrospectively from the SX4/X-Se
-
ries S to the tape cutters of the X-Series and HF. A rework will be charged (lubrication nip
-
ple: DIN 71412-B-M6 [03036943
-
xx]).
⇨ Tape cutters without lubrication nipples are not greased.
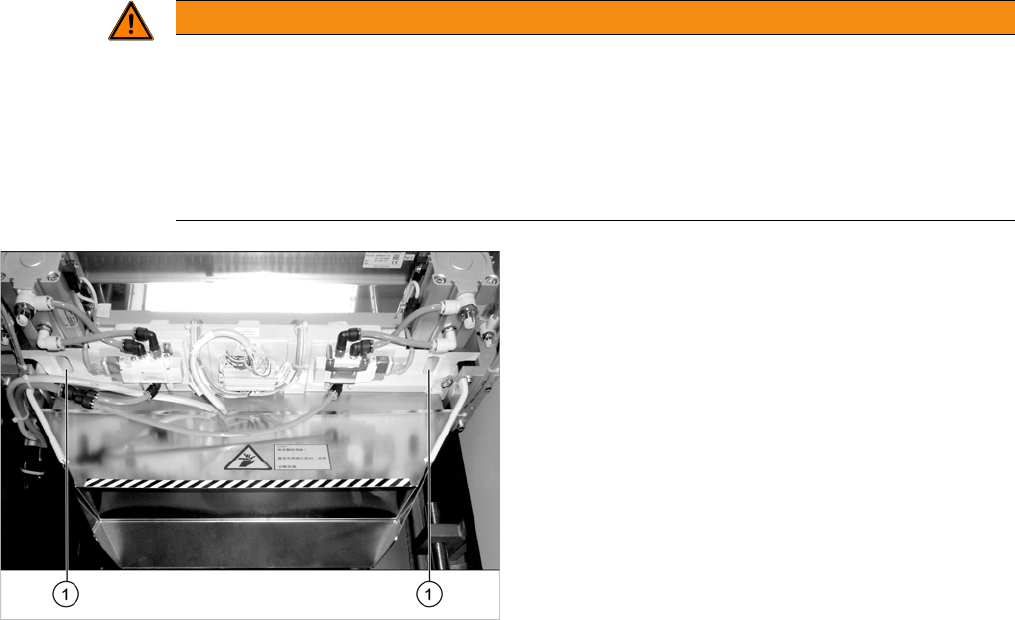
► Position the hose of the grease gun straight onto the
lubrication nipple (1).
NOTICE!
If the lubrication nipple no longer lets lubricant through or
if it is damaged, replace it (DIN71412-B-M6 [03036943-
xx]).
► Press grease into the tape cutter until it visibly pro
-
trudes out again.
► Remove excess grease with a brush.
► Repeat these steps for the other side of the tape cut
-
ter.
► Repeat these steps for each tape cutter.
Major Maintenance
5.3.3 Performing Maintenance Tasks Maintenance Tasks for the Component Docking Unit
Maintenance Manual SIPLACE X Series 43
5.3.3.3
5.3.3.3 Cleaning the Tape Cutter
Cleaning the Tape Cutter
Risk of injury when working near the tap e cutter
WARNING
Risk of injury when working near the cutter.
When working in the area of the tape cutter, move the component trolley out of the machine
and disconnect the machine from the mains supply and the compressed air supply.
► Wait until the operating pressure has dropped to 0 MPa.
► Always secure the machine against unauthorized reactivation.
► Do not reach into the tape cutter.
► Remove any contaminants and small pieces of tape
from the two holes on the underside of the tape cut
-
ter. Use a pair of tweezers or a brush.
Major Maintenance
Maintenance Tasks for the Component Docking Unit 5.3.3 Performing Maintenance Tasks
44 Maintenance Manual SIPLACE X Series
5.3.3.4
5.3.3.4 Greasing the Cutting Blade of the Tape Cutter
Greasing the Cutting Blade of the Tape Cutter
Risk of injury when working near the tap e cutter
WARNING
Risk of injury when working near the cutter.
When working in the area of the tape cutter, move the component trolley out of the machine
and disconnect the machine from the mains supply and the compressed air supply.
► Wait until the operating pressure has dropped to 0 MPa.
► Always secure the machine against unauthorized reactivation.
► Do not reach into the tape cutter.
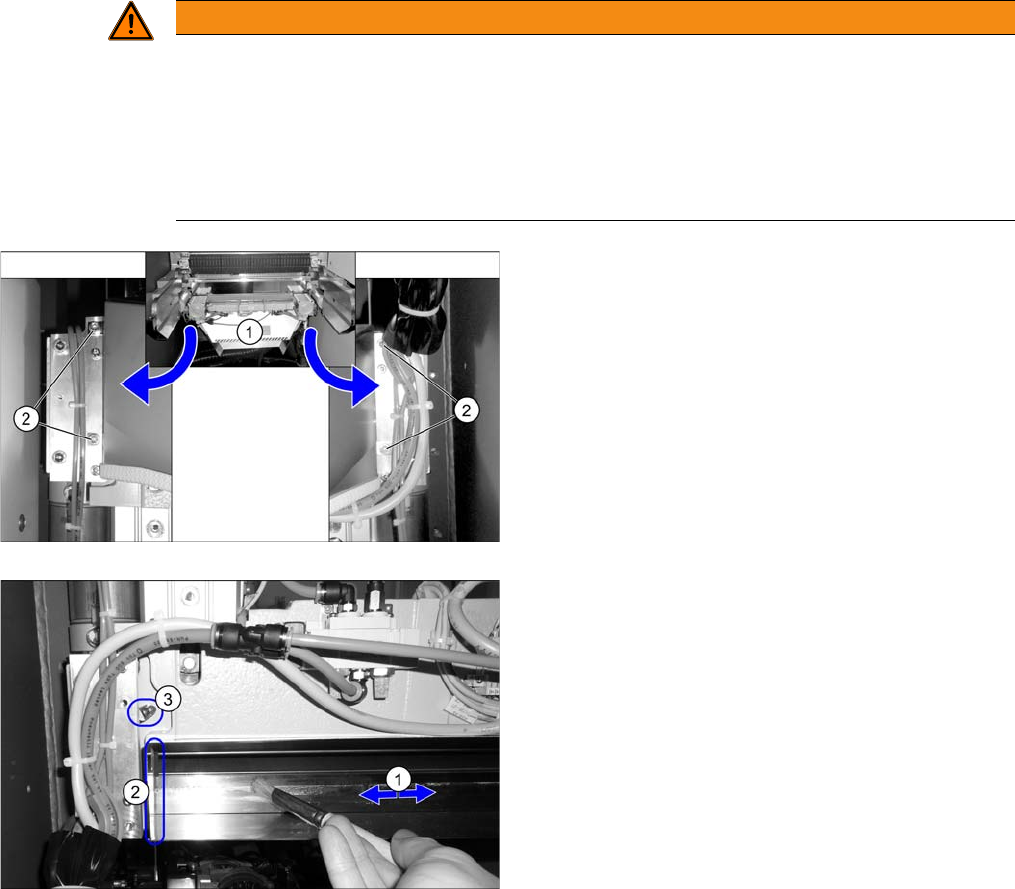
► Dismantle the waste slide (1). Loosen the four
fastening screws (2) and lift off the used tape chute.
► Spray a bit of Interflon Fin grease [03020782-xx] into
a suitable container.
► Distribute the grease with a new brush to the under
-
side of the fixed blade (1) as shown in the figure.
► Use a lint-free cloth to remove any excess grease
from the contact surfaces of the cutting blades (2)
and the grease nipple (3).
► Install the waste slide.