00194422-09_MM_X-Series_en.pdf - 第49页
Major Maintenance 5.4.3 Performing Maintenance Ta sks Maintenance Tasks for Optical Systems Maintenance Manual SIPLACE X Series 49 5.4.3.2 5 . 4 . 3 . 2 C le a n in g t h e C o p la n a r it y M o d u le Cleaning the Cop…
Major Maintenance
Maintenance Tasks for Optical Systems 5.4.3 Performing Maintenance Tasks
48 Maintenance Manual SIPLACE X Series
► Repeat these steps for all IC and FC cameras.
CAUTION!
There is a risk of cutting yourself on the edges of the
glass disk!
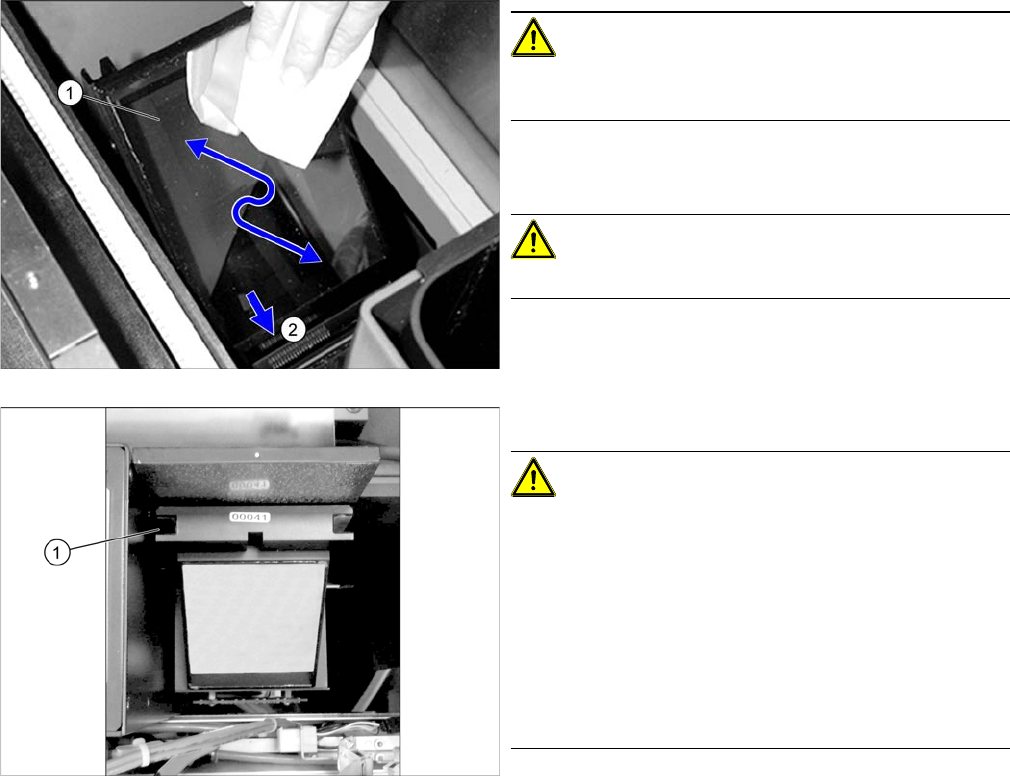
► Clean the slanted glass disk (1) with a microfiber
cloth.
CAUTION!
Do not use any chemical cleaning agents!
► Remove any components which have collected in the
duct (2) underneath the glass disk.
► Refit the upper part.
CAUTION!
Make sure that you do not damage the glass disk.
Make sure that the upper part of the camera slides
smoothly into the (1) guidance.
Make sure that the upper part of the camera is evenly
seated on the lower section and that it cannot move. If
necessary, gently press against the metal cover of the
upper part.
Make sure that the upper part does not protrude at the
upper edge of the conveyor.
Major Maintenance
5.4.3 Performing Maintenance Tasks Maintenance Tasks for Optical Systems
Maintenance Manual SIPLACE X Series 49
5.4.3.2
5.4.3.2 Cleaning the Coplanarity Module
Cleaning the Coplanarity Module
5.4.3.3
5.4.3.3 Clean the stationary 3D sensor module
Clean the stationary 3D sensor module
5.4.3.4
5.4.3.4 Clean the PCB barcode scanner
Clean the PCB barcode scanner
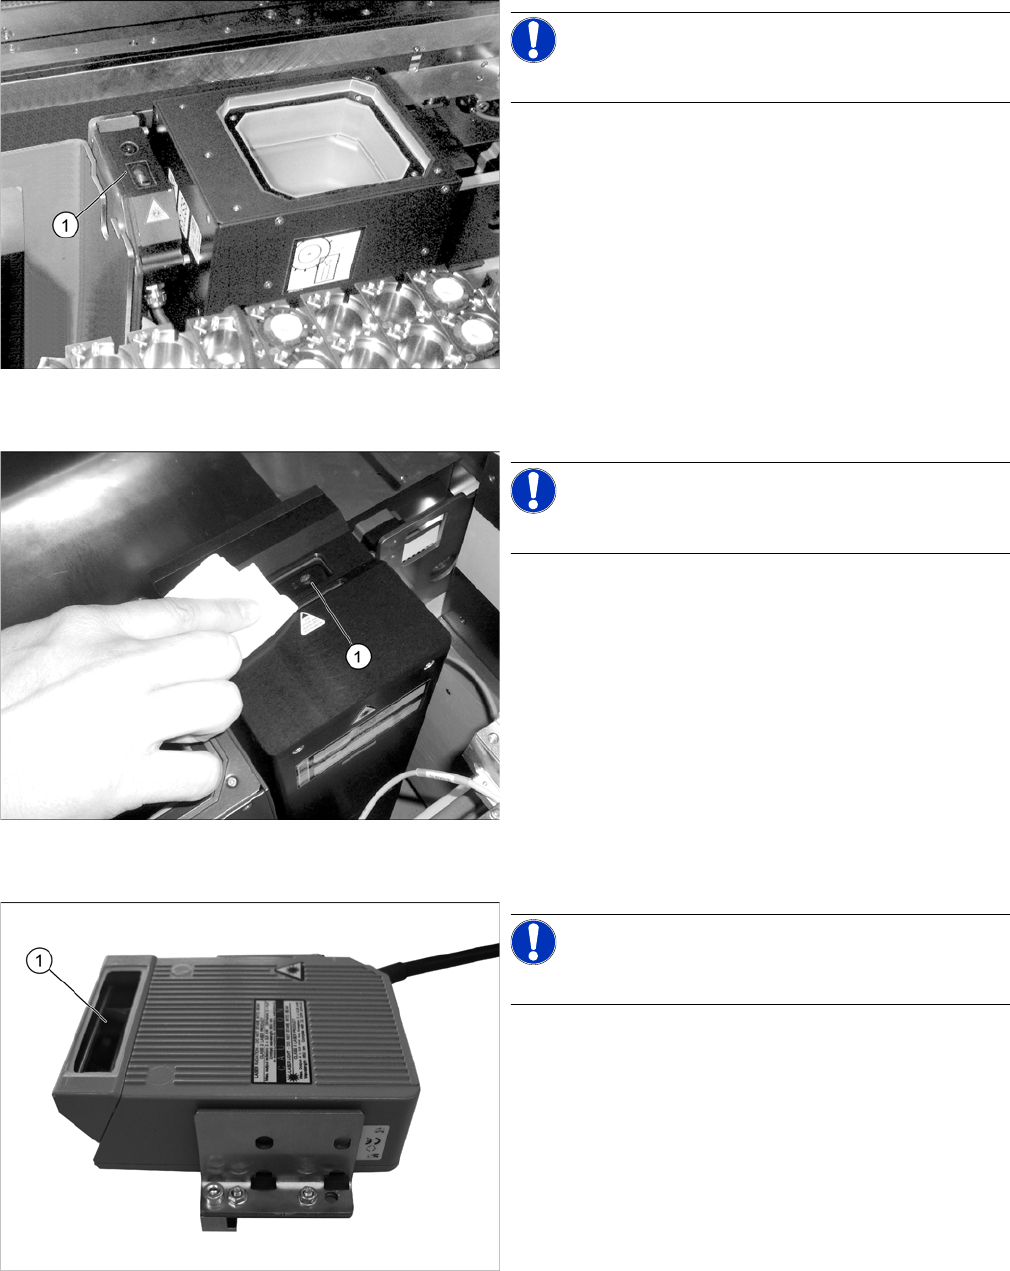
NOTICE!
The coplanarity module is optional.
► Clean the lenses (1) of the coplanarity module with a
microfiber cloth.
NOTICE!
The 3D sensor module is optional.
► Clean the 3D sensor module lens (1) with a microfiber
cloth.
NOTICE!
The PCB barcode scanner is optional.
► Clean the lens (1) of the PCB barcode scanner with a
microfiber cloth.

Major Maintenance
Maintenance Work on the Gantry 5.5.1 Tools, Consumables, Spare and Wear Parts
50 Maintenance Manual SIPLACE X Series
5.5
5.5 Maintenance Work on the Gantry
Maintenance Work on the Gantry
5.5.1
5.5.1 Tools, Consumables, Spare and Wear Parts
Tools, Consumables, Spare and Wear Parts
▪ Lint-free cloths [03082092-xx]
▪ SIPLACE cleaning cloth [00315253-xx]
▪ Klüberplex BEM 34-132 lubricant, 1 kg tin [00374565-xx]
▪ Ethanol
Isopropanol – IPA can be used as an alternative.
▪ Protective latex gloves [00372972-xx]
▪ Cotton gloves [00359087-xx]
▪ ESD wristband [00320279-xx]
▪ Grease gun with hose for Y axis (volume applied: approx. 0.4 g) [00374563-xx]
▪ Grease gun with nozzle for X axis (volume applied: approx. 0.13 g) [00374564
-
xx]
▪ Set of Allen keys
▪ A high-precision set of scales (recommended minimum measuring accuracy: 1 g)
▪ DIN71412 - A M6 lubrication nipple [03036936-xx], if required
▪ Lubrication nipple for upper guide carriage (X axis) R3417 004 09 [03094503-xx]
▪ Lubrication nipple for lower guide carriage (X axis) R3417 029 90 [03094505-xx]
▪ Cooling air set (black) [03003704-xx] or cooling air set (white) [03030955-xx], if required
5.5.2
5.5.2 Preparatory Steps
Preparatory Steps
► There must be no PCBs on the PCB conveyor for the following jobs.
► Switch off the machine, disconnect it from the power supply and secure it to prevent unauthorized
reactivation. Observe the instructions in section "1.2 Preparatory Work..." [ ➙ 12].
See also
6.1 Filling the Grease Gun [ ➙ 59]
5.5.3
5.5.3 Performing Maintenance Tasks
Performing Maintenance Tasks
See also
1.1.2 Safety Instructions for Working with Strong Magnetic Fields [ ➙ 8]
5.5.3.1
5.5.3.1 Greasing and Cleaning the X Axis
Greasing and Cleaning the X Axis
CAUTION
Greas all grease nipples and pay attention to the capacity!
► Remember to grease every visible grease nipple on the X and Y axes!
► Use the amounts of grease specified. Too much or too little grease can damage the bear
-
ing.