00194422-09_MM_X-Series_en.pdf - 第55页
Major Maintenance 5.6.1 Tools, Consumables, Spare and Wear Parts Maintenance Tasks for the Conveyor Maintenance Manual SIPLACE X Series 55 5.6 5 . 6 M a in t e n a n c e T a s k s f o r t h e C o n v e y o r Maintenance …
Major Maintenance
Maintenance Work on the Gantry 5.5.3 Performing Maintenance Tasks
54 Maintenance Manual SIPLACE X Series
5.5.3.7
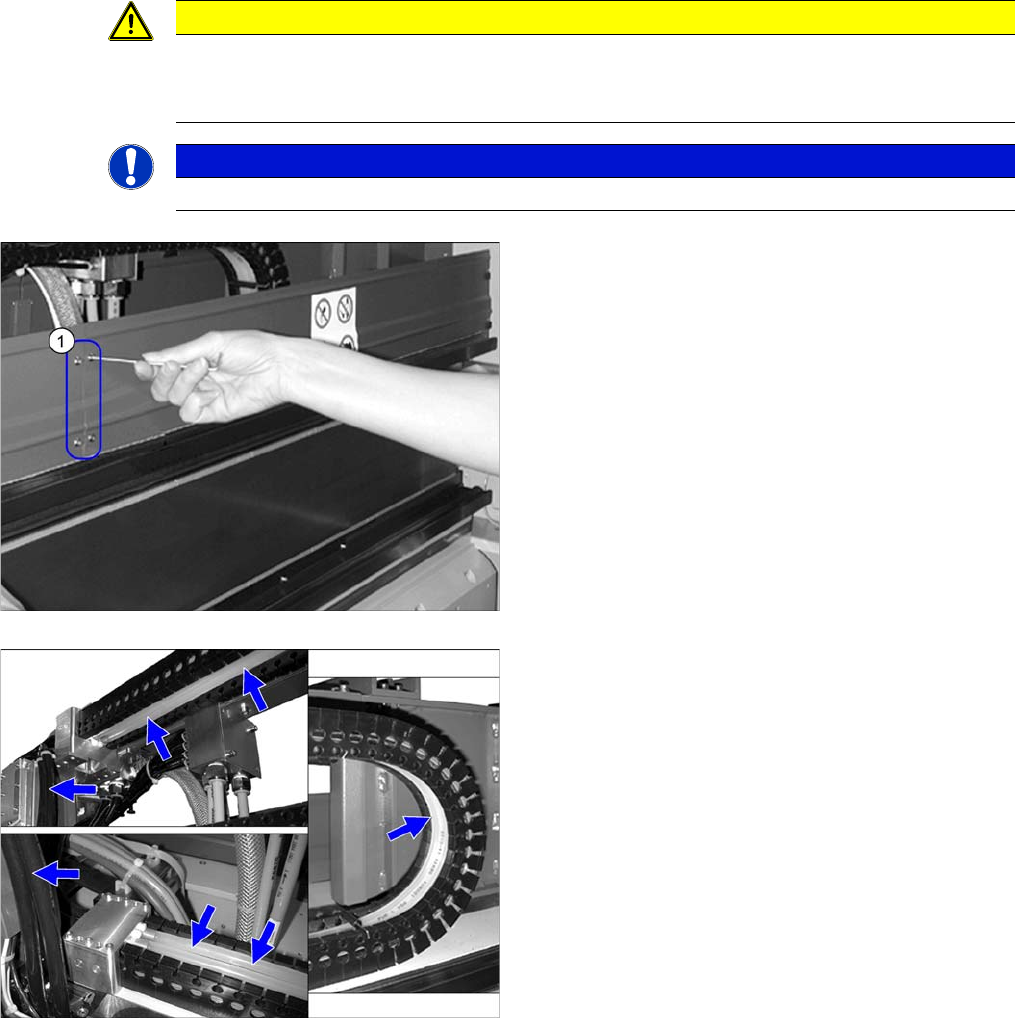
5.5.3.7 Checking the Cooling Air Hoses for the Y Axis
Checking the Cooling Air Hoses for the Y Axis
CAUTION
Broken cooling air hoses
If the cooling air hoses are defective, the Y motor could overheat and cut out. Guide carriages
and guides may be damaged as a result.
NOTICE
This maintenance task is only required up to serial number B078.
► Loose the screw (1) fastening the cover plates above
the magnetic strip, which is in front of the trailing ca
-
ble.
► Remove the cover plates.
► Check the cooling air hoses for damage, particularly
in the vicinity of the cooling hose fixings in the trailing
chain. If the cooling air hoses are damaged, replace
them. For removal and installation details, read the
service manual for your machine.
► Fit the cover plates again.
► Repeat these steps for all cooling air hoses on all
gantries and replace the cooling air hoses where nec
-
essary.

Major Maintenance
5.6.1 Tools, Consumables, Spare and Wear Parts Maintenance Tasks for the Conveyor
Maintenance Manual SIPLACE X Series 55
5.6
5.6 Maintenance Tasks for the Conveyor
Maintenance Tasks for the Conveyor
5.6.1
5.6.1 Tools, Consumables, Spare and Wear Parts
Tools, Consumables, Spare and Wear Parts
▪ ESD wristband [00320279-xx]
▪ OIL Interflon Fin Super (teflon oil) [03017760-xx]
▪ Lint-free cleaning cloths [03082092-xx]
▪ Ethanol
Isopropanol – IPA can be used as an alternative.
▪ SIPLACE cleaning cloth [00315253-xx]
▪ Protective latex gloves [00372972-xx]
▪ Cotton gloves [00359087-xx]
5.6.2
5.6.2 Preparatory Steps
Preparatory Steps
Caution Conveyor - No PCB Must Be in the Conveyor
Note Co nveyor - Re commendation: Ad justing Sides via S oftware for Acces sibility
► Move the component trolley out of the machine.
See also
1.2 Preparatory Work... [ ➙ 12]
5.6.3
5.6.3 Performing Maintenance Tasks
Performing Maintenance Tasks
5.6.3.1
5.6.3.1 Cleaning and Preserving the Conveyor
Cleaning and Preserving the Conveyor
Preservi ng the Conveyor - Preparator y Tasks: Moving Sides Etc.
Moving the Conveyor Sides
► Move all conveyor sides to one side of the conveyor. Use the station software to set the dual con
-
veyor to single conveyor mode (right).
► First perform the following cleaning and preserving steps only to the side of the conveyor which is
now free.
CAUTION
No board
There must be no PCBs in the machine during the following tasks.
NOTICE
Accessibility
We recommend using the following procedure for better access:
► Use the station software to adjust the conveyor sides in such a way that you can easily
reach all conveyor belts as well as the whole area below the sides.
CAUTION
Observe the exact order
► Observe the following steps in exactly the order shown.
NOTICE
Keep the clamping surfaces clean
► During work, keep the clamping surface free of any dirt or oil. This makes subsequent
cleaning much easier.
Major Maintenance
Maintenance Tasks for the Conveyor 5.6.3 Performing Maintenance Tasks
56 Maintenance Manual SIPLACE X Series
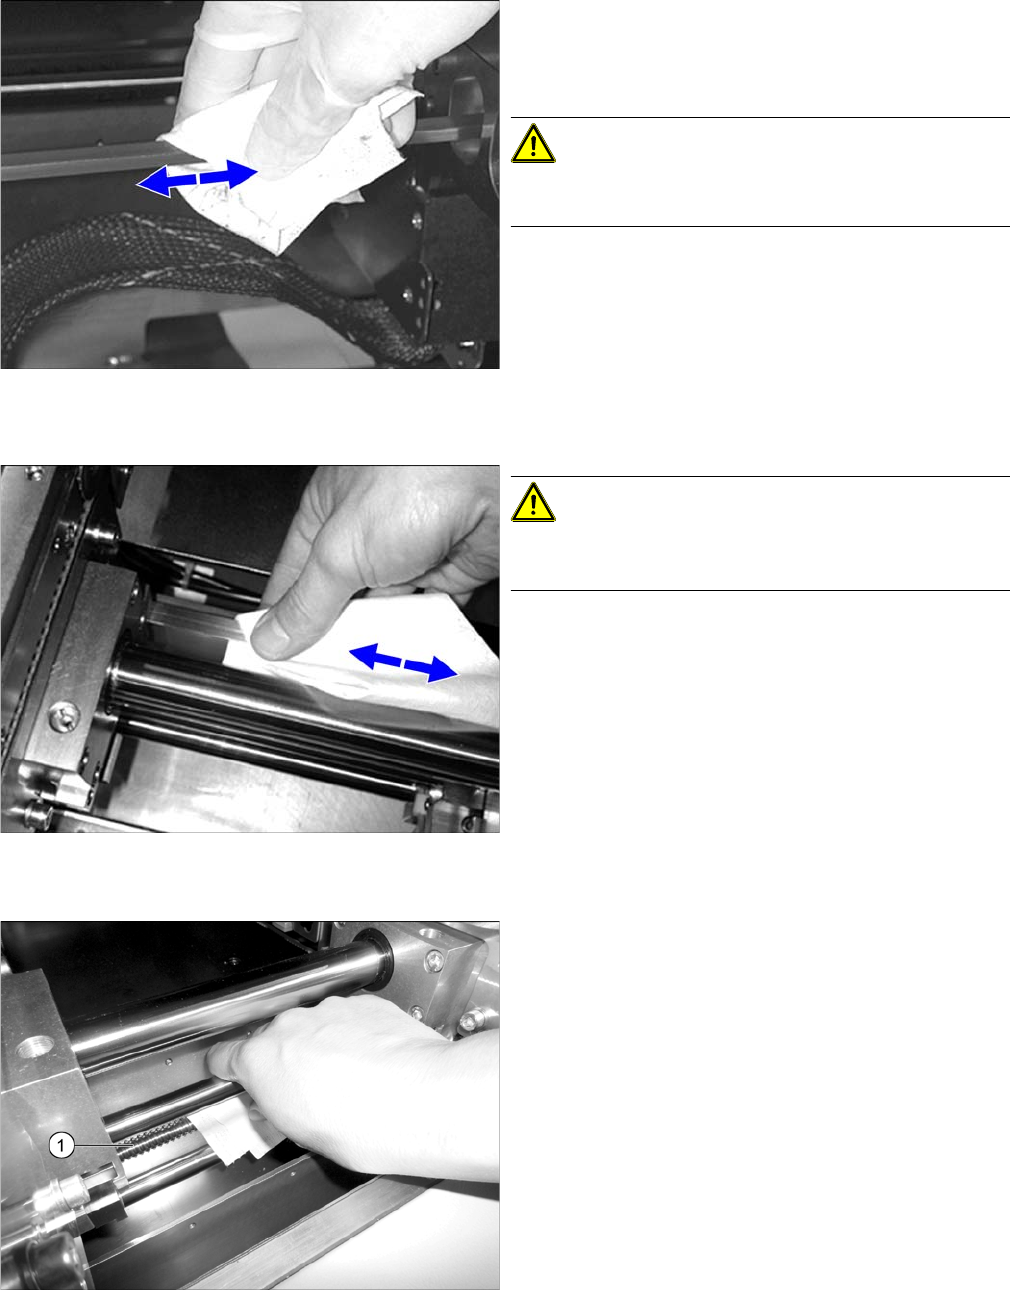
Cleaning and Preserving the Hexagonal Shafts
Cleaning the Fixture Tape
Cleaning and Preserving the Recirculating Ball Screws
► Apply Teflon oil to a lint-free cloth and clean the hex
-
agonal shafts (1) in the conveyor.
Alternatively you can also use a SIPLACE cleaning
cloth.
CAUTION!
Never apply the Teflon oil to the cloth inside the machine.
Where possible, go away from the machine.
► Repeat the procedure for all hexagonal shafts in the
conveyor.
CAUTION!
Risk of cutting!
The fixing strip has a sharp edge.
► Clean the fixing strip of the width adjustment clamp
-
ing unit using a lint-free cloth moistened with ethanol.
► Clean and preserve the recirculating ball screw (1) by
running a SIPLACE cleaning cloth along the thread of
the screw.
► Repeat this procedure for all ball screws in the con
-
veyor.