NPM Calibration Manual-En.pdf - 第20页
NPM Maint en anc e E di ti on 9.5 W idth Adj ustm ent EJM9BE-M B-09M-21 Page 9-19 D ual c onv e yor t yp e For the dual c onveyor type, select the lanes 1 and 2. The oper ati ng pr ocedure and det ails are the sam e as…
NPM
Maintenance Edition
9.5 Width Adjustment
Page 9-18 EJM9BE-MB-09M-21
9
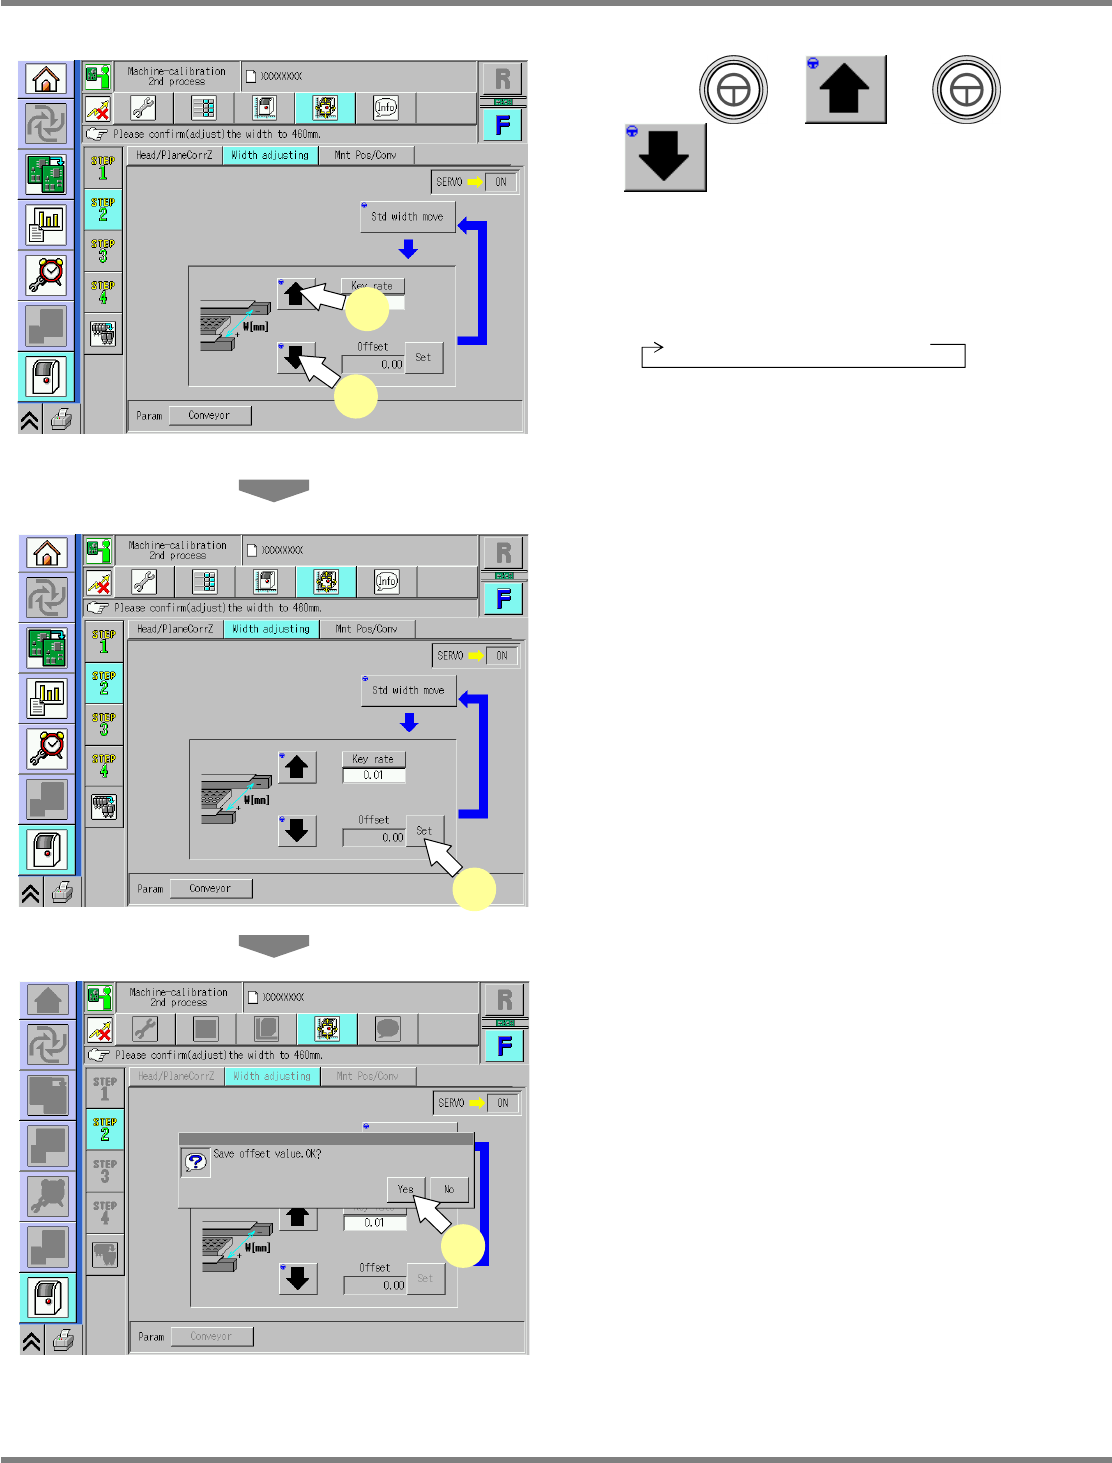
Press + or +
.
∗
Adjust the conveyor width to the reference
width + 0.5 mm to 0.7 mm.
∗
When pressing [Key rate], you can change the
response.
0.01 mm
→
0.1 mm
→
1 mm
10
Repeat steps 4 to 9 until the above
reference width is reached.
11
Press [Set].
•
The adjustment result is saved.
12
Save the result of adjustment.
•
Press [Yes] to save the result.
UnitCalibConveyorWideOrigin-02E01
11
UnitCalibConveyorWideOrigin-03E01
12
UnitCalibConveyorWideOrigin-02E01
9
10
NPM
Maintenance Edition
9.5 Width Adjustment
EJM9BE-MB-09M-21 Page 9-19
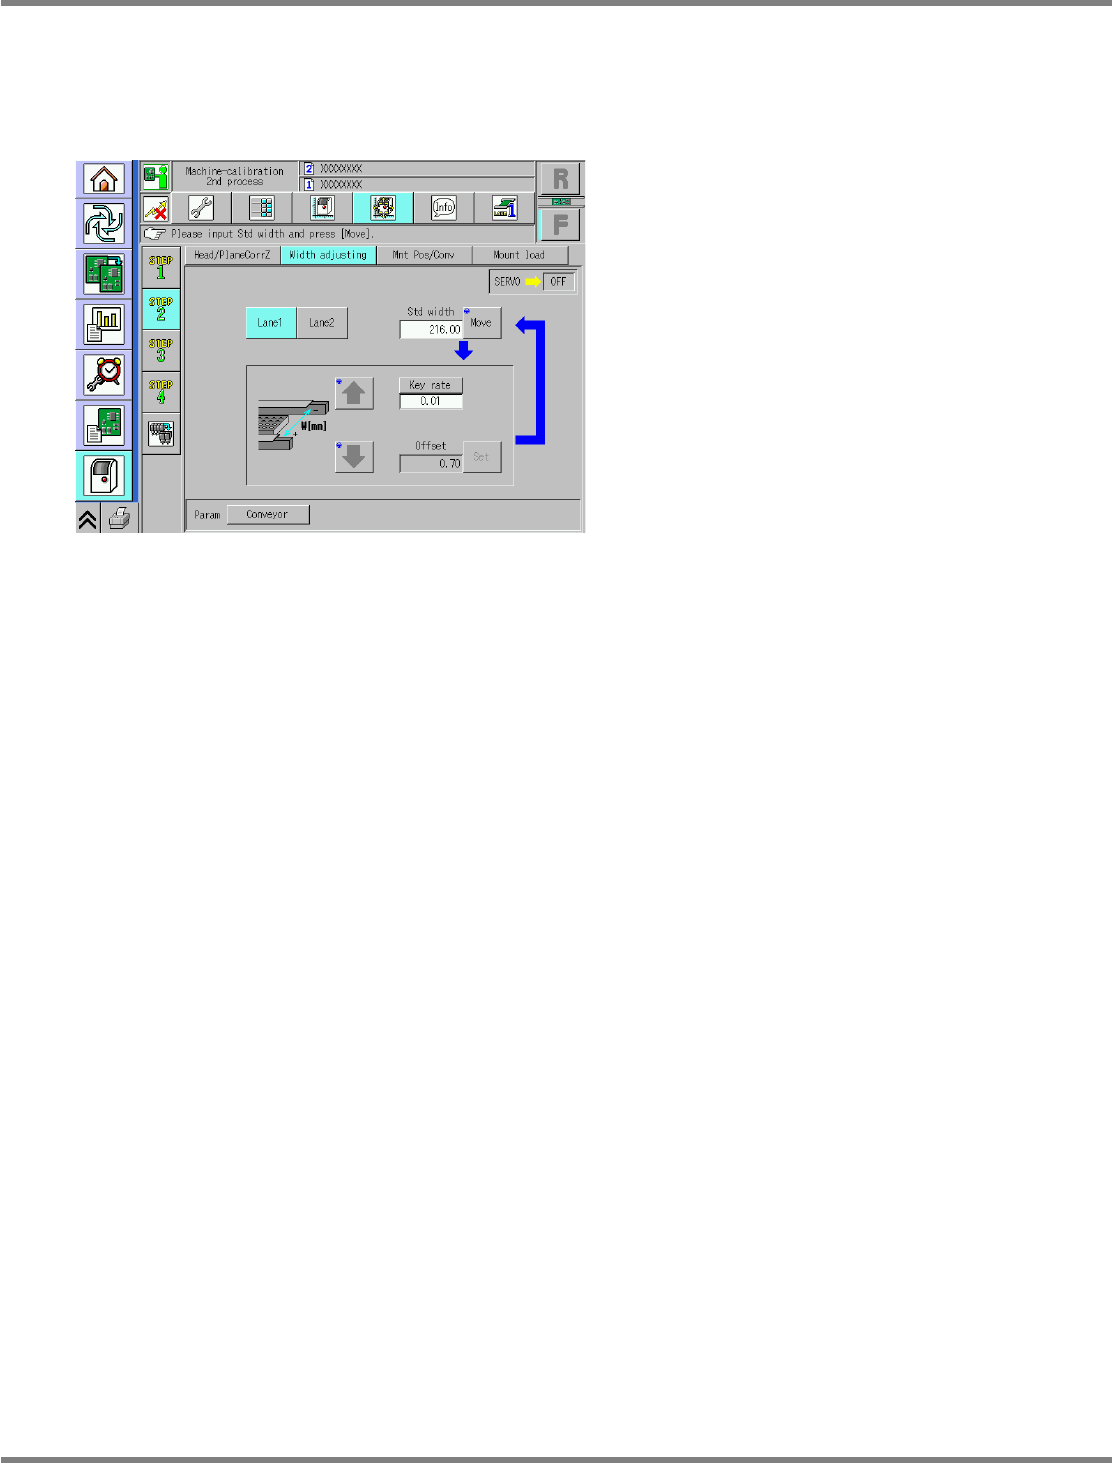
Dual conveyor type
For the dual conveyor type, select the lanes 1 and 2.
The operating procedure and details are the same as those for the single conveyor.
∗
The reference width is 216 mm.
UnitCalibConveyorWideOrigin-05E00
NPM
Maintenance Edition
9.6 Placement Position / Conveyor
Page 9-20 EJM9BE-MB-09M-21
9.6 Placement Position / Conveyor
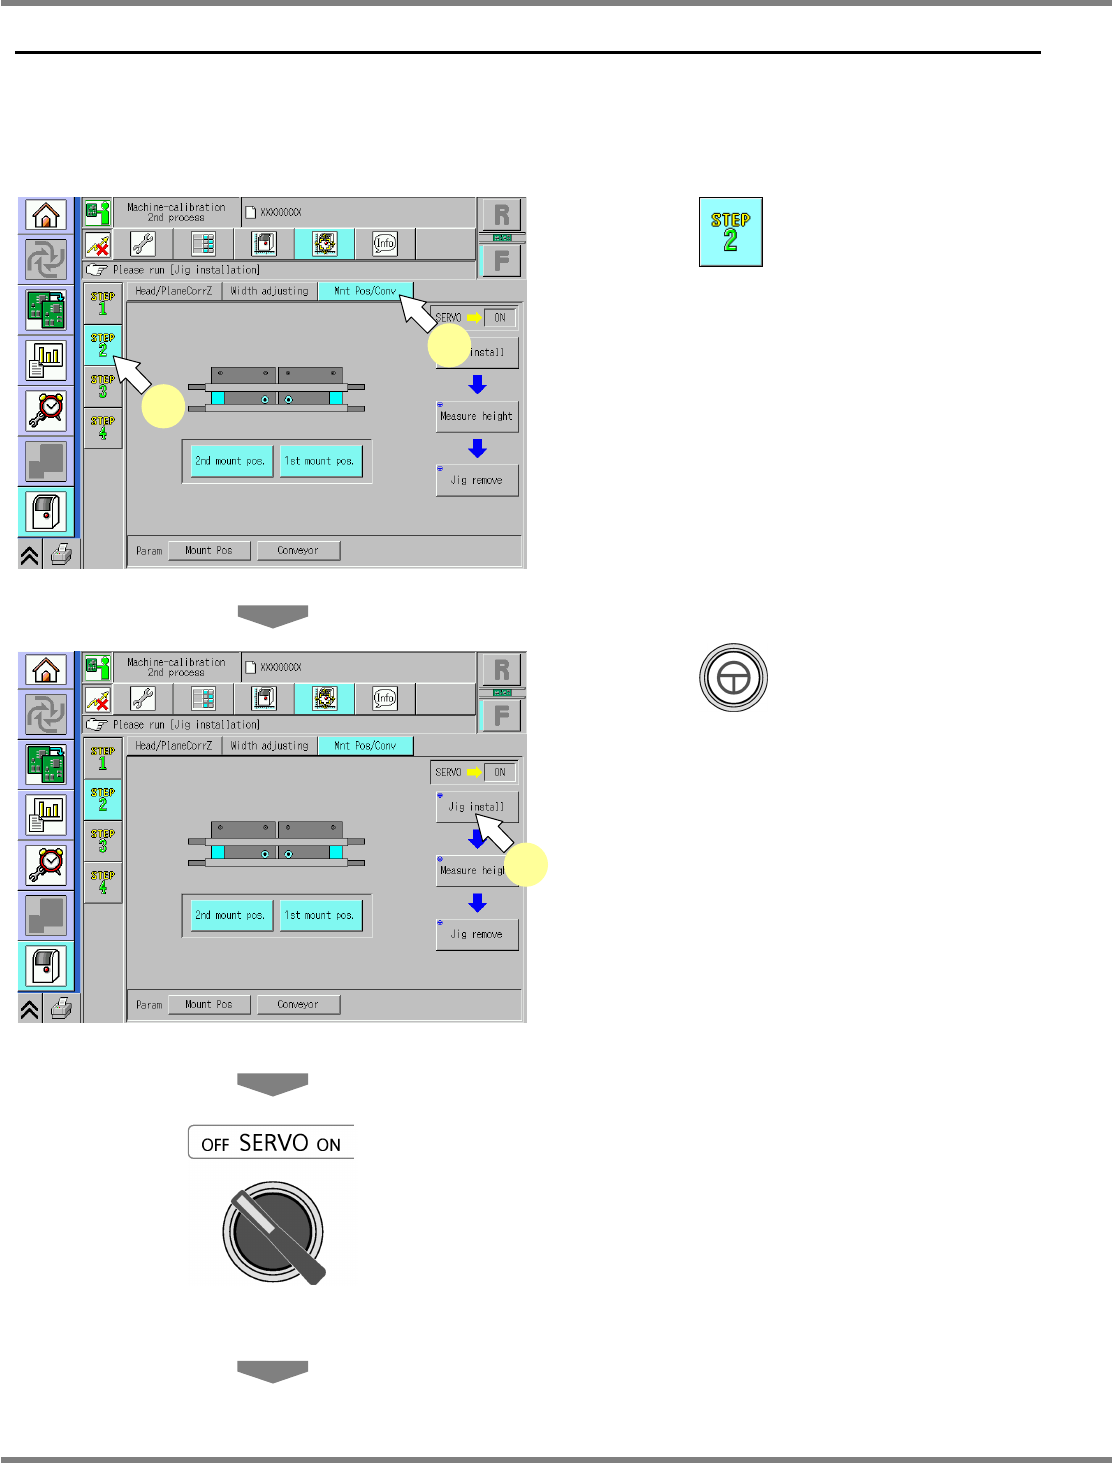
This procedure is common to 12-nozzle, 8-nozzle, and 2-nozzle heads.
Single conveyor type
1
Press .
2
Press [Mnt Pos/Conv].
3
Press + [Jig install].
•
The head moves to the retraction position, the
width-adjustment axis moves to the origin,
and the support blocks ascend.
4
Turn OFF the servo switch.
5
Open the safety cover.
UnitCalibConveyorPCBPos-01E02
1
2
UnitCalibConveyorPCBPos-01E02
3