NPM Calibration Manual-En.pdf - 第26页
NPM Maint en anc e E di ti on 9.6 Pl ac ement Positi on / Conveyor EJM9BE-M B-09M-21 Page 9-25 23 Check that it i s successfu ll y com pl ete. 24 Press + [Ji g rem ove]. 25 Press + [OK]. 26 Turn OFF the se rvo switch. 27…
NPM
Maintenance Edition
9.6 Placement Position / Conveyor
Page 9-24 EJM9BE-MB-09M-21
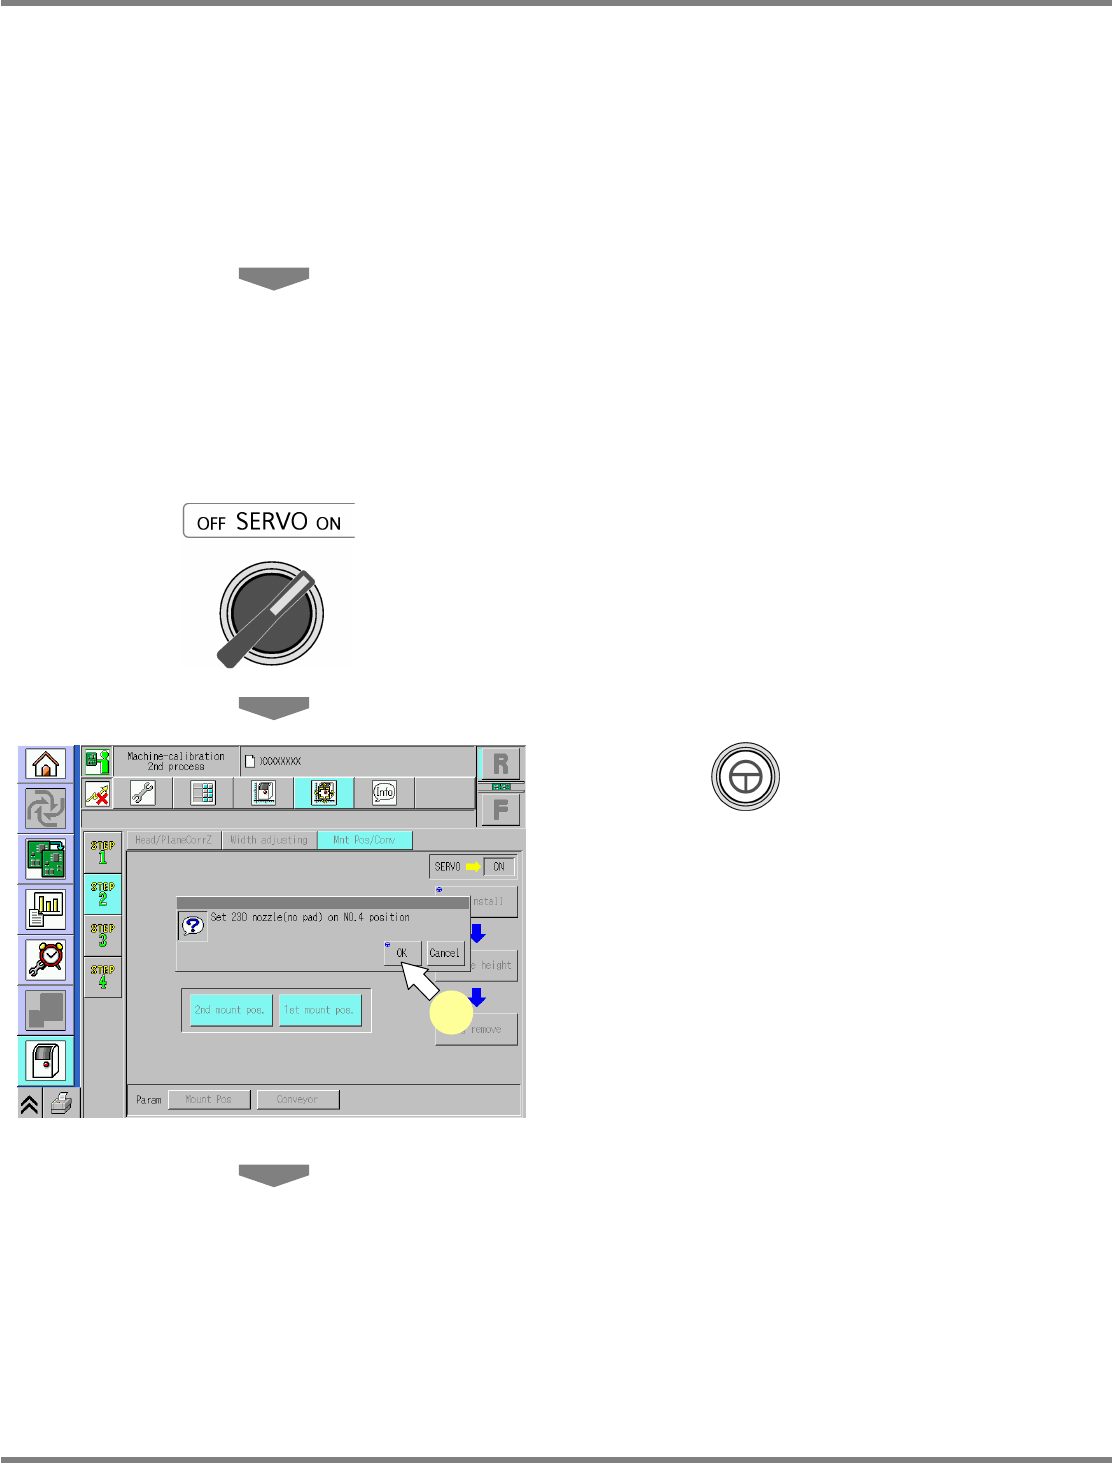
19
Attach the nozzle.
12-nozzle head
∗
Attach the 230CS nozzle to the nozzle
position 4.
8-nozzle head
∗
Attach the 230C nozzle to the nozzle position
3.
2-nozzle head
∗
Attach the No.1003 nozzle to the nozzle
position 2.
20
Close the safety cover.
21
Turn ON the servo switch.
22
Press + [OK].
•
The calibration is carried out.
UnitCalibConveyorPCBPos-05E01
22
NPM
Maintenance Edition
9.6 Placement Position / Conveyor
EJM9BE-MB-09M-21 Page 9-25
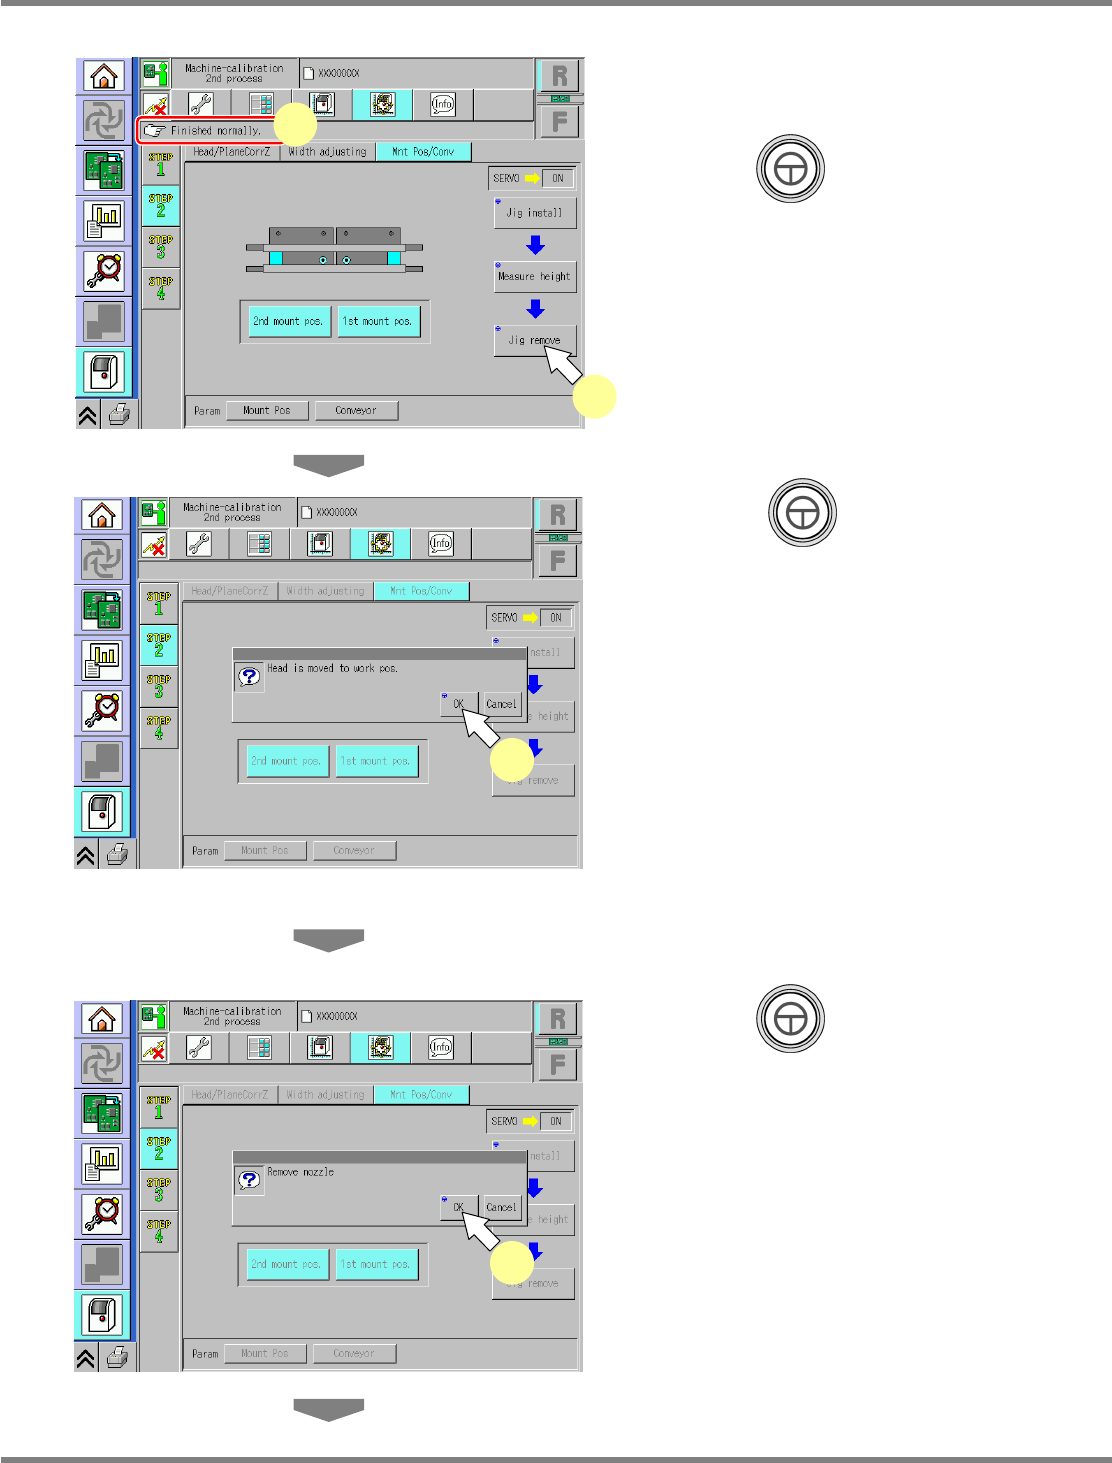
23
Check that it is successfully complete.
24
Press + [Jig remove].
25
Press + [OK].
26
Turn OFF the servo switch.
27
Open the safety cover.
28
Detach the nozzles.
29
Close the safety cover.
30
Turn ON the servo switch.
31
Press + [OK].
UnitCalibConveyorPCBPos-07E01
25
UnitCalibConveyorPCBPos-08E01
31
UnitCalibConveyorPCBPos-06E01
24
23
NPM
Maintenance Edition
9.6 Placement Position / Conveyor
Page 9-26 EJM9BE-MB-09M-21
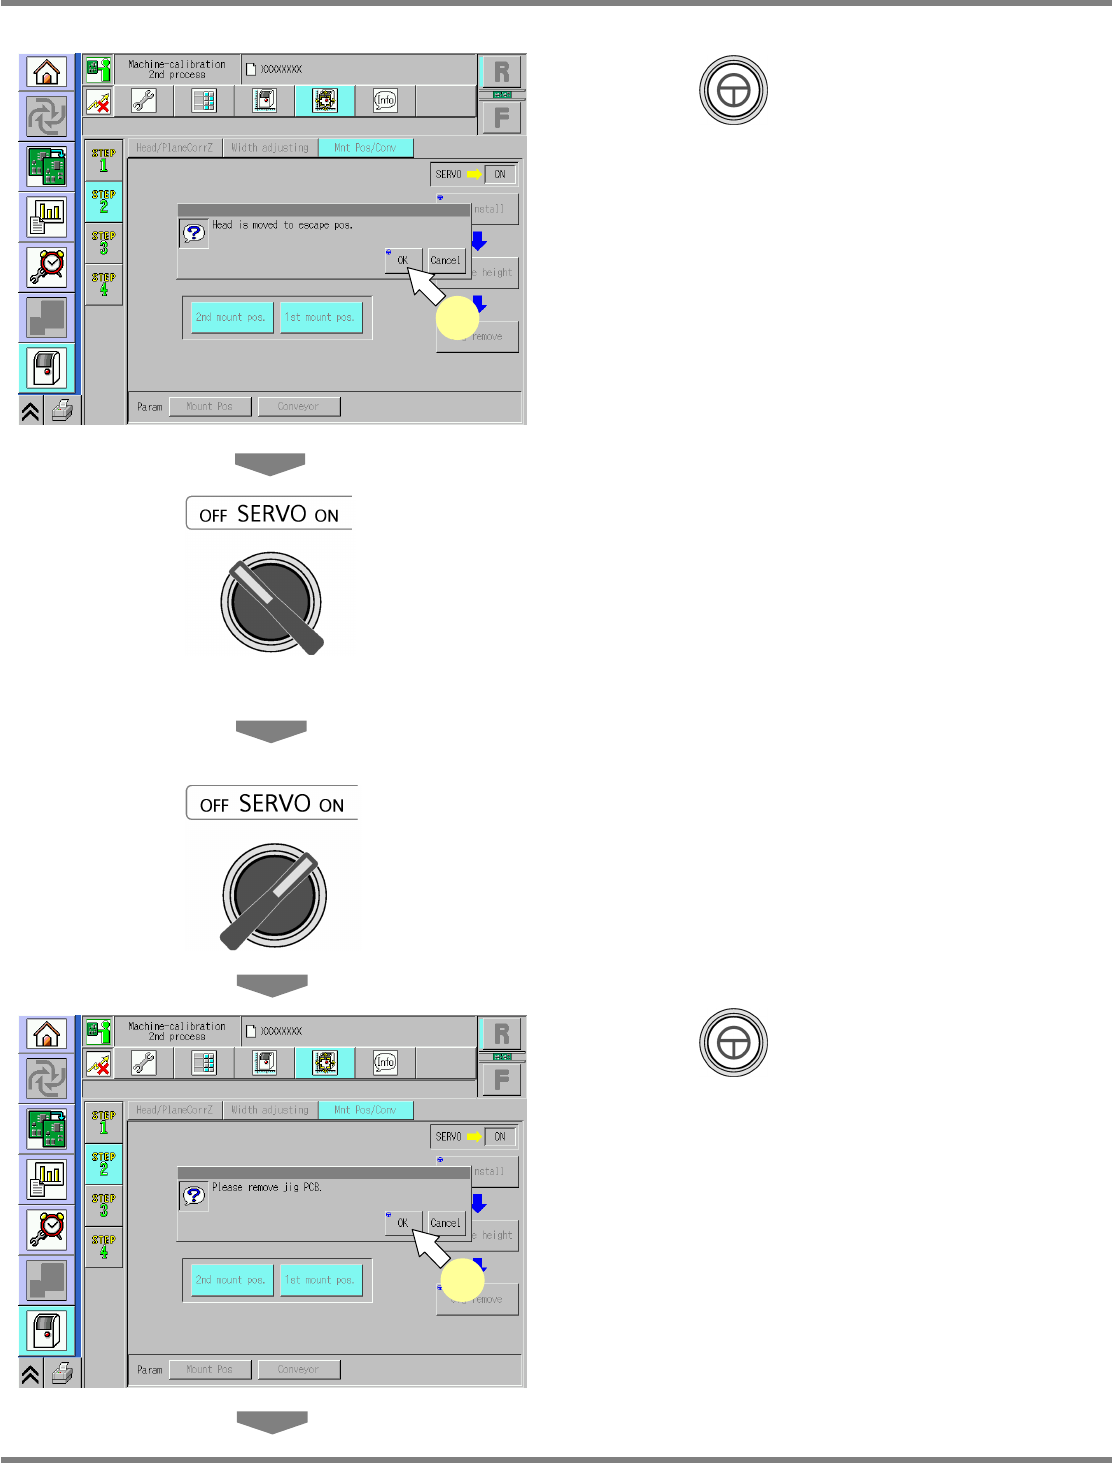
32
Press + [OK].
•
The head moves to the retraction position.
33
Turn OFF the servo switch.
34
Open the safety cover.
35
Remove the placement-height
teaching jig.
36
Close the safety cover.
37
Turn ON the servo switch.
38
Press + [OK].
•
The width-adjustment axis moves to the
origin, and the support blocks ascend.
UnitCalibConveyorPCBPos-10E01
38
UnitCalibConveyorPCBPos-09E01
32