NPM Calibration Manual-En.pdf - 第28页
NPM Maint en anc e E di ti on 9.6 Pl ac ement Positi on / Conveyor EJM9BE-M B-09M-21 Page 9-27 39 Turn OFF the se rvo switch. 40 Open the s afety cover. 41 Remove the suppo rt jig pins. 42 Close the safety cover . 43 Tur…
NPM
Maintenance Edition
9.6 Placement Position / Conveyor
Page 9-26 EJM9BE-MB-09M-21
32
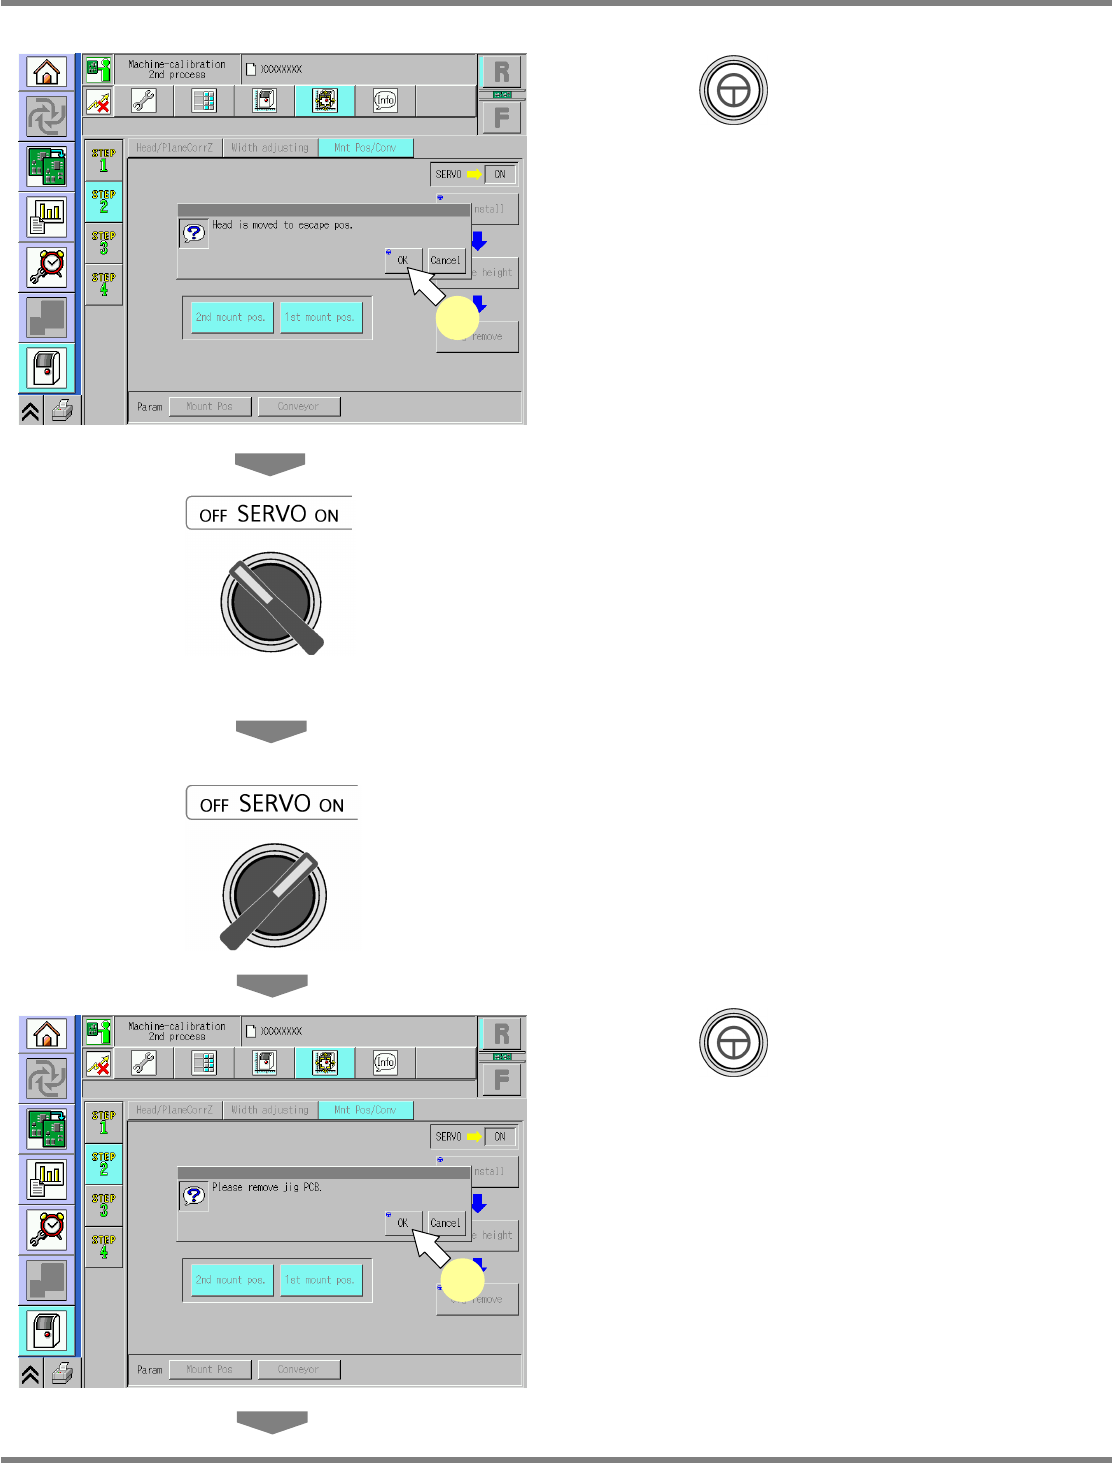
Press + [OK].
•
The head moves to the retraction position.
33
Turn OFF the servo switch.
34
Open the safety cover.
35
Remove the placement-height
teaching jig.
36
Close the safety cover.
37
Turn ON the servo switch.
38
Press + [OK].
•
The width-adjustment axis moves to the
origin, and the support blocks ascend.
UnitCalibConveyorPCBPos-10E01
38
UnitCalibConveyorPCBPos-09E01
32
NPM
Maintenance Edition
9.6 Placement Position / Conveyor
EJM9BE-MB-09M-21 Page 9-27
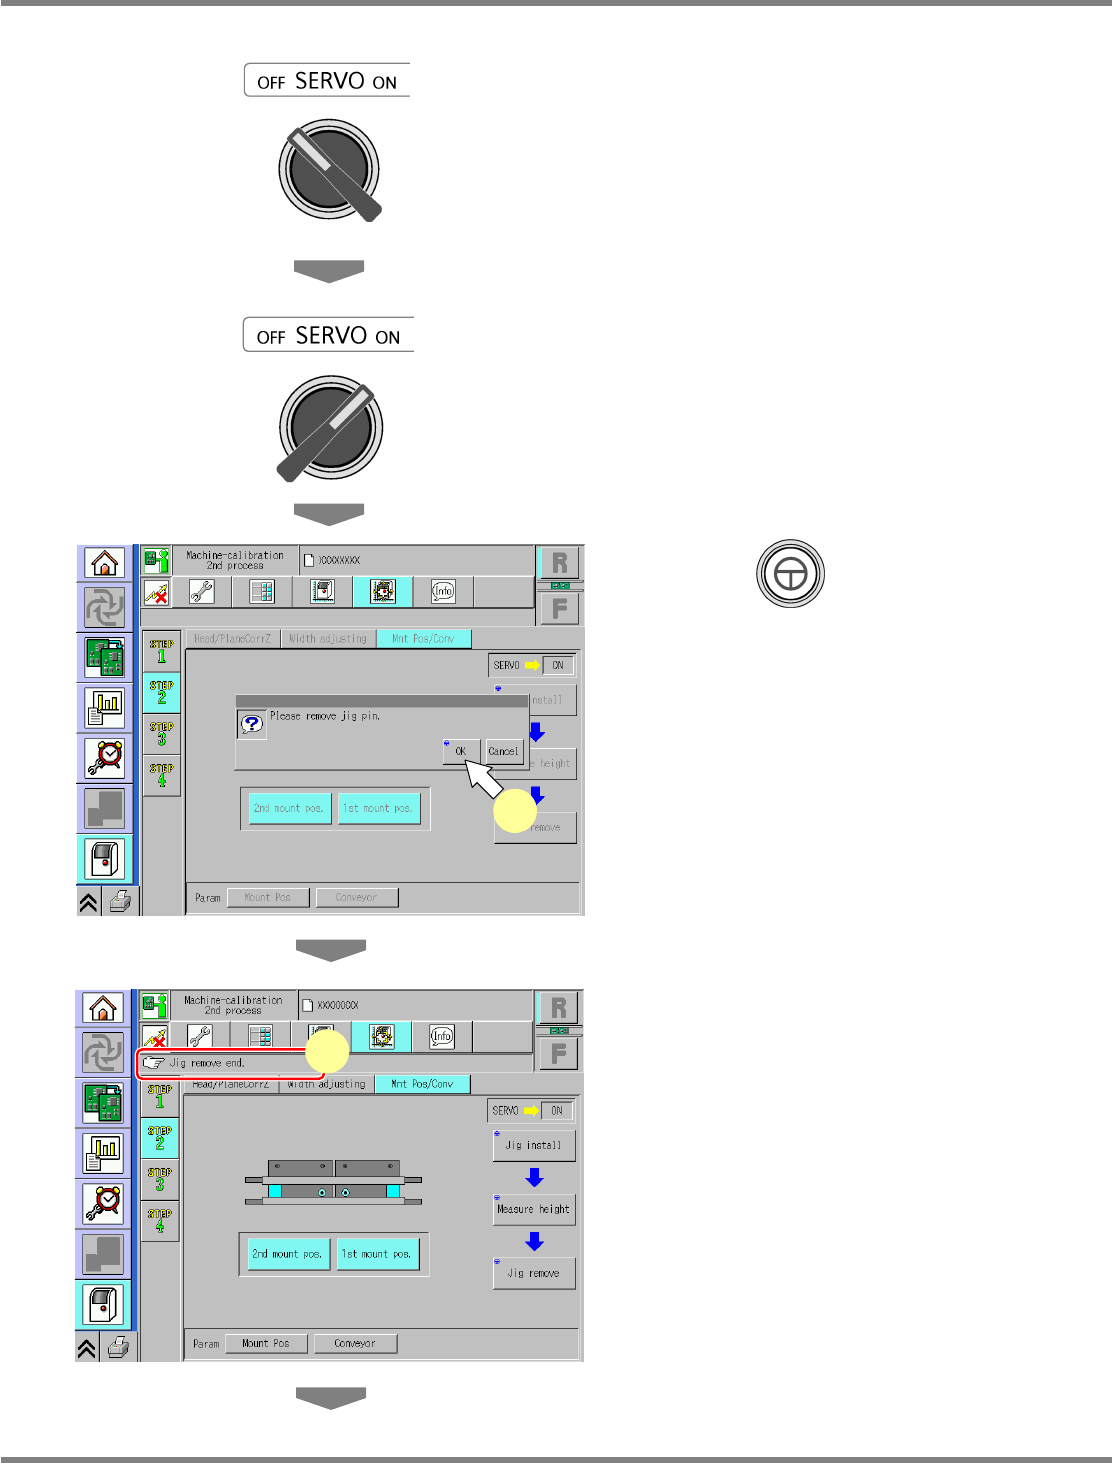
39
Turn OFF the servo switch.
40
Open the safety cover.
41
Remove the support jig pins.
42
Close the safety cover.
43
Turn ON the servo switch.
44
Press + [OK].
•
The support blocks descend.
45
Check that the process has been
finished successfully.
UnitCalibConveyorPCBPos-11E01
44
UnitCalibConveyorPCBPos-12E01
45
NPM
Maintenance Edition
9.6 Placement Position / Conveyor
Page 9-28 EJM9BE-MB-09M-21
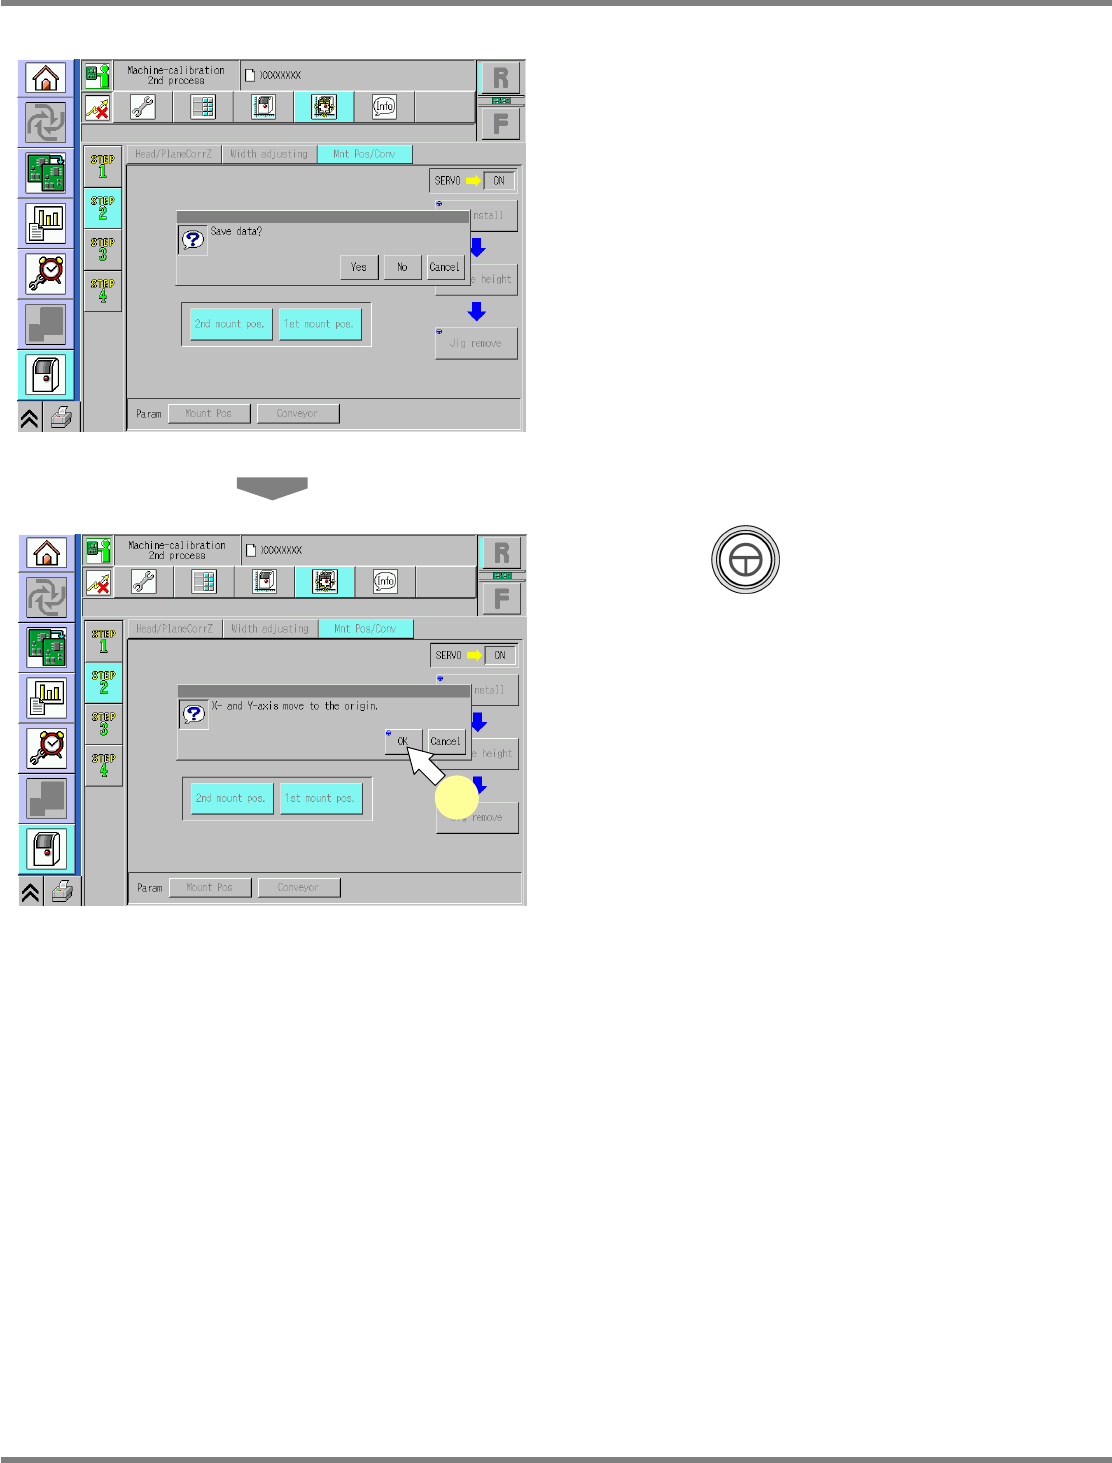
46
Save the data.
•
If you press [No], the return-to-origin process
is carried out and the data obtained by the
calibration are lost.
47
Press + [OK].
•
The head moves to the origin position.
•
After the above operation, the next screen is
displayed.
UnitCalibConveyorPCBPos-13E01
UnitCalibConveyorPCBPos-14E01
47