NPM Calibration Manual-En.pdf - 第33页
NPM Maint en anc e E di ti on 9.7 Pl ac ement Load Page 9-32 EJM9BE-M B-09M-21 6 Press + [OK]. • T he head mov es to the r etracti on positi on. 7 Turn OFF the se rvo switch. 8 Open the s afety cover. 9 Set the load m ea…
NPM
Maintenance Edition
9.7 Placement Load
EJM9BE-MB-09M-21 Page 9-31
9.7 Placement Load
This procedure is exclusive to the 2-nozzle head.
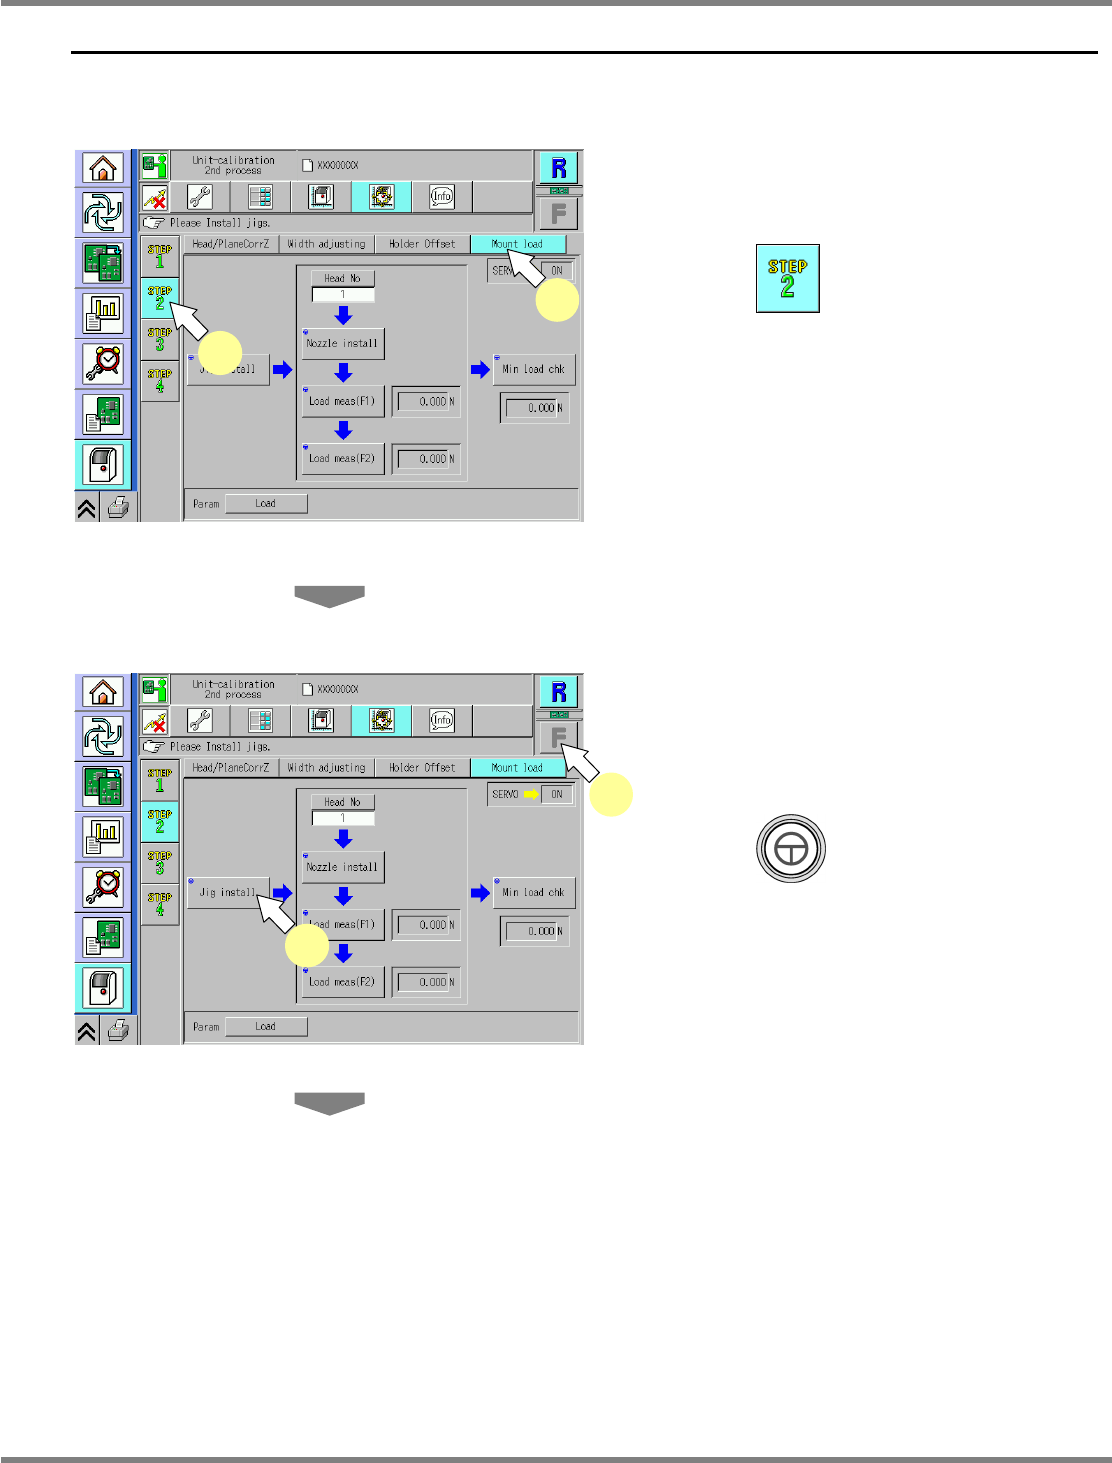
1
Adjust the conveyor width to 120 mm.
2
Press .
3
Press [Mount load].
4
Select a table.
∗
Select the target table for calibration.
5
Press + [Jig install].
UnitCalibHeadLoad-01E02
2
3
UnitCalibHeadLoad-01E02
5
4
NPM
Maintenance Edition
9.7 Placement Load
Page 9-32 EJM9BE-MB-09M-21
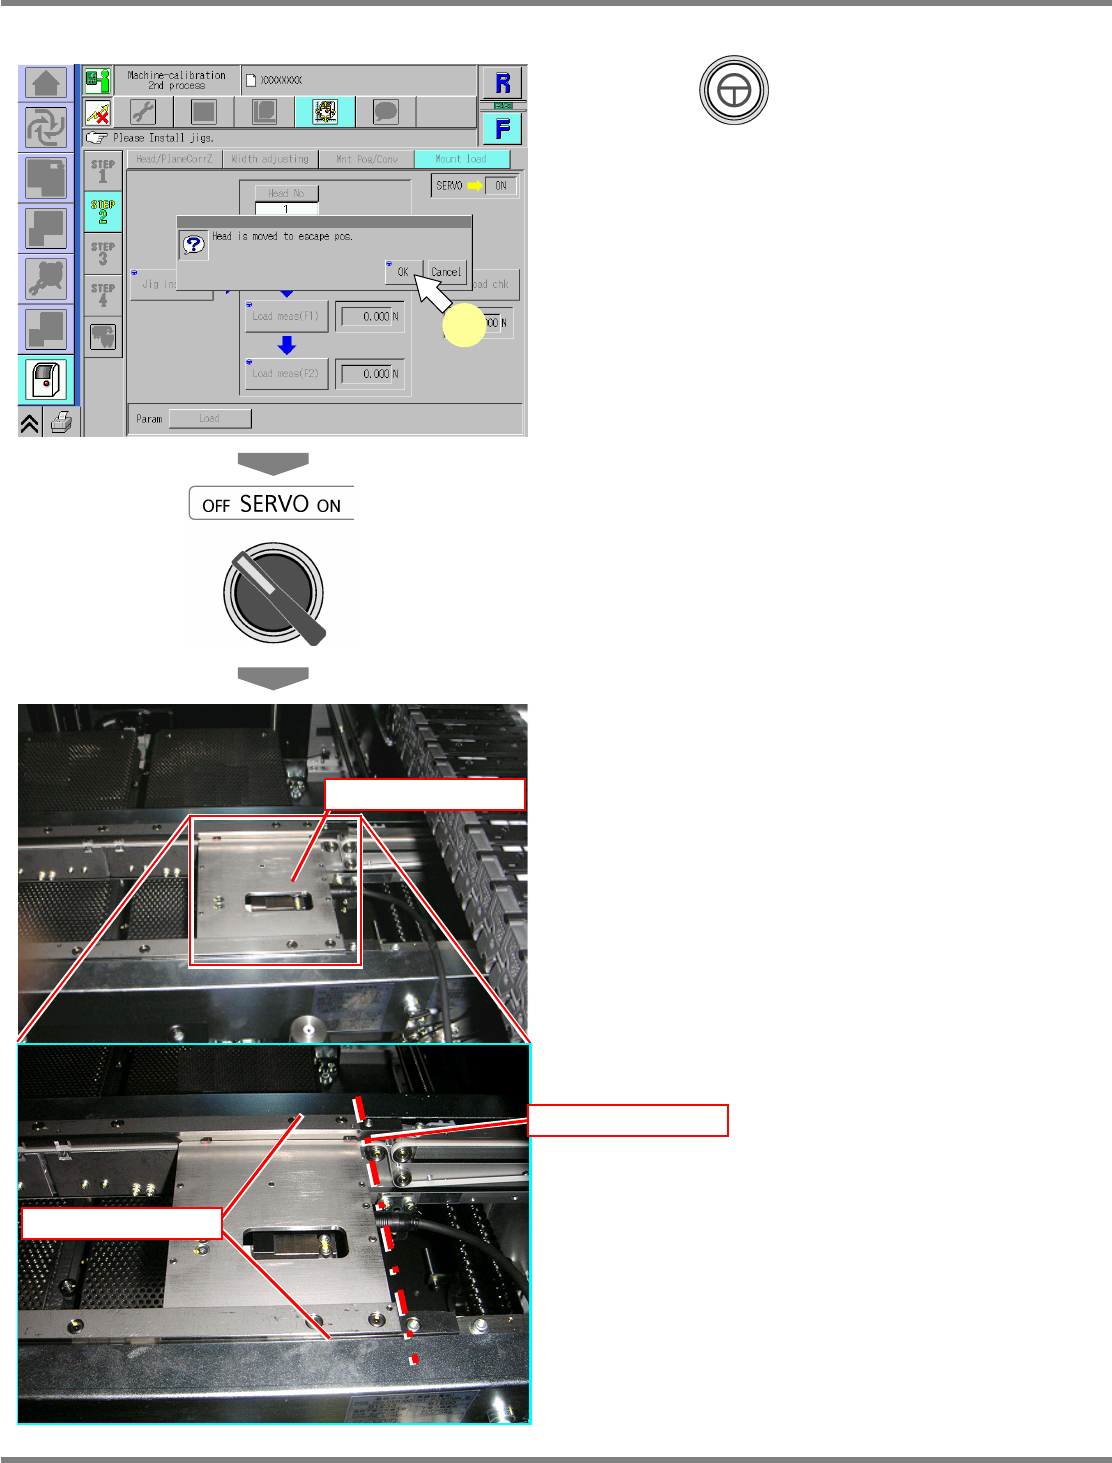
6
Press + [OK].
•
The head moves to the retraction position.
7
Turn OFF the servo switch.
8
Open the safety cover.
9
Set the load measuring jig.
∗
The load measuring jig should be pressed
against the rail’s reference side and set with
its right end fit to the right end on the PCB
clamp of the conveyor.
Load measuring jig
Load measuring jig
Fit
UnitCalibHeadLoad-02E01
6
NPM
Maintenance Edition
9.7 Placement Load
EJM9BE-MB-09M-21 Page 9-33
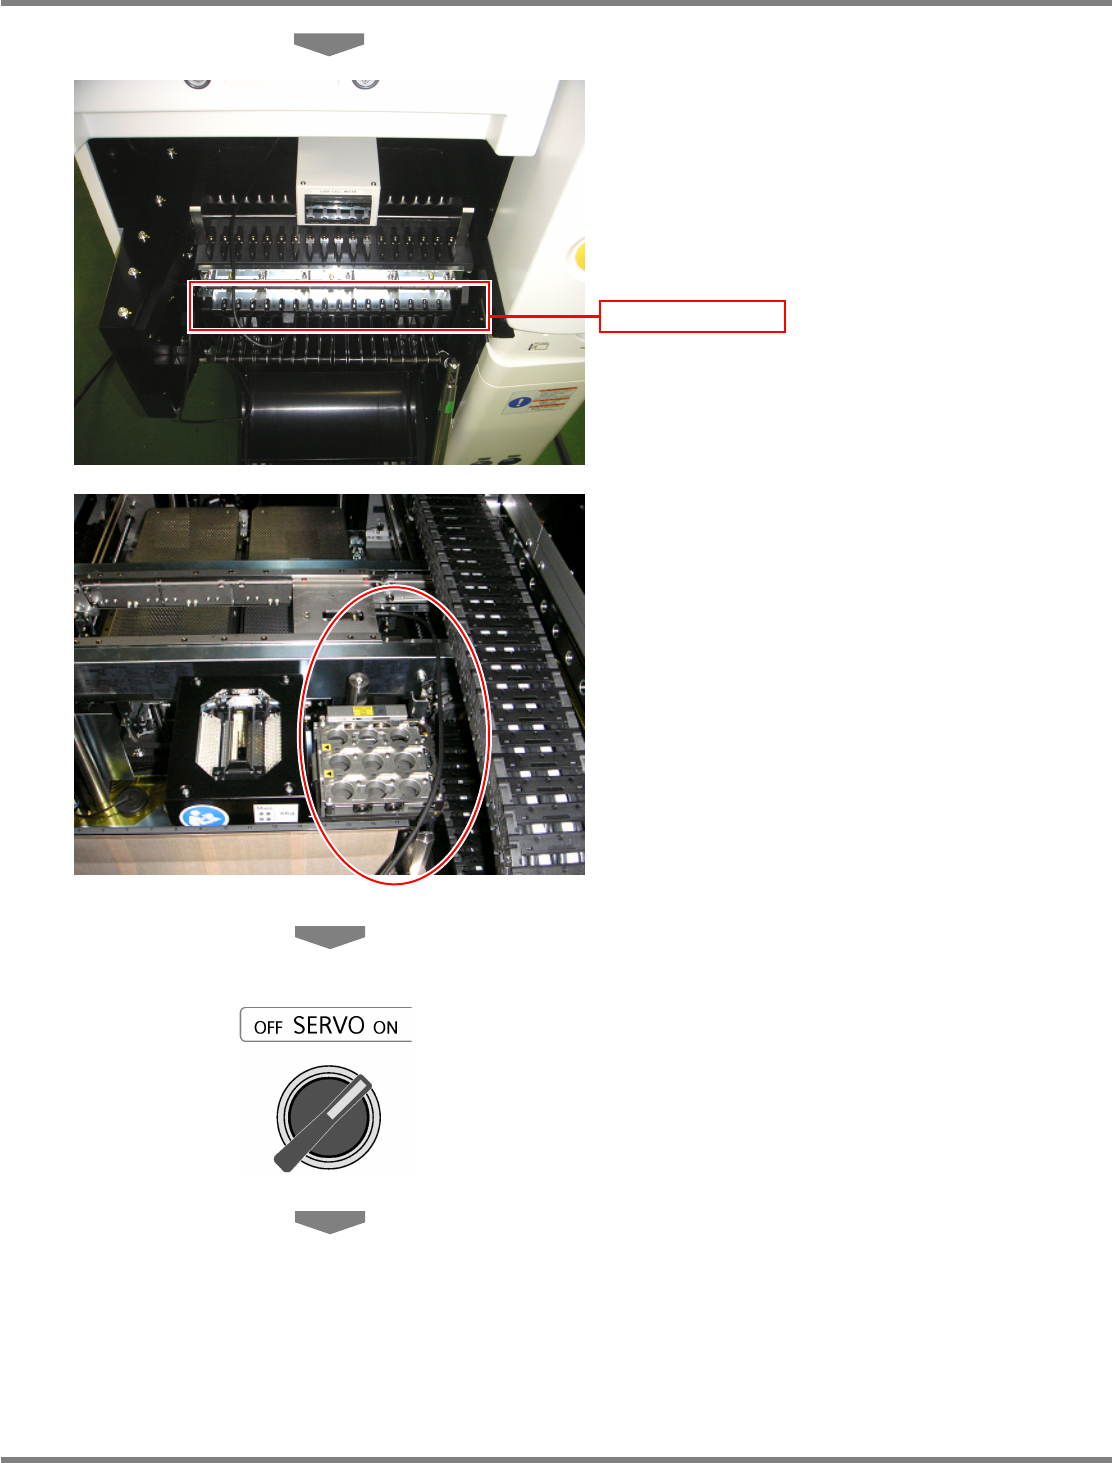
∗
Connect the power cord to one of the
connector on the power supply unit of the
changing truck.
∗
Route the wire between the nozzle changer
and the cable bearer so that it will not interfere
with the head, as shown in the photo.
10
Close the safety cover.
11
Turn ON the servo switch.
Power supply unit