NPM Calibration Manual-En.pdf - 第38页
NPM Maint en anc e E di ti on 9.7 Pl ac ement Load EJM9BE-M B-09M-21 Page 9-37 27 Check that it i s successfu ll y com pl ete. 28 Press the num eri c value. • T he numer i c keypad window opens. 29 Enter the m easured va…
NPM
Maintenance Edition
9.7 Placement Load
Page 9-36 EJM9BE-MB-09M-21
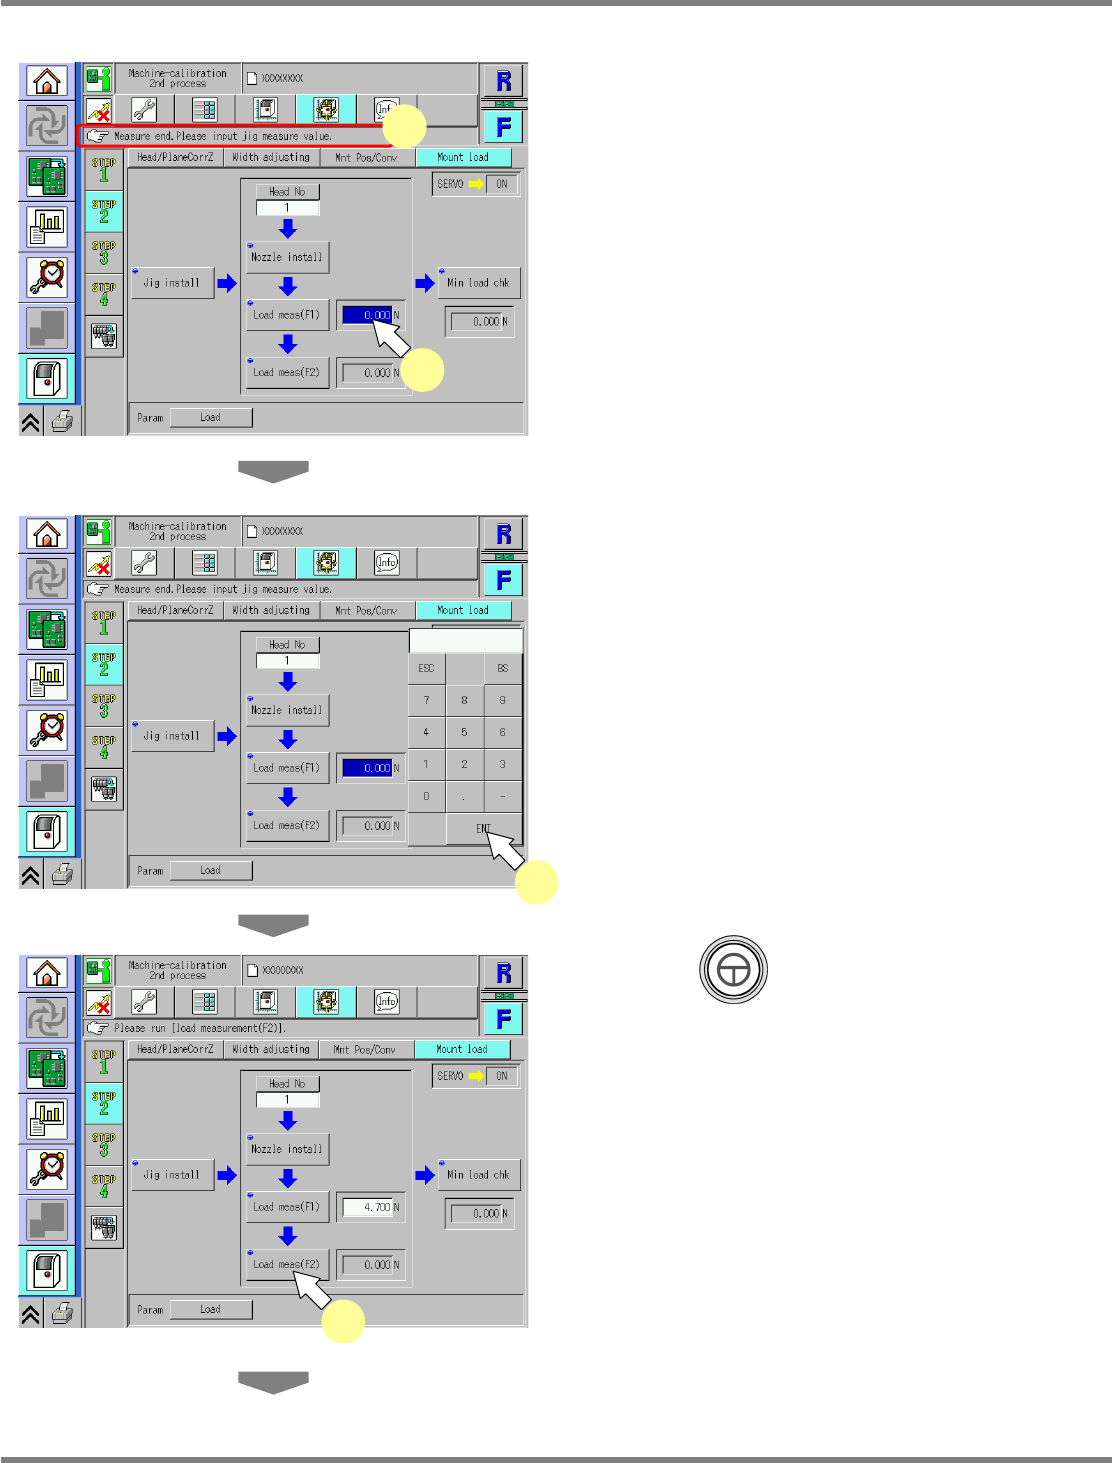
23
Check that it is successfully complete.
24
Press the numeric value.
•
The numeric keypad window opens.
25
Enter the measured value.
∗
Enter the numeric value indicated on the load
measuring jig.
Input range: 3.2 N to 6.2 N
26
Press + [Load meas(F2)].
•
The calibration is carried out.
UnitCalibHeadLoad-08E01
23
24
UnitCalibHeadLoad-09E01
25
UnitCalibHeadLoad-10E01
26
NPM
Maintenance Edition
9.7 Placement Load
EJM9BE-MB-09M-21 Page 9-37
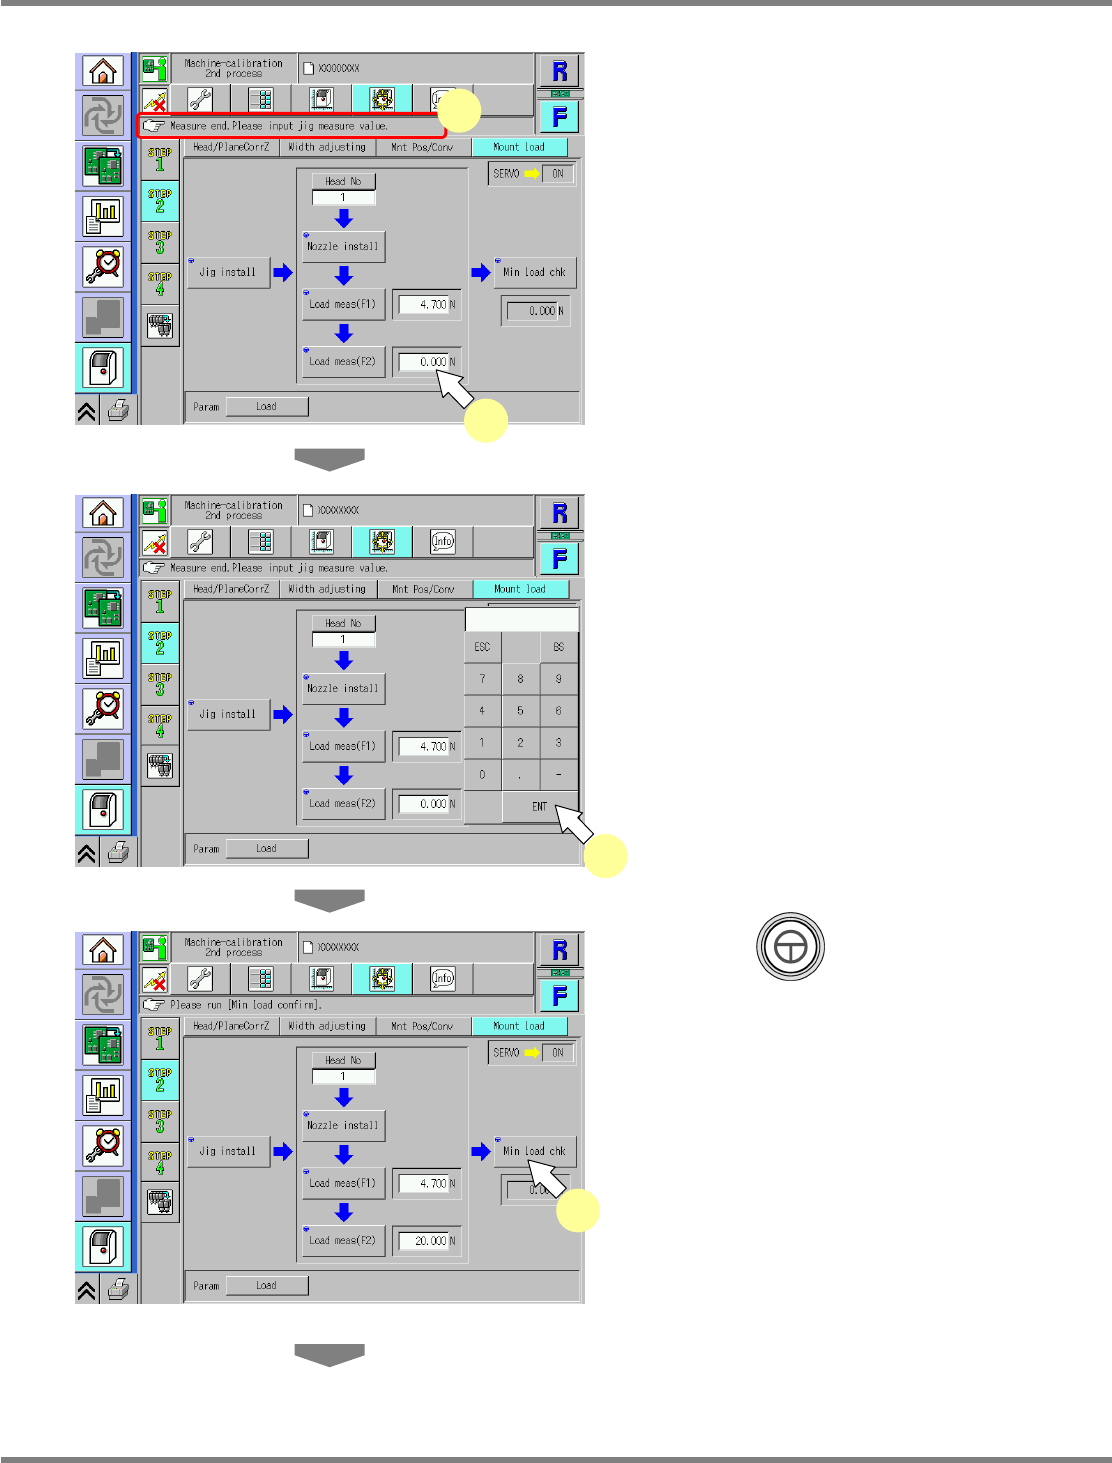
27
Check that it is successfully complete.
28
Press the numeric value.
•
The numeric keypad window opens.
29
Enter the measured value.
∗
Enter the numeric value indicated on the load
measuring jig.
Input range: 15 N to 25 N
30
Press + [Min load chk].
•
The calibration is carried out.
UnitCalibHeadLoad-11E01
27
28
UnitCalibHeadLoad-12E01
29
UnitCalibHeadLoad-13E01
30
NPM
Maintenance Edition
9.7 Placement Load
Page 9-38 EJM9BE-MB-09M-21
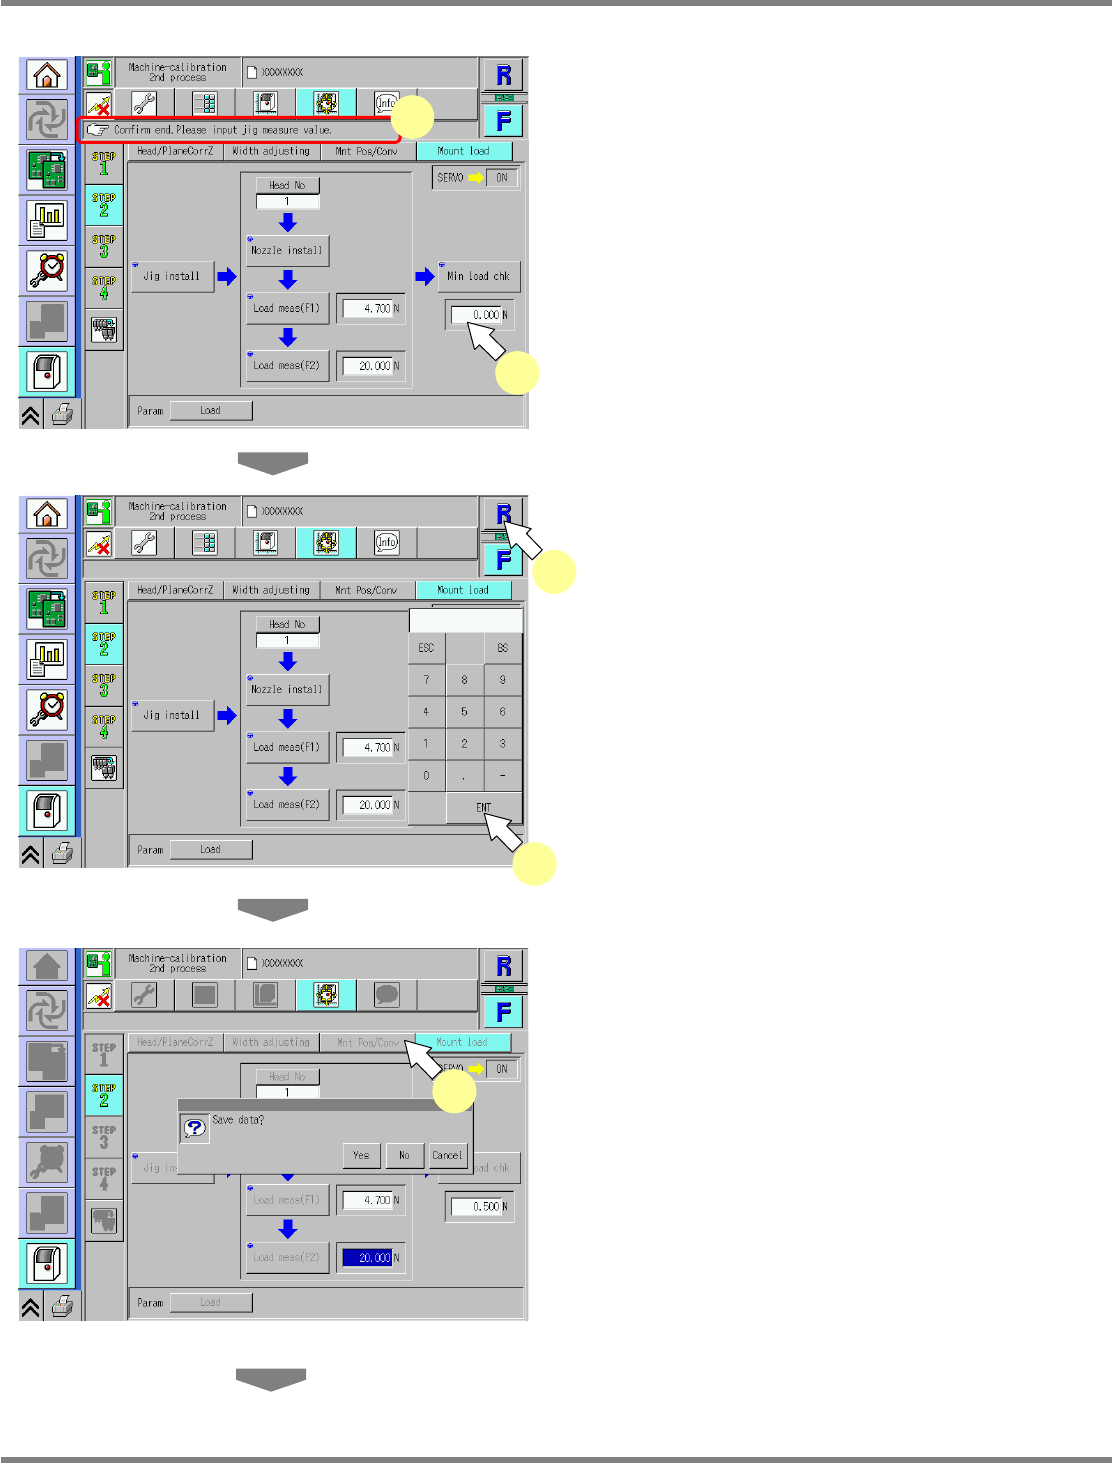
31
Check that it is successfully complete.
32
Press the numeric value.
•
The numeric keypad window opens.
33
Enter the measured value.
∗
Enter the numeric value indicated on the load
measuring jig.
∗
Perform steps 13–33 for also the other nozzle
positions.
34
Select the other table.
∗
Perform steps 5–33 for also the other table.
35
Press [Mnt Pos/Conv].
•
When exiting this screen to the other one, you
are always prompted to save the data.
∗
To save the data obtained by the calibration,
press [Yes].
•
If you press [No], the return-to-origin process
is carried out and the data obtained by the
calibration are lost.
•
After the above operation, the next screen is
displayed.
UnitCalibHeadLoad-16E01
UnitCalibHeadLoad-14E01
31
32
35
UnitCalibHeadLoad-15E01
33
34