NPM Calibration Manual-En.pdf - 第61页
NPM Maint en anc e E di ti on 9.9 Ji g Stati on Page 9-60 EJM9BE-M B-09M-21 10 Set the j ig station. ∗ Set t he jig com ponents and the light lumi nosit y ji g ont o the j i g stat i on bef orehand. Ji g stati on ∗ Set t…
NPM
Maintenance Edition
9.9 Jig Station
EJM9BE-MB-09M-21 Page 9-59
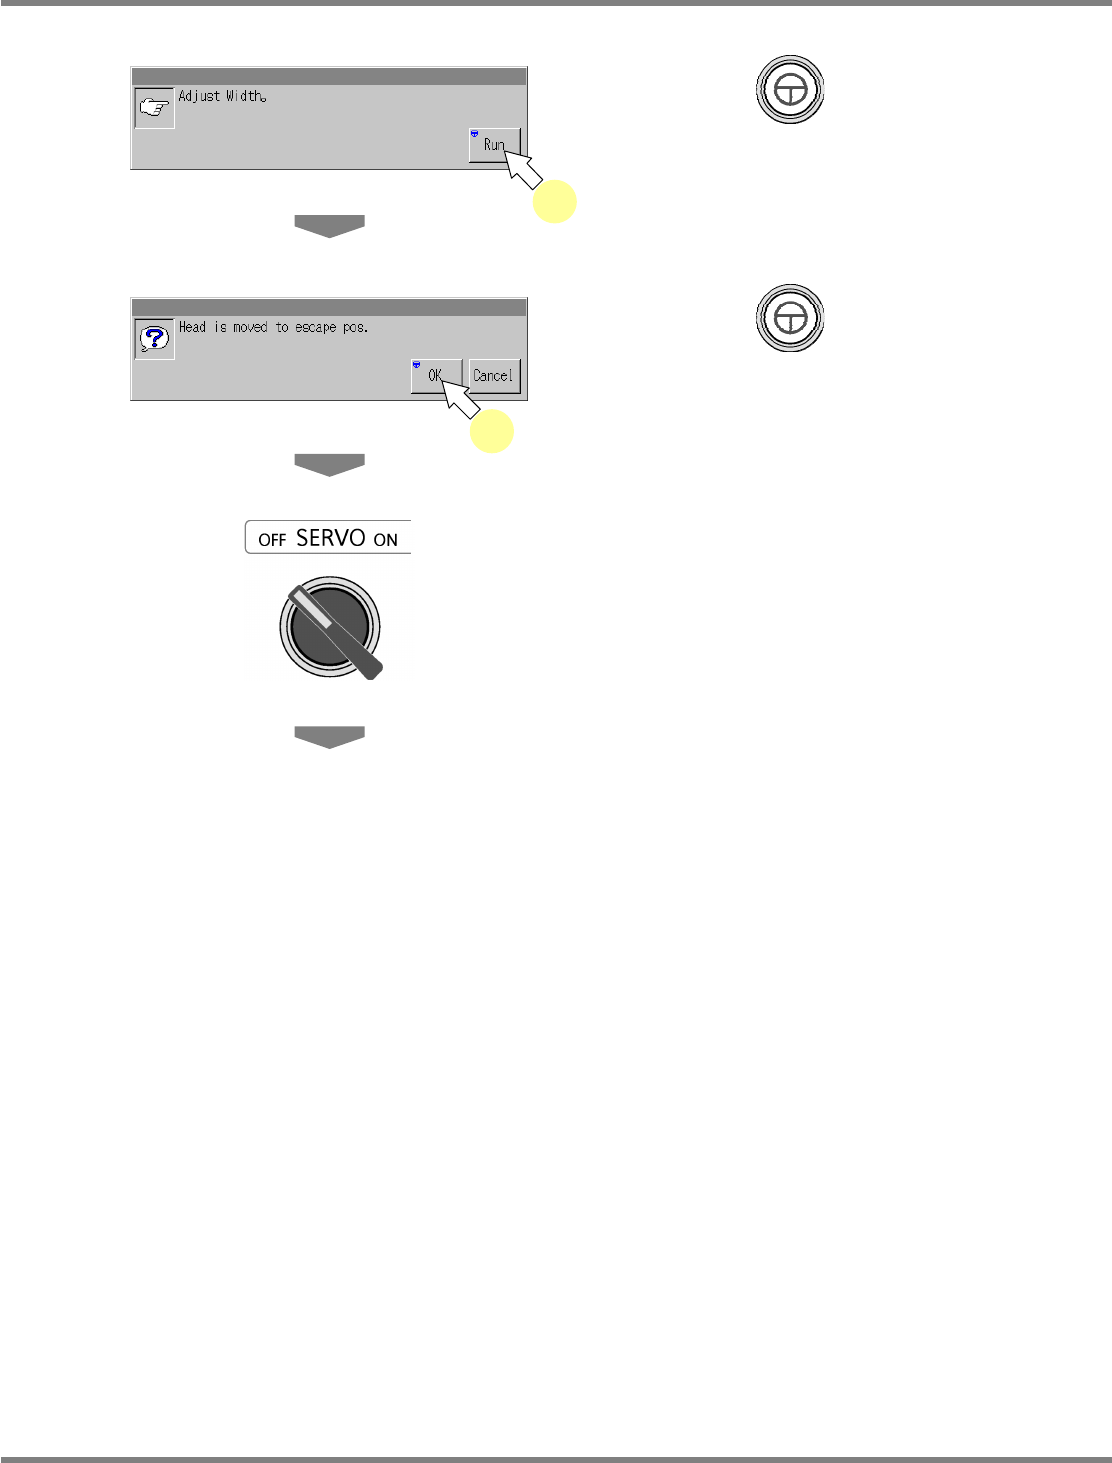
6
Press + [Run].
•
The conveyor width is adjusted to 215 mm.
7
Press + [OK].
•
The head moves to the retraction position.
8
Turn OFF the servo switch.
9
Open the safety cover.
6
7
NPM
Maintenance Edition
9.9 Jig Station
Page 9-60 EJM9BE-MB-09M-21
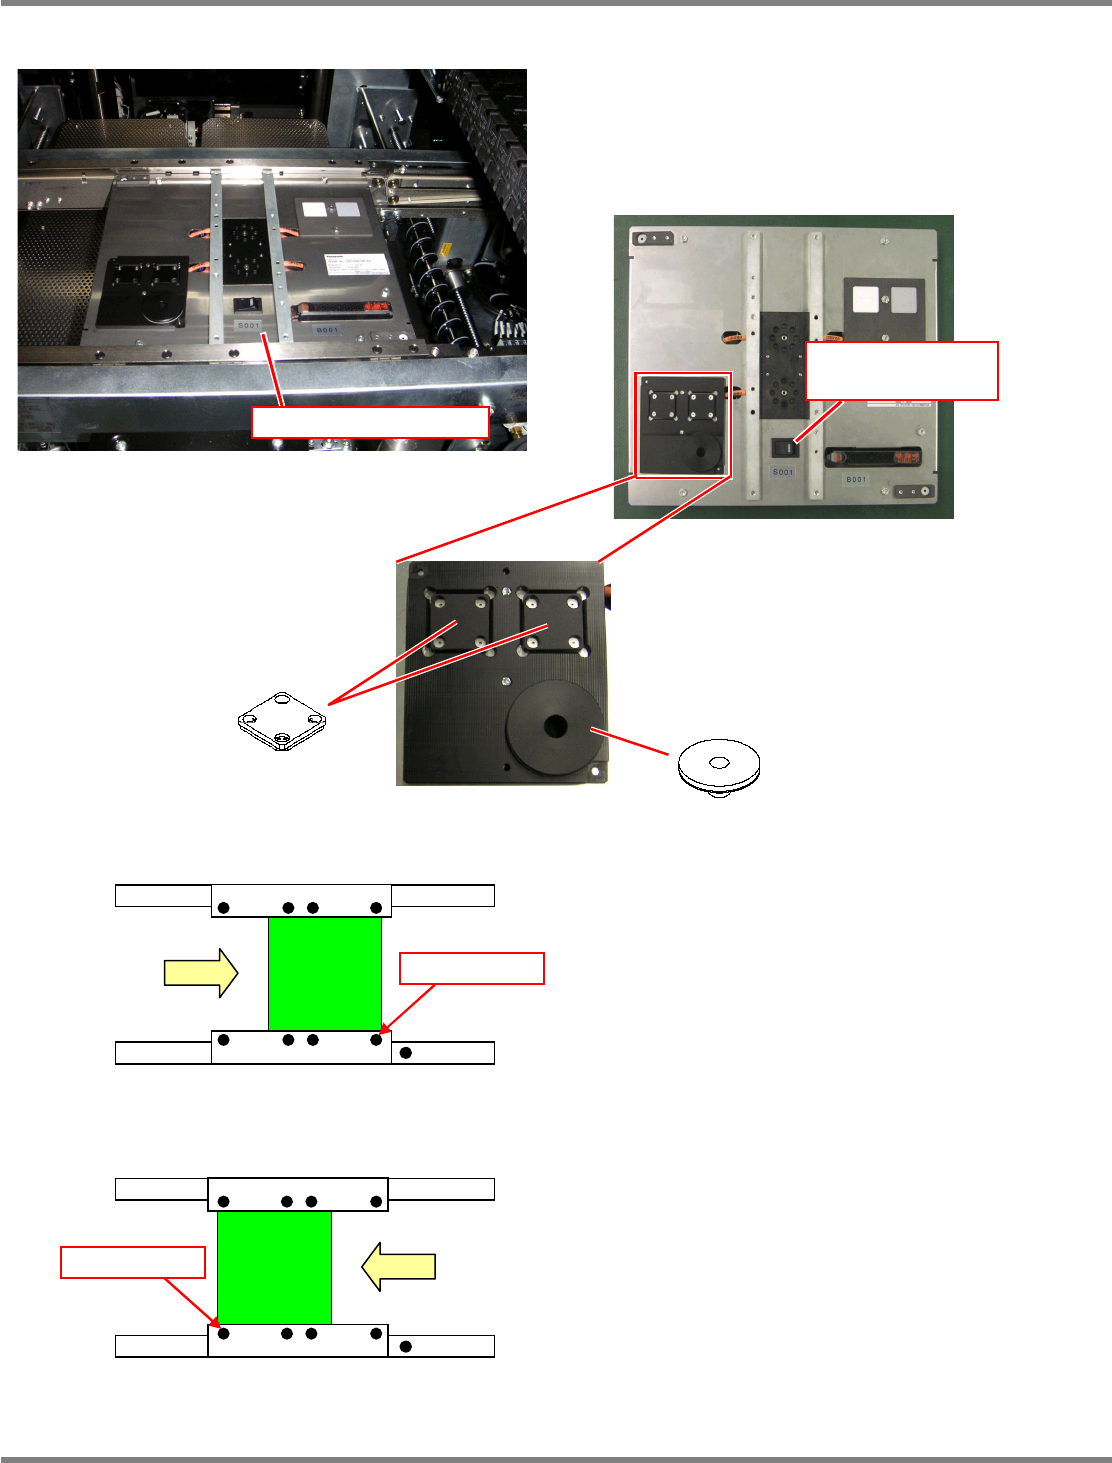
10
Set the jig station.
∗
Set the jig components and the light
luminosity jig onto the jig station beforehand.
Jig station
∗
Set the jig station with its end fit to the
reference mark on the upper surface of the
front rail.
11
Turn ON the power supply switch of
the jig station.
∗
Check that the LED lamp on the power supply
switch is lit.
Jig station
Reference mark
In left right flow
Reference mark
In right left flow
Jig component
Light luminosity jig
Power supply switch
(LED lamp)
∗
As shown in the left photo, place the jig
component and light luminosity jig to the
jig station.
These jigs have no particular orientation.
NPM
Maintenance Edition
9.9 Jig Station
EJM9BE-MB-09M-21 Page 9-61
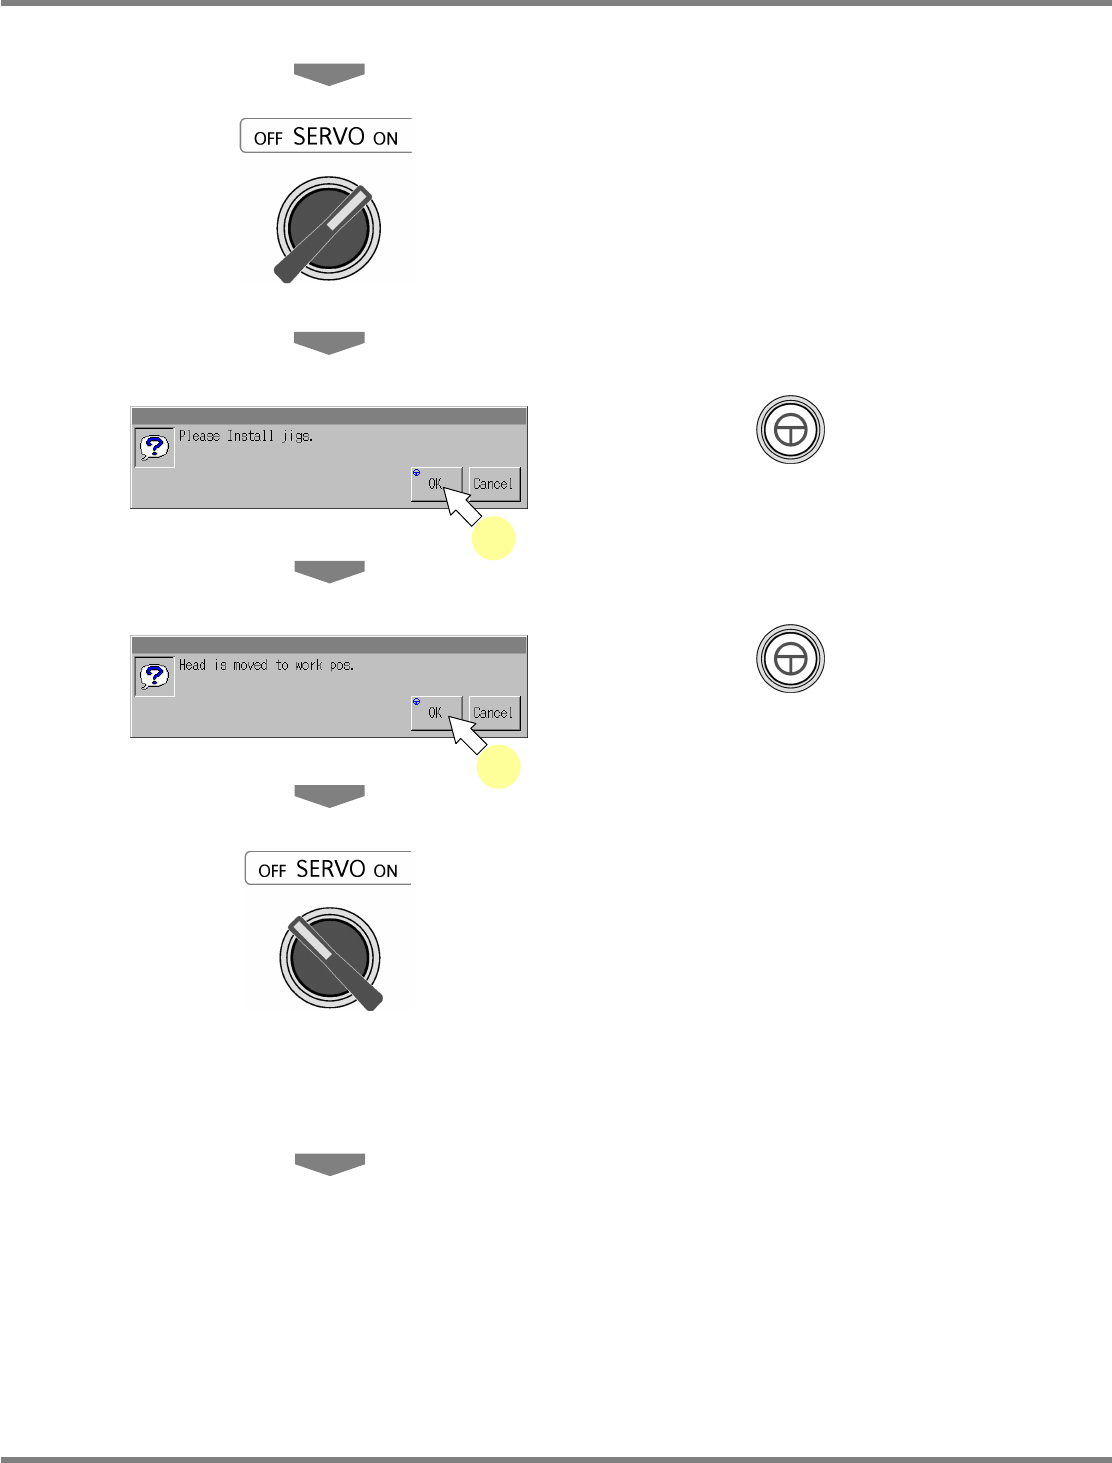
12
Close the safety cover.
13
Turn ON the servo switch.
14
Press + [OK].
15
Press + [OK].
•
The head moves to the working position.
16
Turn OFF the servo switch.
17
Open the safety cover.
18
Attach the nozzle.
12-nozzle head
∗
Attach the 153S nozzle to the nozzle positions
4 and 7.
8-nozzle head
∗
Attach the No.184 nozzle to the nozzle
positions 3 and 6.
2-nozzle head
∗
Attach the No.1003 nozzles to all the nozzle
positions.
14
15