NPM Calibration Manual-En.pdf - 第66页
NPM Maint en anc e E di ti on 9.10 3D Camer a EJM9BE-M B-09M-21 Page 9-65 9.10 3D Camer a Thi s procedur e i s co mm on to 8-noz zle and 2-noz zle heads. ∗ It uses the jig stati on, as w it h t he line camer a. ∗ Rem ove…
NPM
Maintenance Edition
9.9 Jig Station
Page 9-64 EJM9BE-MB-09M-21
34
Detach the nozzles from the nozzle
changer.
35
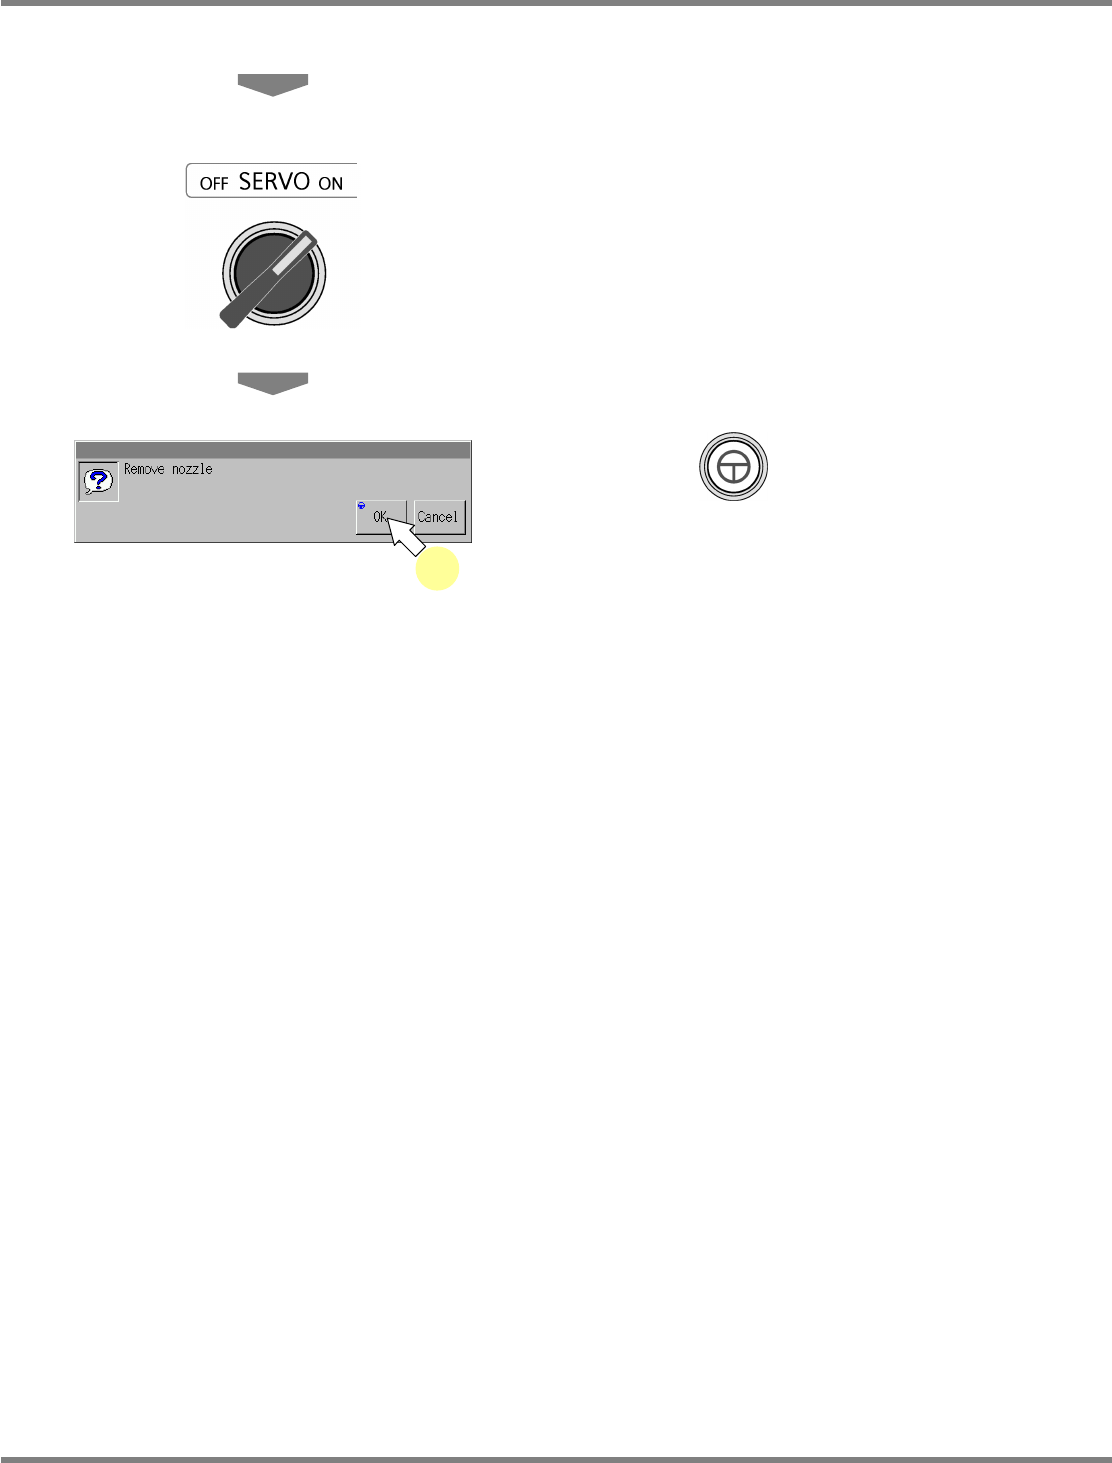
Close the safety cover.
36
Turn ON the servo switch.
37
Press + [OK].
•
The screen selected in step 23 is displayed.
37
NPM
Maintenance Edition
9.10 3D Camera
EJM9BE-MB-09M-21 Page 9-65
9.10 3D Camera
This procedure is common to 8-nozzle and 2-nozzle heads.
∗
It uses the jig station, as with the line camera.
∗
Remove all support-pins before performing calibration.
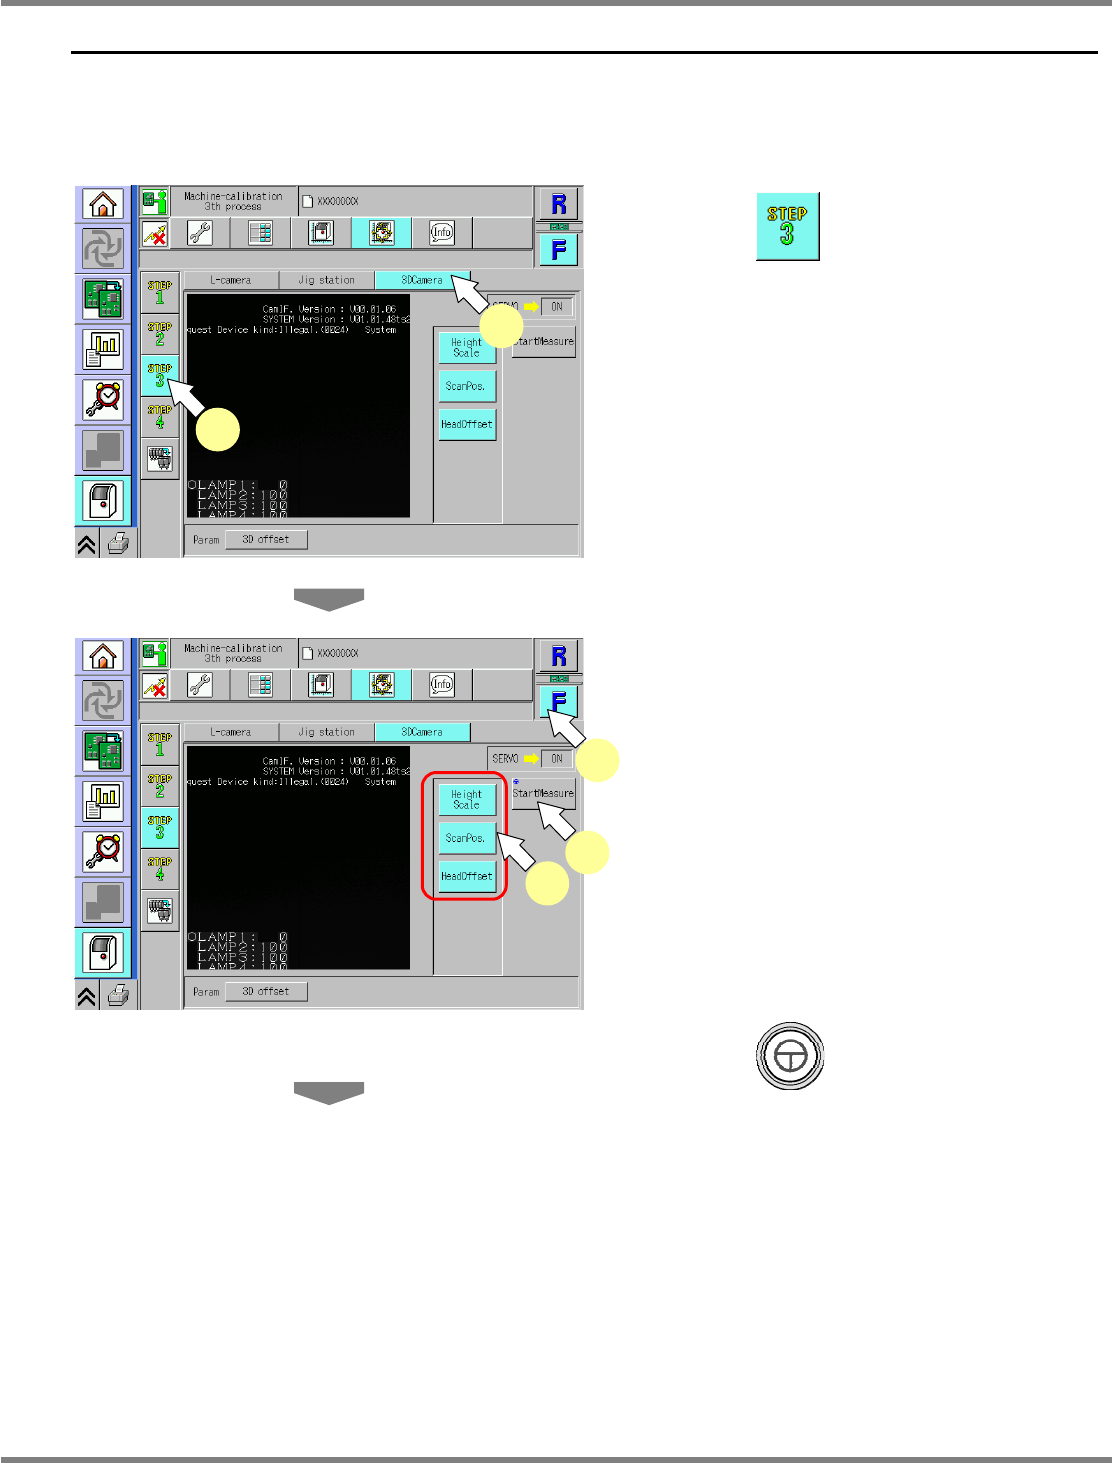
1
Press .
2
Press [3DCamera].
∗
Check that no PCBs remain in the machine.
3
Select a table.
∗
Select the target table for calibration.
4
Select all the measurement items.
•
The selected items are displayed in light blue.
(The deselected items are grayed out.)
5
Press + [StartMeasure].
UnitCalibCamera3D-01E01
4
3
5
UnitCalibCamera3D-01E01
1
2
NPM
Maintenance Edition
9.10 3D Camera
Page 9-66 EJM9BE-MB-09M-21
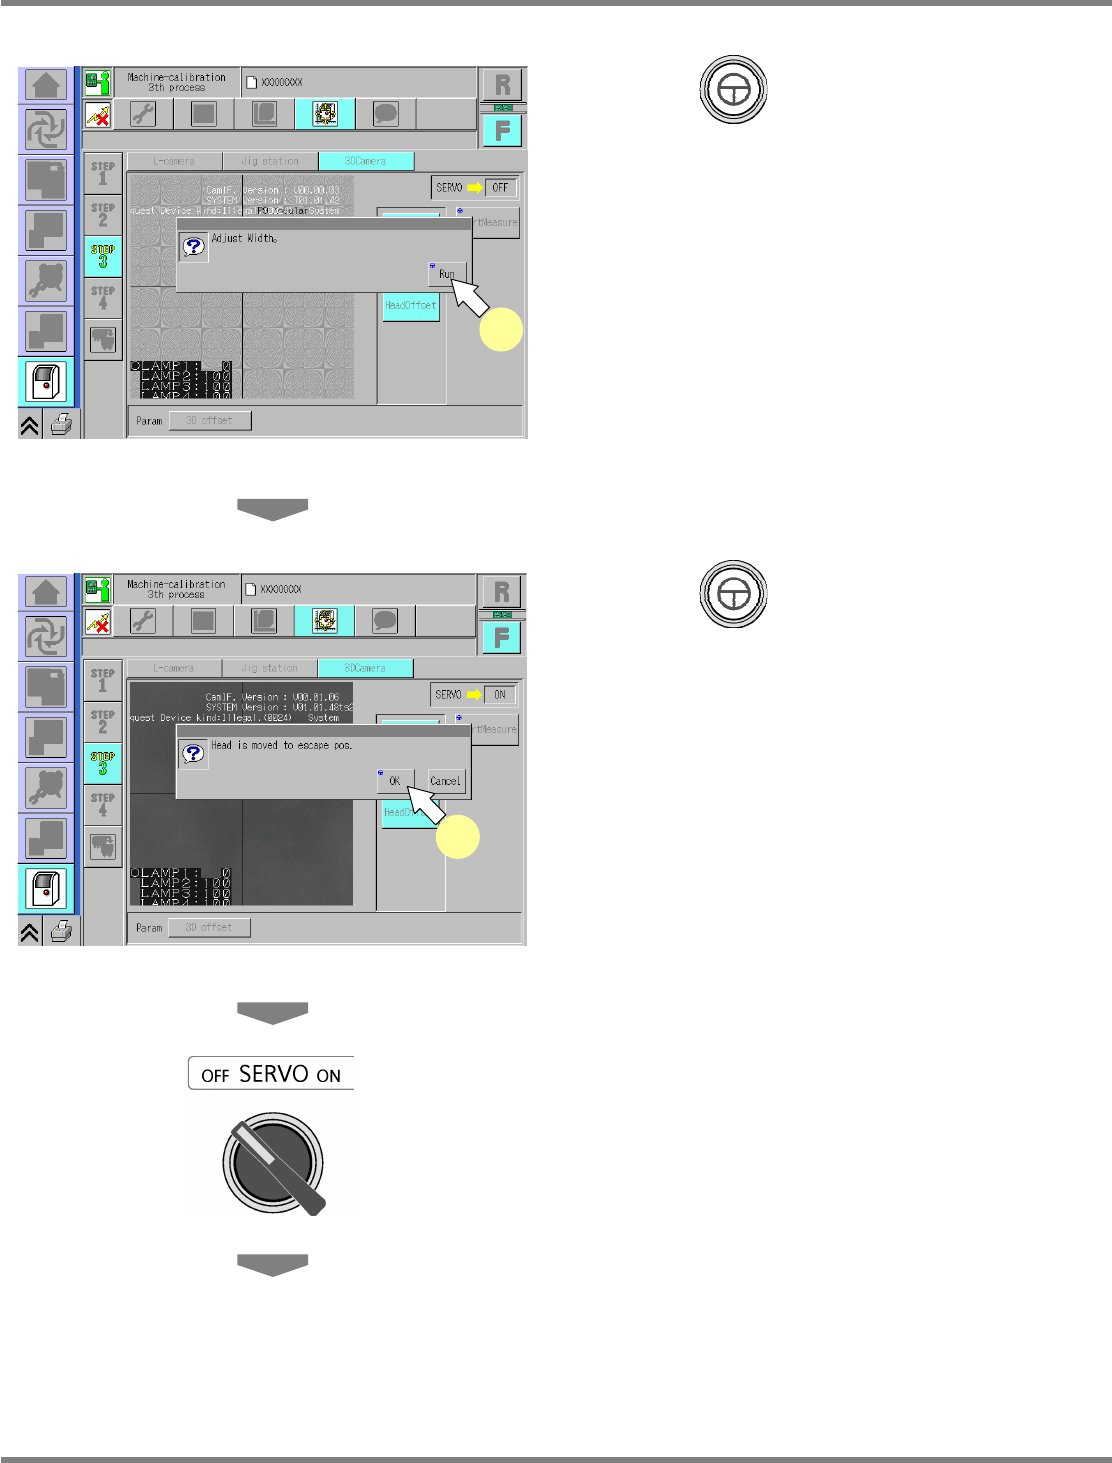
6
Press + [Run].
•
The conveyor width is adjusted to 215 mm.
7
Press + [OK].
•
The head moves to the retraction position.
∗
After the head is moved, set the jig station.
8
Turn OFF the servo switch.
9
Open the safety cover.
UnitCalibCamera3D-14E00
6
UnitCalibCamera3D-02E00
7