NPM Calibration Manual-En.pdf - 第77页
NPM Maint en anc e E di ti on 9.11 Hei ght Off set Page 9-76 EJM9BE-M B-09M-21 14 Set the p ickup-posit io n-he ight teaching j ig. ∗ Set t he pick up-positi on- height t eachi ng jig in the No. 9 slot on t he center of …
NPM
Maintenance Edition
9.11 Height Offset
EJM9BE-MB-09M-21 Page 9-75
11
Press + [OK].
•
The head moves to the measurement
position.
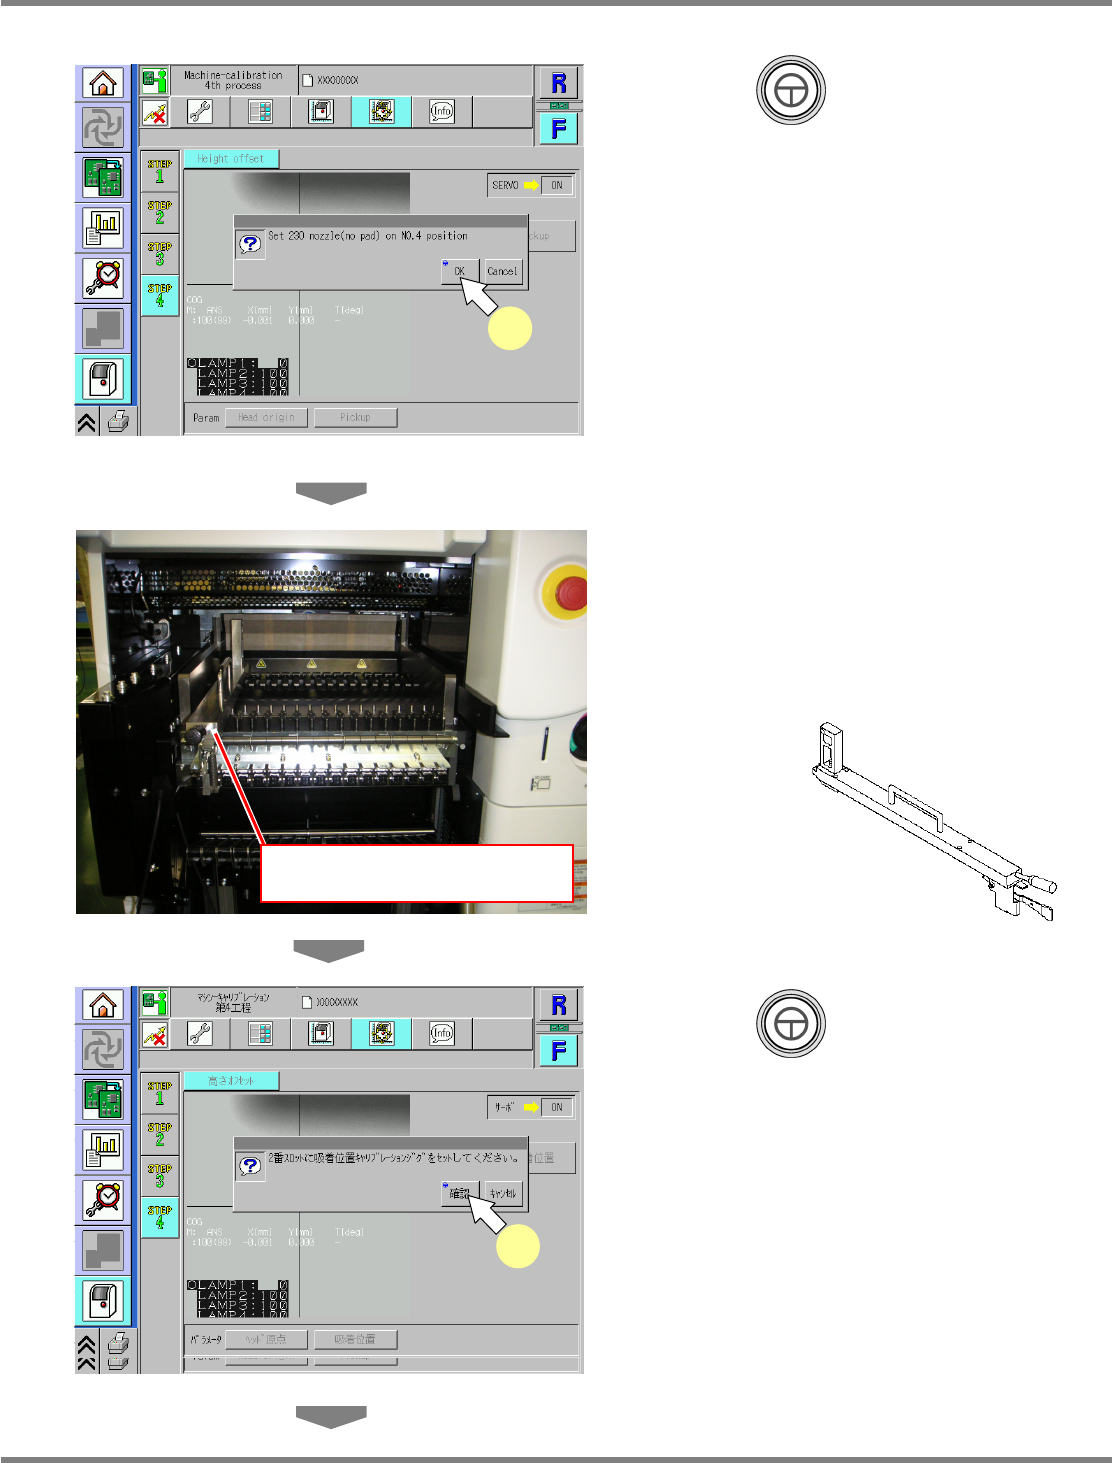
12
Set the pickup-position-height
teaching jig.
∗
Set the pickup-position-height teaching jig in
the No.2 slot on the left side of the table
selected in step 3.
13
Press + [OK].
•
The calibration is carried out.
UnitCalibHeadHightMeasure-02E00
11
Pickup-position-height teaching jig
(No.2 slot)
UnitCalibHeadHightMeasure-03E00
13
UnitCalibHeadHightMeasure-03J00
13
Pickup-position-height teaching jig
NPM
Maintenance Edition
9.11 Height Offset
Page 9-76 EJM9BE-MB-09M-21
14
Set the pickup-position-height
teaching jig.
∗
Set the pickup-position-height teaching jig in
the No.9 slot on the center of the table
selected in step 3.
15
Press + [OK].
•
The calibration is carried out.
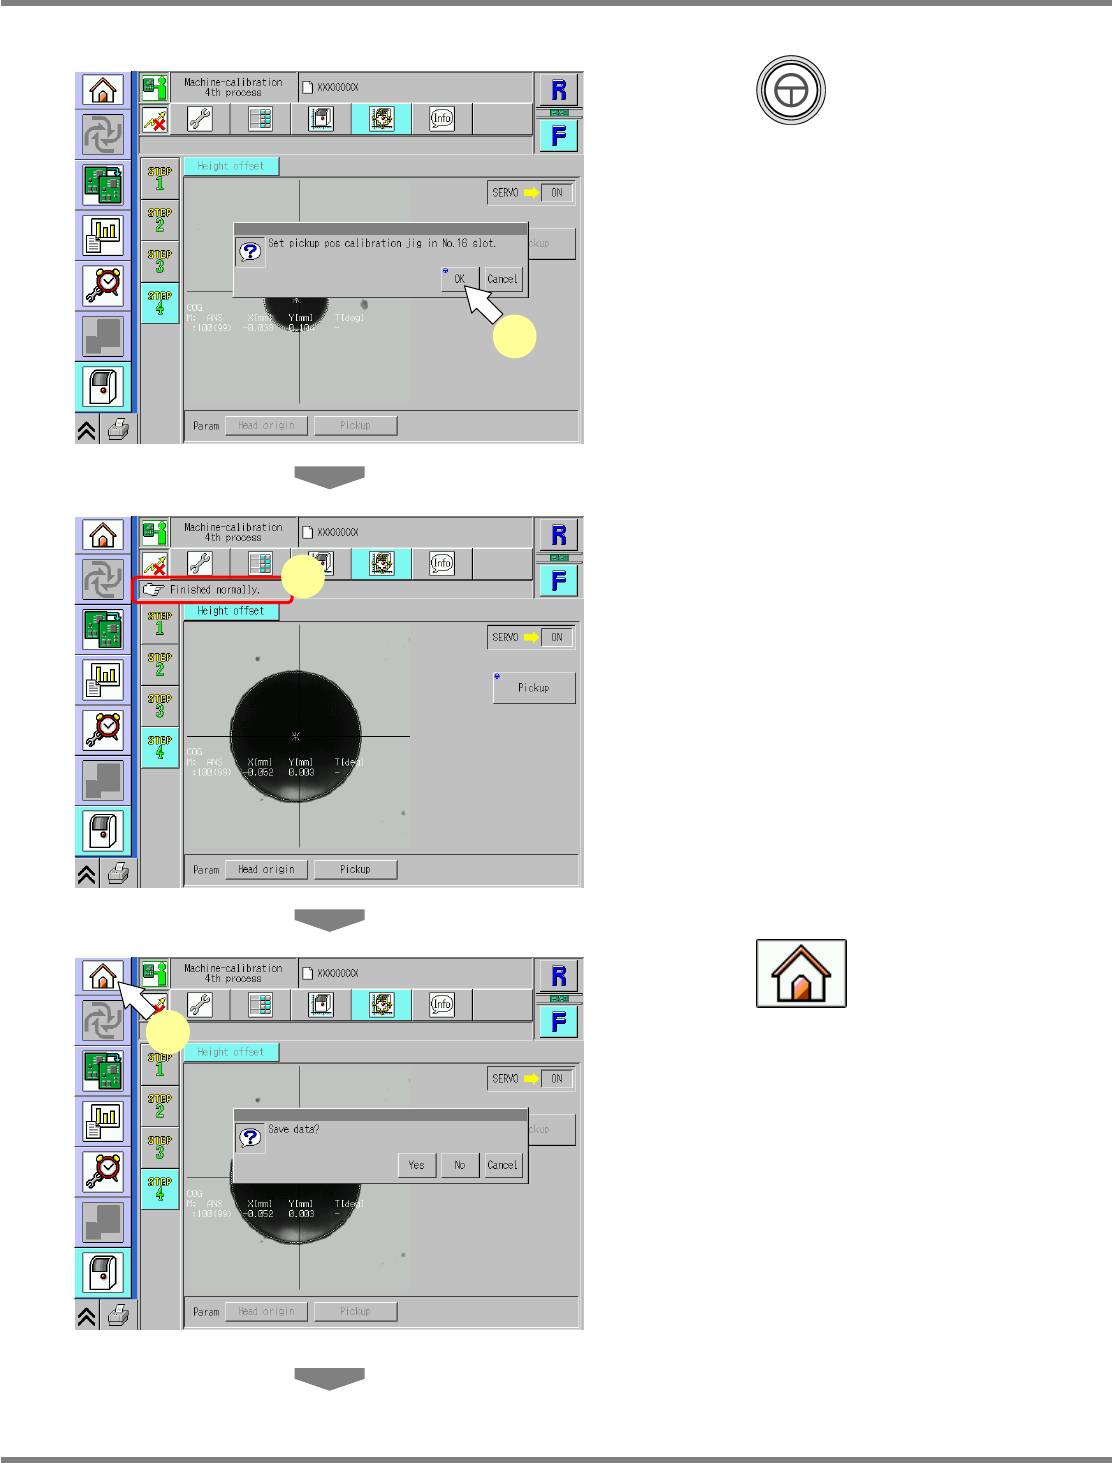
16
Set the pickup-position-height
teaching jig.
∗
Set the pickup-position-height teaching jig in
the No.16 slot on the right side of the table
selected in step 3.
Pickup-position-height teaching jig
(No.9 slot)
UnitCalibHeadHightMeasure-04E00
15
Pickup-position-height teaching jig
(No.16 slot)
NPM
Maintenance Edition
9.11 Height Offset
EJM9BE-MB-09M-21 Page 9-77
17
Press + [OK].
•
The calibration is carried out.
18
Check that it is successfully complete.
∗
Perform steps 3–18 for also the other table.
19
Press .
•
When exiting this screen to the other one, you
are always prompted to save the data.
∗
To save the data obtained by the calibration,
press [Yes].
•
If you press [No], the return-to-origin process
is carried out and the data obtained by the
calibration are lost.
•
After the above operation, the next screen is
displayed.
UnitCalibHeadHightMeasure-07E00
19
UnitCalibHeadHightMeasure-05E00
17
UnitCalibHeadHightMeasure-06E00
18