NPM Calibration Manual-En.pdf - 第96页
NPM Maint en anc e E di ti on 9.14 Accu racy Ve rificat ion EJM9BE-M B-09M-21 Page 9-95 7 Place the com ponents. The c omponent s are plac ed by aut omatic operat ion. Aft er all the component s are plac ed, the head cam…
NPM
Maintenance Edition
9.14 Accuracy Verification
Page 9-94 EJM9BE-MB-09M-21
2 Checking and Reflection of Placement
Place components actually and check the result.
③
Placement
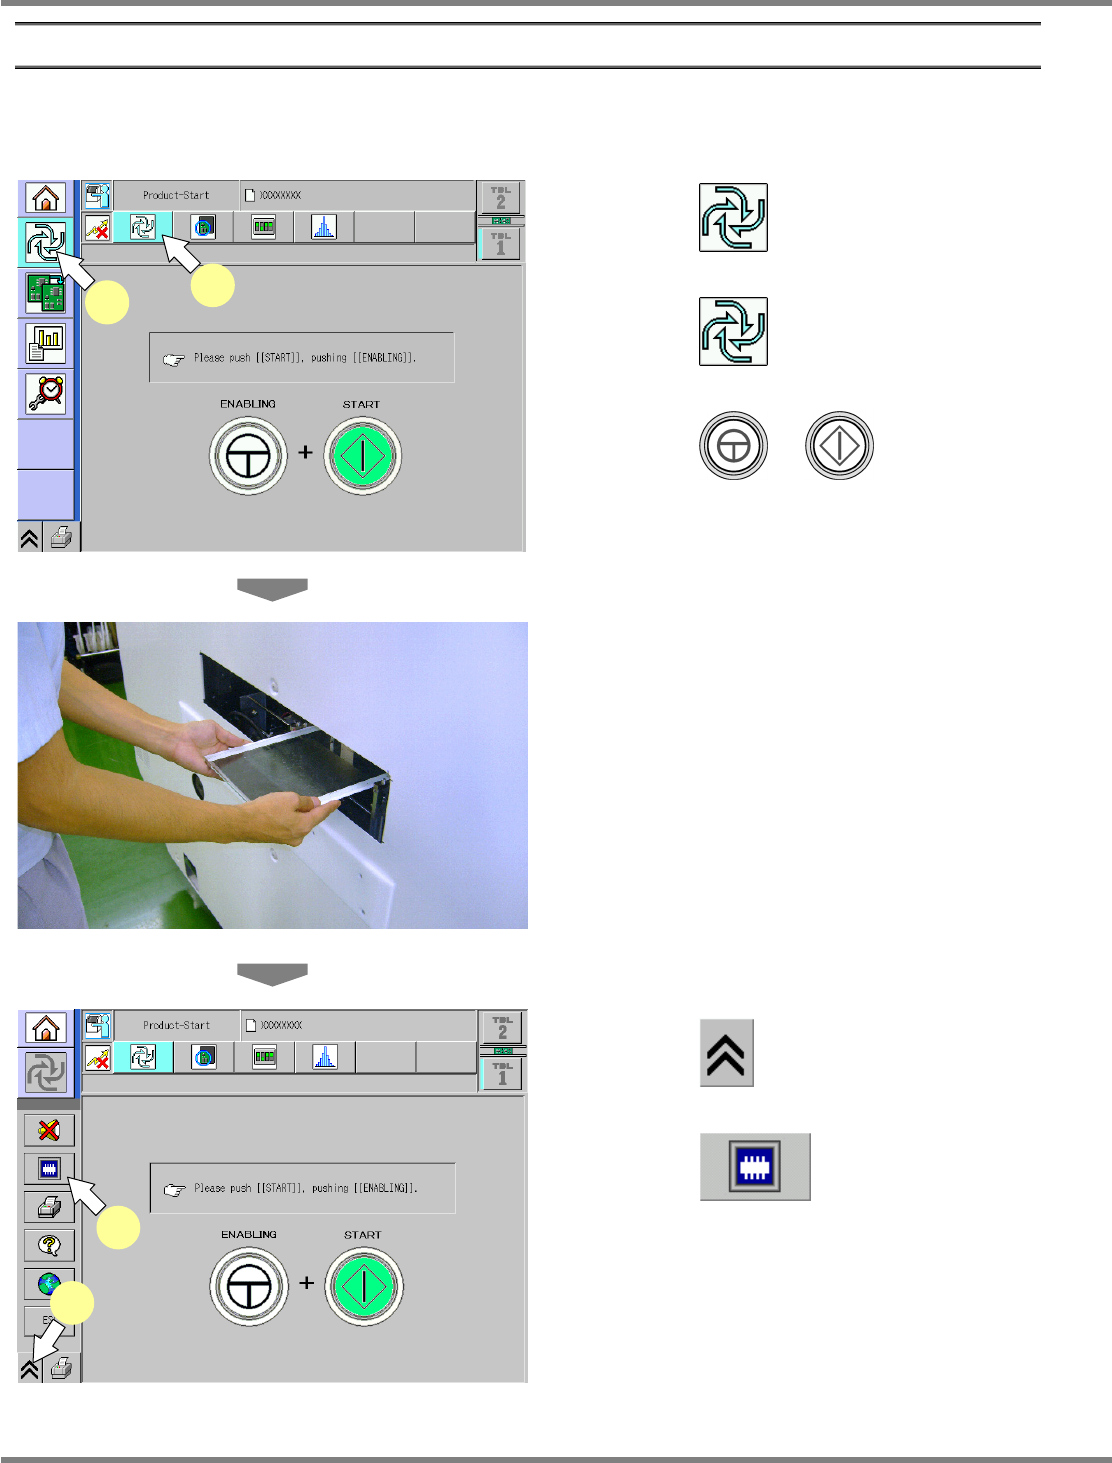
1
Press .
2
Press .
3
Press + .
∗
This step is the same as that for usual
preparation for production.
4
Load the glass PCB.
∗
After preparation for production is complete,
when the glass PCB is loaded, production
starts.
5
Press .
6
Press .
The head camera screen appears and you can
view the chip being measured.
ComEnabStart-01E02
1
2
ComEnabStartMenu-01J02-K
5
6
NPM
Maintenance Edition
9.14 Accuracy Verification
EJM9BE-MB-09M-21 Page 9-95
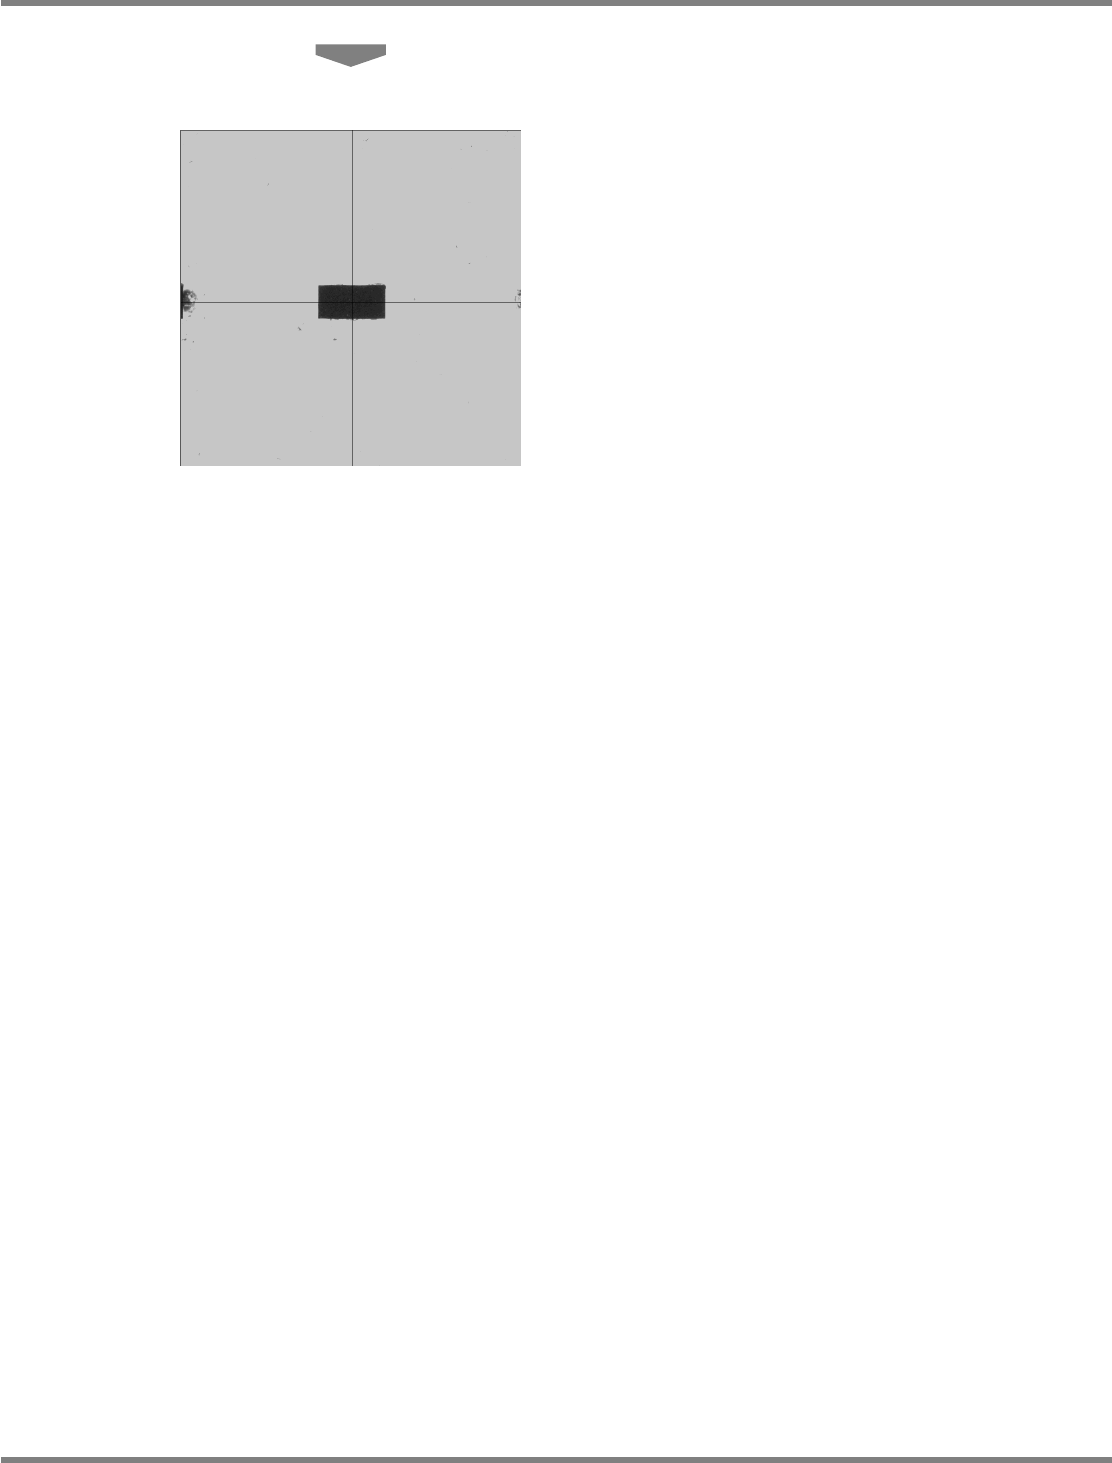
7
Place the components.
The components are placed by automatic
operation.
After all the components are placed, the head
camera starts measuring the placement
positions.
NPM
Maintenance Edition
9.14 Accuracy Verification
Page 9-96 EJM9BE-MB-09M-21
④
Checking and Reflection of Placement Results
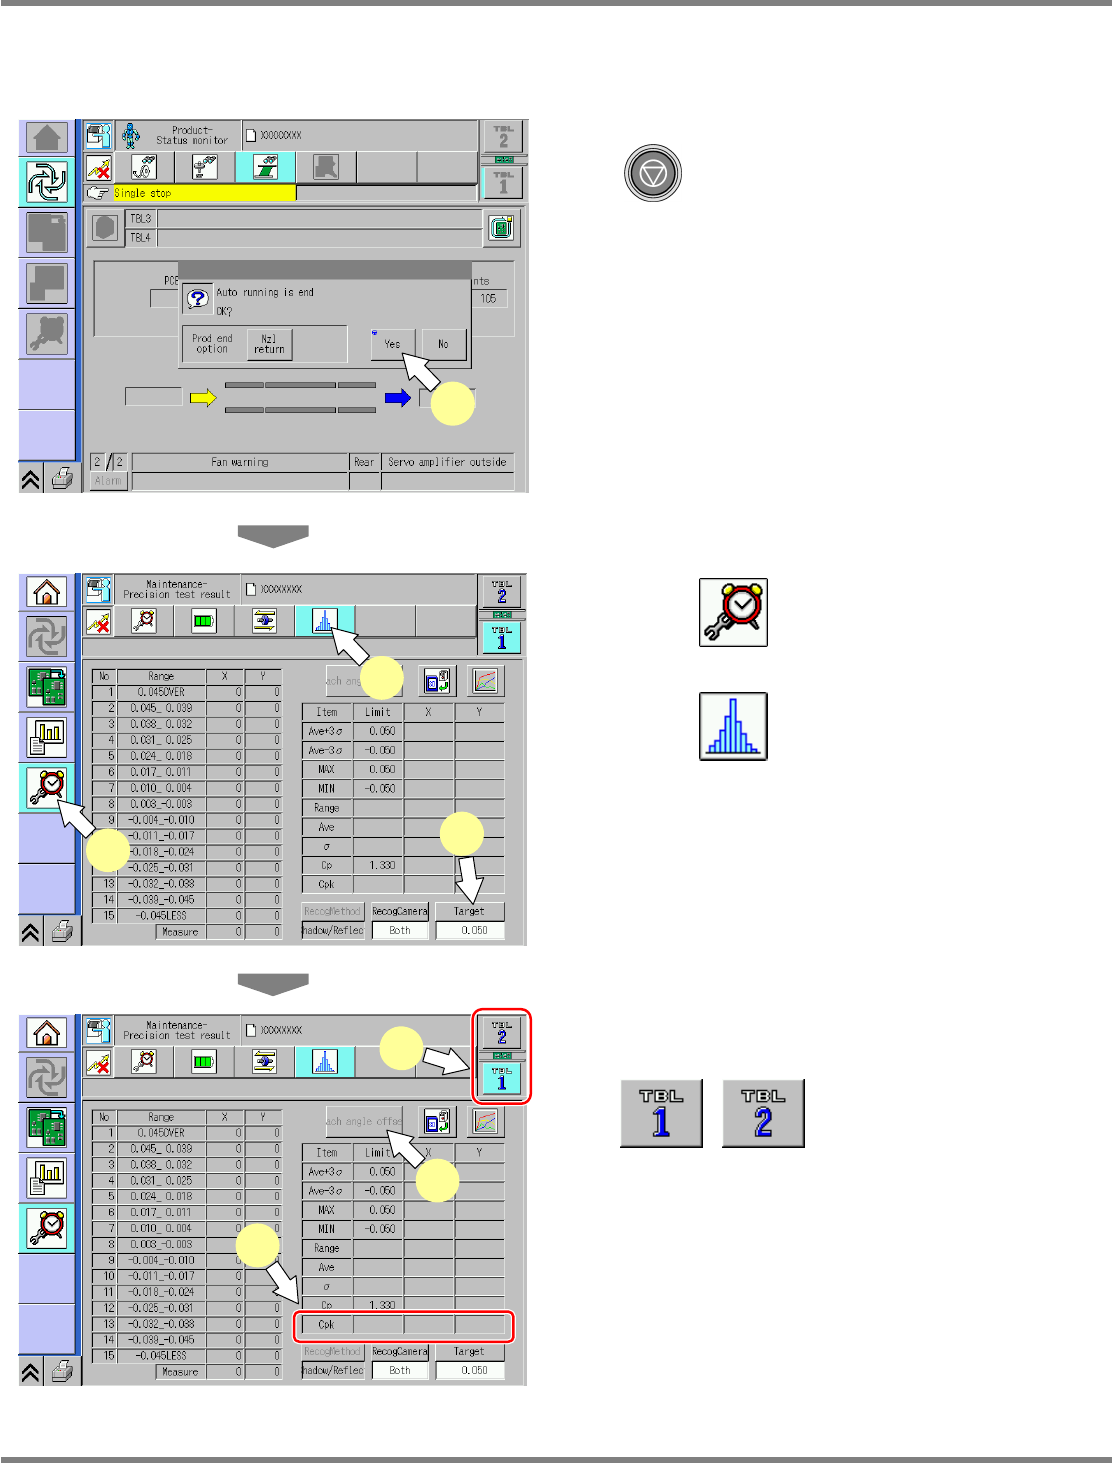
1
After placement is complete, press
.
2
Press [Yes].
Automatic operation is complete.
3
Press .
4
Press .
5
Press [Target].
•
Chip component 0.040 mm
•
Irregular-shaped component
0.030 mm
6
Select the table.
displays the individual
and the general accuracy on the front and the
rear.
7
Display the placement accuracy.
If the measurement result CpK is lower than
the prescribed value, reflect the each-angle
offset.
ProductionProc-02E00
2
ProdConditionVarifyCPK-01E01
3
4
5
ProdConditionVarifyCPK-01E01
8
6
7