1OM-1505-004_w.pdf - 第126页
1OM-1505 4. Automatic Operation Stop, Interruption and Re-Start : Chap.3 3-21 1002-003 4.2 Interruption of Automatic Operation To stop the machine immediately in an emergency, press the [EMERGENCY STOP] switch. [EMERGENC…
1OM-1505
3-20
4. Automatic Operation Stop, Interruption and Re-Start : Chap.3
4. Automatic Operation Stop, Interruption and Re-Start
4.1 Automatic Operation Stop
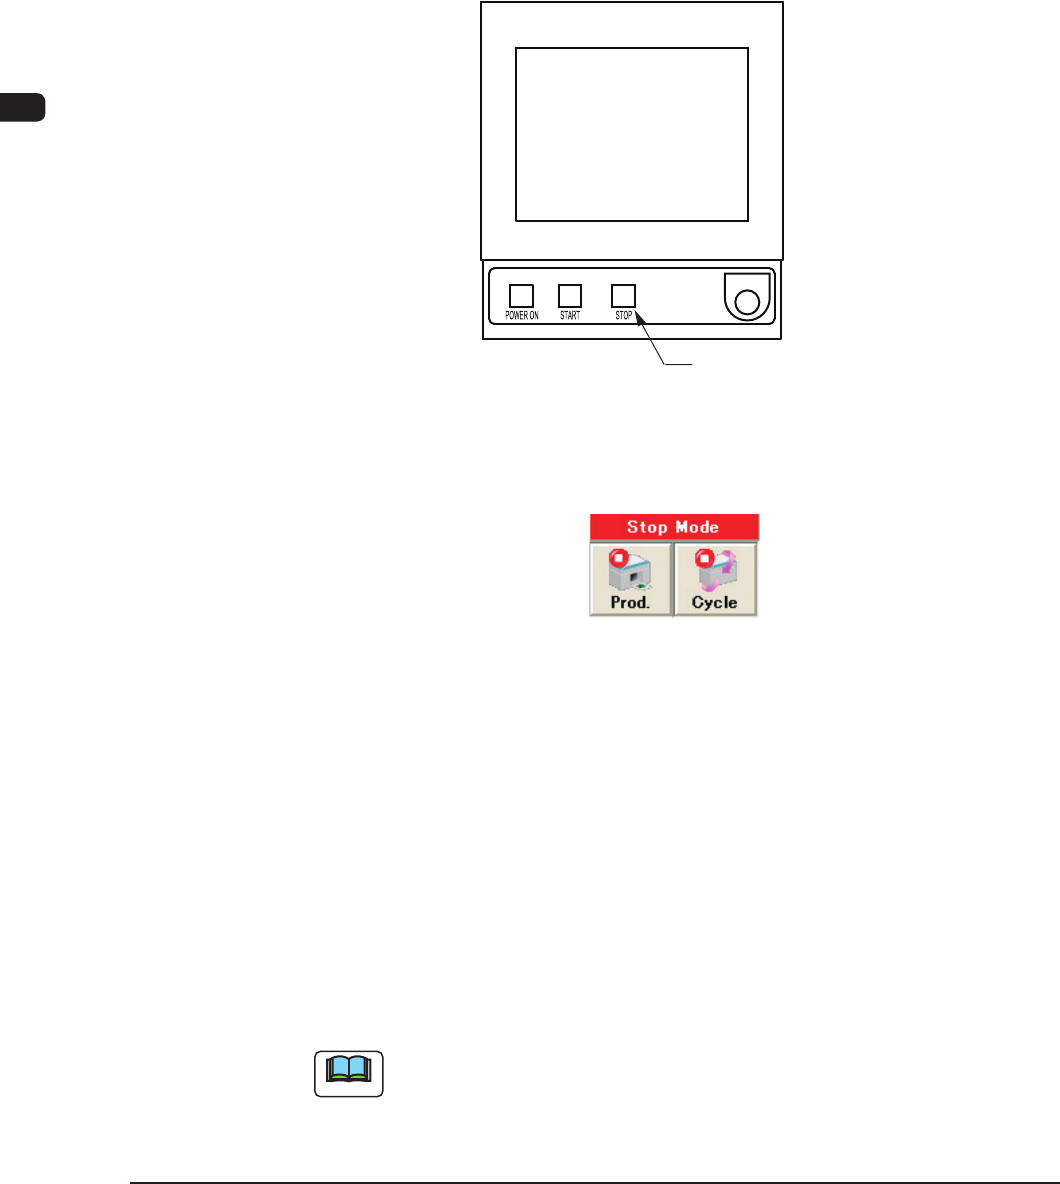
4.1.1 Temporary Stop (Pause) with [STOP] Button
When the machine is to be stopped after the automatic operation start, press the
[STOP] button on the operation panel to stop the machine.
The automatic operation is stopped after the PCB printing mid-way is completed.
[STOP] Button
F1C21
4.1.2 Stop using the Stop Mode
F1C22
Stop with [Prod.] Button
When the [Prod.] button in the operation window is pressed, the machine
discharges the PCB after the production of the unnished PCB is completed.
After that, the automatic operation stops. At this time, the green lamps of the
[START] button on the operation panel and the light tower extinguish.
Stop with [Cycle] Button
When the [Cycle] button in the operation window is pressed, the green lamps of
the [START] button and the light tower, are turned OFF after the PCB printing
mid-way is completed, and the automatic operation is stopped.
Note
Both of the [STOP] button on the operation panel and [Cycle] button in the
"Stop Mode" in the operation window, can stop the machine after the completion
of the PCB printing.
Select the button depending on the processing condition.
1002-002
1OM-1505
4. Automatic Operation Stop, Interruption and Re-Start : Chap.3
3-211002-003
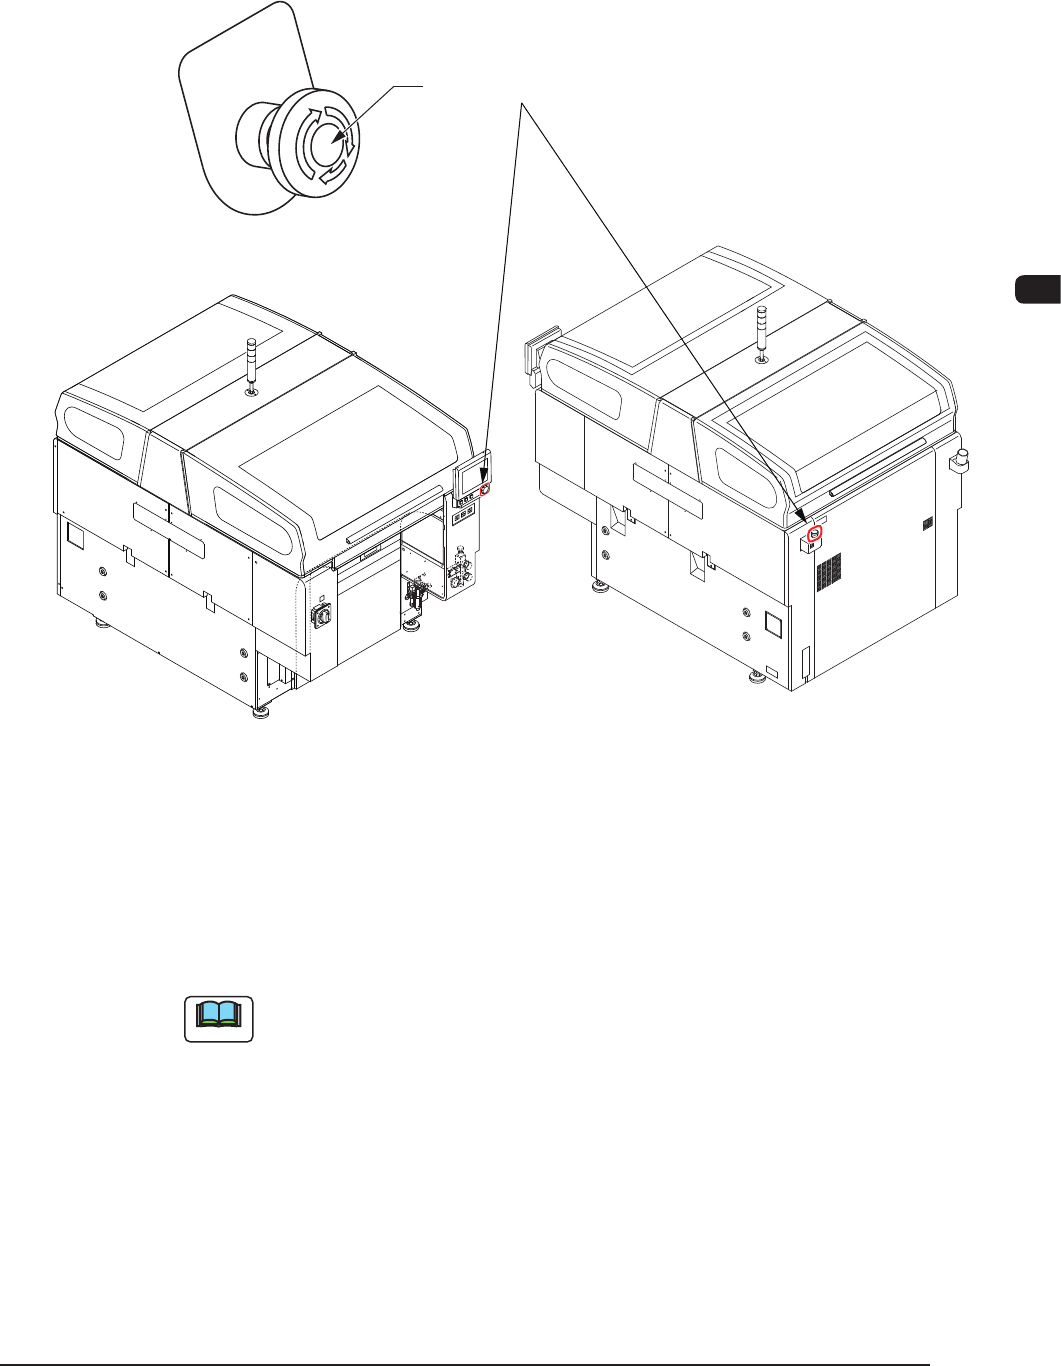
4.2 Interruption of Automatic Operation
To stop the machine immediately in an emergency, press the [EMERGENCY
STOP] switch.
[EMERGENCY STOP] Switch
F1C24
An alarm is issued and the [POWER ON] button illuminates in red.
4.3 Automatic Operation Re-Start
When the [START] button on the operation panel is pressed, the automatic
operation is re-started.
Note
Once the zeroing operation has been performed, the automatic operation can be
re-started even when each axis is not zeroed.
1OM-1505
5. Running-In Operation : Chap.3
3-221002-002
5. Running-In Operation
After the machine has been stopped for a long period of time, perform a running-
in operation for approx. 30 minutes to smoothly start up the machine.
Procedure
(1) Select an appropriated pattern program in the "PRGM. CHANGE" window
in the "Setup" menu and perform the processing until the completion of the
conveyor width setup operation.
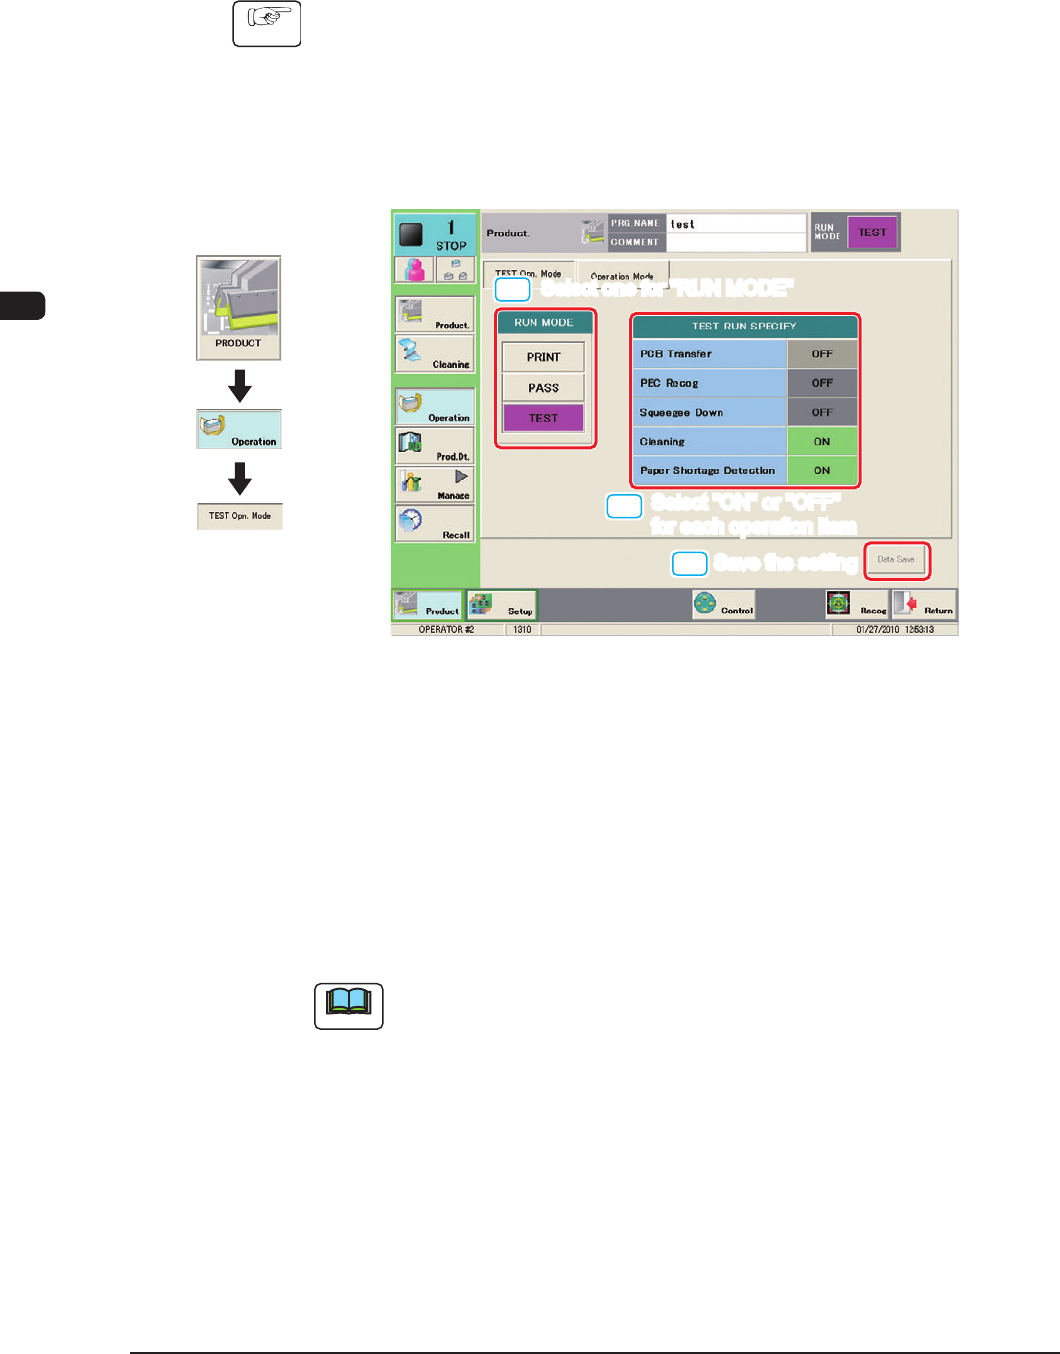
(2) Press the "TEST Opn. Mode" tab.
(The following tab sheet will be displayed.)
[1]
[2]
[3]
Select one for "RUN MODE"
Select one for "RUN MODE"
Select "ON" or "OFF"
for each operation item
Select "ON" or "OFF"
for each operation item
Save the setting
Save the setting
F1C25
(4) Press the [TEST] button for the "RUN MODE".
(5) Select "ON" or "OFF" for each item in the "TEST RUN SPECIFY" pane and
press the [Data Save] button.
(The specied test pattern will be set for the running-in operation.)
(6) Press the [START] button on the operation panel.
(The running-in operation will be started.)
Note
To stop the running-in operation, press the [STOP] button on the operation
panel.
Graphic
Development