1OM-1505-004_w.pdf - 第97页
1OM-1505 2-12 2. Operation Window : Chap.2 0906-001 [1] "Recognition Camera" Window An image captured by the PEC or the stencil recognition camera is displayed in real time. Whenever the [RECOG.] button on the …
1OM-1505
2. Operation Window : Chap.2
2-11
2.2 Recognition Window
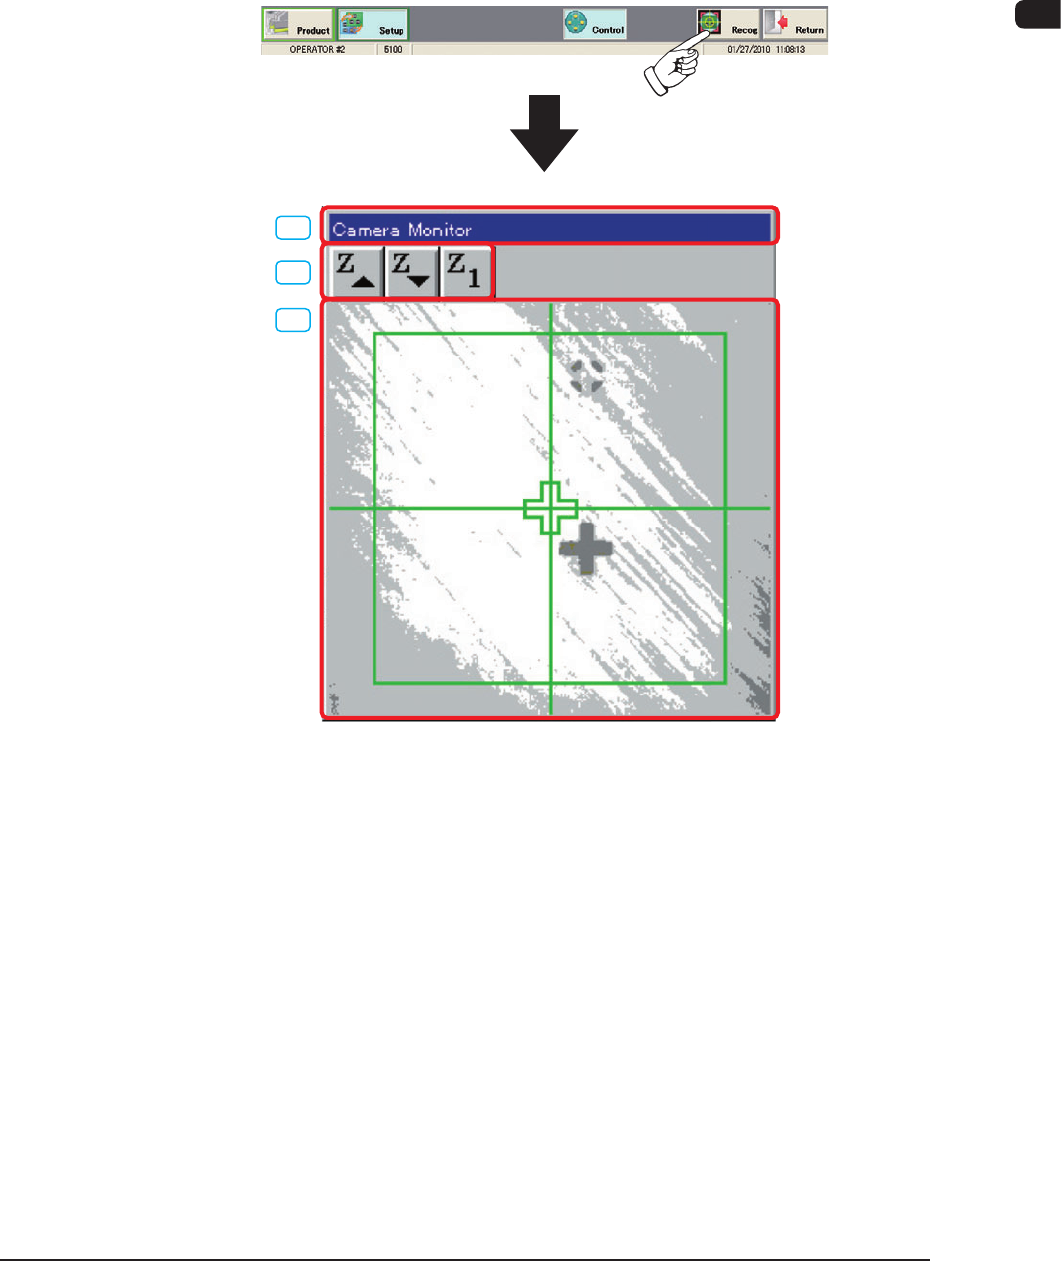
In the "Recognition" window the display pattern is designated to impose-display
the recognition image on the operation window indicated on the touch screen.
When the [Recog] button is pressed on the common menu bar, the "Camera
Monitor" window is displayed using the "multiple window" format.
[1]
[2]
[3]
F1B9
1002-002
1OM-1505
2-12
2. Operation Window : Chap.2
0906-001
[1] "Recognition Camera" Window
An image captured by the PEC or the stencil recognition camera is displayed
in real time.
Whenever the [RECOG.] button on the main menu bar is pressed, the
"Recognition Camera" window appears or disappears.
Note
(a) A camera can be selected in the "MAN. SUB-SYS" window
(submenu). (Operation Sequence: [MAINT.] Button
→
[MAN. SUB-
SYS] Button
→
"Recog. Block" Tab Sheet)
(b) When the "Recognition Camera" window is pressed twice in rapid
succession, a toolbar appears or disappears.
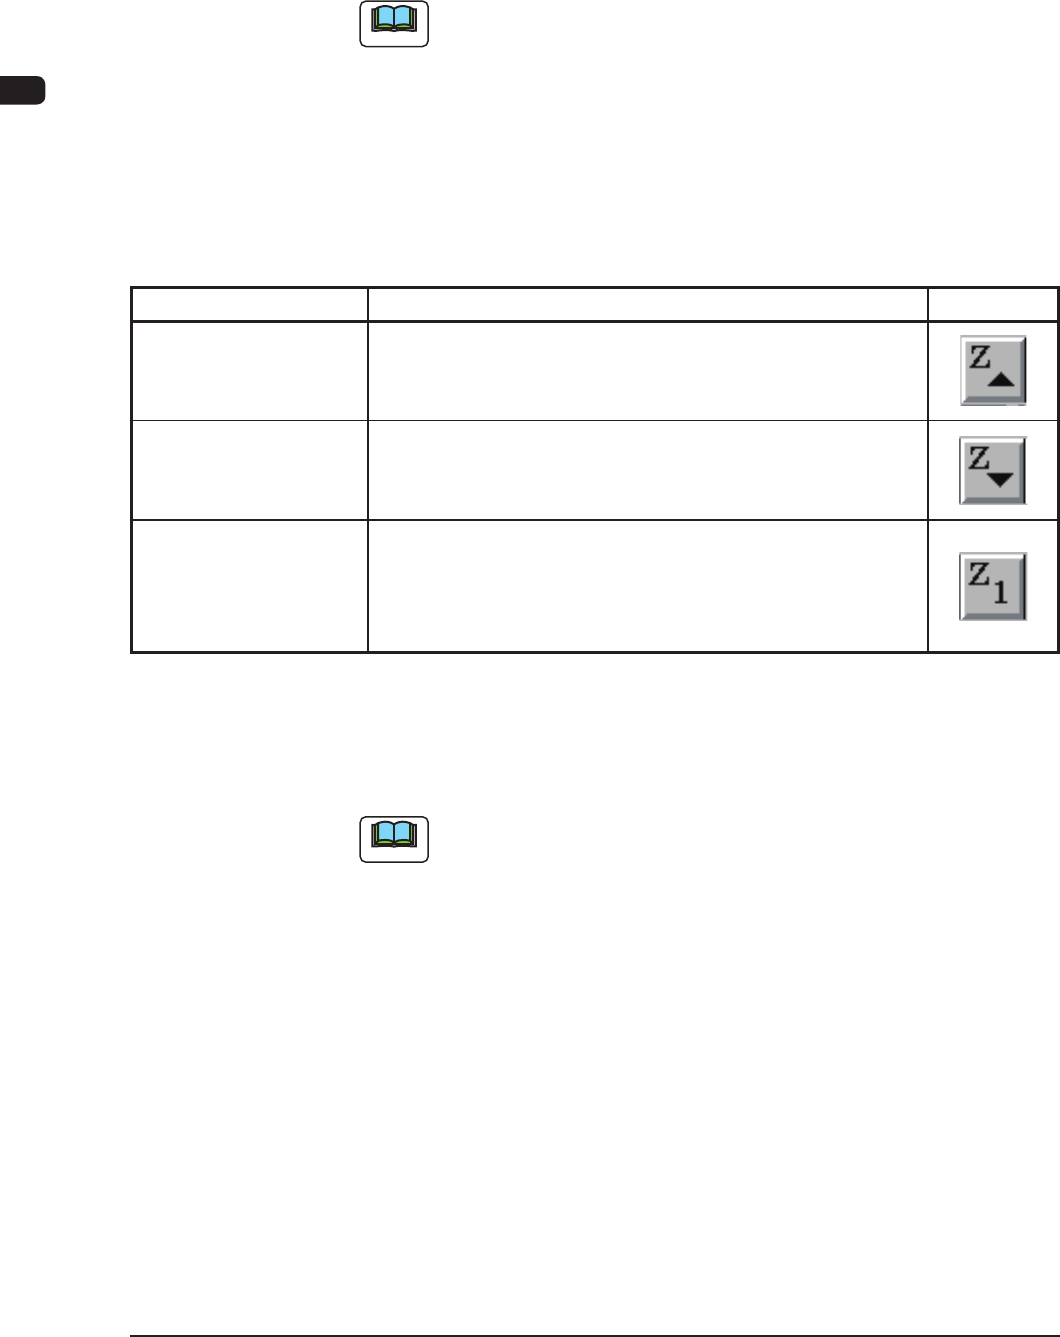
[2] Toolbar
A collection of icons (buttons) are arranged on the toolbar.
Command Menus Function Icons
Zoom In Press this icon to increase the size of the "Recognition
Camera" window. The displayed image is also magnied
according to the change of the window size.
Zoom Out Press this icon to decrease the size of the "Recognition
Camera" window. The displayed image is also reduced
according to the change of the window size.
Zoom Back Press this icon to resume the previous window size (the size
before the "Recognition Camera" window is magnied or
reduced).
T1B1
[3] Window Size Change Mode Selection Bar
This bar is used to determine whether or not the display size of the
"Recognition Camera" window should be changed.
Note
Pressing this bar twice in rapid succession turns on or off the function to
change only the magnication of the captured item (not the size of the
"Recognition Camera" window).
1OM-1505
3. Data Input : Chap.2
2-130906-001
3. Data Input
This section describes the procedure for the data input on the operation window.
3.1 Numerical Data Input
Procedure
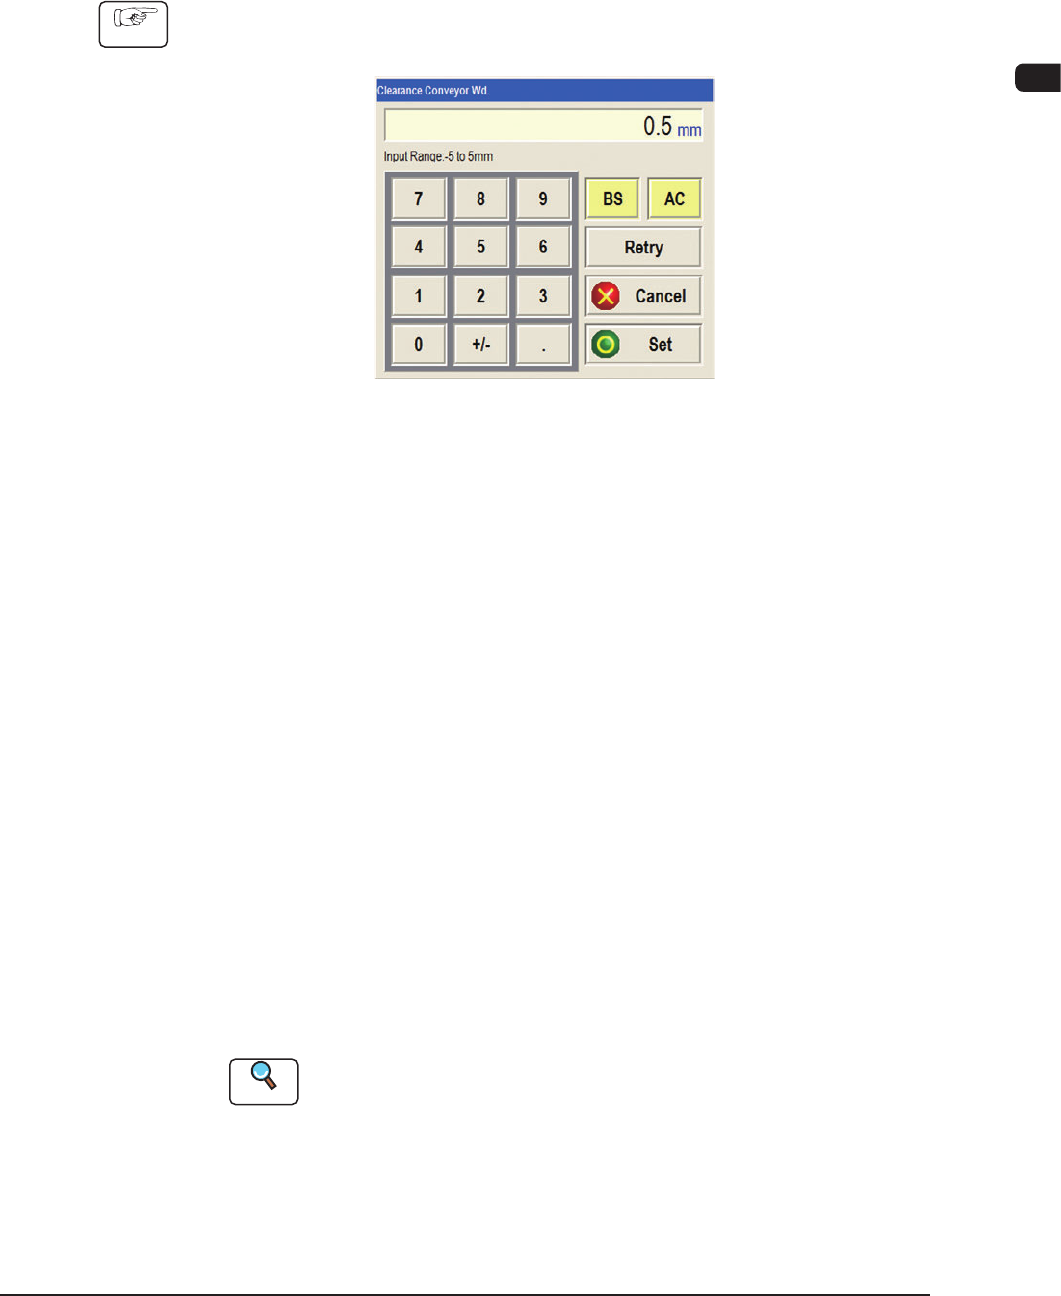
(1) When the button indicating the data input window is pressed on the operation
window, the data input window including the "Ten-key" pad appears.
F1B13
(2) Press the numerical value buttons referring to the "Input Range" indicated in
the window.
The input data will be displayed in the data box on the upper section of the
input window.
(3) Conrm the input data and press the [Set] button.
The data input window will be closed and the entered data will be indicated
in the data box in the operation window.
When the input data is to be modied or the input operation is to be
cancelled, the following buttons are used.
[BS] Button
: When this button is pressed, one gure from the
numerical data string is deleted.
[AC] Button
: When this button is pressed, the data indicated in the data
box is deleted.
[Retry] Button
: When this button is pressed, the data input operation is
retried.
[Cancel] Button
: When this button is pressed, the data input operation is
cancelled.
Reference
Refer to "3.2 Character Data Input" for the input of the character data such
as a password.