00192792-02.pdf - 第62页
2 Retrofitting Instructions: M atrix Tray Changer MTC on S-25 HM (Option) SIPLACE 80 S-25 HM 2.6 Preparatory Steps 01/01 Issue 62 Å Undo the screws fas tening th e nozzle chang er (4 soc ket hex he ad cap sc rews M4, Fig…
SIPLACE 80 S-25 HM 2 Retrofitting Instructions: Matrix Tray Changer MTC on S-25 HM (Option)
01/01 Issue 2.6 Preparatory Steps
61
.H\
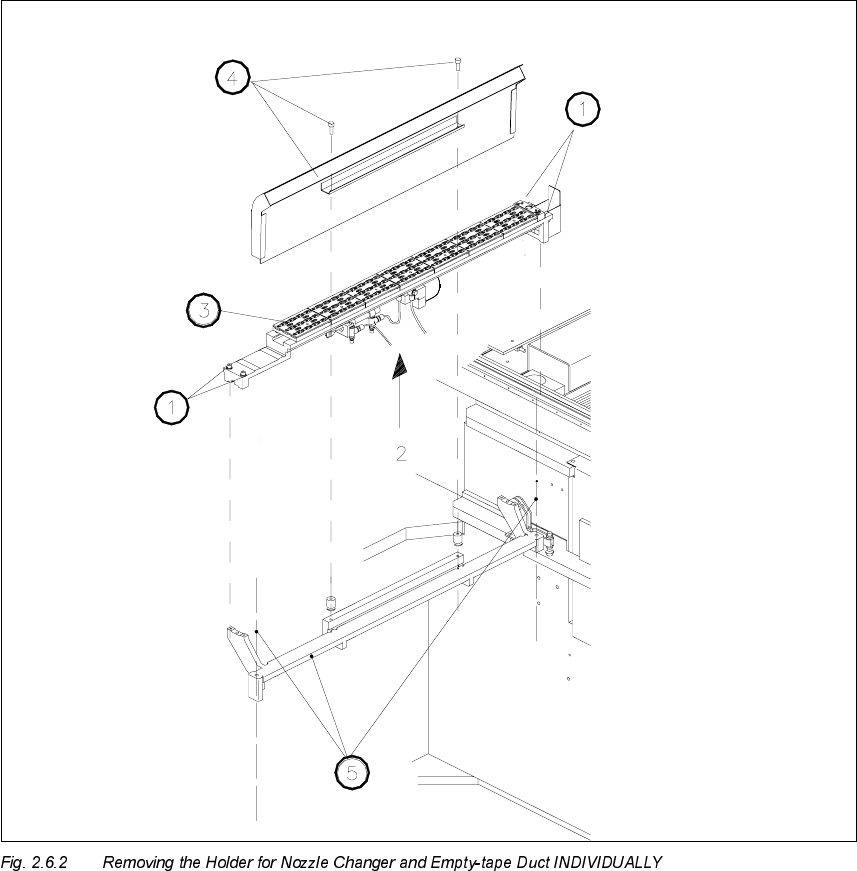
1. Fasteners for the nozzle changer. 4 M4 socket hex head cap screws M4
2. Electrical and pneumatic connection on the bottom of the nozzle changer
3. Nozzle changer
4. An empty-tape duct (is only dismantled as a complete unit)
Fastener: 2 socket hex head cap screws M4
5. Carrier for empty-tape duct and nozzle changer,
Fastened to the machine frame with 1 socket hex head cap screw M6 each, left and right
2 Retrofitting Instructions: Matrix Tray Changer MTC on S-25 HM (Option) SIPLACE 80 S-25 HM
2.6 Preparatory Steps 01/01 Issue
62
Å Undo the screws fastening the nozzle changer (4 socket hex head cap screws M4, Fig. 2.6.2)
and lift the changer a little.
Å On the bottom of the nozzle changer, loosen the electrical and pneumatic connections (see
Fig. 2.6.2) and take the nozzle changer out of the machine.
Å Dismantle the empty-tape duct (2 socket hex head cap screws M4).
Å Remove the carrier for nozzle changers (1 socket hex head cap screw M6 each, left and right:
see Fig. 2.6.2).
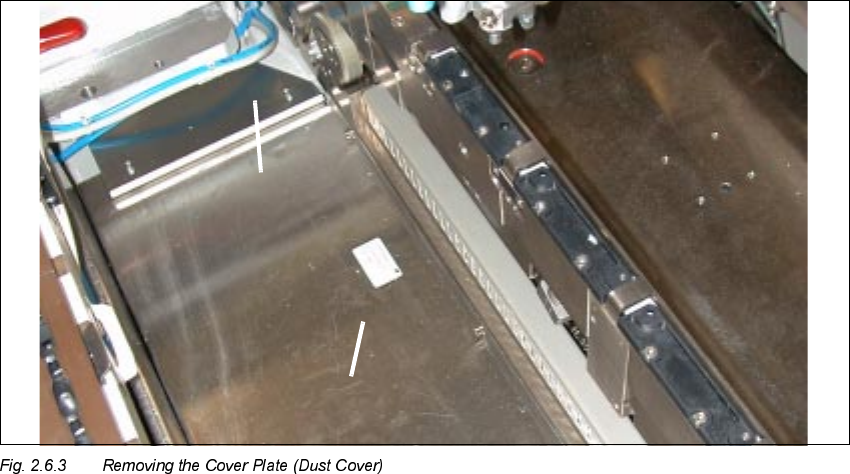
5HPRYLQJWKH&RYHU3ODWH'XVW&RYHU
.H\
1. Long metal component; fasteners: 3 socket hex head cap screws M4
2. Side plate, left and right; fasteners: 2 socket hex head cap screws M3 each)
Å To guard against injury, place a wide adhesive strip over the gap between cover plate and fixed
blade along the entire length of the cutter.
Å Dismantle the cover plate (dust cover) in the area between the PCB conveyor and the compo-
nent feeder table (see Fig. 2.6.3).
If old machines are involved, this part may be made of black plastic.
To dismantle the cover plate:
Å Loosen the screws fastening the RH side panel (2 socket hex head cap screws M3 with half
rounded head).
SIPLACE 80 S-25 HM 2 Retrofitting Instructions: Matrix Tray Changer MTC on S-25 HM (Option)
01/01 Issue 2.6 Preparatory Steps
63
Å Dismantle the LH side panel (2 socket hex head cap screws M3) because you will not be
able to take out the large panel otherwise.
Å Then loosen the screws fastening the long metal component to the machine frame (3 socket
hex head cap screws M4). The cover plate will not be re-used.
Å With the exception of the cover plate, keep ALL of the parts removed up to this point because
they may be needed for subsequent re-installation.
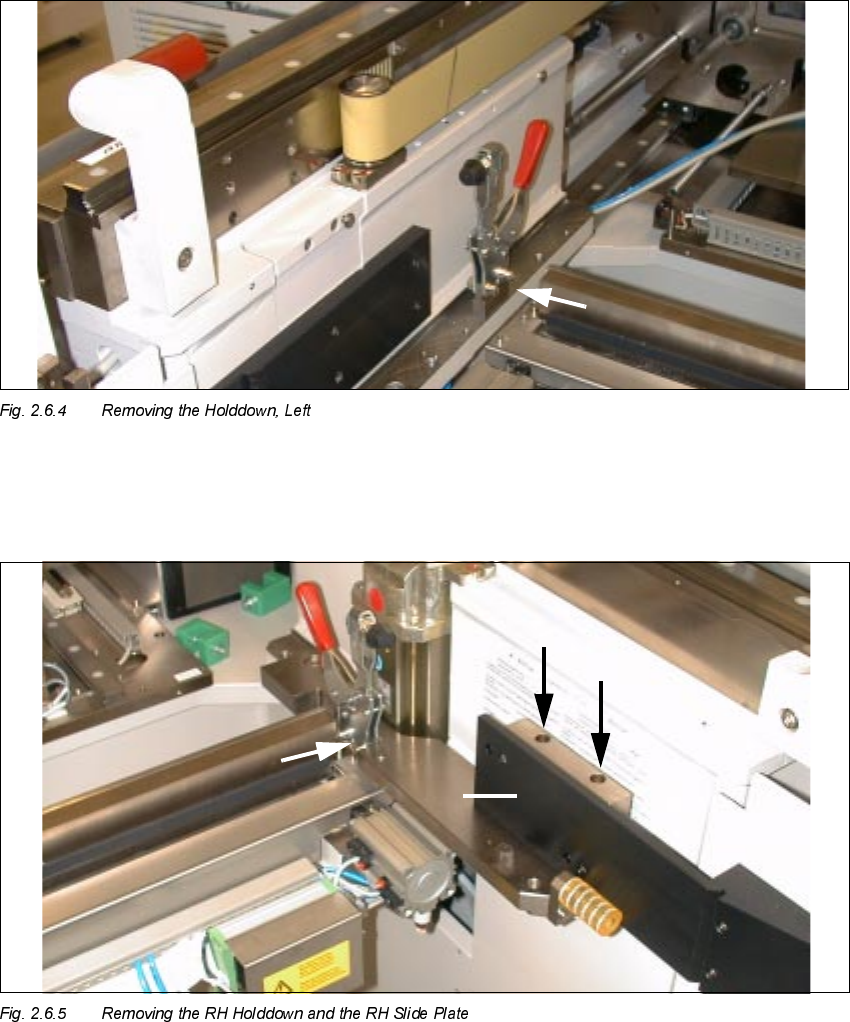
Å On the LH side, loosen the screws fastening the component table holddowns on the "Rail, com-
ponent table" (2 x socket hex head cap screws M6, size 5) and remove the holddown (see Fig.
2.6.4). The holddown will be needed for later re-installation.