DECAN_S2_Admin(Eng_Ver4.5).pdf - 第122页
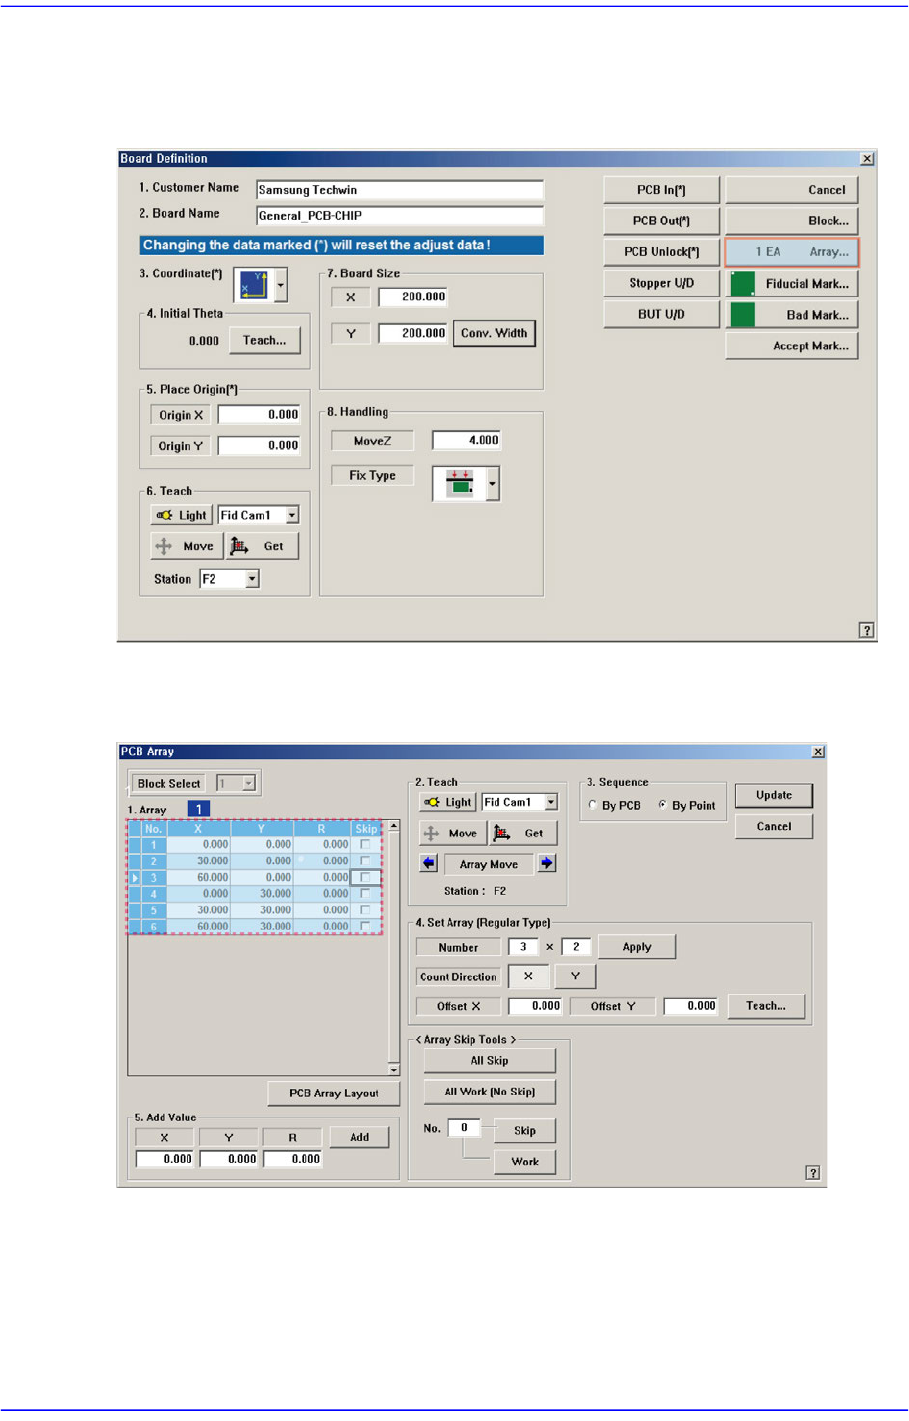
6-9 Board Definition 6.2. Array PCB Setup For an array PCB, setup the off set value between the origin of t he small PCB in the array PCB and place origin of the array PCB. When this <Array…> button is clicked on, …
6-8
Advanced Chip Shooter DECAN S2 Administrator’s Guide
Therefore, set the height to optimum value.
Caution Move Z is installation height, the test PCB shall not hang
down.
If teaching is done without checking whether a nozzle is
mounted on the Head,
the minimum movement height of head becomes low and
the head and the transport rail might collide.
Since the Z axis moving height is different for each
machine, the same value cannot be set for all machines.
<PCB In> button
Loads the PCB in the operation area.
<PCB Out> button
Out the PCB in the operation area.
<PCB Unlock> button
Release the PCB fixed in the operation area.
<Stopper U/D> button
Moves up or down the work stopper, the stopper of PCB in the operation area.
<BUT U/D> button
Moves up or down the BUT (Back Up Table) that locks up the PCB in the operation
area.
<Cancel> button
Cancels the edited data.
Caution If you move to another screen while editing the “Board”
dialog box, the edited data is saved automatically.
Warning During teaching, the operator or people near the operator
could be injured due to operation error or insufficient
checking of surroundings
Before start teaching, check the device to teach one more
time, and check whether there is any worker near the
machine
6-9
Board Definition
6.2. Array PCB Setup
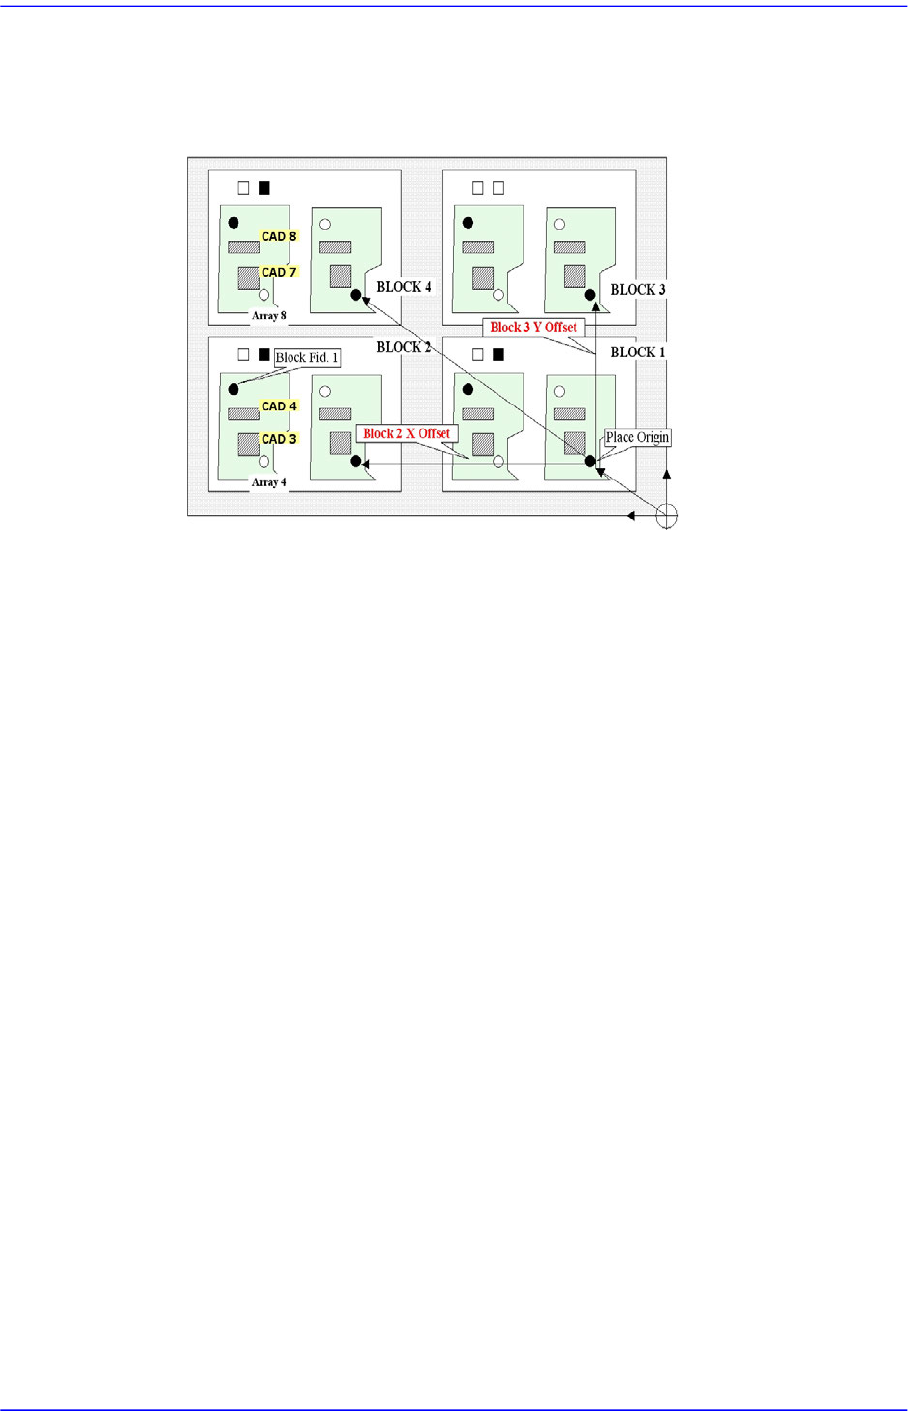
For an array PCB, setup the offset value between the origin of the small PCB in the array
PCB and place origin of the array PCB.
When this <Array…> button is clicked on, the following dialog box is displayed.
Figure6.3 “PCB Array” dialog box
1: Grid Cell
<Block Select> combo box
For a Multi PCB
The model selected from the “Board Definition” dialog box is selected
6-10
Advanced Chip Shooter DECAN S2 Administrator’s Guide
automatically and the corresponding combo box is disabled.
For a Block PCB
Select the model for which setup will be performed and set other items.
<1. Array> group
Set the offset value of Array PCB from the “Place Origin” of the PCB. Lines
corresponding to the number of small PCBs in the array PCB setup in <4. Set Array
(Regular Type)> are made.
<No.> column
Set the offset value of Array PCB from the “Place Origin” of the PCB. Lines
corresponding to the number of small PCBs in the array PCB setup in <4. Set
Array (Regular Type)> are made.
<Skip.> column
Used to select the small PCB that will not be worked on among those in the Array
PCB. The machine continues to work without working on the small PCB selected
here.
<PCB Array Layout> button
Used to determine whether to work on the corresponding PCB while watching the
arrangement of small PCBs in the Array PCB when selecting the small PCB that will
not be worked on among small PCBs in the Array PCB.