DECAN_S2_Admin(Eng_Ver4.5).pdf - 第157页
6-44 Advanced Chip Shooter DECAN S2 Admi nistra t or’s Guide <Update> button Save the array setup data and close the “Barcode P osition” dialog box. <Cancel> button Close the “Barc od e Position” dialog b…
6-43
Board Definition
<Height> edit box
Sets the 2D barcode size in the Y axis. Generally, it is set to 4mm.
<Shape> group
<SQUARE> option button
Sets the square type barcode.
<Rectangle> option button
Sets the bar type rectangular barcode.
<7. Bar Code Color> group
<White > option button
The barcode looks brighter than its surrounding.
<Black > option button
The barcode looks darker than its surrounding.
<8. Parameter > group
<Score > edit box
Sets the basis by which it is determined whether the 2D barcode exists when
analyzing the image. The recommended value is 600.
<Light > group
Sets the light value when checking the barcode. Generally, it is set to 5. However,
adjust it appropriately according to the state of the barcode.
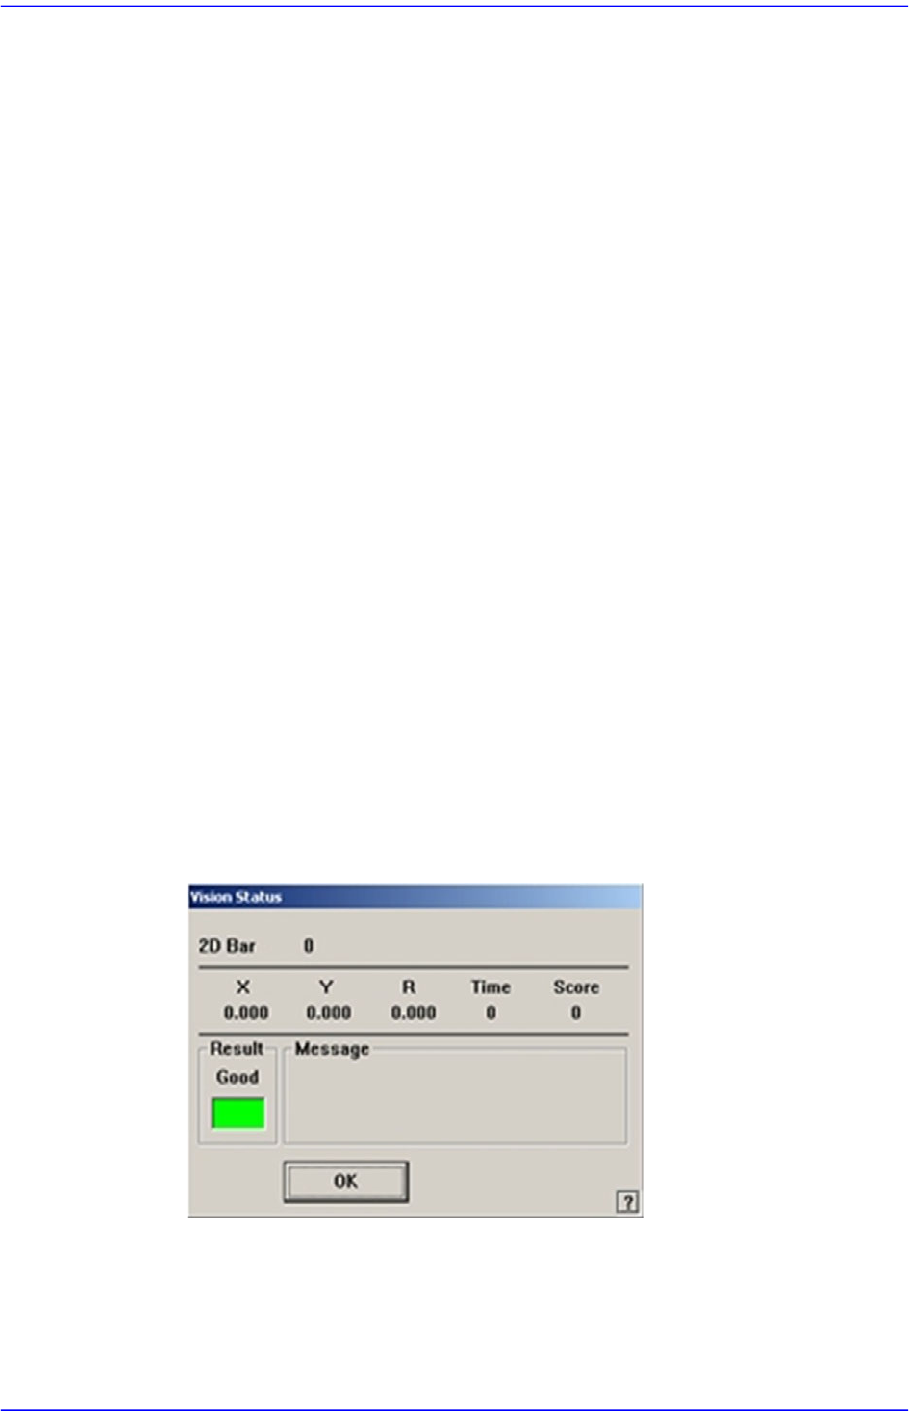
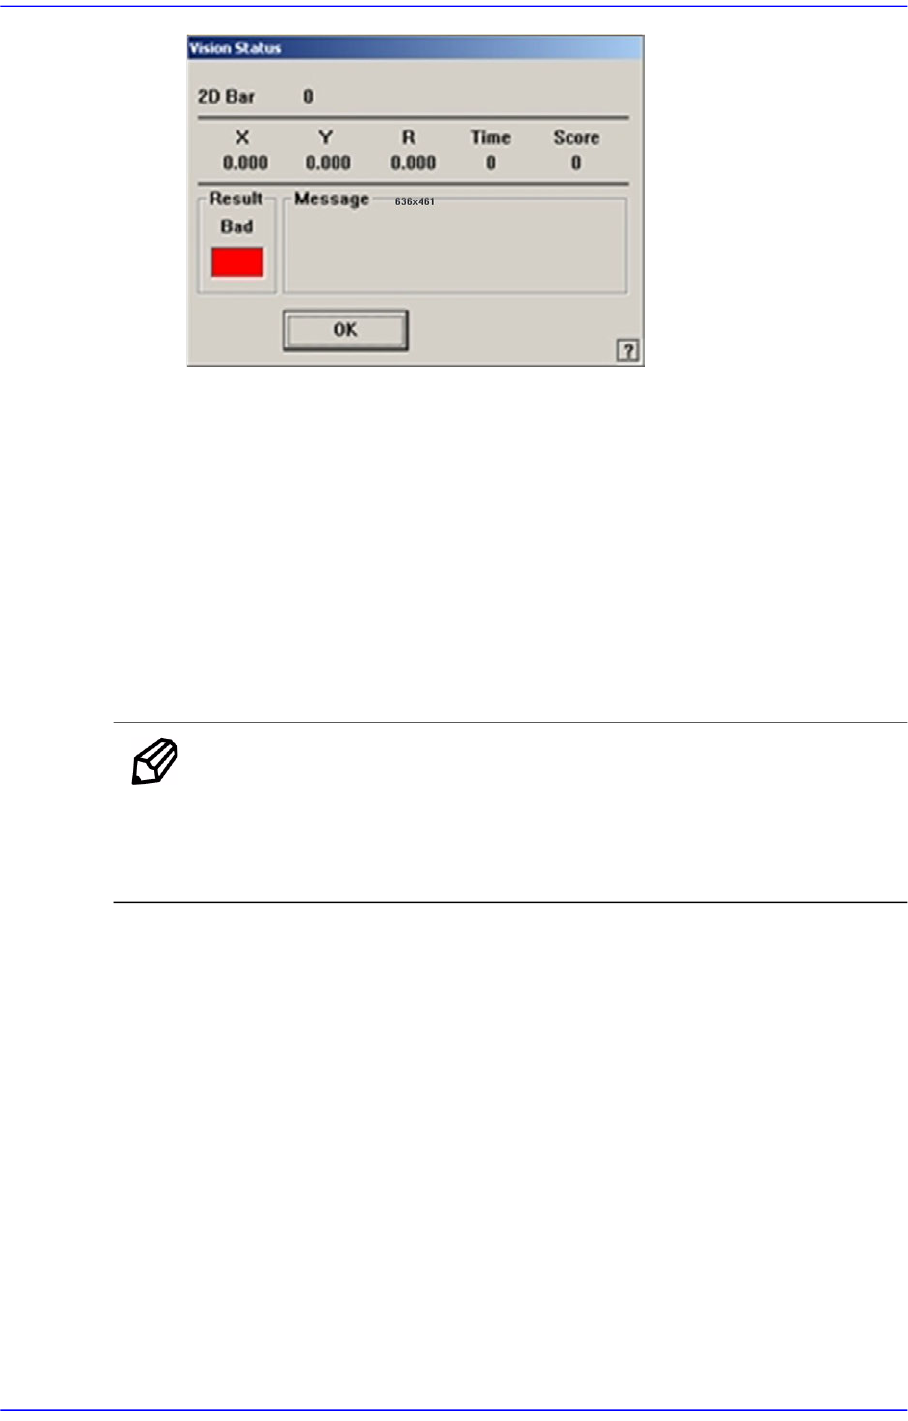
<Test> button
Checks if the read barcode data can be used. If the test is successfully performed,
the following window is displayed.
If the test fails, the following window is displayed.
6-44
Advanced Chip Shooter DECAN S2 Administrator’s Guide
<Update> button
Save the array setup data and close the “Barcode Position” dialog box.
<Cancel> button
Close the “Barcode Position” dialog box without saving the array setup data.
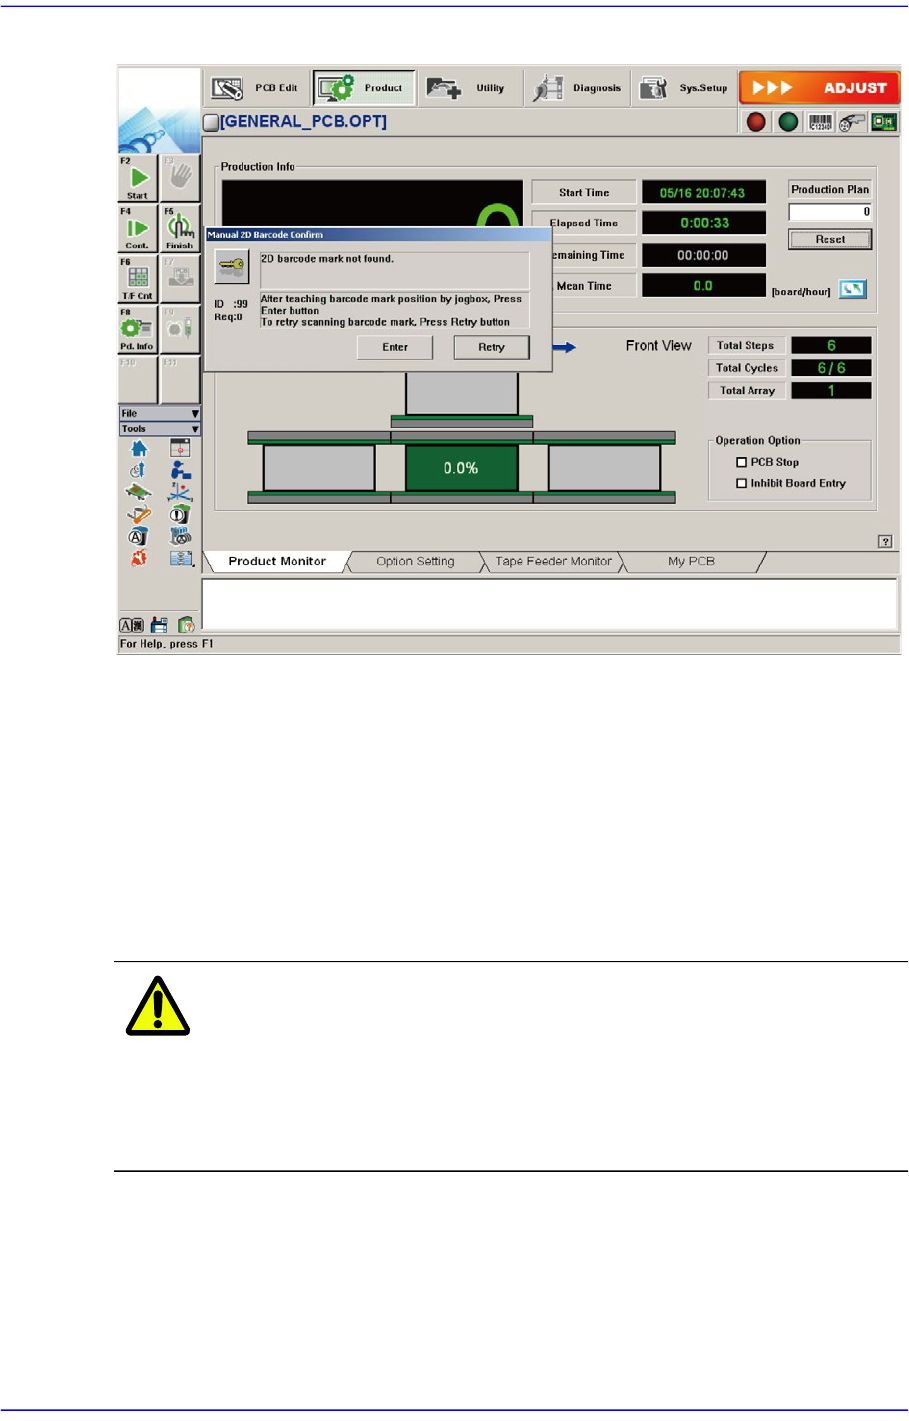
6.6.3. Manual 2D Barcode Confirm Dialog Box
If 2D barcode recognition error occurs during automatic production when using the 2D
barcode function, pressing the ‘Stop’ button on the machine operation panel will display
the screen for processed errors as follows.
Memo In order to enable the following screen, the system constant setup
must be preceded. If you want to take measures against the error
during automatic production, please contact our CS or local
representative office.
6-45
Board Definition
Figure6.11 Manual 2D Barcode Confirm Dialog Box
<Enter> button
Move the teaching camera on the barcode using the jog box and click this button to
select the new barcode position.
<Retry> button
Execute the ‘Barcode Position’ dialog box to re-teach the barcode position and
perform the recognition test. For more details, refer to “6.6.2 Barcode Position”.
If the 2D barcode recognition fails after manual processing, remove the corresponding
PCB manually.
Warning If you remove the board manually or take measures against
the error while the machine is in ready state, you may get
injured. Release the ready state and manually remove the
board or take measures against the error while the machine
is in idle state.