DECAN_S2_Admin(Eng_Ver4.5).pdf - 第232页
7-67 Part Registration or white when checking a bad mark. The value can be adjusted by e n tering a numerical value in the edit box. Check the <Auto> check b ox to automatically set up the <Threshold> value. …
7-66
Advanced Chip Shooter DECAN S2 Administrator’s Guide
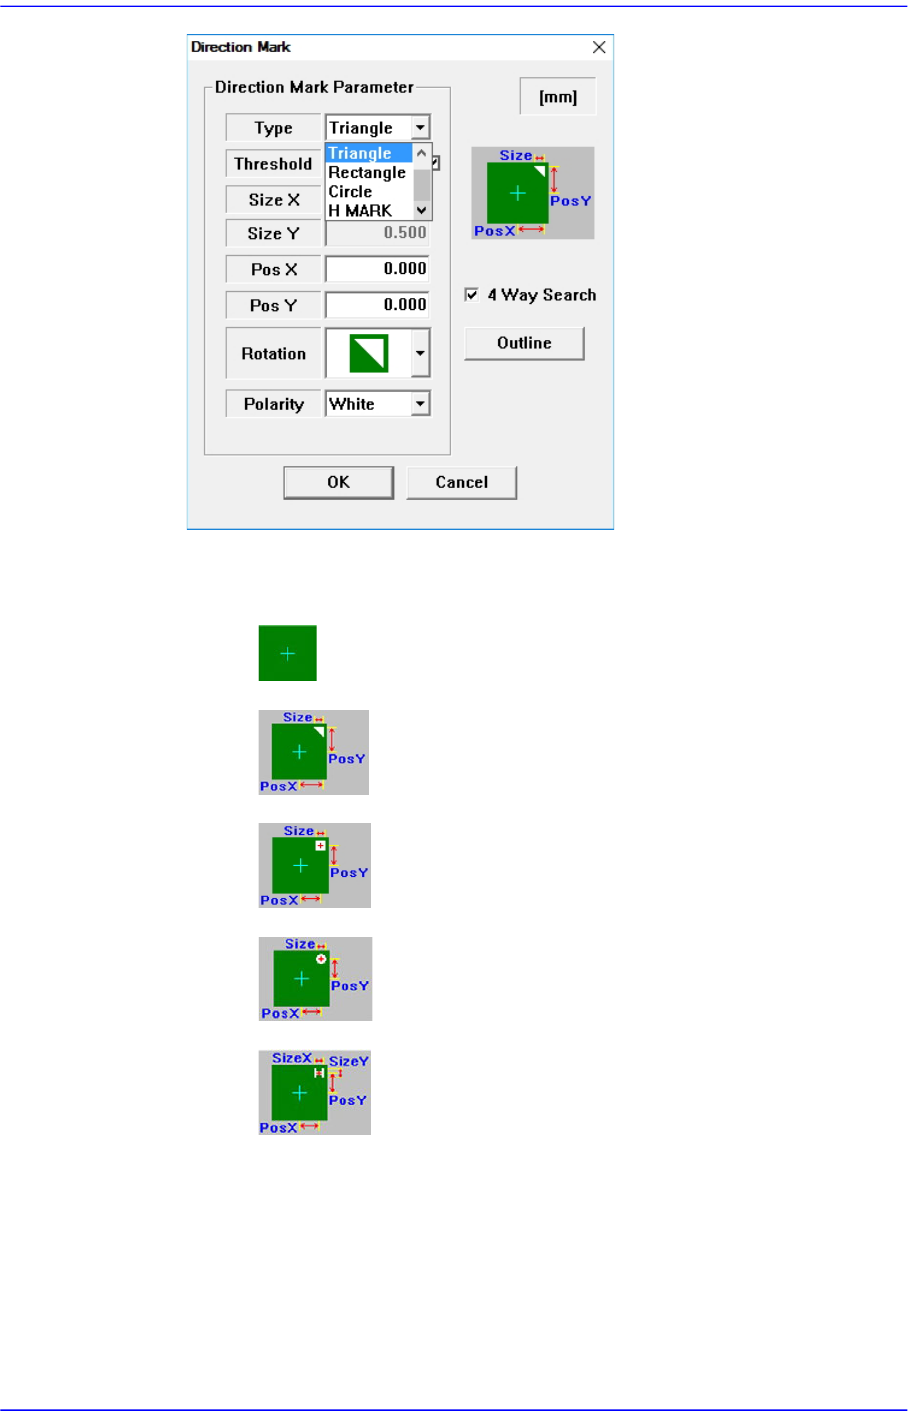
<Direction Mark Parameter> group
<Type> combo box
None: There is no Direction Mark.
Triangle: Selected when the direction mark is a triangle.
Rectangle: Selected when the direction mark is a rectangle.
Circle: Selected when the direction mark is a circle.
H MARK: Selected when the direction mark is “H” mark.
<Threshold> edit box
The image viewed through the SM Vision window is composed of each
pixel.Each pixel has a unique value between 0 and 255 according to the
seen degree of brightness. Here, ‘Threshold Value’ indicates the border
value deciding whether each pixel should be recognized in white or black.
That is, setup the limitation for deciding if the image pixel should be black
7-67
Part Registration
or white when checking a bad mark.
The value can be adjusted by entering a numerical value in the edit box.
Check the <Auto> check box to automatically set up the <Threshold>
value.
<Size X> edit box
Displays the area size in the X direction.
<Size Y> edit box
Displays the area size in the Y direction.
<Pos X> edit box
Displays the X coordinate of the area center..
<Pos Y> edit box
Displays the Y coordinate of the area center.
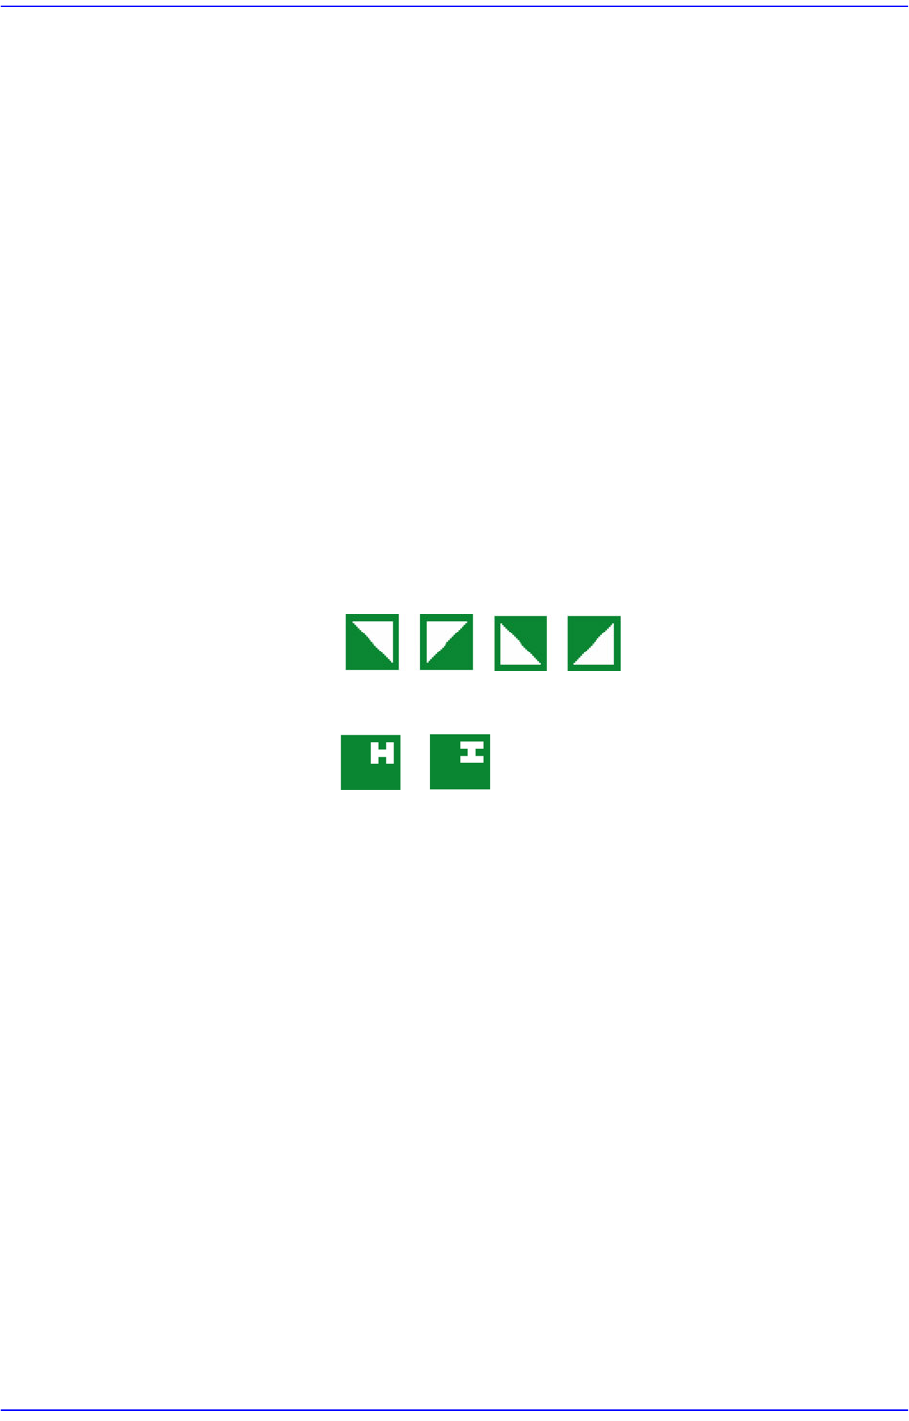
<Rotation> combo box
Selects the rotating angle of the direction mark. The rotation angle can be
selected according to the direction mark type as follows:
Triangle:
Circle: The angle cannot be selected.
H Mark:
<Polarity> combo box
Select the color of fiducial mark. Available colors are as follows.
- White: the mark looks lighter than the surroundings.
- Black: the mark looks darker than the surroundings.
<Outline> button
Shows the image seen through the Vision in real display to which threshold is
not applied, or in the image (Binary) to which threshold is applied as
recognized by MMI.
<OK> button
Saves the align data and closes the dialog box.
<Cancel> button
Closes the dialog box without saving the align data.
<Move> button
Used for parts recognition test by manually picking up parts. Please refer to “Common
Align Data” for more information.
7-68
Advanced Chip Shooter DECAN S2 Administrator’s Guide
<Test> button
Tests component recognition by using the set align data. Please refer to “Common
Align Data” for more information.
<Make Image> button
Displays the component shape recognized by the MMI through the SM Vision window
by assembling the split images after performing split recognition of the component.
<Image Capture> button
Helps to specify the optimum lighting value. The lighting is gradually changed
automatically and the images are saved. The user can check the best image and
identify the optimum lighting value. Please refer to “Common Align Data” for more
information.