DECAN_S2_Admin(Eng_Ver4.5).pdf - 第266页
8-9 Feeder Setup <Move to Fix Camera> button It is activated only when the correspond i ng component is aligned by the vision camera and the align camera is the fix c amera. W hen this button is clicked on, Moves…
8-8
Advanced Chip Shooter DECAN S2 Administrator’s Guide
Memo Performing pocket teaching will automatically reflect the offset
information obtained during pocket teaching and automatically
correct the home offset of the tape feeder. However, the corrected
offset value will be applied during the next feeding.
If the distance between the position recognized by the vision
system and the logical origin exceeds 0.2mm, the feeder ignores
the offset value.
A motor driven feeder using parts other than 1005/0603 parts
does not use the home offset adjustment function.
<Pocket Teach All> button
Performs the ‘Pocket Teach’ function repeatedly for all tape feeders with the <PT>
column being set to ON or ON-S in the <Grid> group in the “Feeders” dialog box
among the tape feeders installed in the corresponding feeder base.
<Pick> button
Performs pickup of the parts for the tape feeder presently selected in the “Feeder
Base” dialog box. A device (Head to pickup) must be selected first. It is displayed
alternately every time the Pick and Dump are clicked. When the pick-up is successful,
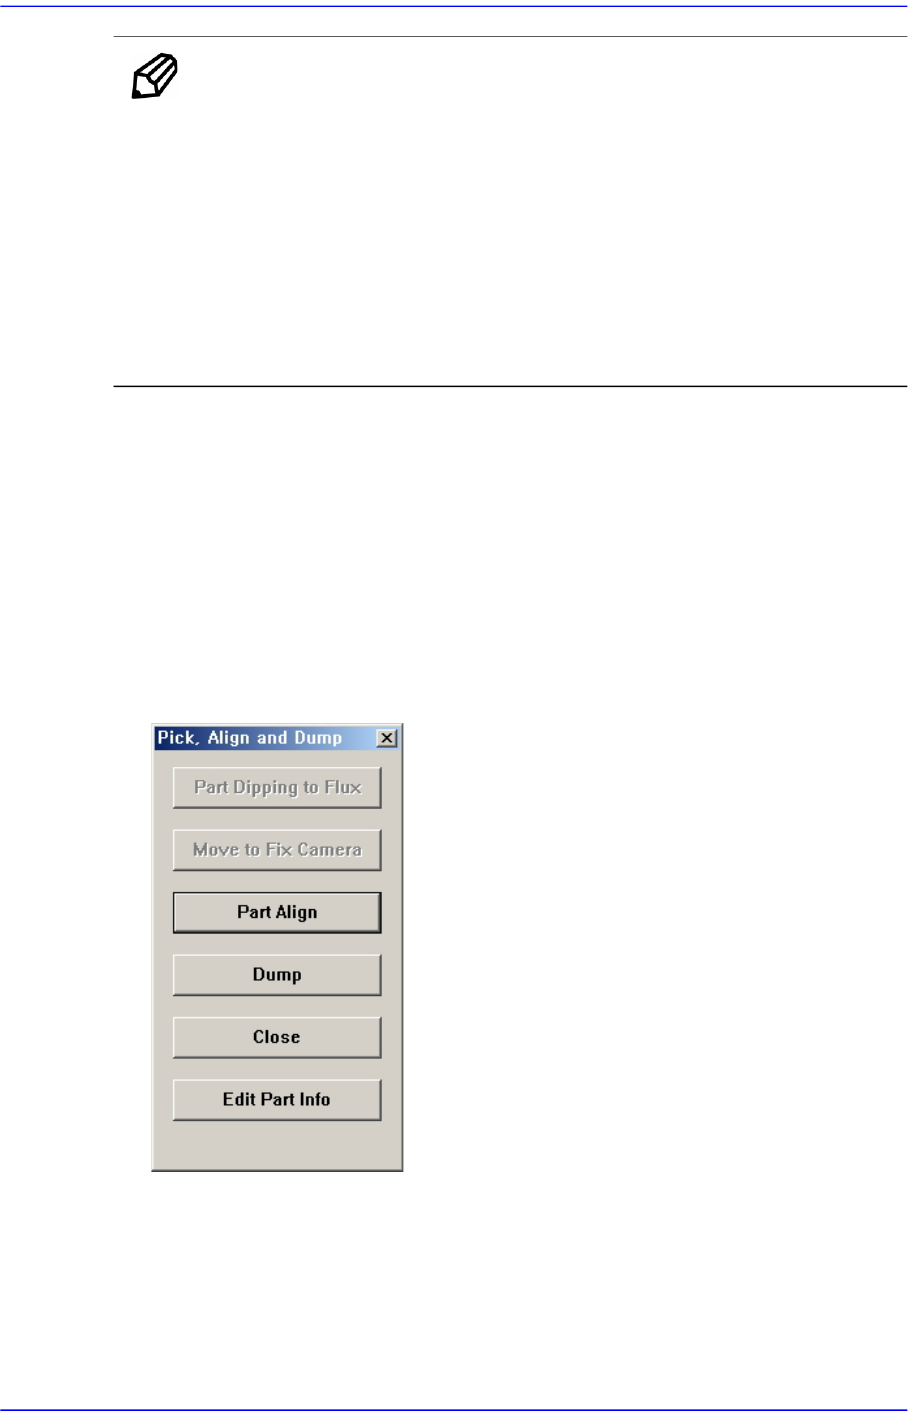
the following dialog box is displayed.
<Part Dipping to Flux> button
The part to take them to the flux device with a flux raises the head spindle to the
height of the component recognition. If you want to adsorb the flux components, it
is enabled.
8-9
Feeder Setup
<Move to Fix Camera> button
It is activated only when the corresponding component is aligned by the vision
camera and the align camera is the fix camera. When this button is clicked on,
Moves the selected object in the <Device> combo box of the <Teach> area to the
position of the fix camera.
<Part Align> button
Executes alignment of the corresponding component.
<Dump> button
Dumps the corresponding component to the dump box.
<Close> button
Closes the dialog box.
<Edit Part Info> button
Closes the ‘Part Edit’ dialog box.
<2Pt. Teach…> button
When teaching the tape feeder pick-up position, This function is used when it is
difficult to teach the part center because the entire part is not viewed in the screen. It
teaches the part center by teaching 2 points at the edges that face with each other
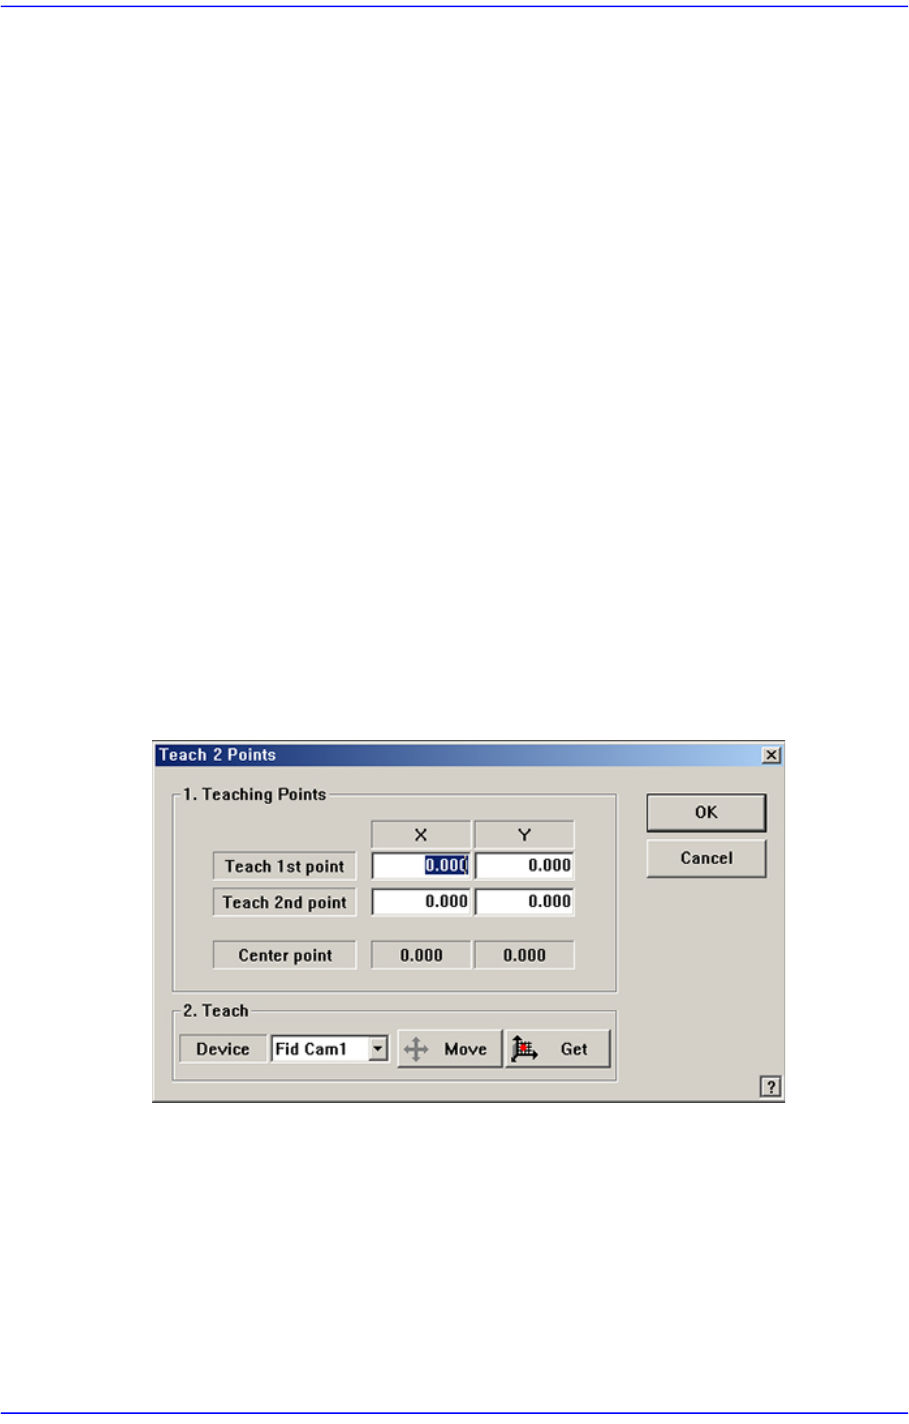
diagonally.When this button is clicked on, the following dialog box is displayed.
Figure8.4 “Feeder :2 point teaching in the Feeder Base” dialog box
<1. Teaching Points> group
Set the position of two corner points to find the center point.
Teach 1st point: Set the first point.
Teach 2nd point: Set the second point.
Center point: Finds the center point from the two corner points and displays it.
<2. Teach> group
Used for moving the selected object to the assigned position of coordinates by

8-10
Advanced Chip Shooter DECAN S2 Administrator’s Guide
rotating XY axis driving motor, or for obtaining the present coordinates of the
selected object.
<Device> combo box
Used for selecting the object to move to the designated coordinates by rotating
the XY axis driving motor or to select the object for which the present
coordinates is searching. Selectable objects are as follows;
Fid Cam2: Select the fiducial camera on the front gantry.
Fid Cam4: Select the fiducial camera on the rear gantry.
Head 1 ~ Head 20: Select #1 ~ #20 heads.
<Move> button
Move the object selected in the <Device> combo box to the position of the
assigned coordinates. At this time, the desired position corresponding to the
teaching position (coordinates of teaching point) must be clicked with the
mouse before clicking on the <Move> button.
<Get> button
Obtain coordinates for XY axis with reference to the object selected in the
<Device> combo box. At this time, the desired position corresponding to the
teaching position (coordinates of teaching point) must be clicked with the
mouse before clicking on the <Get> button.
<Pusher U/D> button
Moves up or down the air pressure cylinder in the slot on the current line in the grid.
When the driving cylinder of the feeder is on, the driving lever of the feeder is lifted,
and the shutter at the top of the feeder opens. Pick-up position teaching is executed in
this state.
<Slot Pitch> button
If this button is selected, the coordinate of each feeder slot is indicated as relative
coordinate, with the pickup point of the No. 1 slot as origin point.
Then if the selection is released, the offset coordinate is indicated based on the pickup
point that was set up through actual teaching at the coordinate of the pickup point set
up for each slot.
<Remove All Tapes> button
Removes all the tape feeders installed in the current feeder base unit.
<Change Slot> button
Moves the tape feeder already installed to other slot. Changed contents are also
reflected on the Step.