2OM-1751-003w_G5S.pdf - 第346页
2OM-1751 6-74 (4) Press the [T eaching] button to select the teaching method. Note When the [Editing] button has been selected, the editing operation is performed based on the sample data. Press the [Complete] button to …
2OM-1751
6-73
Note
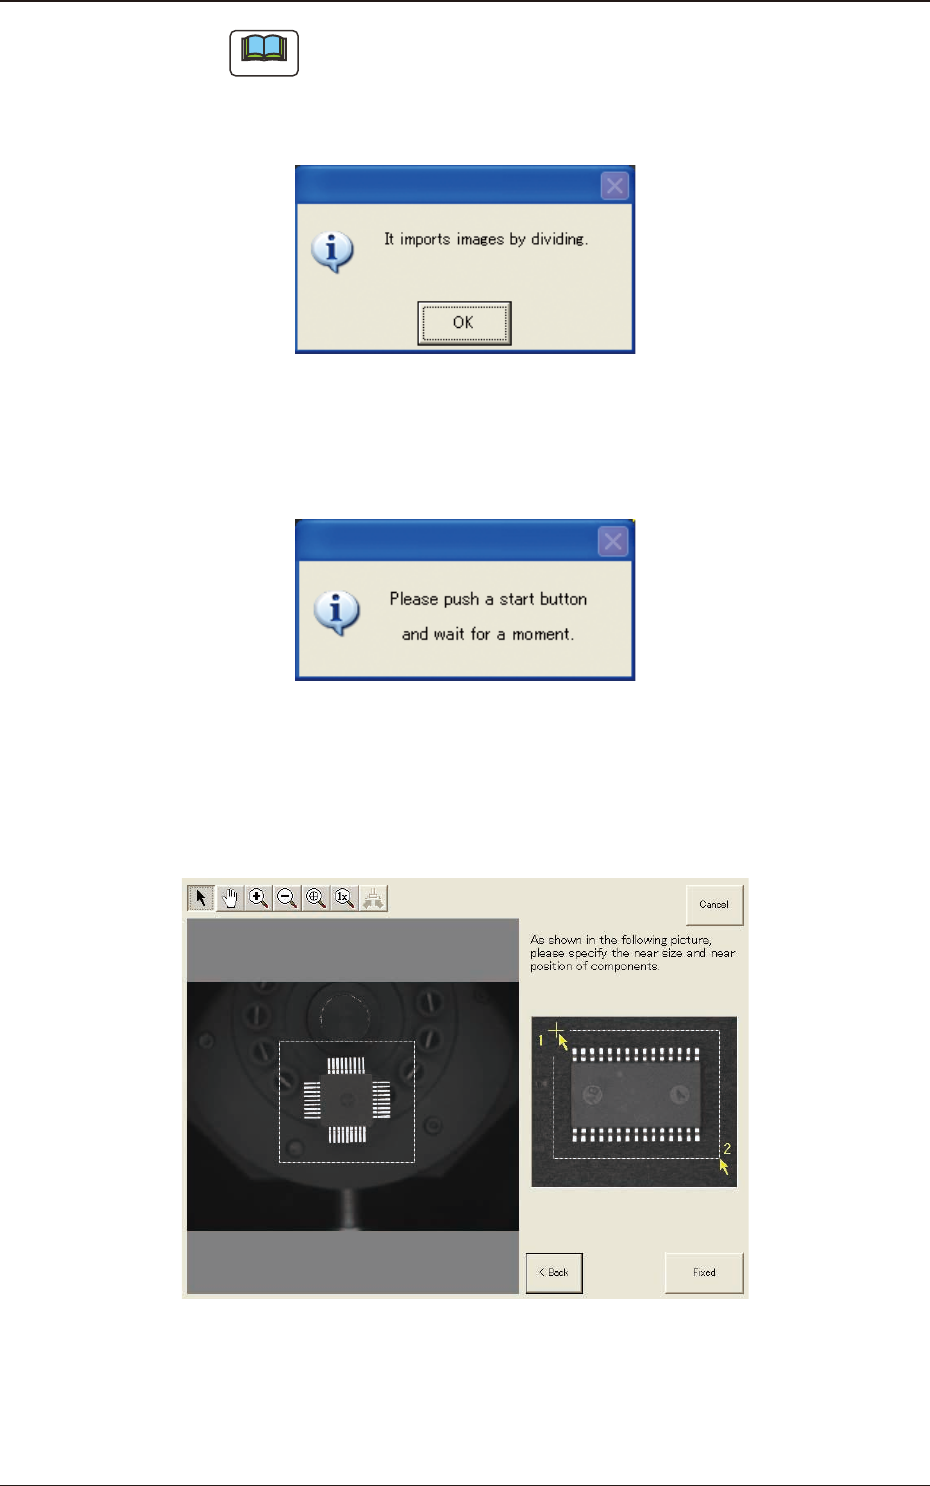
When the [No] button is selected, the component image is split into several
parts which are subsequently captured and reassembled to create the whole
image to be displayed.
The following dialog box appears. Press the [OK] button.
F2F69
When the [OK] button is pressed, the following dialog window opens.
Press the [START] button on the operation panel and wait until the divided
image capturing is completed.
F2F70
(3) After clicking the upper left of the component image, click the lower right to
place the whole component image within a frame.
(Specify an approximate size and position of the component.)
F2F71
1303-001
7.3 "COMP RCG" Test Window

2OM-1751
6-74
(4) Press the [Teaching] button to select the teaching method.
Note
When the [Editing] button has been selected, the editing operation is
performed based on the sample data. Press the [Complete] button to return
to the component library teaching window.
F2F72
(5) Press the [Teach] button to perform the outward length teaching operation.
Note
Make sure that the component is within a frame with dot lines and if not,
adjust it again.
F2F73
1303-001
7.3 "COMP RCG" Test Window
2OM-1751
6-75
(6) When the outward length teaching is completed, check the data and press the
[Fixed] button.
(When the outward length and/or the component angle is different,correct the
graphic errors.)
Note
To turn the graphic, click the coordinate graphic and drag either one of the
arrow ends.
F2F74
(6-1) Press the [Modify] button.
(The following window will appear. Select the modication method.)
F2F75
Note
The indicated data may contain some fractional parts in the values.
At the end of the teaching operation, these fractional parts are truncated.
1303-001
7.3 "COMP RCG" Test Window