JO-072-006_w.pdf - 第99页
4-13 AKBEG-ID (8) Lower the toggle clamp of the jig to x the tape feeder . The parameters are read. C A U T I O N Avoid getting your nger caught in the toggle clamp while fastening the tape feeder to the jig. Fig. D14 …
4-12
AKBEG-ID
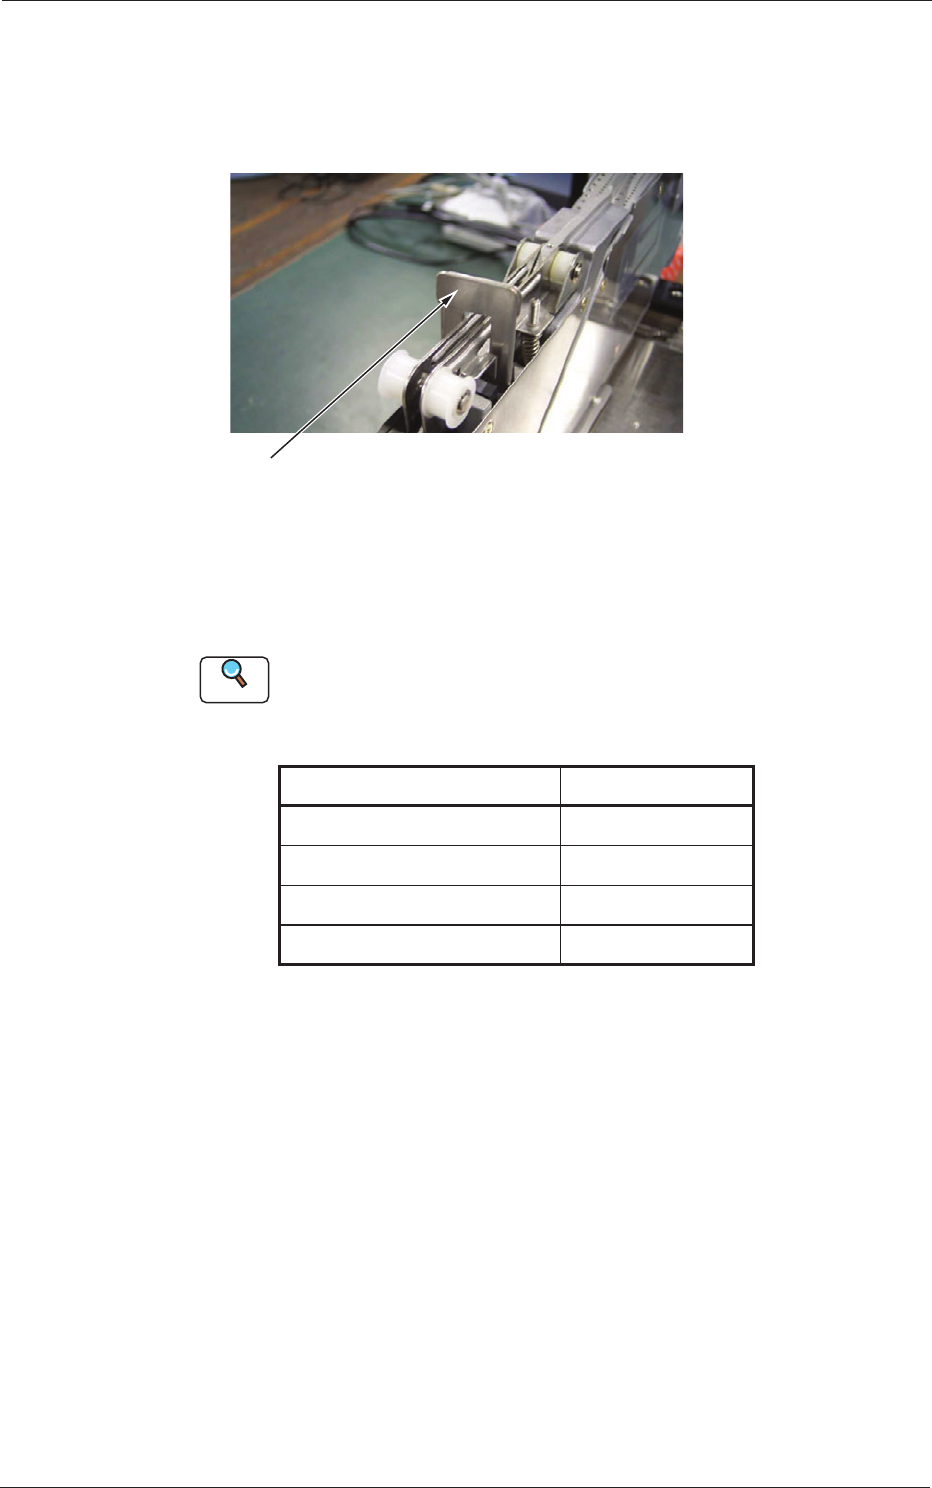
(6) Put the light shielding jig (accessory part) in the cover tape tension
detection photosensor section and set the photosensor in the "E/NR"
mode.
Ref.:
E/NR (Light Emitted and Not Received)
Light Shielding Jig
This may look different from the light shielding jig
(accessory part).
Fig. D13
(7) Set the feeder feeding pitch for the measurement as follows
Reference
Refer to "4.2.2 Feeding Pitch Setting Operation" in the instruction manual "Tape
Feeders for GXH Series" for how to set the feeding pitch.
Table D3
Models Feeding Pitches
GT-0808*, GD-0808* 2 mm
GT-12160, GD-12160 4 mm
GT
-24320, GD-24320 4 mm
GT-44560, GD-44560 4 mm
0508-001
2. Feeder Measurement
4-13
AKBEG-ID
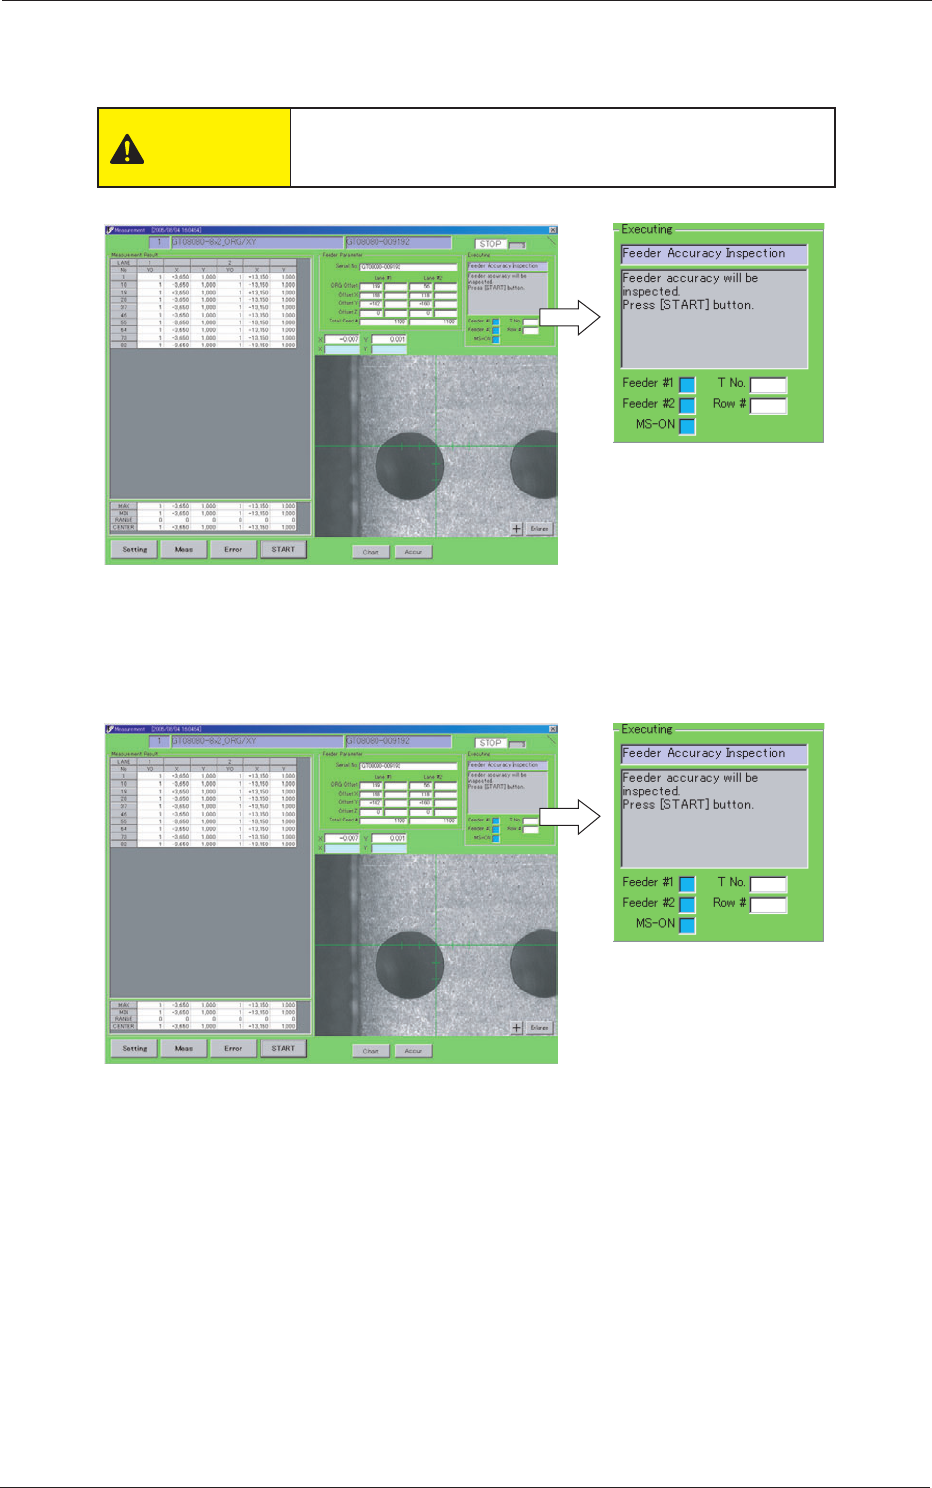
(8) Lower the toggle clamp of the jig to x the tape feeder.
The parameters are read.
CAUTION
Avoid getting your nger caught in the toggle clamp
while fastening the tape feeder to the jig.
Fig. D14
(9) After the reading is completed, the window is changed as follows.
Conrm the following.
Fig. D15
0508-001
2. Feeder Measurement
4-14
AKBEG-ID
•
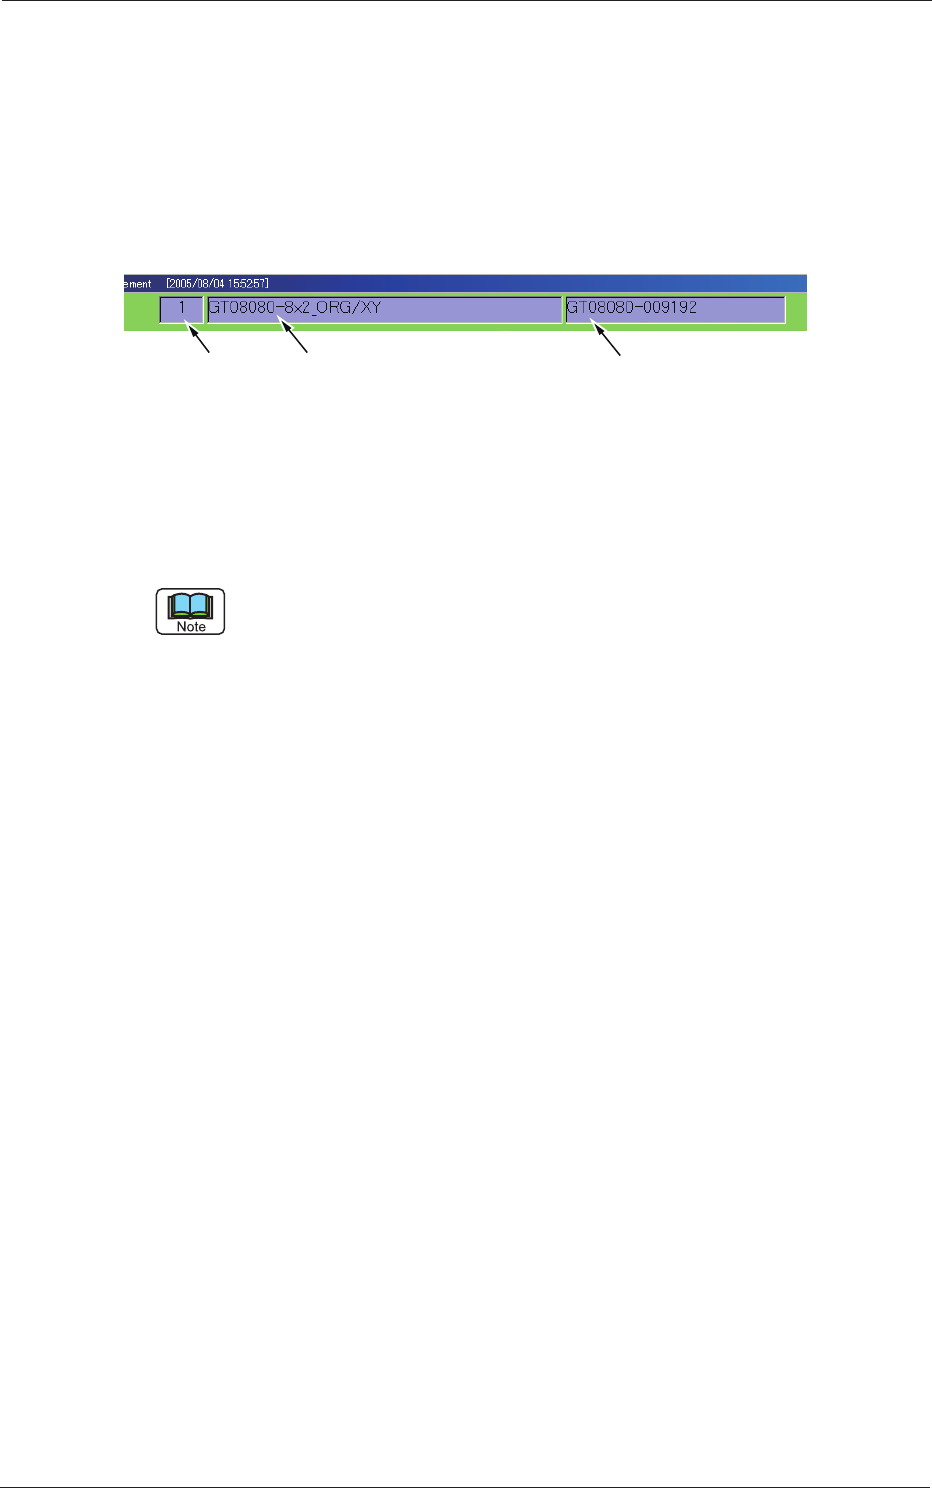
Conrmation of Type No. Type Name, and Serial No.
The type No. the type name, and the serial No. are displayed on the upper
area of the window for the conrmation.
Remarks:
It is required to manually create a type or change the type
be-
fore executing the inspection on the type that was not retrieved
through the automatic type change sequence or on another
type.
Type No. Type Name Serial No.
Fig. D16
•
Conrmation of Crosshair
When a crosshair is not displayed, press the [+] button in the "Measure
-
ment" window to make the crosshair appear.
•
To stop the accuracy inspection sequences temporarily
When the [START] button is pressed to start the inspection, the label on
the button is changed to "STOP".
When the [ST
OP] button is pressed, the inspection is interrupted tempo-
rarily.
"PAUSE" appears in the mode indicator box (located on the upper right
side of the window) while the inspection is stopped temporarily.
To cancel the "PAUSE" mode and continue the inspection, press the
[START] button again.
•
To stop the accuracy inspection sequences completely
To stop the inspection sequences completely, press the [RESET]
button (displayed on the upper left area of the window) in the
"PAUSE" mode.
A message box appears, enabling you to determine whether or not
the sequences should be stopped completely.
When you press the [YES] button, the inspection sequences are
stopped completely.
0508-001
2. Feeder Measurement