00195440-05-SG_D-Series_FSE-EN.pdf - 第276页
16 Annex (FSE) 16.4 Backup of Machine Data Wit hout Disk Drive s 16.4.1 Error / p roblem 276 Student Guide SIPLACE D-Series (FSE) 16.4 1 6 . 4 B a c k u p o f M a c h in e D a t a W it h o u t D is k D r iv e s Backup of…

16 Annex (FSE)
16.3 Calibration Steps and Individual Calibration Functions
Student Guide SIPLACE D-Series (FSE) 275
Replace the current noz-
zle on the TWIN module
with the special calibra-
tion nozzle, according to
the SW message.
The gantry moves the
TWIN module above the
component (IC) camera.
Within a +/-5° tolerance,
the SW determines the
angle correction.
Save in Achs_ver.ma.
Calibration menus reserved for SIPLACE Service
FCCS for digital cameras White adjustment of hard-
ware required.
The PCB camera cali-
brates the calibration tool
carrier position after this
carrier has been moved
into the PCB conveyor
and clamped into place.
Other PCB camera test
measurements follow.
All cameras programmed
in the Config.ma file are
brightness calibrated via
a whiteness adjustment
measurement.
Save in camera EPROM! The results can be saved
in the calibration value
XML file.
Checking the star mounting
position in the magnetic
neutral position
The star mounting posi-
tion is checked by com-
paring the magnetic
neutral position with the
'zero position of segment
1'.
A deviation of up to 95x 1/
1000° is tolerated by the
SW.
Should errors occur, re-
mount the placement
star on the star motor
shaft.
Calibration step/individu-
al calibration function
For D4/
D4i
For D3 For D2/
D2i
For D1/
D1i
Comments
16 Annex (FSE)
16.4 Backup of Machine Data Without Disk Drives 16.4.1 Error / problem
276 Student Guide SIPLACE D-Series (FSE)
16.4
16.4 Backup of Machine Data Without Disk Drives
Backup of Machine Data Without Disk Drives
16.4.1
16.4.1 Error / problem
Error / problem
With the introduction of the CPU assembly “SMP 16-CPU086“ (BOX PC), there is no longer a disk drive
or CD/DVD burner available at the station. Machine data backup or restoration can therefore not be per-
formed with external data carriers at the station.
16.4.2
16.4.2 Backup with Data Network
Backup with Data Network
The backup or recovery of data is performed via a network, to a folder (e.g. on the SIPLACE Pro com-
puter), which the service staff have set up for you!
Select the folder which was set up for your machine, on the required computer in the SIPLACE Pro net-
work.
16.4.3
16.4.3 Backup of Machine Data on CD
Backup of Machine Data on CD
An external CD-RW drive is supplied with D and X machines. The SITEST backup function allows you
to select this CD drive for the backup. Select the CD drive shown for the station computer.
16.4.4
16.4.4 Machine Data Backup with the Fast SYSTEM Recovery Software Option
Machine Data Backup with the Fast SYSTEM Recovery Software Option
This software option enables you to store the station machine data at a computer in the network, with
appropriate comments.
16.4.6
16.4.6 Settings on SIPLACE Pro Computer
Settings on SIPLACE Pro Computer
► Log onto the SIPLACE Pro computer as administrator.
► In partition D (or C, if the hard drive only has one partition), create a new folder and name it
Backup_MachineData (Backup_Maschinendaten) .
NOTICE
German menu names shown in brackets.
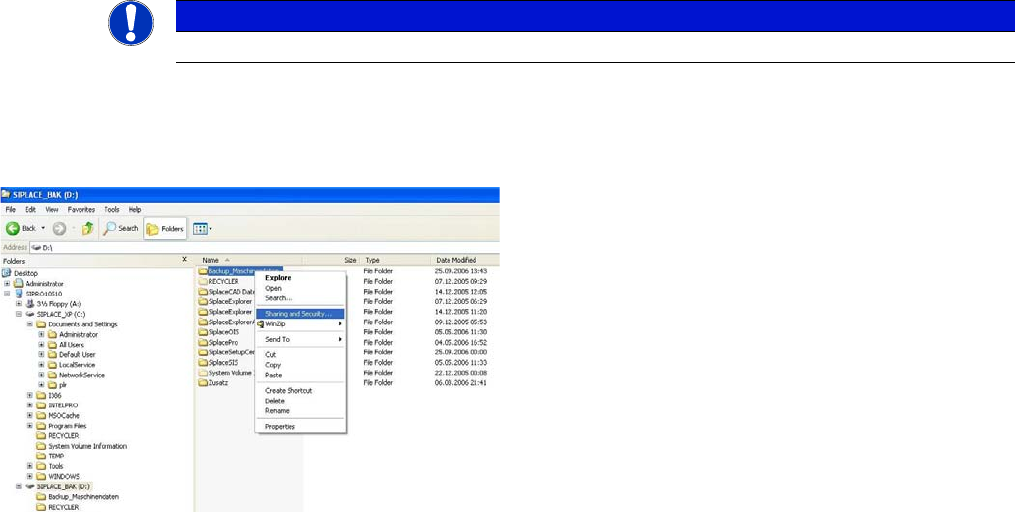
► Release this folder for the network. Right-click with
the mouse to highlight the Backup_MachineData
(Backup_Maschinendaten) folder and open the Shar-
ing and Security (Freigabe und Sicherheit)...menu:
16 Annex (FSE)
16.4.6 Settings on SIPLACE Pro Computer 16.4 Backup of Machine Data Without Disk Drives
Student Guide SIPLACE D-Series (FSE) 277
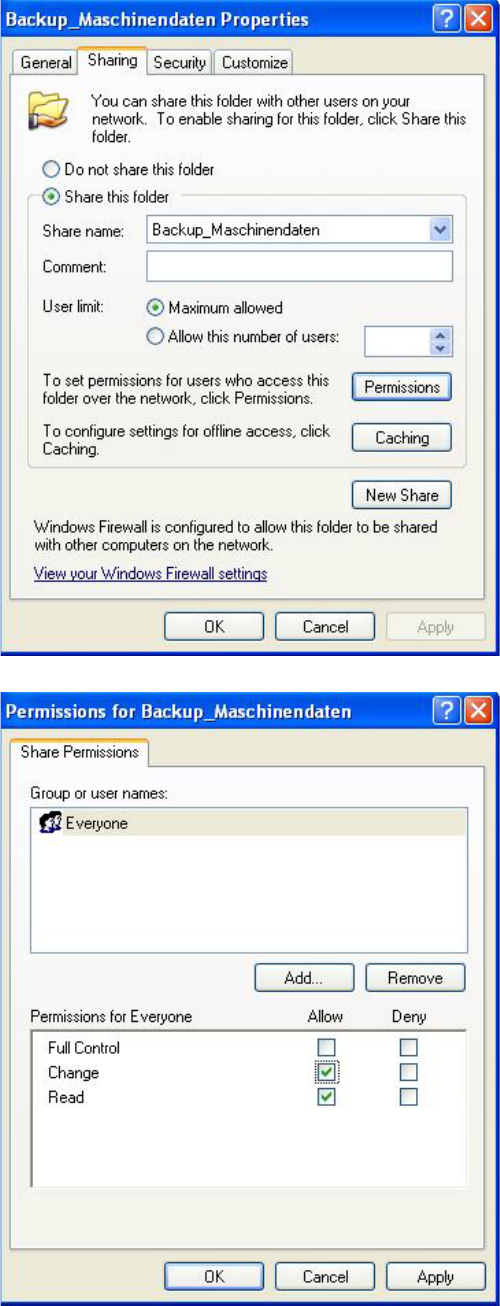
► In the menu Backup_MachineData Properties
(Backup_Maschinendaten Eigenschaften) (Proper-
tiesand the tab Sharing (Freigabe).
Press Share this folder (Diesen Ordner freigeben) to
release this folder for network access:
► Click on Permissions for Backup_MachineData (Be-
rechtigung) to set the access rights.
► In the menu Permissions for Backup_MachineData (
Permissions für Backup_Maschinendaten) select
group Everyone (Jeder) and activate the permission
Change (Ändern):
► Click twice on the OKbuttons to accept the settings.