80S-15贴片机.pdf - 第399页
SIPLACE 80S/F/G Service Manual 9 Revolver Head Edition 04/97 9 - 115 9.15.8 Replacing the spacer ring, spring wash er and upper deep-groove ball b earing ● Dismantl e and ins tall the sleeve a s descr ibed in sections 9.…
9 Revolver Head SIPLACE 80S/F/G Service Manual
Edition 04/97
9 - 114
ATTENTION
Hold the brake bracket firmly to prevent the compression spring jumping out.
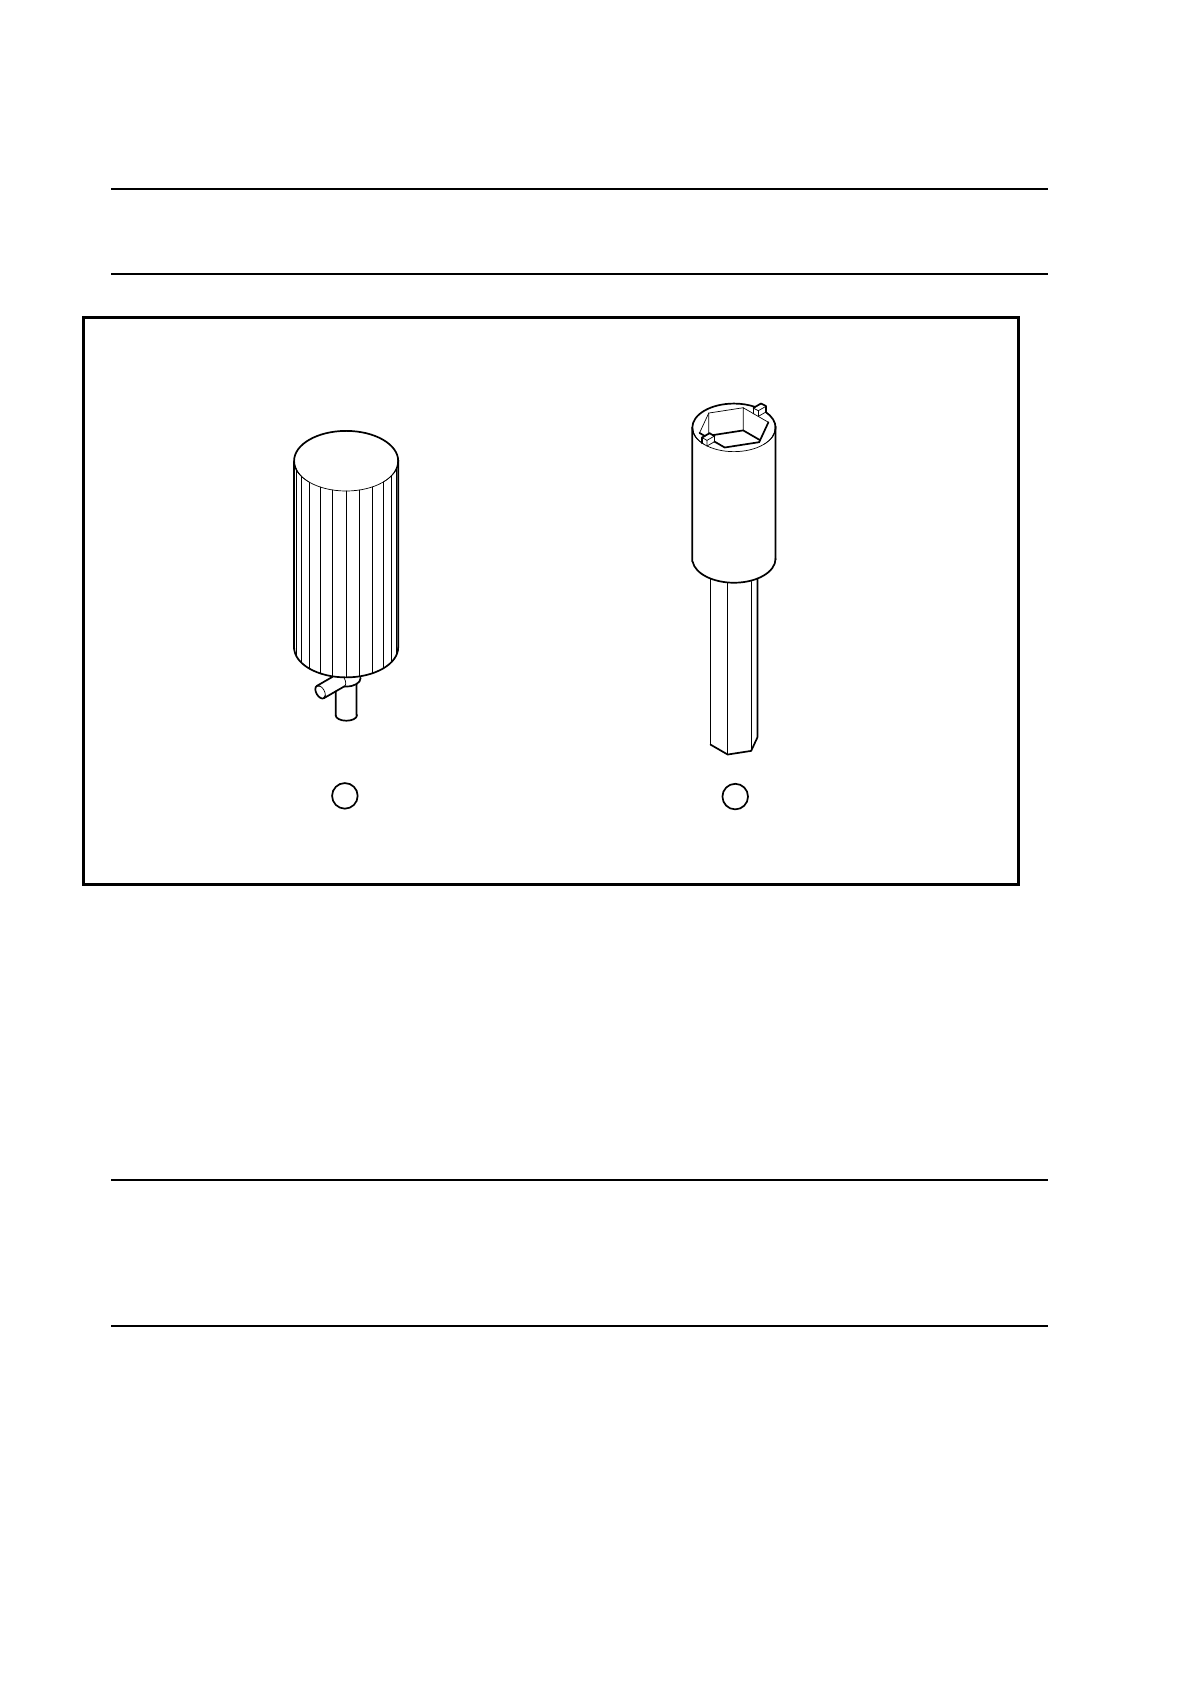
Fig. 9.15.2 Tool for replacing sleeves and pushers
1 Screwdriver for sleeves
2 Torque insert for ring nuts
9.15.7 Installing a new sleeve
●
Push the deep-groove ball bearing from the repair kit onto the new sleeve as far as the stop.
PLEASE NOTE
Watch the scale disk during assembly. Do not impose any stresses on the scale disk since it could break.
Make sure that the scale disk is not contaminated with oil or grease, which could cause counting errors
and thus placement errors.
●
Insert the friction wheel.
●
Push the sleeve into the segment body as far as the stop.
●
Insert the spacer ring, the spring washer and the upper deep-groove ball bearing.
●
Place the ring nut on the sleeve thread.
●
Check that the torque wrench is set to 20 Ncm.
●
Tighten the ring nut with a torque of 20 Ncm.
●
Turn the sleeve to check the braking effect of the brake.
●
Finally, check that the sleeve can be turned easily when the brake is released.
1
2

SIPLACE 80S/F/G Service Manual 9 Revolver Head
Edition 04/97
9 - 115
9.15.8 Replacing the spacer ring, spring washer and upper deep-groove
ball bearing
●
Dismantle and install the sleeve as described in sections 9.15.6 and 9.15.7 and replace the spacer ring,
spring washer or the upper deep-groove ball bearing beneath it.
9.15.9 Installing the sealing piston
●
Clean the sealing piston and O-ring using the segment cleaning cloth.
●
Replace the O-ring, if necessary.
●
Wipe the sealing piston with a lint-free cloth.
●
Carefully insert the sealing piston into the hole in the sleeve as far as the stop.
●
Wipe the cam shaft with the segment cleaning cloth.
●
Push in the cam shaft. Ensure that the pin of the cam shaft engages in the ring groove of the sleeve.
●
Turn the cam shaft and check that the sealing piston moves freely.
9.15.10 Inserting the nozzle
●
Insert the nozzle.
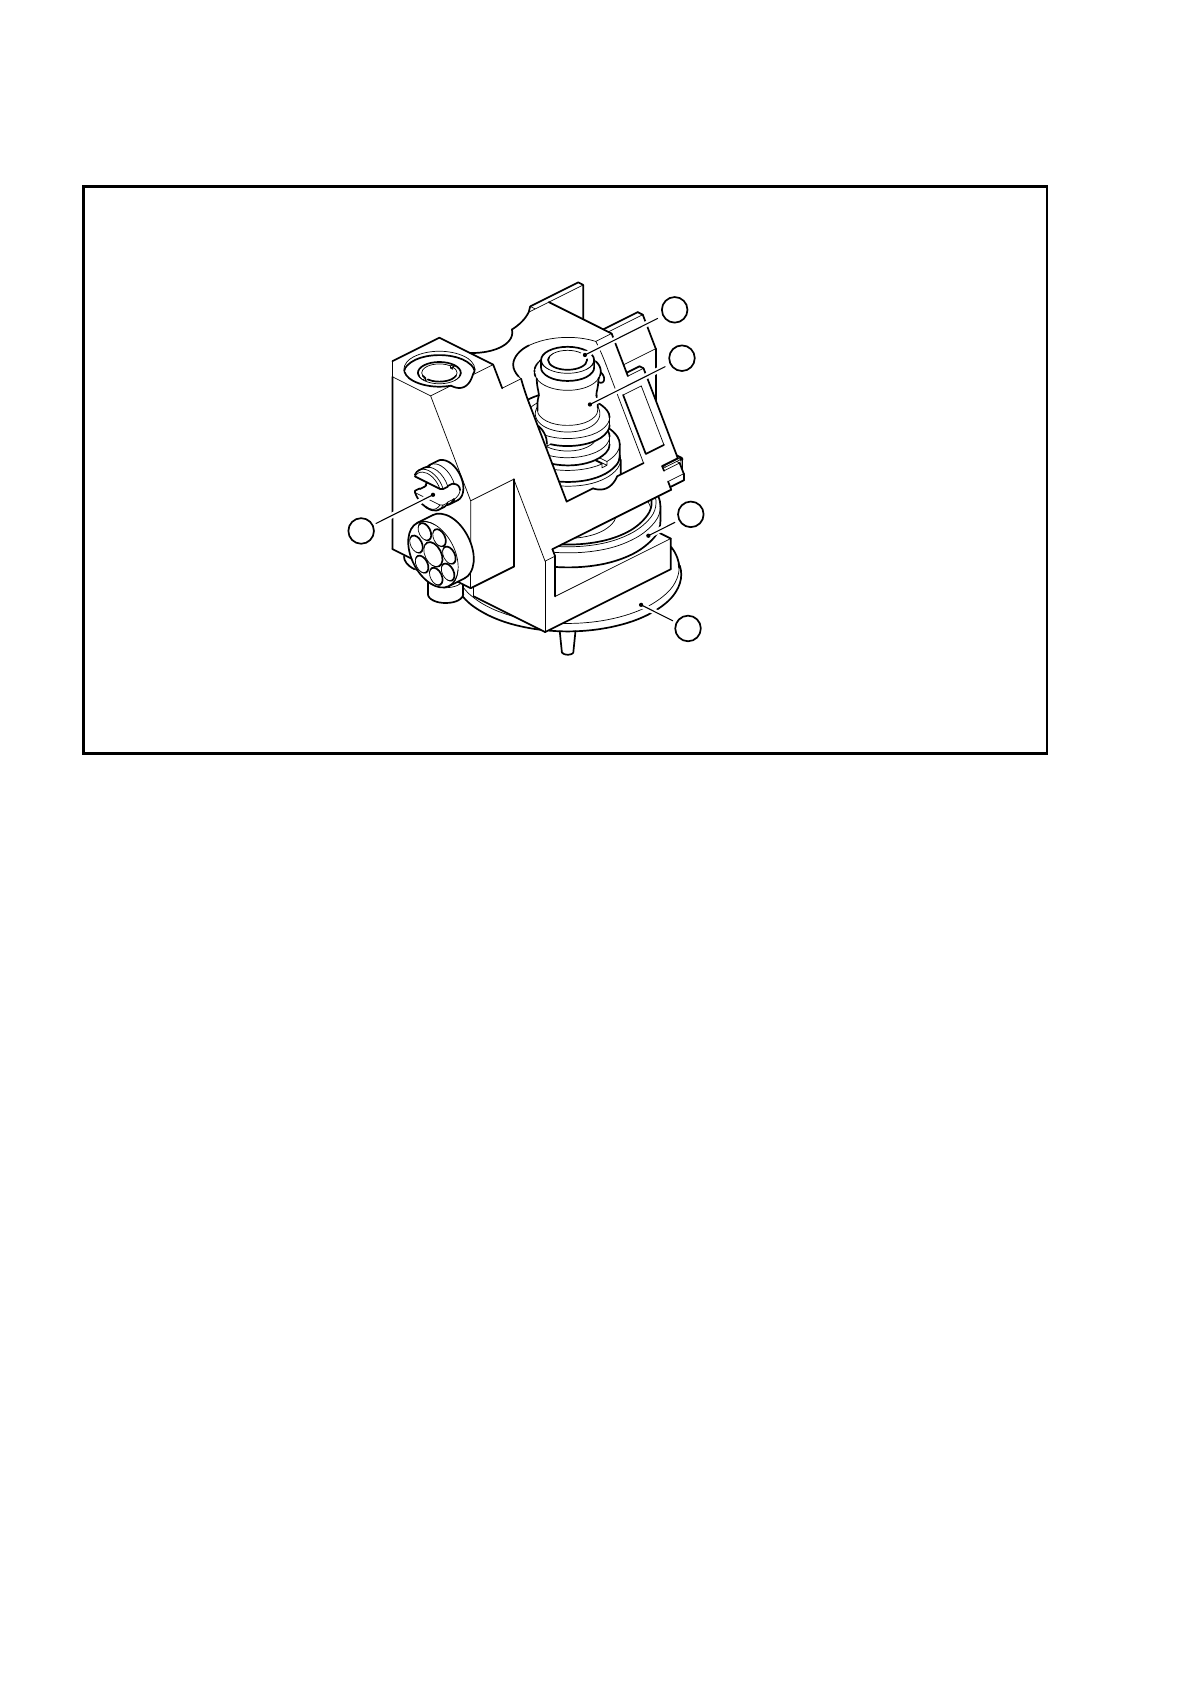
9.15.11 Checking the segment before insertion
Check the following points before inserting the segment in the star (see Fig. 9.15.3):
–
Is the sealing piston fully retracted? (A)
–
Is the slot in the cam shaft horizontal? (B)
–
Is the cam shaft engaged in the spring plunger? (B)
–
Is the scale disk free from oil and grease? (C)
Wipe away any dust with a clean, dry cloth. (D)
–
Is the scale disk undamaged? (C)
–
Is the circumference of the friction wheel free from oil and grease residues? (D)
Clean the surface with ethyl alcohol, if necessary.
–
Is the sealing slide bush free from contamination? (E)
If necessary, clean it with a pipe-cleaner. To do this, moisten the pipe-cleaner with the cleaning agent on
the segment cleaning cloth and afterwards wipe the sealing slide bush with a dry cloth.
9 Revolver Head SIPLACE 80S/F/G Service Manual
Edition 04/97
9 - 116
Fig. 9.15.3 Checking the segment before insertion
9.15.12 Inserting the segment
●
Clean the vacuum tube of the star using the segment cleaning cloth.
●
Use the segment changing device to insert the segment.
9.15.13 Adjustments
●
Use the SITEST program to measure the segment.
E6.1
D
C
B
A
E