205020 OTS Standalone Manual - 第28页
OVER THE TO P SNUGGER (OTS) SEQUENC ES 1.16 Over the Top Snuggers (OTS) Manual Chapt er Issue 3 A ug 14 or the print is halted. Retai n Mode Disabled 1. S tate 12 ( as S t ate 8) - post print , the rising t able lower s,…
OVER THE TOP SNUGGER (OTS)
SEQUENCES
Chapter Issue 3 Aug 14 Over the Top Snuggers (OTS) Manual 1.15
Unclamping There are two unclamping states, there is unclamping with the board retained
by the OTC plate and unclamping with the board released. The two modes of
operation are programmed via the software. The parameter, OTS Retain Mode,
if enabled, allows the board to be held during the unclamping phase of the cycle
If disabled, the clamp is retracted preventing the possibility of smudging the
print. This is the default setting.
Retain Mode
Enabled
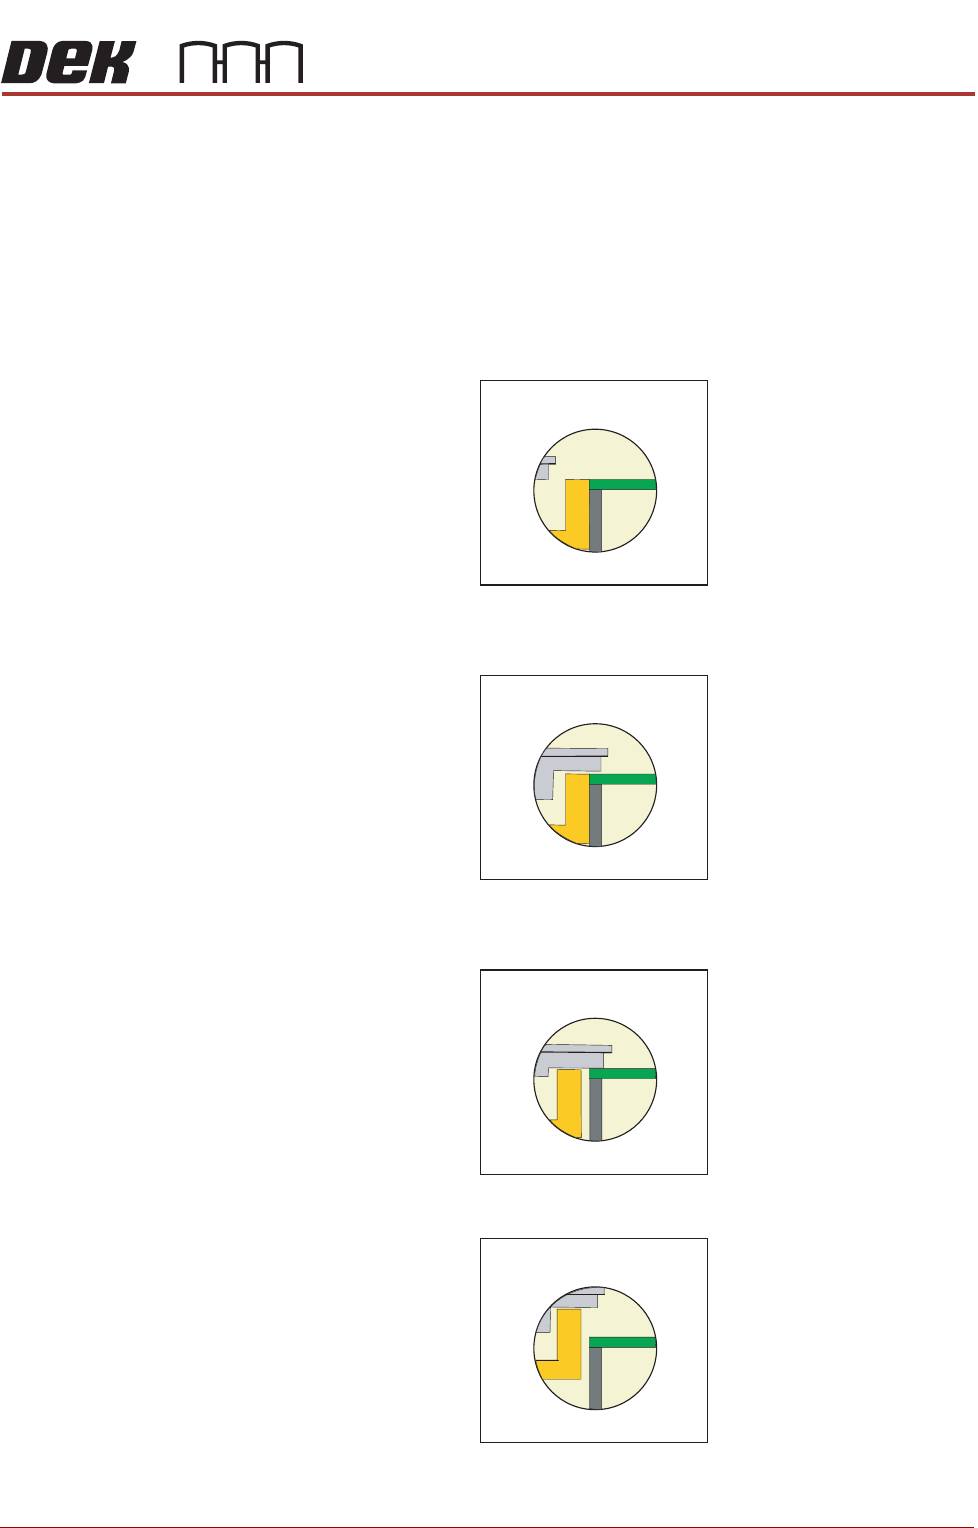
1. State 8 - post print, the rising table lowers, the OTC plate retracts away from
the snugger and lifts; ready to release the product.
2. State 9 The OTC plate moves into position, this prevents any movement of
the product that may occur as a result of the unclamping action.
3. State 10 The vacuum is on, releasing the brakes. The snugger moves away
from the product.
4. State 11 The mid plate/snugger lifts.
The status returns to State 0; the product is fed out of the printer and another
is fed in; the cycle continues until the complete batch of boards has printed
STATE 8
STATE 9
STATE 10
STATE 11

OVER THE TOP SNUGGER (OTS)
SEQUENCES
1.16 Over the Top Snuggers (OTS) Manual Chapter Issue 3 Aug 14
or the print is halted.
Retain Mode
Disabled
1. State 12 (as State 8) - post print, the rising table lowers, the OTC plate
disengages away from the snugger and lifts.
2. State 13 The vacuum is on, releasing the brakes. The snugger moves away
from the product.
3. State 14 The mid plate/snugger lifts.
The status returns to State 0; the product is fed out of the printer and another
is fed in; the cycle continues until the complete batch of boards has printed
or the print is halted.
STATE 14

OVER THE TOP SNUGGER (OTS)
ADJUSTMENTS AND SETTINGS
Chapter Issue 3 Aug 14 Over the Top Snuggers (OTS) Manual 1.17
ADJUSTMENTS AND SETTINGS
Vision Height
WARNING
BOARD CLAMPS. EXTREME CARE MUST BE EXERCISED WHEN WORKING IN
THE TOOLING AREA OF THE MACHINE TO AVOID INJURY. THE FOILS ON THE
FRONT AND REAR BOARD CLAMPS ARE VERY SHARP.
NOTE
Ensure the board file used has the correct board thickness value. Check rail /
camera X motor bracket clearance. Remember that the vision height may be
higher if a thinner board is used.
1. Select Unload Screen.
2. Open the front printhead cover.
3. Remove the screen from the machine.
4. Place the board on the rails and slide to a central position.
5. Refit the screen.
6. Close the front printhead cover.
7. Press the System button.
8. Select Load Screen.
9. Select Maintenance.
10. Select Diagnostics.
11. Use Next or Previous to highlight Rising Table.
12. Select Select Module.
13. Use Next or Previous to highlight Raise Table To Vision Height.
14. Select Run Diagnost.
15. Remove the left hand safety cover.
16. Using a suitable metric rule, measure the distance between the bottom of
the screen to the top of the board. Check that the dimension is 79.5mm.
17. If the dimension is correct, go to Step 26.
18. Use Next or Previous to highlight Drive Table Using Jog Buttons.
19. Select Run Diagnost.
20. Using jog buttons drive the rising table to achieve a vision height of 79.5mm.
CAUTION
VISION HEIGHT. The rising table must not be jogged up higher than the
specified dimension, camera damage may occur.
NOTE
The right jog button drives the rising table up, the left jog button drives the
rising table down.
21. Use Next or Previous to highlight Set Reference Vision Height.
22. Select Run Diagnost. The message ‘This Will Alter The Printer Config-
uration File - Please Confirm’ is displayed.