00198586-02_JC_PMWF2_TX_V2_EN.pdf - 第25页
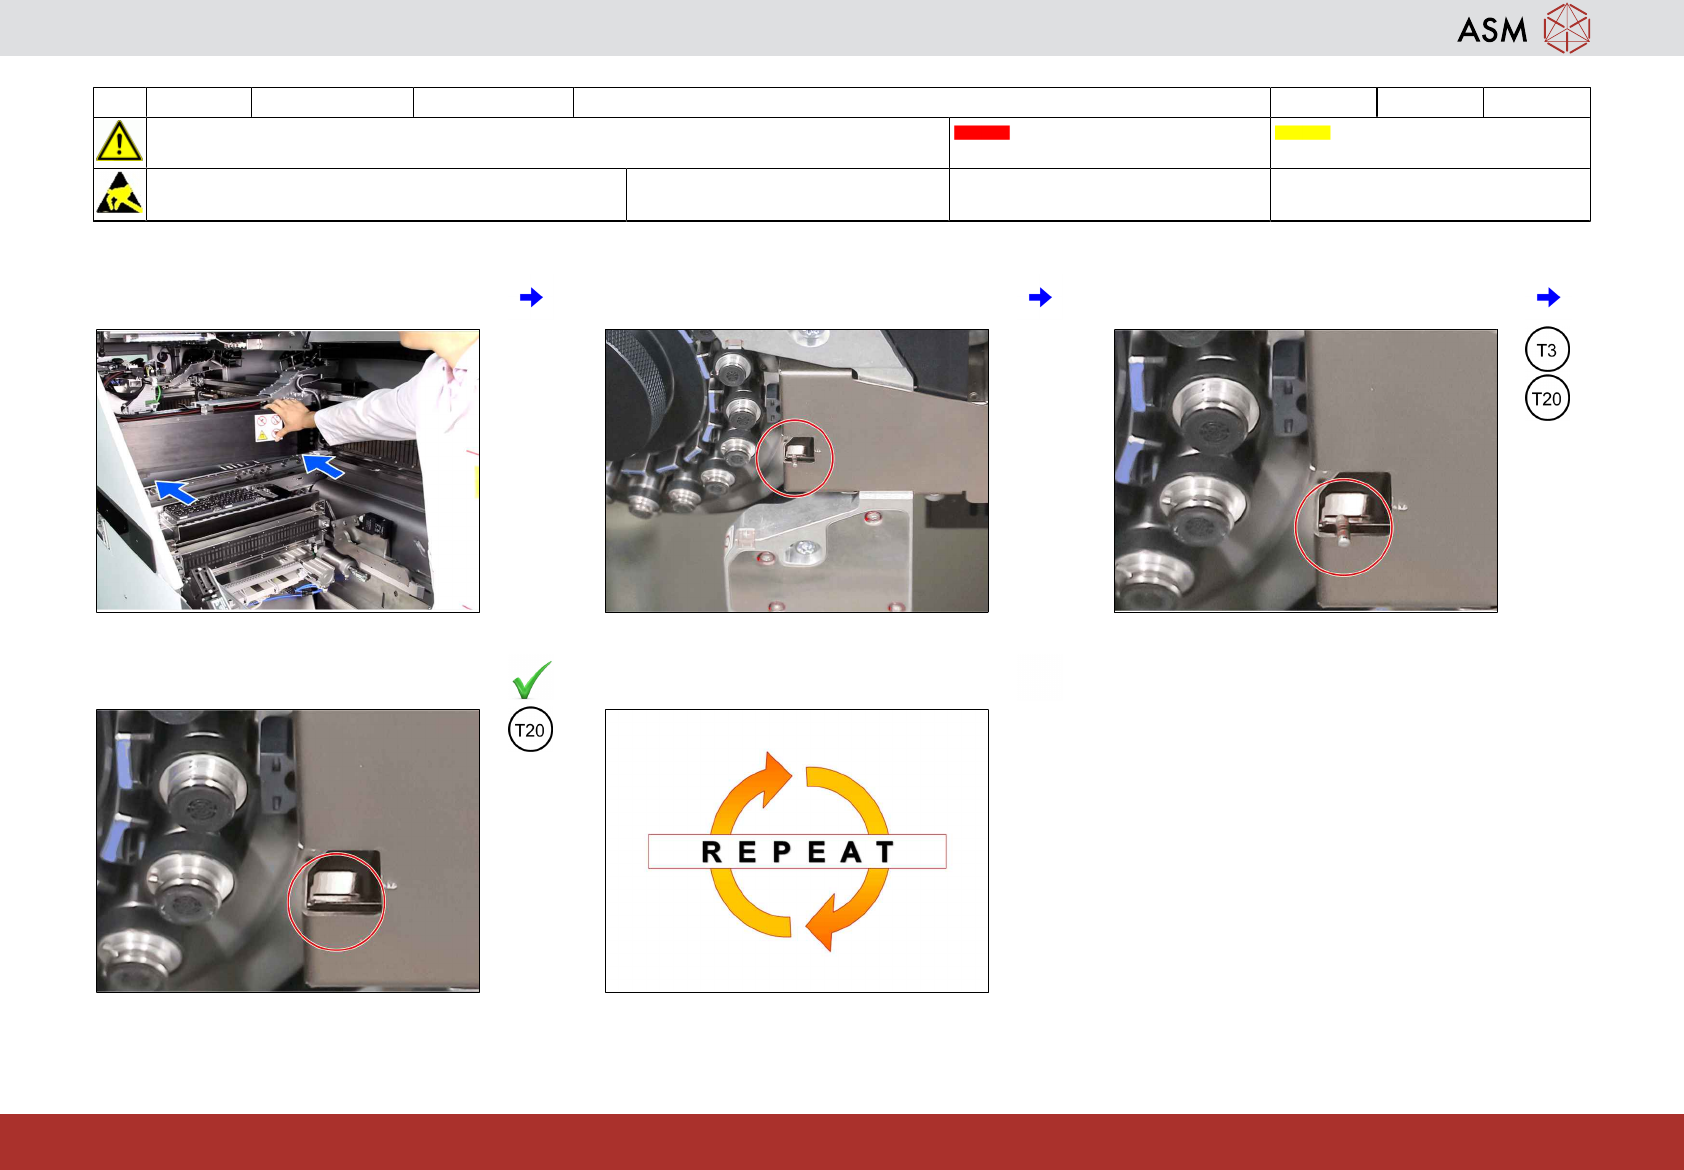
6 WF 2 TX-Series V2 Maintenance Clean the Z-Axis of the remaining C&P20x heads 1 min 1 / 1 C A U T I O N ! R e f e r t o s a f e t y i n s t r u c t i o n s i n u s e r m a n u a l b e f o r e c o m m e n c i n g M…
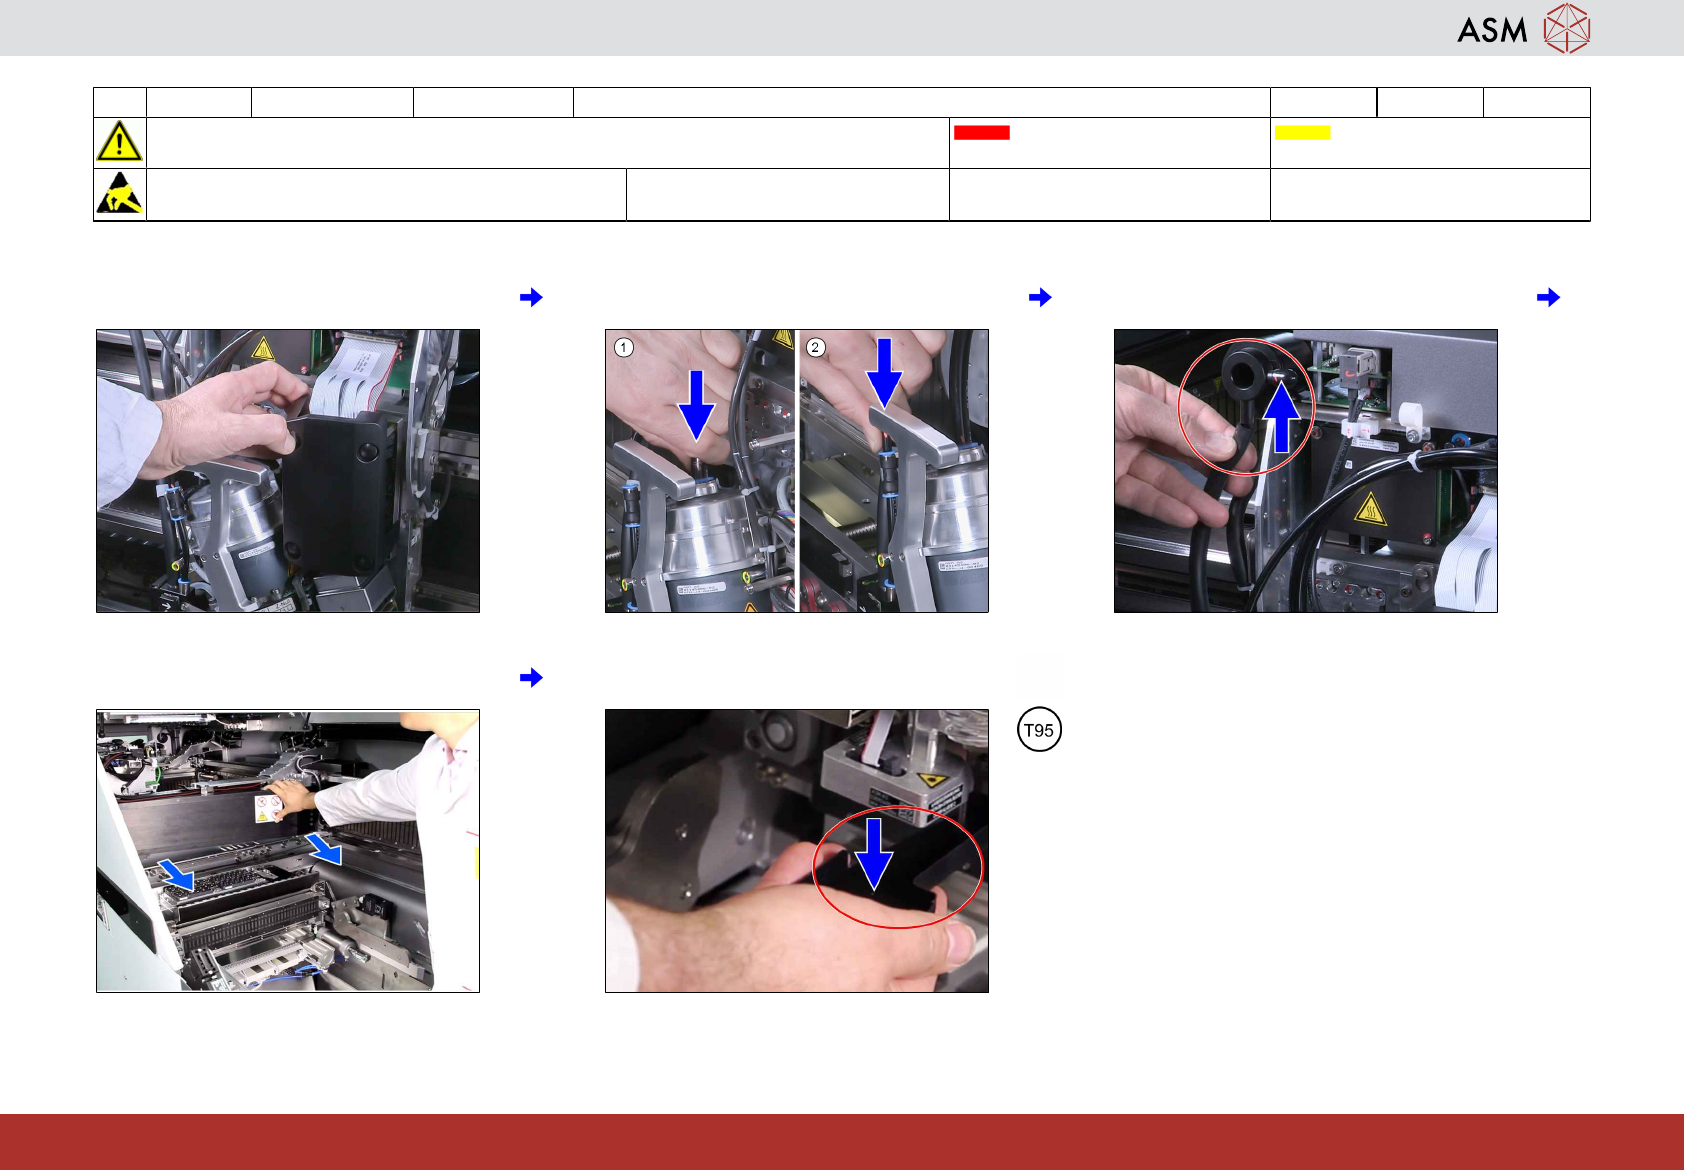
5 WF 2 TX-Series V2 Maintenance Return a maintained C&P20x 3 min 2 / 2
CAUTION! Refer to safety instructions in user manual before commencing Maintenance
Machine Status OFF Conveyor Empty
NOTICE! ESD guidelines are to be followed Tool:
T7, T8, T9, T94, T95
Wear Part: Consumables:
www.asm-smt.com
7 Mount the protection cover. 8 Connect the compressed air connections
to the head.
9 Connect the exhaust hose.
10 Move the gantry with the maintained head
to the end limit.
11 Remove the component sensor protection.
6 WF 2 TX-Series V2 Maintenance Clean the Z-Axis of the remaining C&P20x heads 1 min 1 / 1
CAUTION! Refer to safety instructions in user manual before commencing Maintenance
Machine Status OFF Conveyor Empty
NOTICE! ESD guidelines are to be followed Tool:
T3, T20
Wear Part: Consumables:
www.asm-smt.com
1 Move all gantries to the end limit for the
heads remaining in the machine.
2 Area of the head to be cleaned. 3 Remove any components from the Z-Axis.
4 If OK → next task. 5 Repeat steps 1 to 4 for the remaining
heads.

www.asm-smt.com