00198371-01_UM_SWS-EN.pdf - 第123页
User manual SIPLACE Wafer System (SWS) 6 Options Edition 04/2018 6.3 SWS wafer stretcher (expander) 123 6.3.6.3 Removing the 8" wafer support Removing t he downho lder plate Y ou need to replace the downholder plate…

6 Options User manual SIPLACE Wafer System (SWS)
6.3 SWS wafer stretcher (expander) Edition 04/2018
122
6.3.6.2 Preparations
Close all current processes on the SWS module.
Move the wafer table into the changeover position.
Select Manual operations -> Wafer handling systems -> Go to change position.
Open the clamp.
Select Manual operations -> Wafer handling systems ->Open wafer clamp.
– The clamp will open and the expansion ring will move downwards.
Open the expander
Select Manual operations -> Wafer handling systems ->Release stretcher.
– The downholder plate will move upwards.
Select Settings -> Shut down machine.
SWS GUI and Linux are shut down properly. 6
Switch off the SWS at the main switch.
CAUTION
Avoid damage to the gripper
When working on the SWS wafer stretcher (expander), the gripper could be damaged.
Push the gripper in the direction of the wafer lift and out of the SWS wafer stretcher
(expander) working area.
User manual SIPLACE Wafer System (SWS) 6 Options
Edition 04/2018 6.3 SWS wafer stretcher (expander)
123
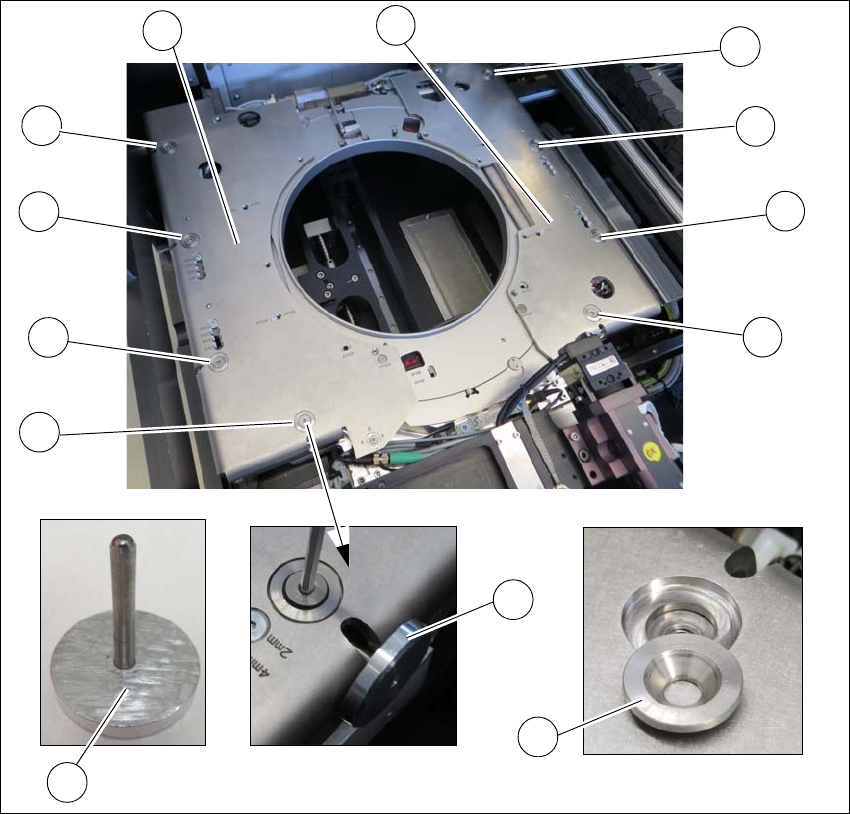
6.3.6.3 Removing the 8" wafer support
Removing the downholder plate
You need to replace the downholder plate for the relevant wafer support.
Fig. 6.3 - 7 Wafer support - removing the downholder plate
Insert the auxiliary tool for fixing the lifting piston (2) into the opening and fix the piston inside
(2+5).
One after the other, loosen all 4 screws (1) on the two downholder plates (4).
Remove the conical fixing disc (3). Make sure that you keep these safe for installation later
on.
Remove the two downholder plates (4).
1
1
1
1
1
1
1
1
2
5
4
4
3
6 Options User manual SIPLACE Wafer System (SWS)
6.3 SWS wafer stretcher (expander) Edition 04/2018
124
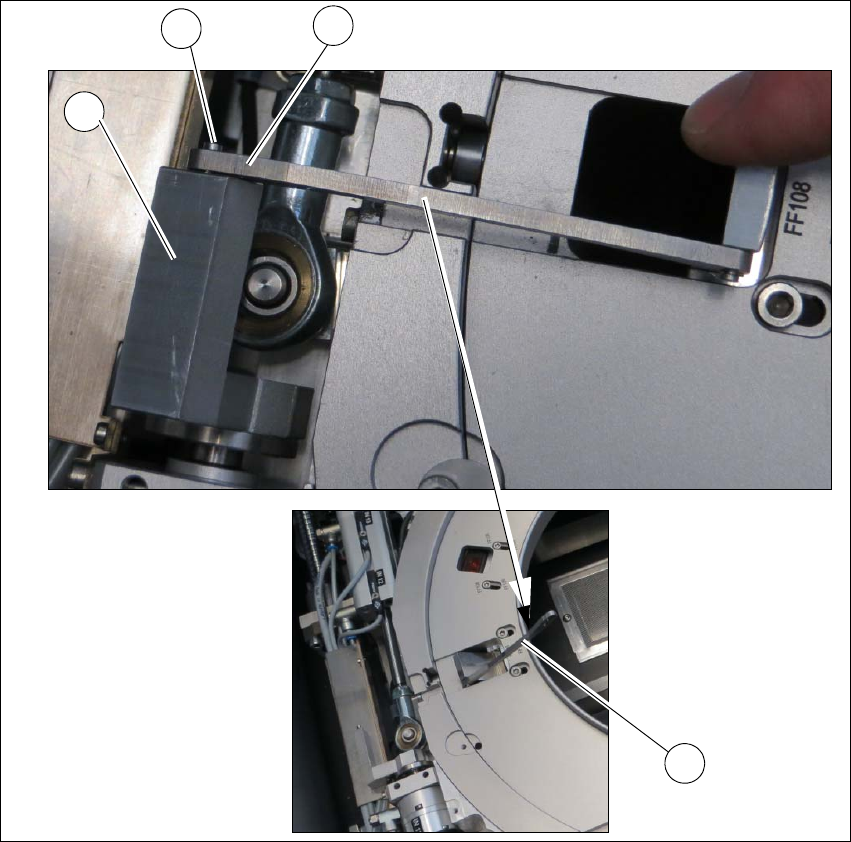
Loosening the clamp
Fig. 6.3 - 8 Wafer support - loosening the clamp
Remove the circlip on the shaft (2) of the clamp (1).
Unhook the clamp so that the clamping lever (3) is free (4).
1
2
4
3