OPERATING MANAUAL(FOR ENGINEERS) - 第119页
Page 5-23 TEACHING 5 T eaching the Chip Recognition 17 . Set the area to be recognized by BL 1. • Set the size with . Set the size so that the recognition point (set at procedure 13.) is in the area. 18 . Press Complete …
Page 5-22
Teaching the Chip Recognition
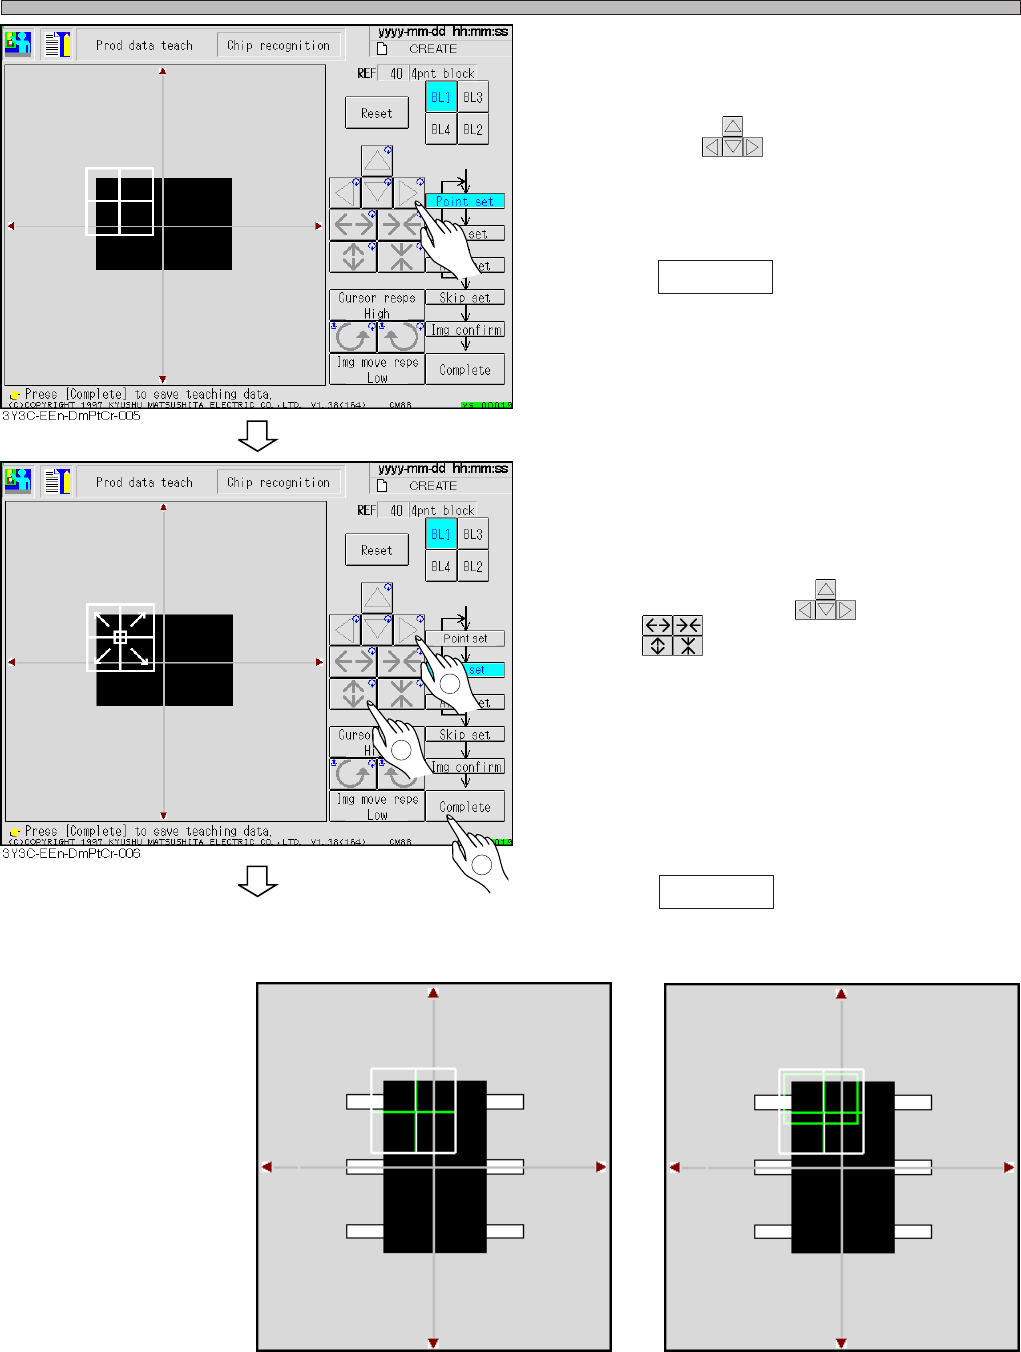
13. Set the point to be recognized by
BL 1.
• Move with .
Set the point so as the chips (shown to be
black) in the point occupies about 70 % of
whole.
14. Press Complete .
∗ Set the point so that about 70 % of whole chips
with pin are shown to be black.
(E.g.: recognition screen 1)
15. Set the range of image to be recog-
nized by BL 1.
• Move the inner frame appeared at the center of
recognition point with , and set the size
with .
∗ Usually set the range so as to occupy the
recognition point at full size.
∗ As for the chip with pin and parts with variation,
set characteristic part or stable part in the
range of image to recognize. (E.g. : recognition
screen 2)
16. Press Complete .
Recognition screen 1
Recognition screen 2
3Y3C-E-EMD05-A01-00
1
2
3
To the next page
3Y3C-015P
3Y3C-016P
Page 5-23
TEACHING
5
Teaching the Chip Recognition
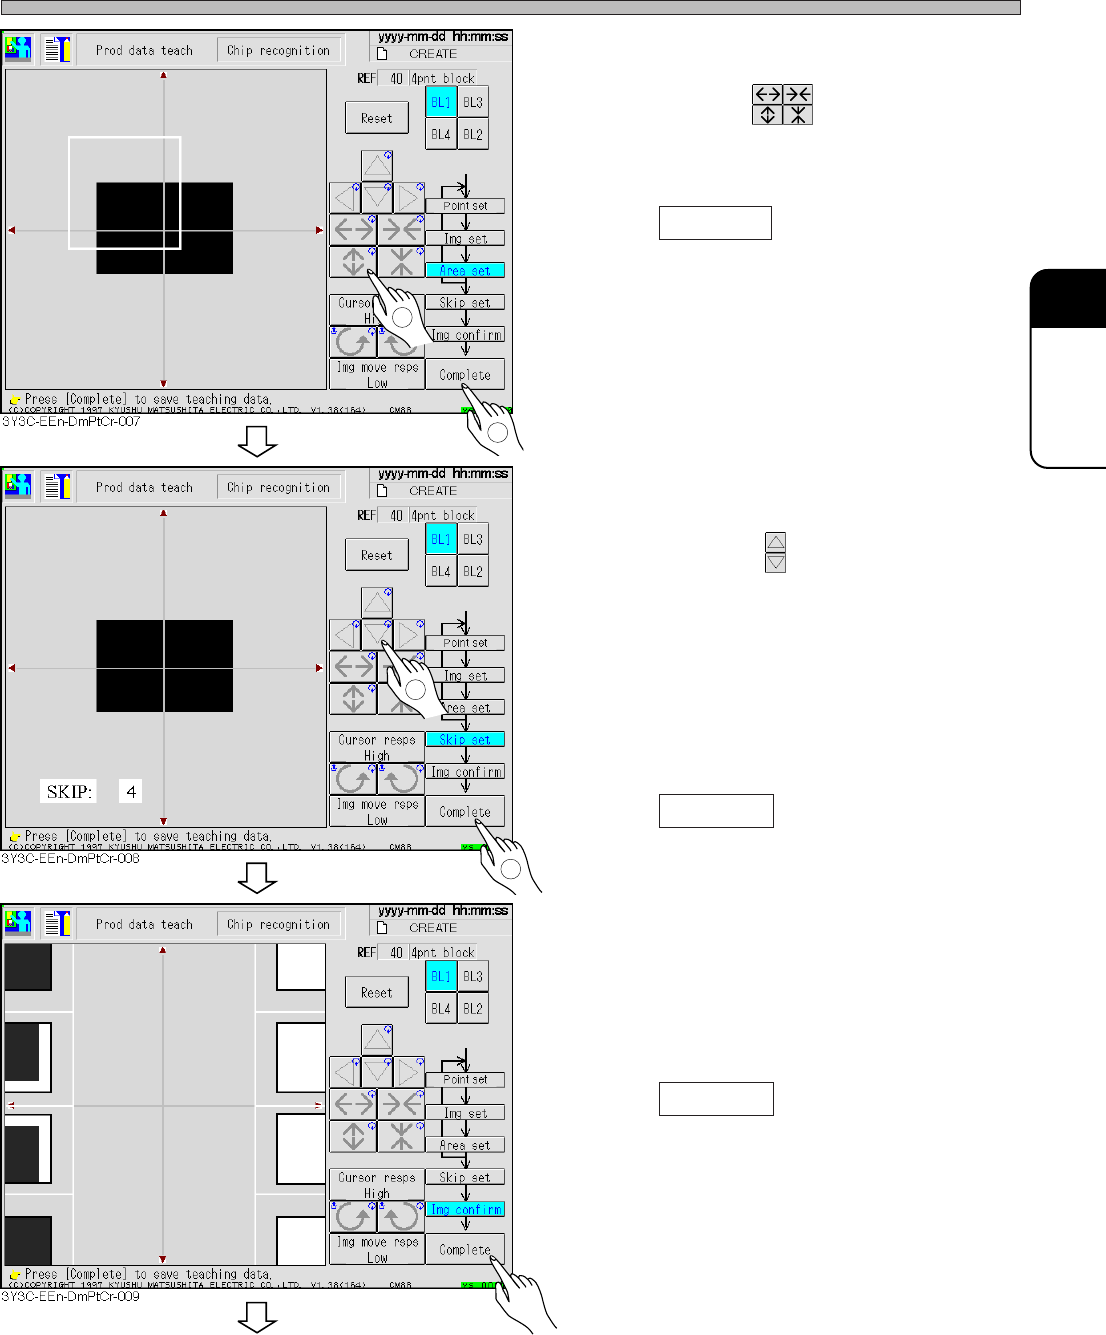
17. Set the area to be recognized by BL 1.
• Set the size with .
Set the size so that the recognition point (set at
procedure 13.) is in the area.
18. Press Complete .
• Data is automatically saved.
19. Repeat the procedure 13 to 18, and
keep setting to BL4.
20. Set the skip value.
• Set the value with .
The image to be recognized is searched
precisely at 1, and roughly at 10, (usually : 4).
Recognition image detection is finally recog-
nized at skip 1.
In recognition, the image is searched at the set
skip value at first, and finally a position is
detected at skip value 1.
21. Press Complete .
• Teaching image for each block appears.
22. Check the taught image.
• Left : position to be recognized (point setting)
Right : Image area to be recognized (image
setting)
23. Press Complete .
• Teaching for each block is finished.
3Y3C-E-EMD05-A01-00
1
2
1
2
To the next page

Page 5-24
Teaching the Chip Recognition
24. Press Recognition .
• Recognition result appears on the recognition
screen.
∗ When the recognition result (ANS=) is under
the recognition rate (judgment value of
machine parameter), retry the procedures 8 to
25 changing the recognition point and so on.
25. Press Complete .
• Teaching is completed.
26. Press Continuous recog (for check) .
• Recognition is repeated 100 times in succes-
sion, and the result is displayed. After checking
the result, press ESC to close the recognition
result.
(This is just for checking, so it is unnecessary
to manage.)
∗ When the recognition result (ANS=) is under
the recognition rate (judgment value of
machine parameter), retry the procedures 8 to
25 changing the recognition point and so on.
27. Press
UNLOCK
and Chip eject .
• Chip used for recognition is carried out.
28. Press .
• 4-point block matching recognition teaching is
finished.
• At this time, the taught data are uploaded to
the PT.
3Y3C-E-EMD05-A01-00
1
2
1
3Y3C-EEn-DmPtCr-012
2