OPERATING MANAUAL(FOR ENGINEERS) - 第122页
Page 5-26 T eaching the Mount Position 2 . Press Production data teach . • Production data teaching screen appears. 3 . Press Mount position . • Mount position screen appears. 4 . Change the mode for teaching. ∗ Every pr…
Page 5-25
TEACHING
5
5-5 Teaching the Mount Position
5-5-1 Teaching the Mount Position
When mount position on the same pattern of production board deviates in succession, it can be
corrected by teaching mount position.
Teaching mount position has three kinds of teaching modes, use them for each mount position
deviation.
1 Mount
When only the mount position of specified sequence is deviated, use this. The mount data coordi-
nate of taught sequence is changed.
2 Mount / block
When the mount position at the same position in each block is deviated, use this. All mount data
coordinates of the same block No. as taught chips, and applicable block data are changed.
3 Pattern
When mount position is deviated as a whole, in spite of proper data for board recognition, use this.
Change the origin offset and board recognition coordinate, and use the changed coordinate
distance of taught chips to all chips.
NOTICE
Before using these teaching, check that CAD data corresponds to the data used.
These teaching is the same operation as changing CAD data, so manage data
properly after teaching.
5-5-2 Creating Procedure
This section describes representative procedure of mount teaching.
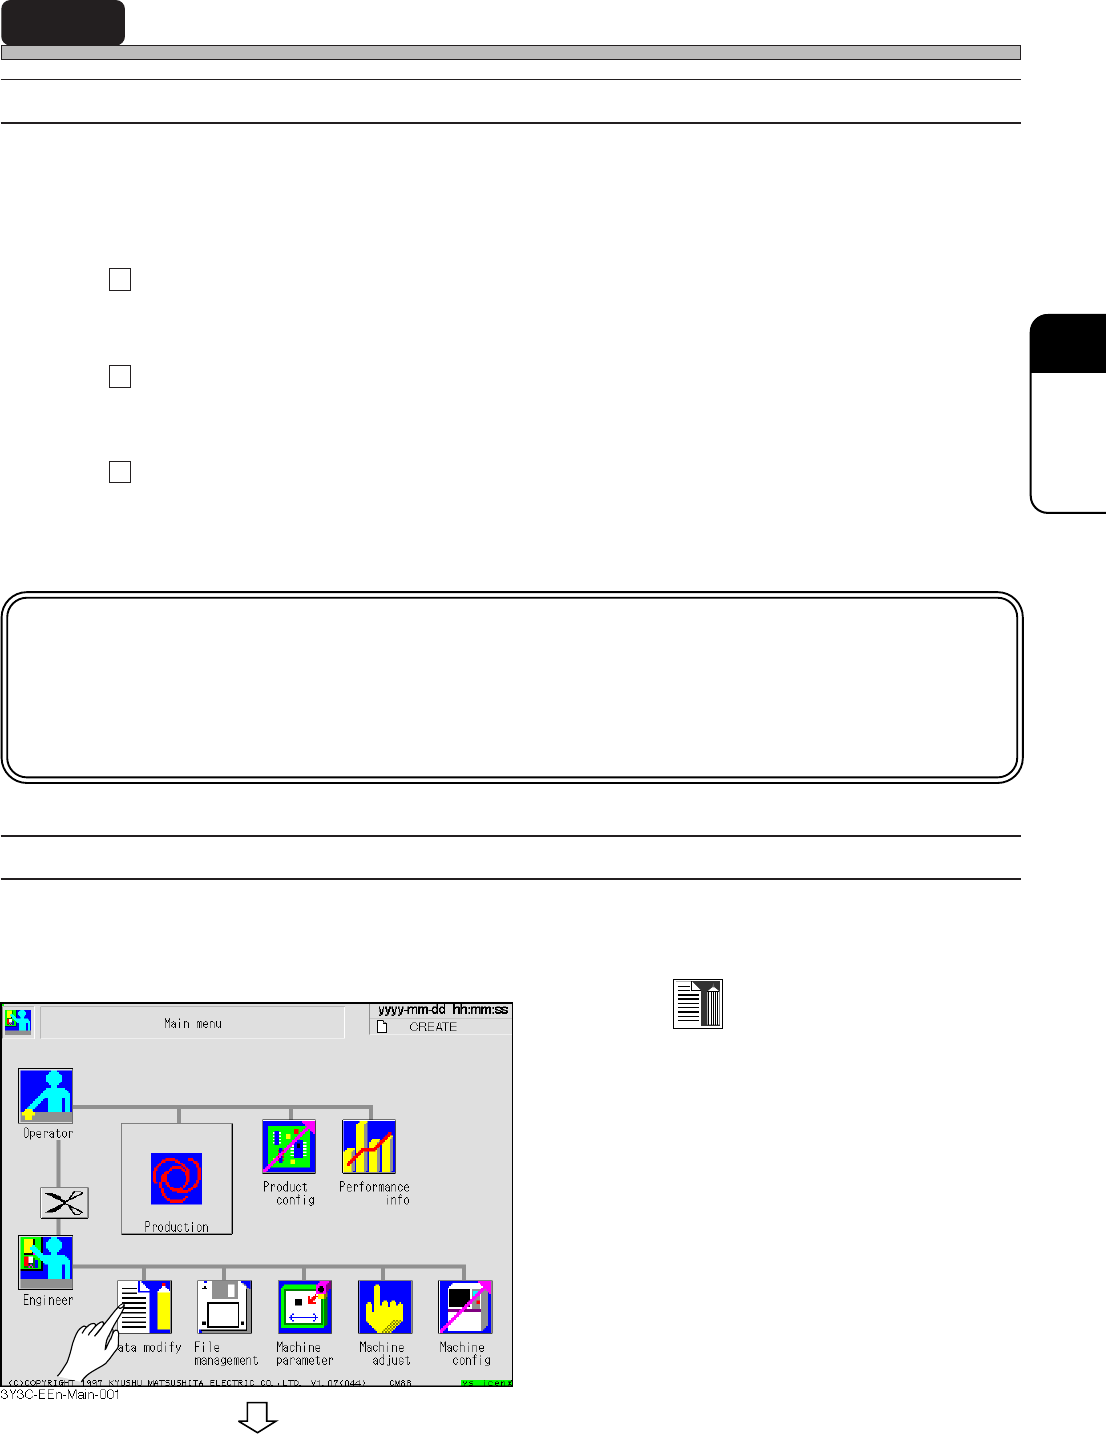
1. Press
Data modify
.
• Data modification menu screen appears.
3Y3C-E-EMD05-A01-00
To the next page
Page 5-26
Teaching the Mount Position
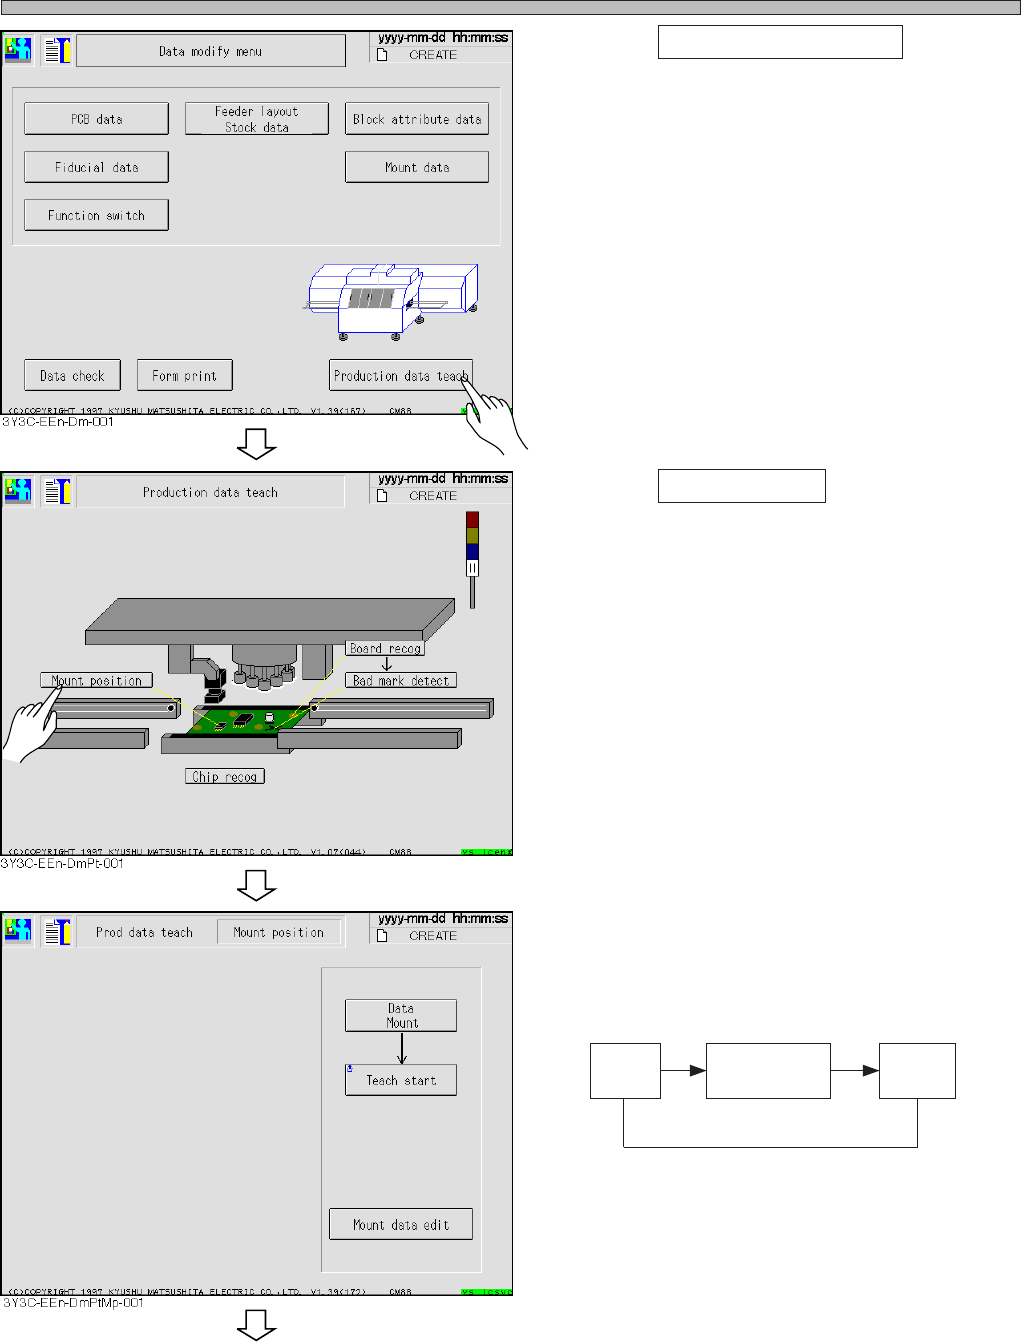
2. Press Production data teach .
• Production data teaching screen appears.
3. Press Mount position .
• Mount position screen appears.
4. Change the mode for teaching.
∗ Every pressing changes the display as follows.
Data
mount
Data
Mount/Block
Data
Pattern
3Y3C-E-EMD05-A01-00
To the next page
Page 5-27
TEACHING
5
Teaching the Mount Position
5. Set the mounted board to the board
carrying in detection PH of front
conveyor.
(It is unnecessary when board is on X-Y table)
∗ D : The sensor is at the fixed side (front side)
of conveyor.
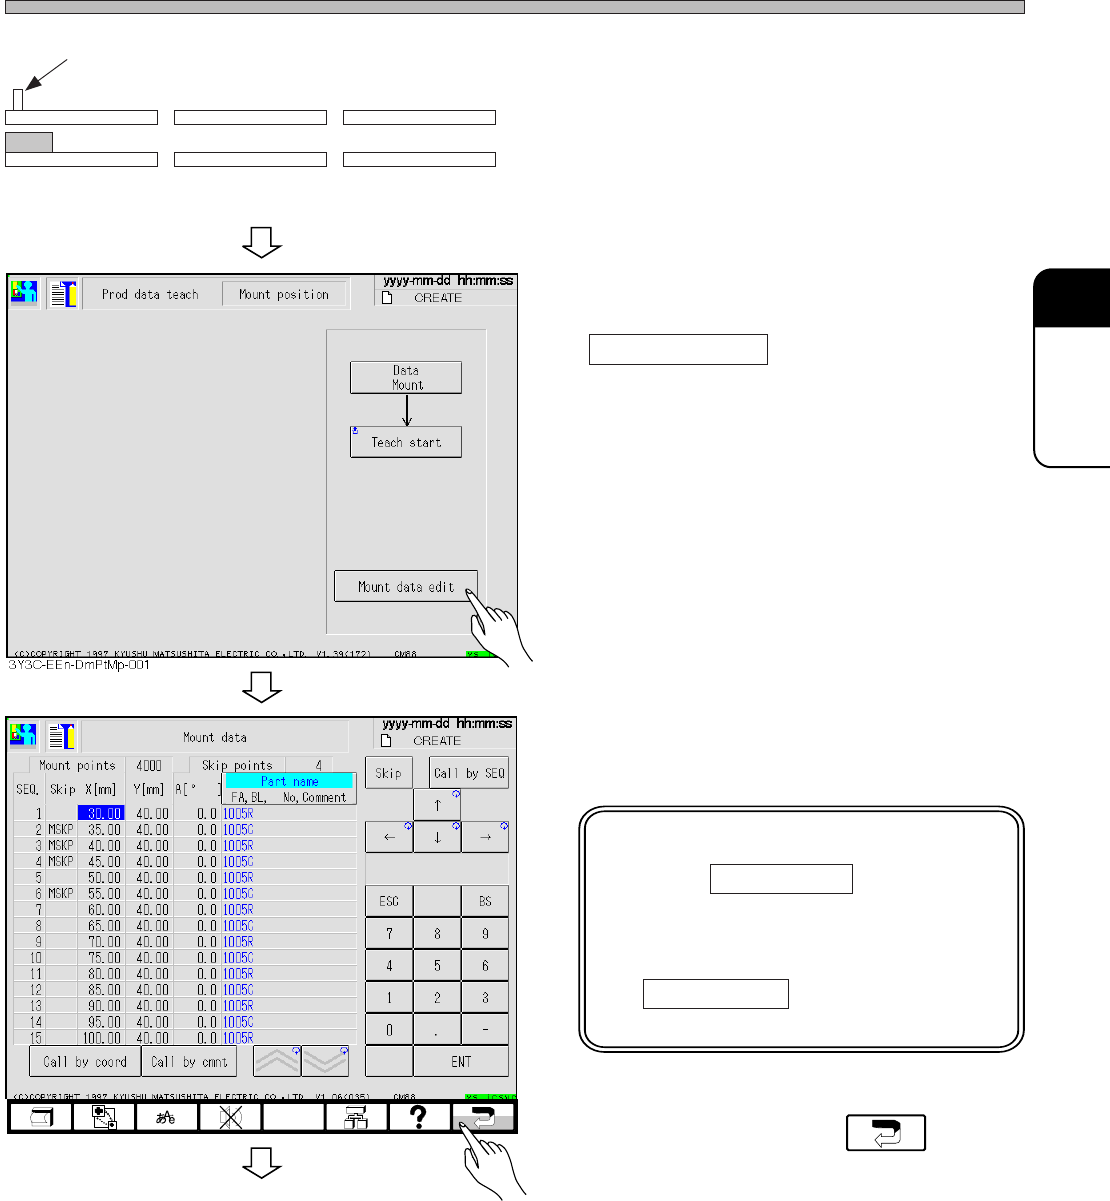
6. When SEQ. No. with a mount position
deviation is recognized, press
Mount data edit .
∗ When SEQ. No. is not known, proceed to
procedure 8.
7. Check the coordinates of SEQ. No.
with mount position deviation.
NOTICE
Pressing Call by SEQ changes
numerical keys and makes it
possible to enter numerals.
Pressing numerals without press-
ing Call by SEQ changes the
numerals of coordinates.
8. After checking, press .
Board carrying in detection PH (sensor ON)
Front conveyor X-Y table Rear conveyor
3Y3C-E-EMD05-A01-01
To the next page
3Y3C-EEn-DmMd-002