YSI_Prog_E - 第118页
2-47 2 Creating inspection pr ograms 6 Set the deplo yment conditions. Select the deployment conditions as requir ed. No changes to OCR By selecting this check box, the inspection cha racter string for character recognit…
2-46
2
Creating inspection programs
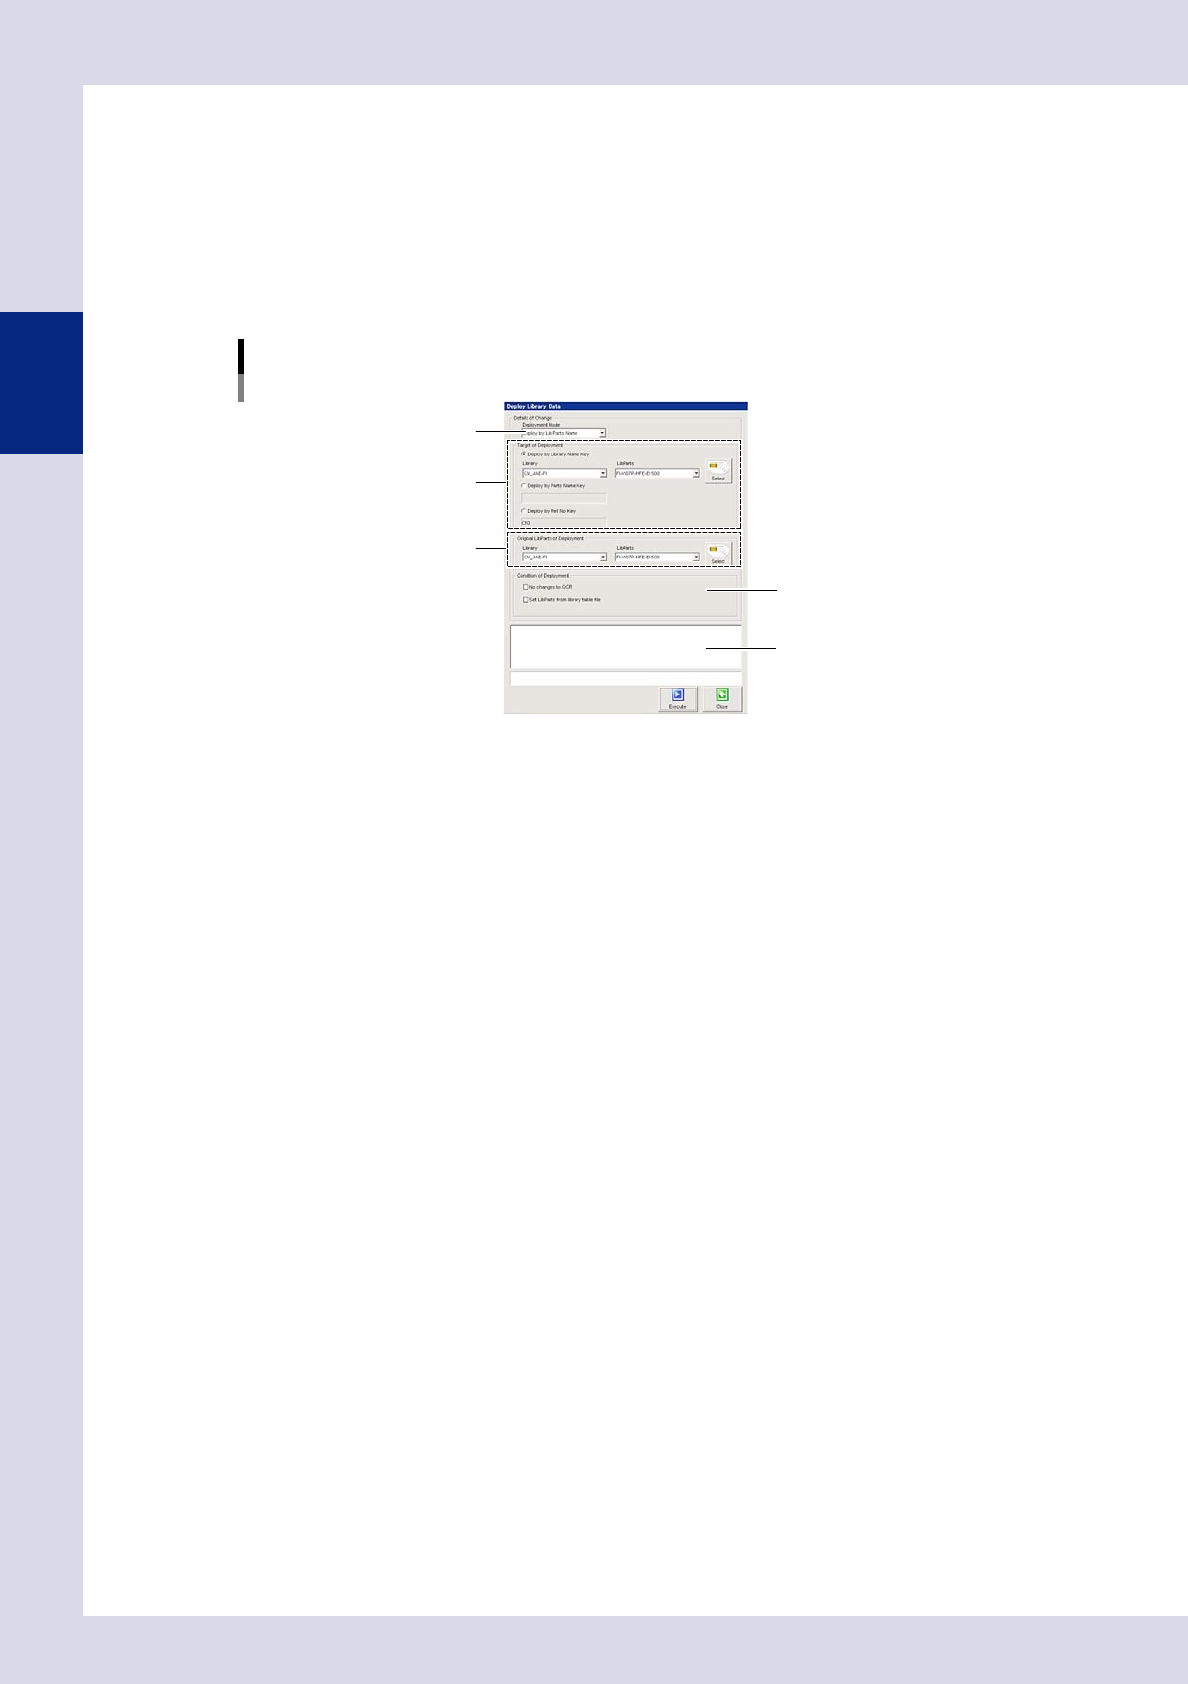
2.7.4 Deploying libraries
The library deployment function is used to paste library data to parts on the board with the same name at one
time.
1
Press the [Data Edit] button and open the "Step" tab.
2
Press the [Redeploy] button at the "Tuning" tab.
A "Deploy Library Data" screen appears.
"Deploy Library Data" screen
Step 3
Step 4
Step 5
Step 7
Step 6
24250-P6-00
3
Select the "Deployment Mode".
Select the library deployment method from the the drop-down list.
Deploy by Lib Parts Name
By specifying the library to be deployed in parts units, the relevant library is deployed.
Deploy all
Libraries from registered libraries for all parts with matching "LibParts" are deployed.
Deploy all in Selected Library
Libraries from libraries with specified "Library" for all parts with matching "LibParts" are deployed.
4
Specify the step to be deployed. (only for "Deploy by Lib Parts Name")
Specify the step if "Deploy by Lib Parts Name" is selected for the deployment mode in Step 3. Verify the
deployed "Library" and "LibParts". The "Library" and "LibParts" selected when the [Redeploy] button was
pressed are displayed. To change them, select from the respective drop-down lists.
Deploy by Library Name Key
Deploys to steps with same name "Library" and "LibParts".
Deploy by Parts Name Key
Deploys to steps with same parts name.
Deploy by Ref No Key
Deploys to steps with same Ref. No.
5
Specify the library to be deployed.
If "Deploy by Lib Parts Name" is selected for the deployment mode at Step 3, the parts name for the
library to be deployed can be changed. Select the "Library" and "LibParts" from the respective drop-
down lists.
If "Deploy all in Selected Library" is selected for the deployment mode at Step 3, the name of the library
to be deployed can be changed. Select the "Library" from the drop-down list.

2-47
2
Creating inspection programs
6
Set the deployment conditions.
Select the deployment conditions as required.
No changes to OCR
By selecting this check box, the inspection character string for character recognition when deploying
the library is not changed.
Set LibParts from library table file
By selecting this check box, the library selected in the library table is deployed.
7
Press the [Execute] button to deploy.
Information registered by "LibParts"is deployed for all relevant parts. The deployment status and
deployment result appear at the bottom of the screen.
8
Press the [Close] button to end deployment.
The display returns to the "Step" screen.
2-48
2
Creating inspection programs
2.7.5 Checking libraries
Existing libraries have been set for inspection of standard parts, and therefore it may sometimes be necessary to
change the settings based on the actual inspection parts. This section describes the procedure used to perform
a test (multi-test) for deployed parts libraries.
1
Select the part for the library to be checked.
2
Press the [Multi] button at the "Tuning" tab.
A multi-test screen appears.
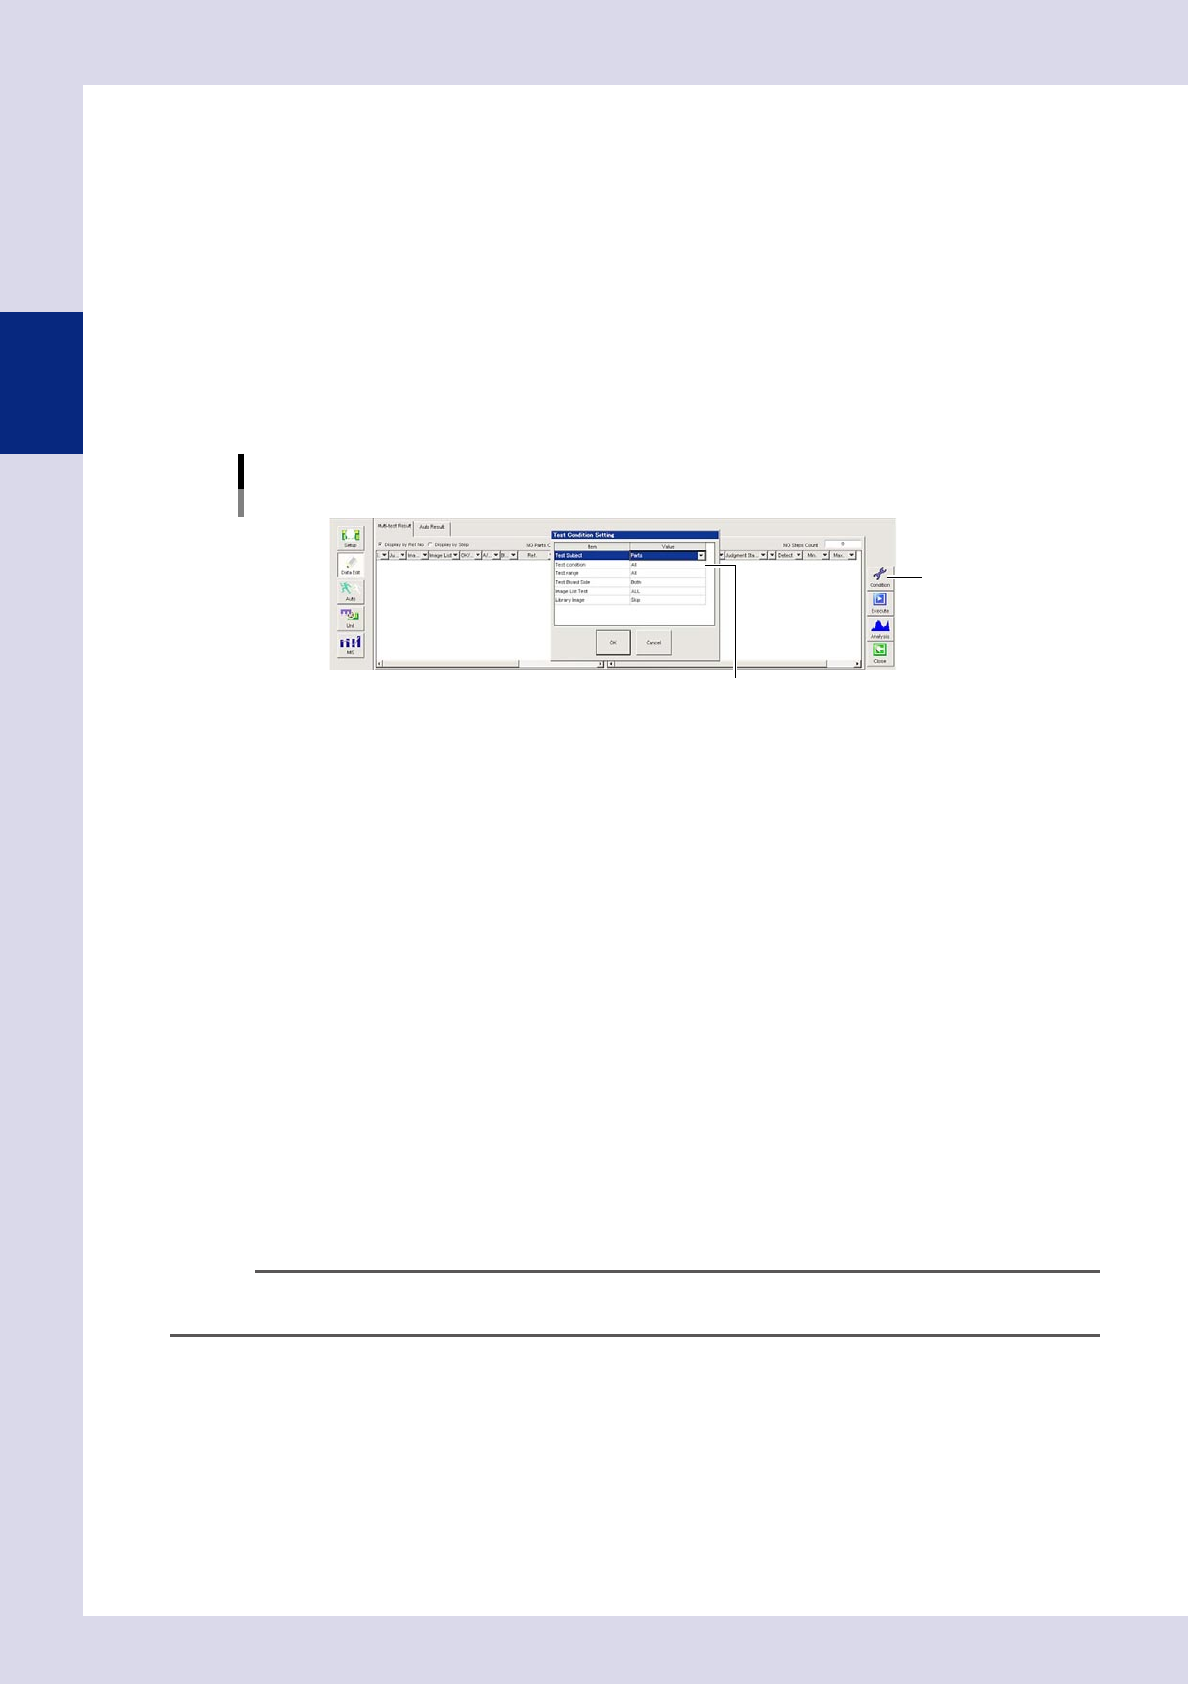
3
Press the [Condition] button to select the test conditions.
Select a value for each item from the drop-down lists. When selection is complete, press the [OK] button
to return to the multi-test screen.
[Multi-test] screen
Test conditions setting
[Condition] button
Select values from drop-down lists.
24254-P6-00
Test Subject
Select the test subject from Step, Inspection Status, Parts, or NG reason.
Test condition
Select from All, Same Lib Parts Name, Same Parts Name, and Same Ref. No.
Test range
Select from All, Only Piece of Board, Only Selected View, and Only Selected Parts.
Test Board side
Select Side A, Side B, or both.
Image List Test
Select from All, Skip, OK Images only, or NG Images only.
Library Image
Select from Skip, Exec OK parts , Exec NG Parts, and Exec all .
4
Press the [Execute] button.
The test results for all steps matching the selected conditions are displayed in a list.
5
Change all parameter settings.
Click steps judged to be NG, and select the relevant step. In order that the step be judged correctly,
change parameters such as step detection conditions and judgment conditions. For details on all
inspection status settings, see Chapter 4, "Inspection status", in this manual.
TIP
By pressing the [Analysis] button, a "Detect Value Graph" screen appears.
Select the "Display item" and display the test result in a graph as a reference to help with parameter correction.