YSI_Prog_E - 第121页
2-50 2 Creating inspection pr ograms 2.8 Librar y details Press the [Detail] button in the [Data Edit] - [Step] screen - "Utility" tab to displa y a library details setting screen. Registered library names can …

2-49
2
Creating inspection programs
2.7.6 Saving view images
If the steps do not fit inside the view for the deployed library, create the view again and save the image.
1
Create the view again.
Press the [Data Edit] button, open the "View" tab, and press the "Auto Creation" function [Auto] button.
Follow the instructions in the dialog box that appears.
2
Save the view image.
Open the image list "OK Image" tab, select "Standard Image", and press the [OverWrite] button.
3
Save the created inspection program.
Press the button area [Save] button.
2-50
2
Creating inspection programs
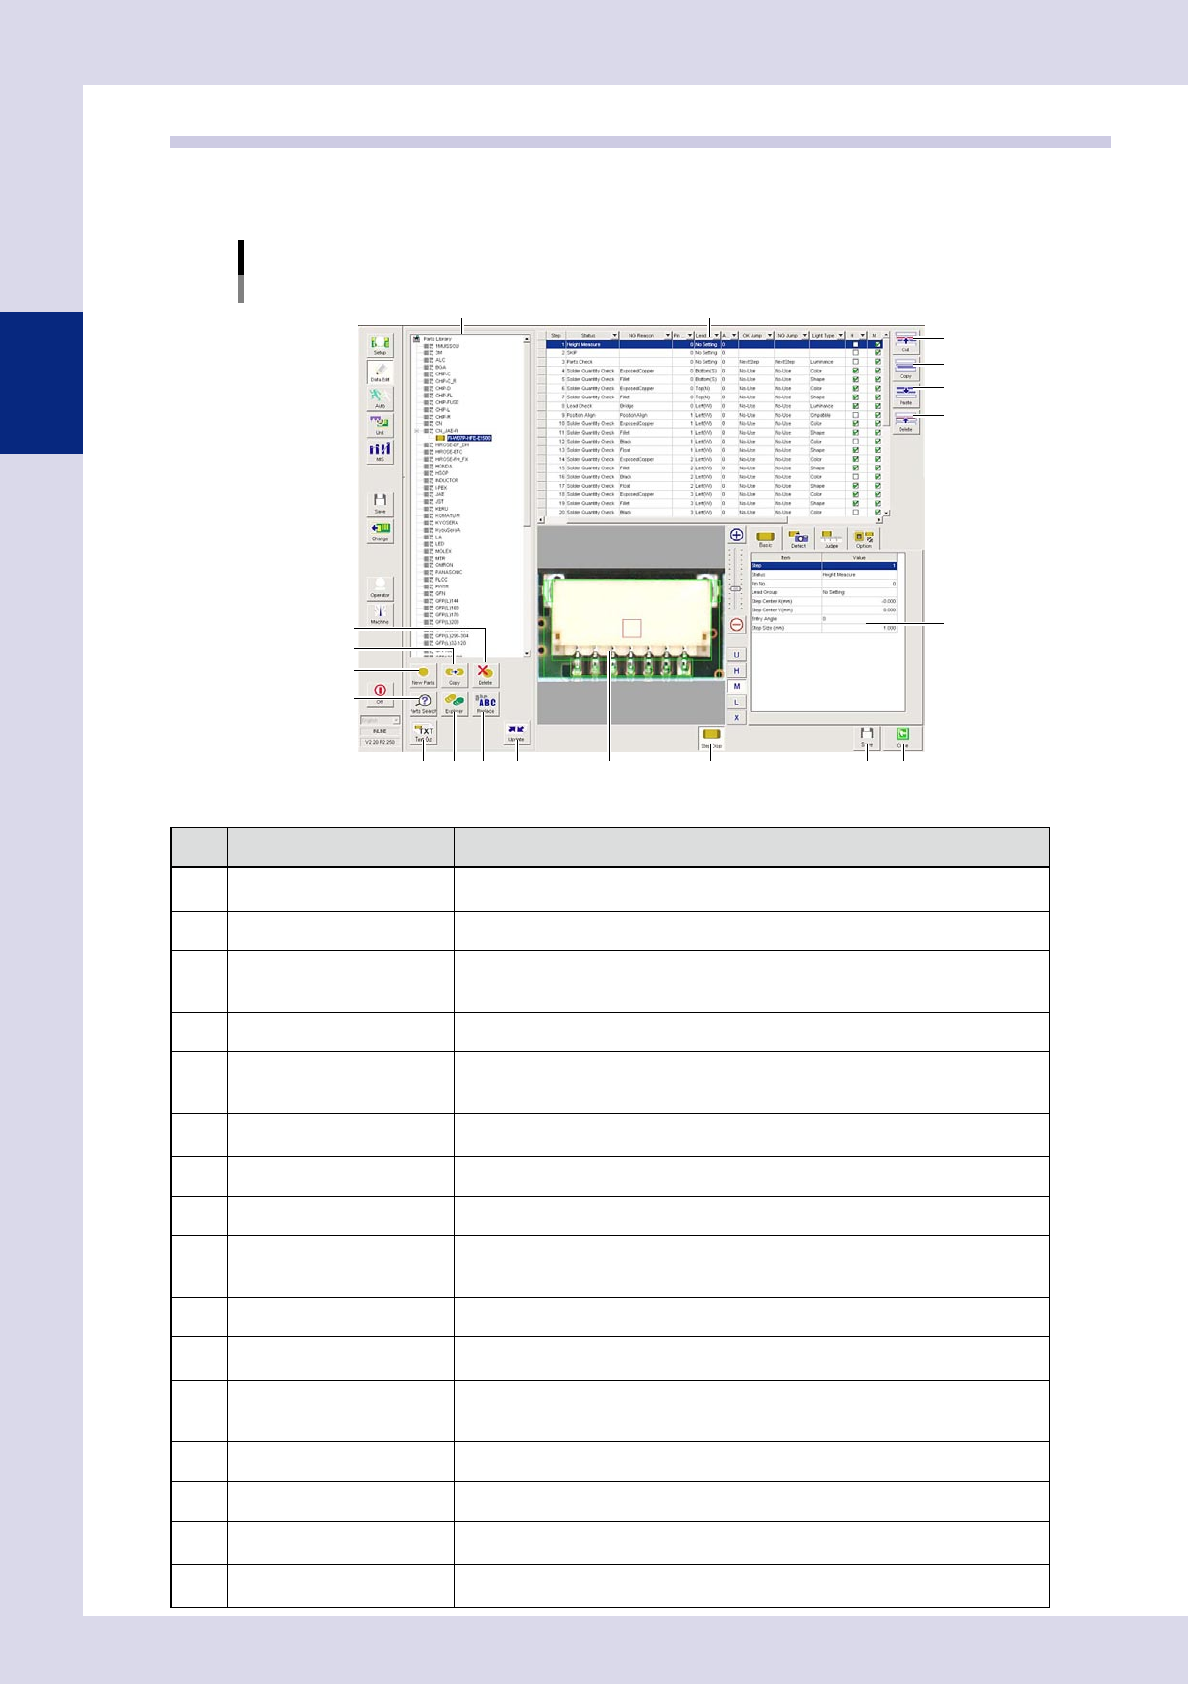
2.8 Library details
Press the [Detail] button in the [Data Edit] - [Step] screen - "Utility" tab to display a library details setting
screen. Registered library names can be changed, and libraries can be deleted or edited at this screen.
[Library details] screen
4
5
6
7
8
9
10
11 12 13 14
1 2
3
15 16
19
17 18
24255-P6-00
Item/button name Function
1 LibParts list
A list of registered Library/LibParts names is displayed. By selecting "Library",
registered "LibParts" are displayed.
2 Step list All steps for the selected library are displayed.
3 Cut
By copying rows in the selected range in the step list to the clipboard and then
pasting, these rows are deleted. The data rows below the deleted rows move up.
The cut data is kept stored until different data is cut or pasted to the clipboard.
4 Copy Copies the rows selected in the step list to the clipboard.
5 Paste
Inserts and overwrites data copied to the clipboard to the step list.
Pressing this button displays an "Add step" dialog box, allowing the add position to
be selected.
6 Delete
Deletes the row selected in the step list. The data rows below the deleted rows move
up.
7 Delete Deletes the selected library.
8 Copy Copies the selected library.
9
New Parts
By selecting the "Library" and "LibParts" name and clicking this button, a dialog
appears. By entering the "LibParts" name and clicking [Save], a "LibParts" name can
be registered for the same "Library".
10
Parts Search
Searches for the library parts name.
11 Text Out
Outputs the library in a text file.
Output destination: Machine settings\Lib Setting\Library Text Output Path
12 Explorer
A library import/export screen appears.
At this screen, libraries can be imported and exported from other folders in the same
"Library" units.
13 Replace Batch replaces library details.
14 Update Recreates the parts library list.
15 Registered parts image
An image of the "LibParts" selected in the parts library list is displayed. If no image
appears, set a board, and save the library again.
16 Step Disp
Steps for the "LibParts" selected in the parts library are displayed on the registered
parts image.

2-51
2
Creating inspection programs
Item/button name Function
17 Save Saves changes.
18 Close Closes the library details screen.
19 Parameter Displays all parameters for the selected step. Settings can also be changed here.