YSI_Prog_E - 第152页
3-29 3 Step screen 3.2 Copying steps T his function is used when creating multiple selected steps in the X and Y directions with arbitrary pitch. 1 Select a step. Select the steps to be copied at the "Step" scr…
3-28
3
Step screen
3. Editing Assistance
By press the [Edit Assist] button at the "Tuning" tab, an "Edit Assist" screen used to create steps efficiently
appears. This section describes operations that can be performed at the "Edit Assist" screen.
3.1 Pin Information Deployment
Pin information deployment is used when changing parameters for steps in which leads with set pin Nos. are
inspected by deploying parameters for inspection of other leads on the same parts to the same settings.
TIP
In order to deploy pin information, the "Ref. No." and "Pin No." must be set correctly for all relevant steps in the basic
parameters.
1
Select a step.
Select the deployment source lead step at the "Step" screen.
2
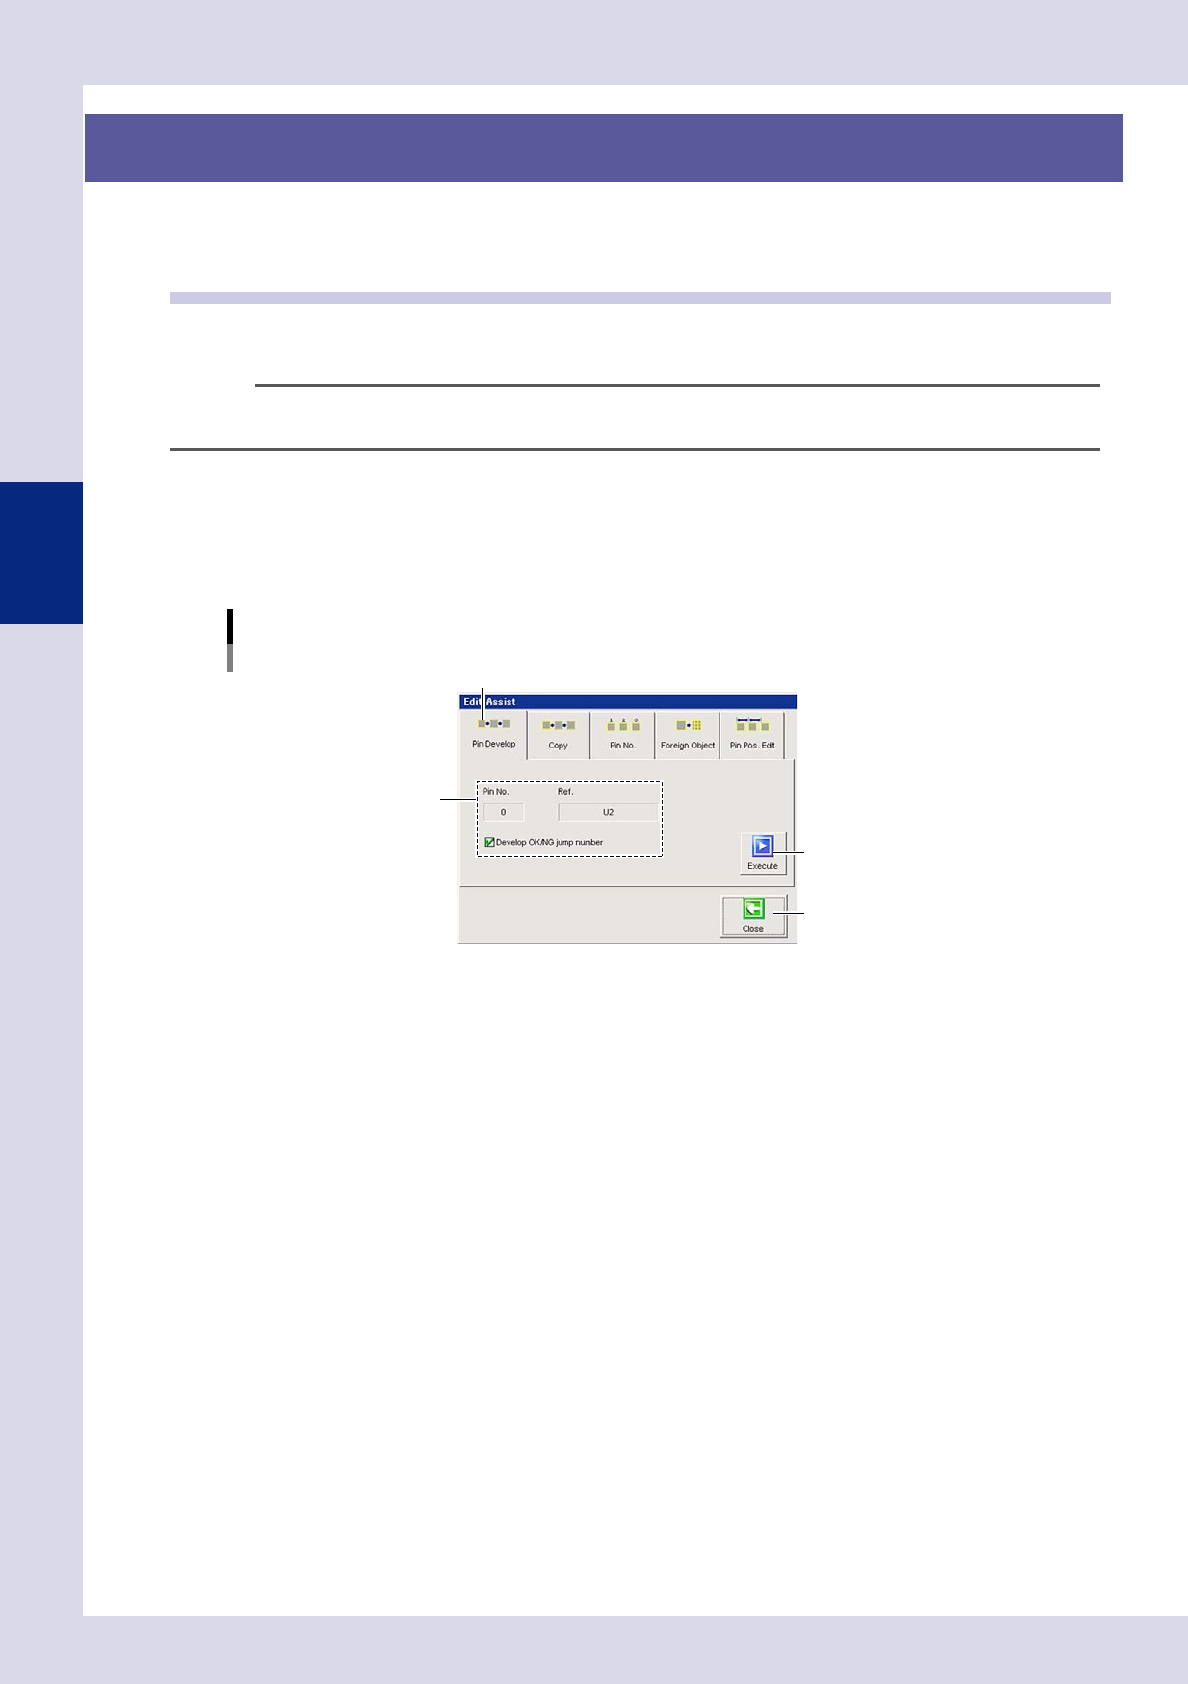
Press the [Edit Assist] button and open the "Pin Develop" tab.
A screen used to set the deployment of pin information appears.
Editing assistance
Pin information deployment
Step 3
[Execute] button
[Close] button
"Pin Develop" tab
24333-P6-00
3
Check the Pin No. and Ref No.
The Pin No. and Ref No. for the step selected at Step 1 are displayed. Verify that they are correct. To
deploy the OK/NG jump number, select the "Develop OK/NG jump number" check box.
4
Press the [Execute] button.
The inspection parameter settings for all leads on the same parts will be the same for the lead
parameters selected at Step 1.
5
Press the [Close] button to end deployment.
3-29
3
Step screen
3.2 Copying steps
This function is used when creating multiple selected steps in the X and Y directions with arbitrary pitch.
1
Select a step.
Select the steps to be copied at the "Step" screen.
Multiple steps can also be copied by dragging with the mouse.
2
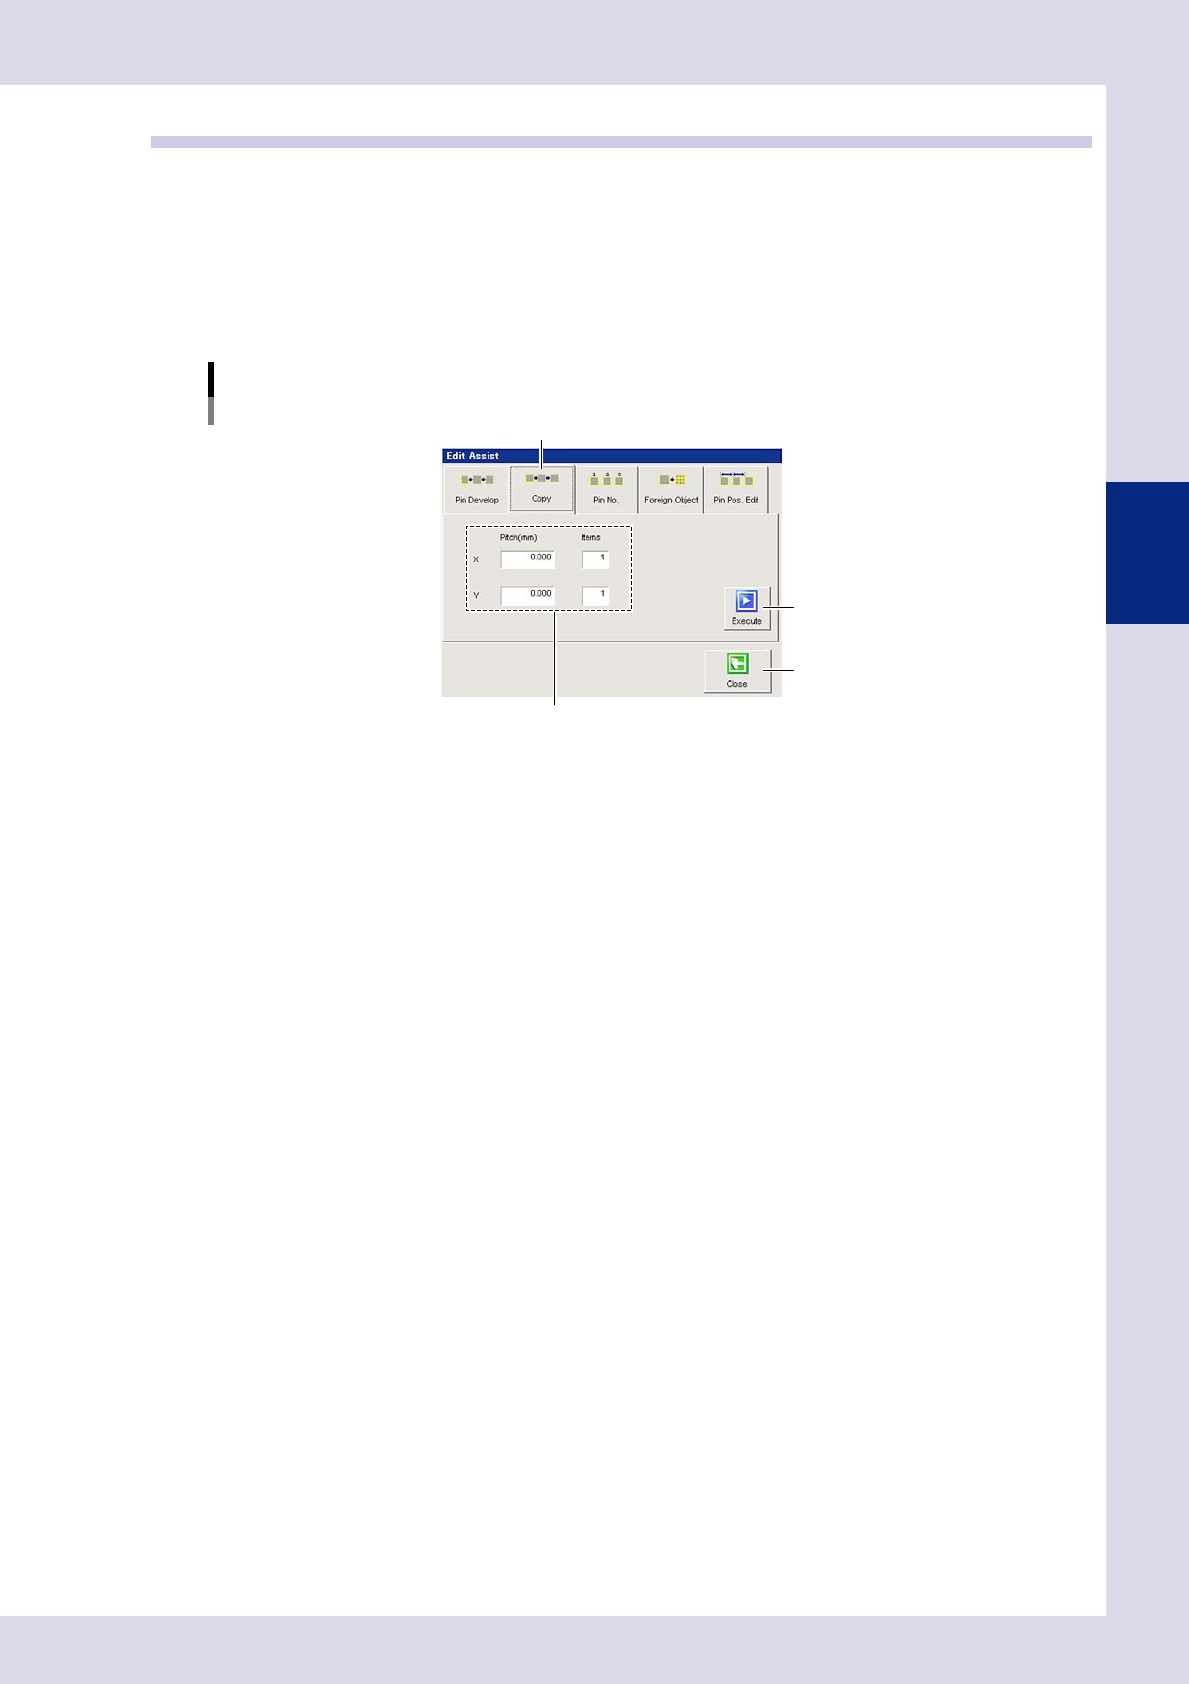
Press the [Edit Assist] button and open the "copy" tab.
A screen used to set step copy conditions appears.
Editing assistance
Copying
Step 4
[Execute] button
[Close] button
"copy" tab
24334-P6-00
3
Enter the pitch and number of items.
If copying the X direction (horizontal), enter the pitch and number of items after copying in the X field.
By entering a positive value for pitch, steps are copied in the right direction, and by entering a negative
value, steps are copied in the left direction. If copying the Y direction (vertical), enter the pitch and
number of items after copying in the X field. By entering a positive value for pitch, steps are copied in
the upward direction, and by entering a negative value, steps are copied in the downward direction.
4
Press the [Execute] button.
Copied steps are displayed in a step image.
5
Press the [Close] button to end deployment.
3-30
3
Step screen
3.3 Editing pin Nos.
3.3.1 Pin No. line editing
This function is used when assigning pin Nos. to the leads on all sides of leaded parts.
1
Select a step.
Select all steps at which pin Nos. are to be assigned at the "Step" screen.
2
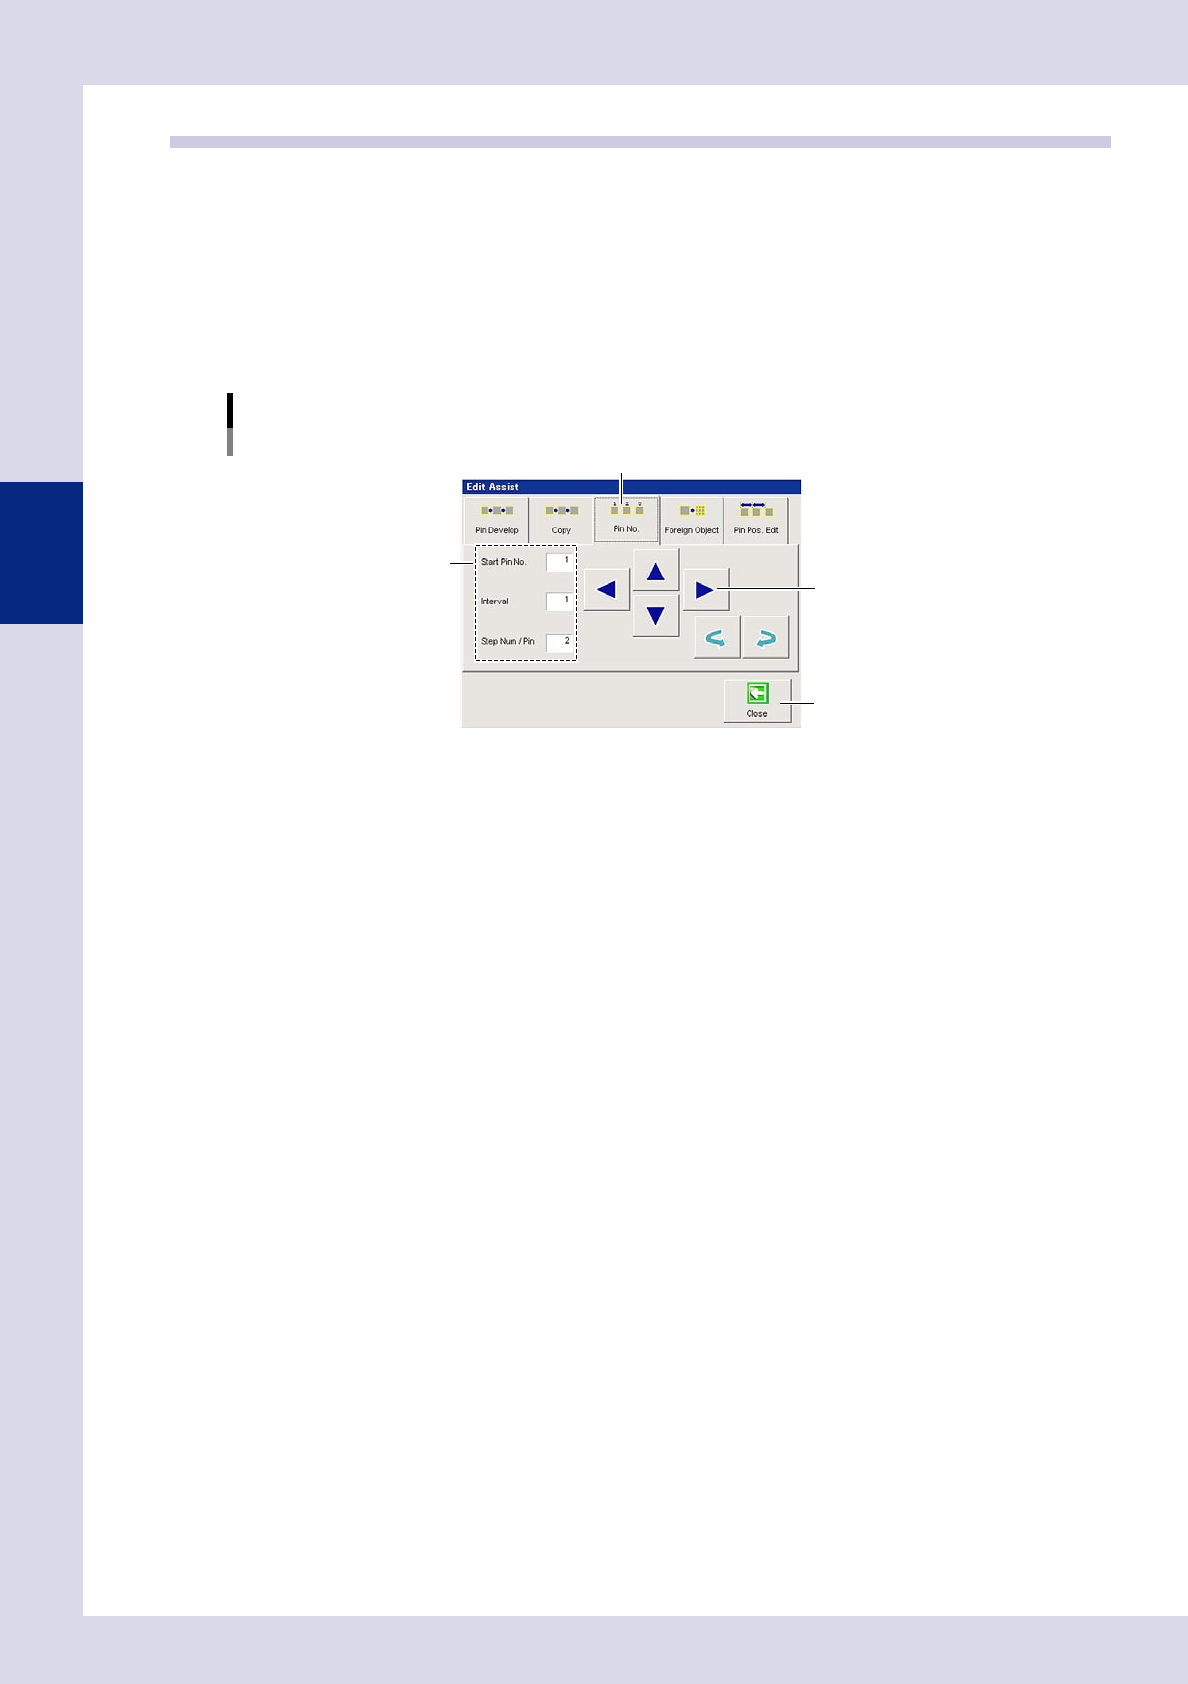
Press the [Edit Assist] button and open the "Pin No." tab.
A screen used to edit step pin Nos. appears.
Editing adjustment
Editing pin Nos.
"Pin No." tab
[Close] button
Step 3
Step 4
24335-P6-00
3
Set all conditions.
Start Pin No.
Enter the first pin No. from among the selected leads.
Interval
Enter the interval for the pin No. being assigned.
Step Num / Pin
Enter the number of steps required to inspect one pin.
4
Press the arrow buttons.
Press the arrow button facing in the direction of the number being assigned.
The pin No. is entered in "Pin No." in the basic parameters.
5
Press the [Close] button to end deployment.